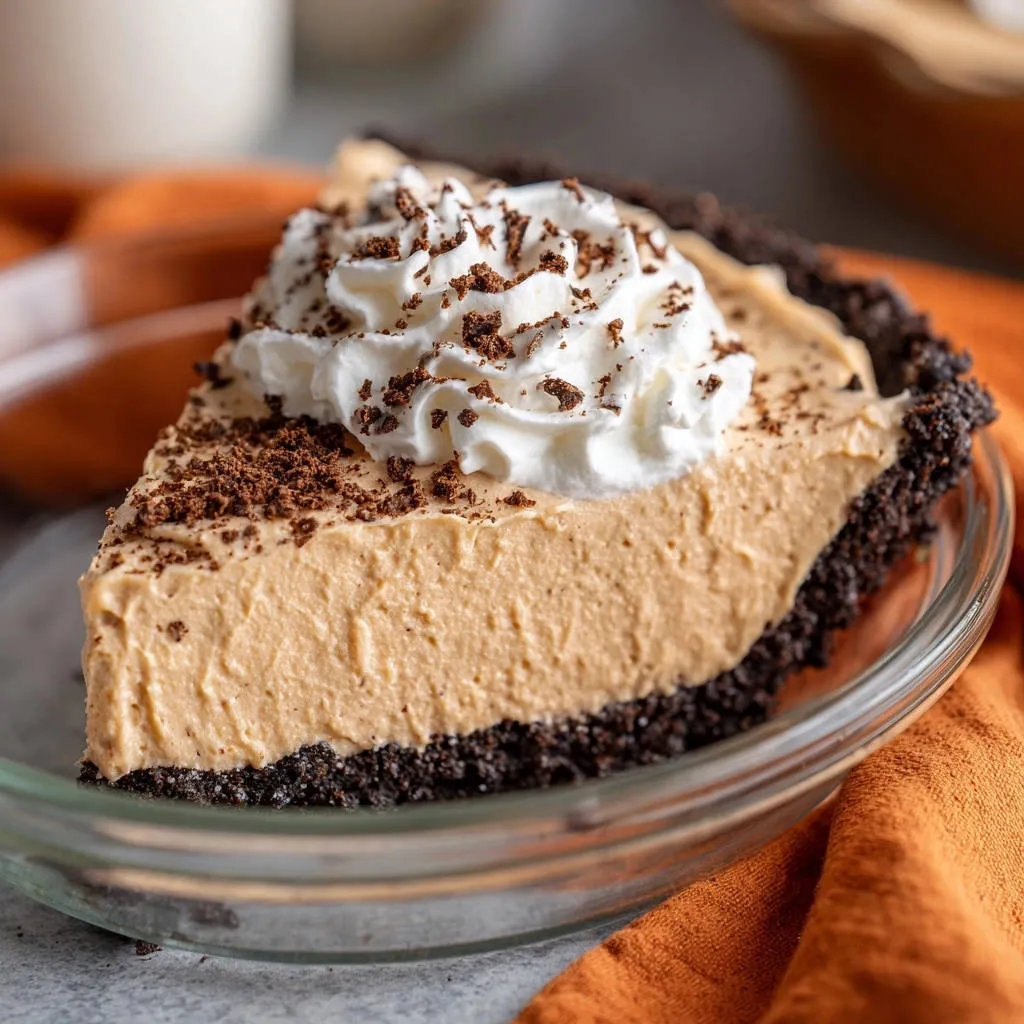
I’ve certainly had my share of no-bake pie mishaps, with fillings that just wouldn’t set, leading to frustratingly runny slices. But after countless experiments, I finally perfected this incredible Peanut Butter Oreo Pie recipe, guaranteeing a slice that holds its shape beautifully every single time. This dessert offers pure indulgence without the oven, making it a dream for busy bakers and peanut butter lovers alike.
Why This Peanut Butter Oreo Pie is Your New Go-To Dessert
The “Perfect Set” Secret Revealed
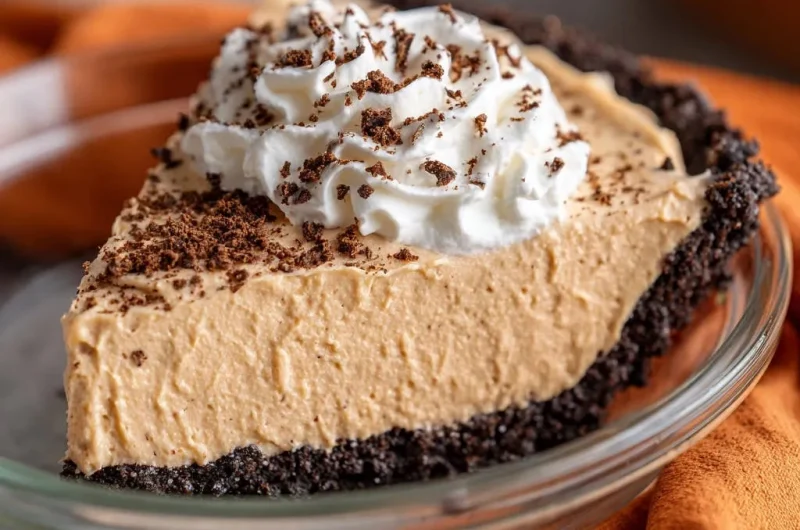
The common frustration with no-bake pies is their tendency to be overly soft or even runny. This recipe incorporates specific techniques and ingredient ratios to ensure a firm, sliceable consistency. You’ll achieve a dessert that maintains its elegant shape, even when cut into thin slices.
Say goodbye to dessert disasters and hello to perfectly structured pie.
Effortless Elegance: No-Bake Bliss
Forget turning on the oven, especially during warmer months or when your kitchen is already busy. This no-bake pie simplifies dessert preparation significantly.
It’s the ideal solution for entertaining, potlucks, or simply satisfying a sweet craving without the fuss of baking, making it a truly easy pie recipe.
A Crowd-Pleaser for Every Occasion
The irresistible combination of creamy peanut butter and crunchy Oreo cookies creates a flavor profile beloved by nearly everyone. This chocolate peanut butter dessert is an instant hit at family gatherings, birthday parties, or casual get-togethers.
It’s a universally appealing treat that disappears quickly, satisfying both chocolate and peanut butter cravings.
The Simple Ingredients Behind Irresistible Peanut Butter Oreo Pie
Quality ingredients are the foundation of any outstanding dessert. Here’s a closer look at what makes this pie sing.
Crust Foundation: The Oreo Base
The classic Oreo cookie provides a delightfully crunchy and rich chocolate base for this pie. Opt for original Oreos rather than double-stuffed, as the extra cream can make the crust too greasy.
Melted unsalted butter binds the crushed cookies, creating a stable and flavorful Oreo crust that perfectly complements the creamy filling.
Pillars of Creaminess: Filling Essentials
Softened cream cheese is critical for the smooth, rich texture of the filling. It provides a tangy balance to the sweetness and helps the pie set firmly.
Creamy peanut butter is the star, delivering that classic nutty flavor. Powdered sugar sweetens the mixture while vanilla extract enhances all the flavors, adding a warm, aromatic depth.
The Whipped Topping Difference
Thawed frozen whipped topping is essential for achieving the light, airy texture of the creamy filling. It helps stabilize the pie without making it overly dense.
Ensuring it’s properly thawed but still cold is key for smooth integration and optimal volume, contributing to a dessert that holds its shape beautifully.
Gather Your Gear: Essential Tools for Pie Perfection
9-inch Pie Plate: The perfect vessel for shaping and chilling your pie, ensuring an even crust and filling distribution.
Electric Mixer: Crucial for beating cream cheese to fluffy perfection and smoothly combining the filling ingredients.
Large Mixing Bowls: For combining ingredients without spills and allowing ample room for mixing and folding.
Rubber Spatula: Essential for gently folding in the whipped topping, preserving its airiness for a light, firm pie.
Measuring Cups & Spoons: For accurate ingredient proportions, which are vital for the proper set and flavor balance of the pie.
Your Step-by-Step Guide to a Flawless Peanut Butter Oreo Pie
- Crafting the Crunchy Oreo Crust:
In a medium bowl, combine the crushed Oreo cookie crumbs and melted butter. Ensure the crumbs are finely crushed for a cohesive base, as large pieces can make the crust uneven.
Press the mixture firmly into the bottom and up the sides of a 9-inch pie plate. Use the back of a spoon or a flat-bottomed glass for a compact, even crust that won’t crumble.
Place the pie crust in the refrigerator to chill while you prepare the filling. This firming step is crucial for preventing a crumbly crust when slicing later.
- Whipping Cream Cheese to Perfection:
In a large mixing bowl, using an electric mixer, beat the softened cream cheese until it is light and fluffy. This step is crucial for achieving a smooth, well-integrated filling that sets properly, so ensure there are no lumps by scraping down the bowl sides.
- Mixing the Rich Peanut Butter Base:
Add the creamy peanut butter, powdered sugar, and vanilla extract to the cream cheese. Beat on medium speed until the mixture is completely smooth and well combined.
Scrape down the sides of the bowl as needed to ensure even mixing and prevent any unmixed pockets. The texture should be thick and uniform before the next step.
- Gently Folding for Airiness:
Gently fold in the thawed whipped topping using a spatula. Do not beat or overmix, as this can deflate the whipped topping and result in a dense, less airy no-bake pie.
The key is to carefully incorporate the whipped topping, maintaining its airiness, which contributes significantly to the pie’s firm yet light set. Continue folding until no streaks of whipped topping remain, ensuring a uniform consistency.
- Filling Your Masterpiece:
Pour the peanut butter filling into the chilled Oreo crust, spreading it evenly with a spatula. Take care to create a smooth and level top for a beautiful presentation once chilled.
- The Critical Chill for a Perfect Set:
Cover the pie loosely with plastic wrap and refrigerate for at least 4 hours, or preferably overnight.
This extended chilling period is vital for the pie to fully firm up and achieve that guaranteed perfect set, making it easy to slice and serve without a runny mess. Patience here truly pays off.
- Final Touches and Garnish:
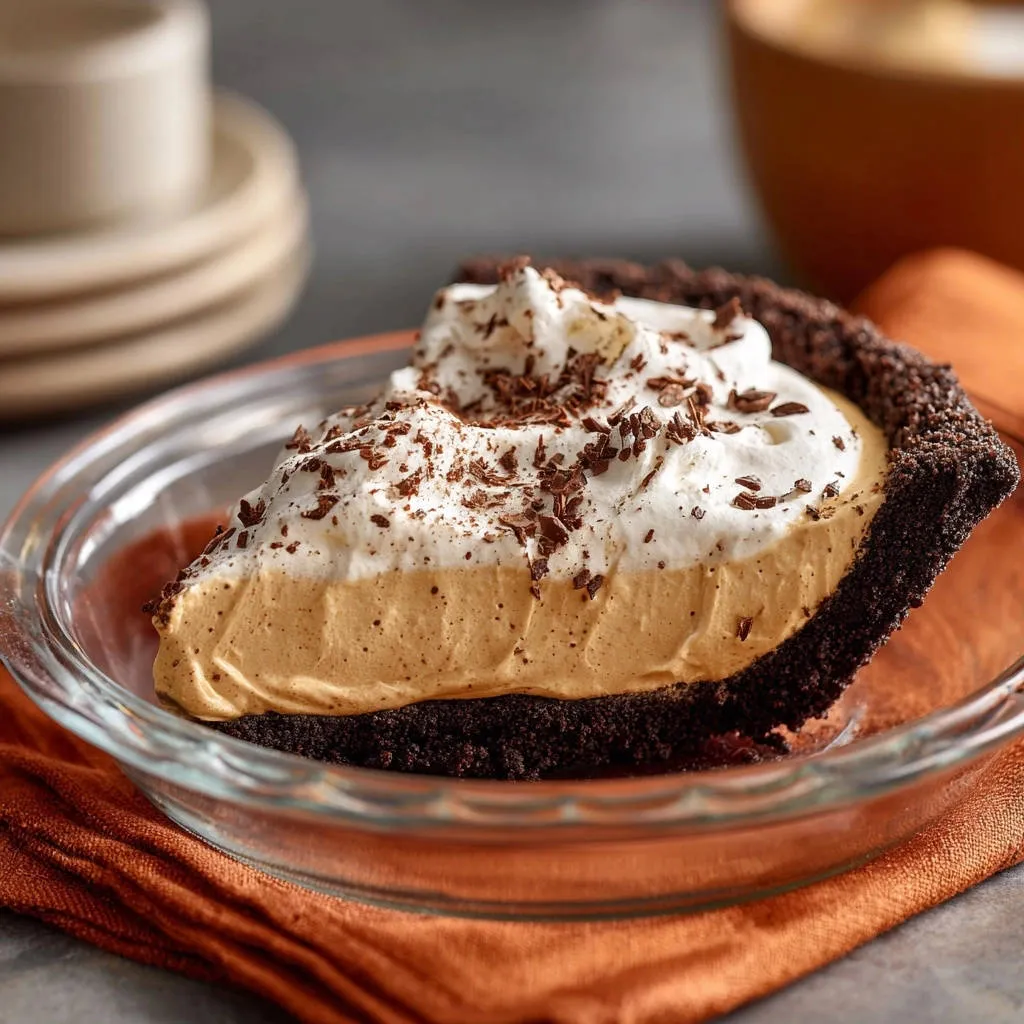
Before serving, garnish each slice with additional chocolate cookie crumbs and a dollop of extra whipped topping if desired. These garnishes add visual appeal and extra flavor, completing your chocolate peanut butter dessert.
Unlocking the Magic: Pro Tips for Your Peanut Butter Oreo Pie
Cream Cheese Temperature is Key: Always ensure your cream cheese is truly softened to room temperature before beating. Cold cream cheese will result in a lumpy filling and a less smooth texture, no matter how much you beat it.
Do Not Overmix the Whipped Topping: The delicate nature of whipped topping means it can quickly deflate if overmixed. Gentle folding is paramount for maintaining the pie’s light, airy texture and its ability to achieve a firm set.
The Power of an Overnight Chill: While 4 hours is the minimum chilling time, an overnight chill (8+ hours) guarantees the most solid, easy-to-slice pie. Planning ahead for this extended chill provides the best results for a dessert that holds its shape.
Quality of Ingredients Matters: Use a good quality, creamy peanut butter and full-fat cream cheese for the best flavor and texture. Avoid reduced-fat versions, as they may affect the consistency and setting ability of the filling.
Experiment with Garnishes: Beyond cookie crumbs and whipped topping, consider other garnishes like mini chocolate chips, a delicate drizzle of chocolate syrup, or even a sprinkle of chopped roasted peanuts for added texture and crunch.
Common Questions & Quick Fixes for Your Pie
Why Isn’t My Pie Setting Firmly?
The most common culprit is insufficient chilling time. Ensure you’ve refrigerated the pie for at least 4 hours, or preferably overnight, to allow all ingredients to fully set. Additionally, overmixing the whipped topping can incorporate too much air, leading to a less stable and firmer filling.
My Crust Is Crumbly/Too Hard
If the crust is too crumbly, you might need a tiny bit more melted butter to bind the crumbs effectively. If it’s too hard, it could be over-compacted when pressed into the pie plate; aim for firm but not rock-solid pressure.
Dealing with Lumpy Filling
Lumps in the filling usually indicate that the cream cheese wasn’t soft enough when initially beaten, or it wasn’t beaten sufficiently on its own before adding other ingredients. Always start with very soft, room-temperature cream cheese and beat it thoroughly until completely smooth before incorporating other components.
Your Peanut Butter Oreo Pie Questions Answered
Can I Use Different Cookies for the Crust?
Absolutely! While Oreos provide a classic flavor, you can easily substitute other similar cookies. Chocolate wafers, graham crackers, or even vanilla sandwich cookies make excellent crust alternatives. You may need to adjust the butter quantity slightly based on the dryness of the alternative crumbs.
Is There a Dairy-Free Option?
Yes, you can adapt this recipe to be dairy-free! Use dairy-free cream cheese alternatives, plant-based whipped topping (such as coconut cream or almond-based whipped topping), and certified dairy-free Oreo-style cookies. Always double-check ingredient labels to ensure they meet your dietary needs.
How Long Does This Pie Last in the Fridge?
Properly covered and refrigerated, your Peanut Butter Oreo Pie will stay fresh and delicious for 3-4 days. Store it loosely covered with plastic wrap or in an airtight container to prevent it from absorbing any refrigerator odors.
Can I Freeze Peanut Butter Oreo Pie?
Yes, this no-bake pie freezes surprisingly well! Cover it tightly with plastic wrap, then an additional layer of aluminum foil, and freeze for up to 1-2 months. Thaw it in the refrigerator for several hours or overnight before serving for the best texture and enjoyment.
Serving, Storing, & Savory Success
Perfect Presentation: Serving Your Masterpiece
For clean, picture-perfect slices, run your knife under hot water and wipe it clean between each cut. This simple trick prevents the filling from sticking and makes for a smooth slice. Garnish each slice right before serving to keep toppings fresh and vibrant.
Keeping Your Pie Fresh: Storage Tips
Always store any leftover Peanut Butter Oreo Pie in the refrigerator. A pie dome or a container large enough to avoid squishing the topping is ideal for maintaining its beautiful shape and preventing the surface from drying out or absorbing foreign odors.
Make-Ahead Marvel: Planning Your Dessert
This pie is perfect for making ahead, truly earning its easy pie recipe title! Prepare it the day before your event, allowing it to chill overnight. This extended chilling ensures the best possible set and frees up valuable time on the day of serving, making entertaining stress-free.
Indulge and Share: Your Peanut Butter Oreo Pie Awaits!
There you have it – the ultimate guide to creating a Peanut Butter Oreo Pie that’s guaranteed to impress. No more runny fiascos, just perfectly set, creamy, and crunchy slices of heaven. This recipe is a testament to how simple ingredients, combined with a few crucial techniques, can yield truly extraordinary results for a dessert that holds its shape beautifully.
Now it’s your turn to whip up this irresistible treat. We’d love to hear how your pie turns out! Share your experiences, tips, and photos in the comments below. And if you’re looking for more delicious no-bake options, be sure to explore our collection of amazing no-bake peanut butter bars that never fall apart or other easy dessert recipes.
Peanut Butter Oreo Pie
Course: DessertCuisine: American CuisineDifficulty: easy8
servings20
minutes240
minutesAmerican Cuisine
Ingredients
15-18 Oreo cookies, crushed (about 1 1/2 cups crumbs)
1/4 cup unsalted butter, melted
8 ounces cream cheese, softened
1 cup creamy peanut butter
1 cup powdered sugar
1 teaspoon vanilla extract
8 ounces frozen whipped topping, thawed
Chocolate cookie crumbs, for garnish (optional)
Directions
- In a medium bowl, combine the crushed Oreo cookie crumbs and melted butter. Press the mixture firmly into the bottom and up the sides of a 9-inch pie plate to form the crust. Place the pie crust in the refrigerator to chill while you prepare the filling.
- In a large mixing bowl, using an electric mixer, beat the softened cream cheese until it is light and fluffy. This step is crucial for achieving a smooth, well-integrated filling that sets properly. Make sure there are no lumps.
- Add the creamy peanut butter, powdered sugar, and vanilla extract to the cream cheese. Beat on medium speed until the mixture is completely smooth and well combined, scraping down the sides of the bowl as needed. The texture should be thick and uniform.
- Gently fold in the thawed whipped topping using a spatula. Do not beat or overmix. The key is to carefully incorporate the whipped topping, maintaining its airiness, which contributes significantly to the pie’s firm yet light set. Continue folding until no streaks of whipped topping remain.
- Pour the peanut butter filling into the chilled Oreo crust, spreading it evenly with a spatula.
- Cover the pie loosely with plastic wrap and refrigerate for at least 4 hours, or preferably overnight. This extended chilling period is vital for the pie to fully firm up and achieve that guaranteed perfect set, making it easy to slice and serve without a runny mess.
- Before serving, garnish each slice with additional chocolate cookie crumbs and a dollop of extra whipped topping if desired.
Notes
- Extended chilling is vital for the pie to fully firm up and achieve a perfect set.