
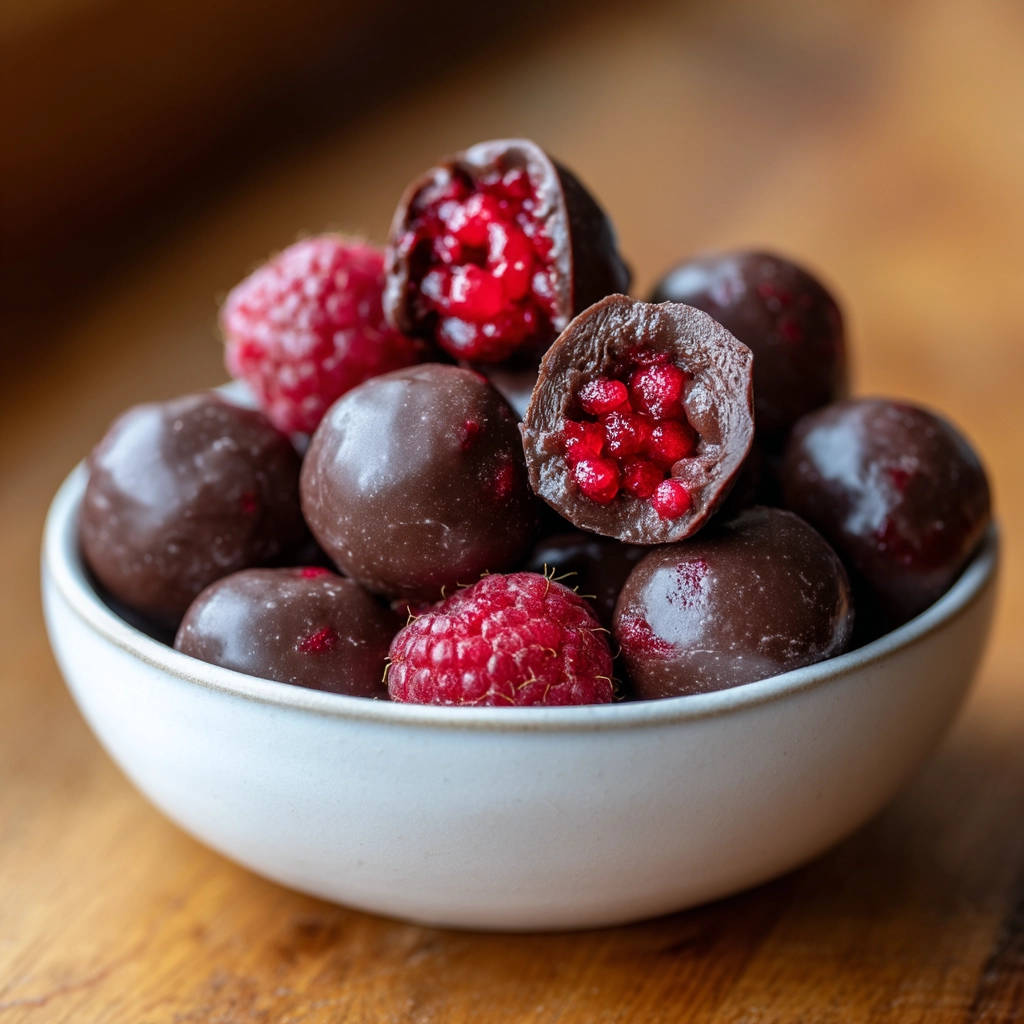
Oh, hello there! Let’s talk about one of life’s simplest, most delightful pleasures: Chocolate Covered Raspberries. Seriously, is there anything more classic, more universally loved than the sweet tang of a fresh raspberry enveloped in a layer of smooth, decadent chocolate? It feels fancy, yet it’s ridiculously easy to make at home. They are the perfect bite-sized treat, whether you need a quick pick-me-up, a last-minute dessert addition, or just want to feel a little bit gourmet without spending hours in the kitchen.
For the longest time, though, I struggled. Every time I tried to make chocolate covered raspberries, I ended up with a bit of a mess. The chocolate wouldn’t stick properly, it would clump, or slide off the delicate fruit. It was frustrating! But I stumbled upon a simple trick, a total game-changer, that ensures that beautiful chocolate coating adheres perfectly every single time. No more messy, uneven coats. Just pure, chocolate-covered berry bliss. Once you know the secret, these truly become the perfect easy snack or dessert you can whip up in minutes.
This recipe is proof that you don’t need a long list of ingredients or complicated techniques to create something truly special. It’s just two simple components coming together in harmony. Ready to unlock the secret to chocolate covered raspberries that actually work?
Why You’ll Absolutely Adore These Chocolate Covered Raspberries
Beyond just tasting incredible (which, let’s be honest, is reason enough!), there are so many reasons to fall in love with making these simple treats:
- They are unbelievably fast. We’re talking maybe 5-10 minutes of active time, plus chilling. Perfect for spontaneous cravings!
- Minimal ingredients means minimal fuss. You likely have everything you need right now.
- They feel indulgent but are surprisingly light, letting the fresh fruit shine.
- Customizable! While the classic is divine, you can easily play with different types of chocolate.
- Ideal for any occasion. From a fancy dessert platter to a simple afternoon snack, they fit right in.
- Knowing the simple trick means foolproof results every single time.
Gathering Your Simple Ingredients for Chocolate Covered Raspberries
One of the best things about this recipe is its beautiful simplicity. You only need two core ingredients, but choosing them well makes all the difference in the final result. It’s about quality over quantity here, letting the natural flavors truly shine.
First, you need the star of the show: fresh raspberries. Look for plump, firm berries that are vibrant red. Avoid any that look bruised, mushy, or have mold. Raspberries are delicate, so handle them with care! The fresher they are, the better your chocolate covered raspberries will taste, offering that perfect burst of sweet-tart flavor against the rich chocolate.
The second essential is the chocolate. You have options here! Chocolate chips are convenient and melt easily, but chopped chocolate from a bar (especially a good quality baking bar) often melts smoother and can give you a glossier finish. Think about what kind of chocolate you love most: dark, milk, or white. Dark chocolate offers a wonderful contrast to the sweet berries, milk chocolate is classic and creamy, and white chocolate adds a different kind of sweetness. Whichever you choose, opt for a good quality chocolate you enjoy eating on its own – it will make a difference in the final product. If you’re a fan of decadent chocolate like I am, exploring different types is half the fun, just like trying different recipes for a deep dark chocolate layer cake or a molten chocolate lava cake.
Here’s the brief list:
- Fresh Raspberries
- Chocolate chips or chopped chocolate (your favorite kind!)
That’s it! Two simple ingredients for an extraordinary treat.
Crafting Your Perfect Chocolate Covered Raspberries: Step-by-Step Guide
Now for the fun part – bringing these two delightful ingredients together. While the steps are straightforward, paying attention to a couple of key details, particularly that crucial first one, is what guarantees success and those perfectly coated berries.
Prepare Your Berries: The Absolutely Crucial Step. If your raspberries seem a little dusty or you want to be extra careful, give them a very gentle rinse under cool water. Place them immediately onto a layer of paper towels. Now, this is where the magic happens: you MUST pat those berries completely, utterly dry. Use more paper towels and be super gentle. Every single bit of moisture is the enemy of well-behaved melted chocolate. Chocolate and water do not mix nicely – even a tiny drop can cause your chocolate to seize and become thick and unusable for dipping. So, take your time here and ensure they are bone dry before moving on.
Gently Melt the Chocolate. Get your chocolate chips or chopped chocolate into a microwave-safe bowl or a heatproof bowl set over a pot of simmering water (a double boiler). If using the microwave, heat in short bursts – think 30-second intervals – stirring really well after each burst. Chocolate holds its shape even when it’s melted, so stirring is key to seeing its true consistency. If using a double boiler, stir gently until smooth. The goal is smooth, fluid chocolate that isn’t too hot. Overheating chocolate can make it thick, dull, and less likely to adhere well. Low and slow is the name of the game here.
Dip the Raspberries. Once your chocolate is beautifully melted and smooth, it’s time to dip! Get a baking sheet ready and line it with parchment paper or wax paper – this is important to prevent the chocolate-coated berries from sticking. Working one raspberry at a time (they’re delicate!), carefully drop it into the melted chocolate. Use a fork, a toothpick, or even a dedicated chocolate-dipping tool if you have one, to gently roll the raspberry in the chocolate until it’s fully coated. Be delicate; we don’t want squished berries!
Lift and Drip. Use your fork or dipping tool to lift the coated raspberry out of the chocolate. Pause for a moment over the bowl, letting any excess chocolate drip back in. This helps create a thinner, more even shell and avoids little puddles of chocolate around the base when they set. A smooth, uniform coating is what we’re after!
Place on the Prepared Sheet. Carefully transfer the coated raspberry from your dipping tool onto the parchment-lined baking sheet. Give it a little nudge off the tool if needed. Arrange them in a single layer, leaving a little space between each one so they don’t freeze or stick together as they set.
Repeat the Process. Continue dipping and placing raspberries until you’ve coated your desired amount or run out of berries or chocolate. Keep the melted chocolate warm enough to stay fluid (a quick 10-second zap in the microwave or a moment over the double boiler might be needed if it starts to thicken, stirring well), but avoid overheating.
Chill to Set. As soon as you’ve finished dipping, slide that baking sheet directly into the refrigerator. This cold environment is crucial for helping the chocolate set up quickly and firmly adhere to the dry raspberries. Let them chill for about 15-20 minutes, or until the chocolate is completely firm to the touch. This quick chill makes sure the chocolate coating has a nice snap and stays put!
Serve and Store. Once the chocolate is fully set, your perfect chocolate covered raspberries are ready to be enjoyed! Arrange them on a plate and watch them disappear. If you have any leftovers (a rare occurrence in my house!), store them in a single layer in an airtight container in the refrigerator. They’re best enjoyed within a day or two for peak freshness, but they’ll keep for a few days if properly stored.
Tips for Perfectly Coated Raspberries Every Time
Getting that smooth, stick-to-the-berry chocolate coating consistently comes down to a few key things. Master these, and you’ll be a chocolate-dipping pro!
- Dryness, Dryness, Dryness: I cannot stress this enough. Moisture is the number one enemy of melting chocolate. If your berries aren’t perfectly dry, the chocolate will seize or won’t stick smoothly. Pat them dry, then let them air dry on paper towels for a few extra minutes just to be absolutely sure.
- Chocolate Quality Matters: Using a good quality chocolate you enjoy eating makes a huge difference in taste and how well it melts and sets. Chocolate chips are formulated to hold their shape (which is why they don’t melt completely flat in cookies), so chopping a good quality bar might give a slightly better melting and coating consistency.
- Don’t Overheat: Melt chocolate gently! Overheated chocolate becomes thick, pasty, and dull. It can also “bloom” later (develop white streaks) when it cools. Low heat, patience, and plenty of stirring are key.
- Use a Deep, Narrow Bowl: Melting your chocolate in a bowl that’s deeper than it is wide makes dipping much easier. You won’t need as much chocolate, and it’s easier to fully submerge the berries one at a time.
- Consider the Temperature: Your melted chocolate should be warm and fluid, but not hot. If it’s too hot, it can cause the berries to soften. If it’s too cool, it will be too thick to coat smoothly. Find that sweet spot where it’s perfectly dippable.
- Work Efficiently: Once the chocolate is melted, work reasonably quickly. As you dip and place, the chocolate will start to cool and thicken. Having everything set up (dried berries, lined baking sheet) before you start melting makes the process go smoothly.
- Get Creative with Toppings: While perfection might be just the chocolate and berry, you can add a little flair! Immediately after placing the coated raspberry on the parchment paper (before it sets), you could sprinkle it with a tiny pinch of sea salt, finely chopped nuts, mini chocolate chips, or edible glitter.
- Humidity Check: Very high humidity can affect how chocolate sets. If it’s a super humid day, chilling in the fridge might take slightly longer.
Serving Suggestions for Your Berry Bites
These chocolate covered raspberries are fantastic all on their own, but they also make a lovely addition to other sweet moments.
Serve them chilled on a simple plate for an elegant, light dessert after dinner. They pair wonderfully with coffee or tea. You could also include them as part of a larger dessert spread alongside other small treats like mini cheesecakes, cookies like classic muddy buddies, or other fruit tarts.
They’re also a fantastic addition to a brunch spread, a baby shower, a bridal shower, or any gathering where you want a fresh, yet indulgent, option. Consider putting them in mini paper cups for easy handling.
Your Chocolate Covered Raspberry Questions Answered (FAQ)
Got questions about making these delightful little treats? Here are some answers to common queries.
What’s the best type of chocolate to use?
That really depends on your preference! Dark chocolate provides a lovely bittersweet contrast to the tart raspberries. Milk chocolate is sweeter and creamier, a classic pairing. White chocolate is also delicious, offering a purely sweet coating. Use a chocolate you genuinely enjoy eating, as its flavor will be prominent. Chocolate chips are convenient, but chopped chocolate from a bar often melts smoother and sets with a better shine.
Can I use frozen raspberries?
Unfortunately, no. Frozen raspberries hold a lot of moisture, and as they thaw, they release even more water. This moisture will cause the chocolate to seize and won’t allow the chocolate to adhere properly. For this recipe, fresh raspberries are essential.
Why did my chocolate seize up?
Chocolate seizing (becoming thick, clumpy, and unusable) is almost always caused by moisture. Even a tiny drop of water, or using fruit that isn’t perfectly dry, can cause it. Overheating the chocolate can also sometimes lead to a similar effect, making it thick and difficult to work with.
How long do chocolate covered raspberries last?
They are best enjoyed within 1-2 days, stored in an airtight container in the refrigerator. The raspberries are fresh fruit and will soften over time, and the chocolate coating can sometimes become dull (bloom) if there are temperature fluctuations, though the drying trick helps prevent this.
Can I leave them out at room temperature?
It’s best to keep them refrigerated until just before serving, especially if your room is warm. The chocolate will soften and melt at room temperature, particularly if handled. Keeping them chilled also maintains the firmness of the raspberry and the crisp snap of the chocolate coating.
Do I have to temper the chocolate?
For this simple recipe, you don’t have to temper the chocolate. The quick chill in the refrigerator helps the chocolate set firmly and adhere well. Tempering chocolate is a more advanced technique that gives chocolate a professional shine and a firm snap at room temperature, but it’s not necessary for delicious, perfectly set chocolate covered raspberries made this way.
Enjoy Your Homemade Chocolate Covered Raspberries!
See? I told you it was simple! With just two ingredients and one key trick (drying the fruit!), you can create these beautiful, delightful treats that taste like you spent much longer on them than you did. They are the perfect expression of how sometimes, the simplest things in life are the most delicious.
Whether you make them for yourself as a healthy-ish indulgence, surprise your family, or take them to share (if they last that long!), these chocolate covered raspberries are sure to be a hit. Give them a try and let me know how they turn out in the comments below! Did you use milk chocolate or dark? Add any fun toppings? I can’t wait to hear!
Chocolate Covered Raspberries

Ingredients
- Fresh raspberries
- Chocolate chips or chopped chocolate
Directions
- Gently rinse the fresh raspberries if needed, then very carefully pat them completely dry using paper towels. This step is crucial for the chocolate to adhere properly. Make sure there is absolutely no moisture left.
- Melt the chocolate gently. You can do this in a microwave safe bowl in 30-second intervals, stirring well after each, or over a double boiler until smooth. Do not overheat the chocolate.
- Working with one raspberry at a time, carefully drop it into the melted chocolate. Use a fork or toothpick to gently roll it and ensure it’s fully coated.
- Lift the raspberry out, allowing any excess chocolate to drip back into the bowl. This helps create a nice, even shell.
- Place the coated raspberry onto a baking sheet lined with parchment paper.
- Repeat with the remaining raspberries.
- Once all raspberries are coated, immediately place the baking sheet into the refrigerator for about 15-20 minutes, or until the chocolate is completely set and firm. Chilling helps the chocolate harden quickly and stick firmly to the dry fruit.
- Serve and enjoy these perfectly coated treats! Store any leftovers in an airtight container in the refrigerator.