Oh, pie. Just the word conjures up feelings of comfort, warmth, and pure deliciousness, doesn’t it? Especially a homemade apple pie! There’s nothing quite like that sweet, spiced apple filling encased in a flaky crust. But if you’re like me, you might have faced the dreaded “soggy bottom” – that disappointing moment when your beautiful pie crust turns into a damp, undercooked mess at the bottom. Ugh! It used to happen to me all the time, especially with juicy fruit fillings like apple.
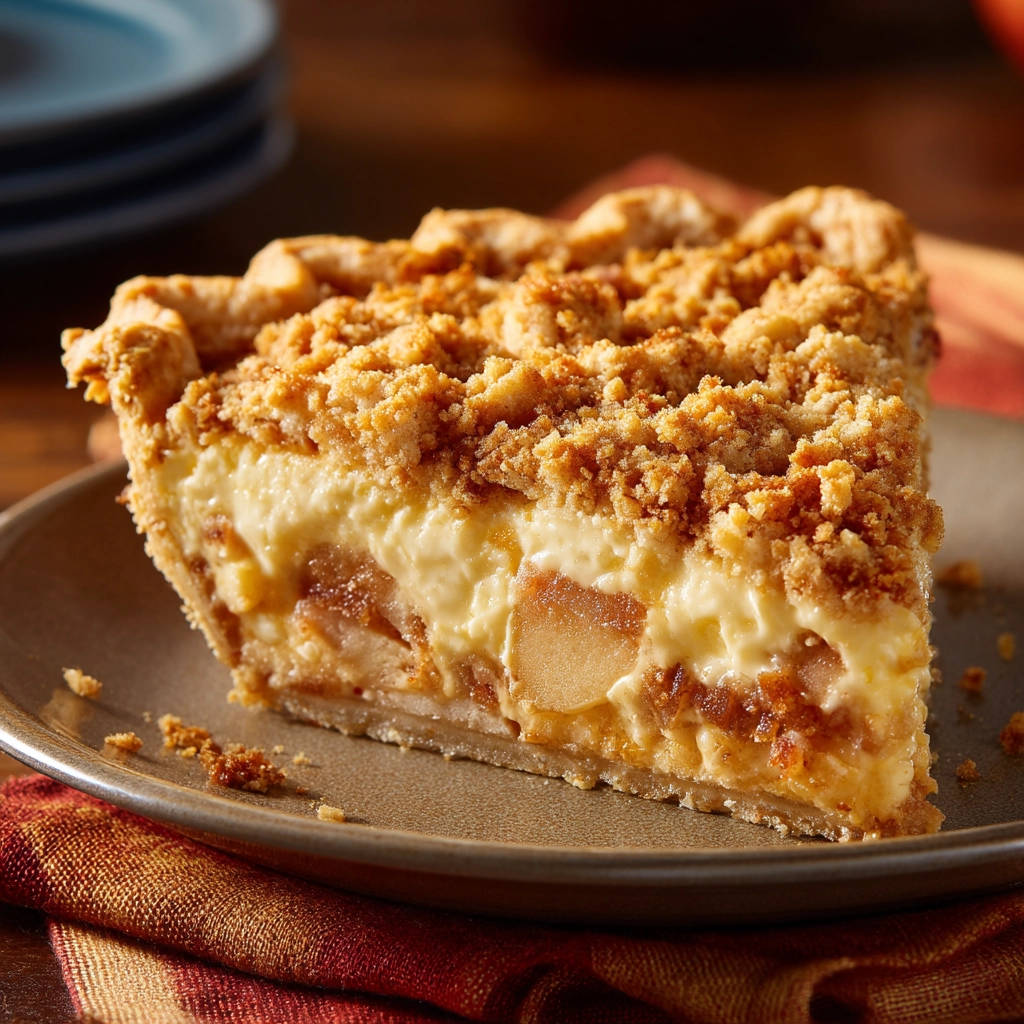
Well, I’m here to tell you that you can say goodbye to soggy bottoms forever! I discovered a simple, game-changing trick that ensures your crust stays perfectly crisp and flaky from the very first slice to the last. Combine that with tender, spiced apples, a decadent creamy layer, and a buttery crumble topping, and you have this Perfect Apple Crumble Cream Pie Trick recipe that will become your go-to.
This isn’t just any apple pie; it’s a layered dream with textures and flavors that sing together in perfect harmony. Ready to bake a pie that’s truly exceptional? Let’s get started!
Why You’ll Adore This Apple Crumble Cream Pie
So, what makes this Apple Crumble Cream Pie stand out from the crowd? It’s all about the layers and that crucial crust technique!
- No More Soggy Bottom: Seriously, the par-baking trick is a revelation. Your bottom crust will be golden and firm, ready to support all that wonderful filling without succumbing to moisture.
- Creamy Indulgence: A luscious layer of sweet cream cheese sits between the crust and the apples. It adds an unexpected richness and acts as a delicious buffer against the apple juices. If you love creamy desserts, this layer takes the pie to a whole new level. For another creamy treat idea, you might enjoy our Mini Apple Crumble Cheesecakes, which also feature that delightful apple and cream cheese pairing.
- Classic Apple Comfort: The heart of the pie is packed with plenty of perfectly spiced, tender apples. It’s the flavor you know and love, elevated.
- Buttery Crumble Topping: Forget a top crust! A generous layer of sweet, crumbly topping made with flour, brown sugar, white sugar, and cold butter adds incredible texture and flavor. It’s much easier than fussing with a second crust and provides that wonderful crisp contrast to the soft fillings. Speaking of crumbles, if you’re a fan, you should definitely check out our Classic Peach Crumble recipe too!
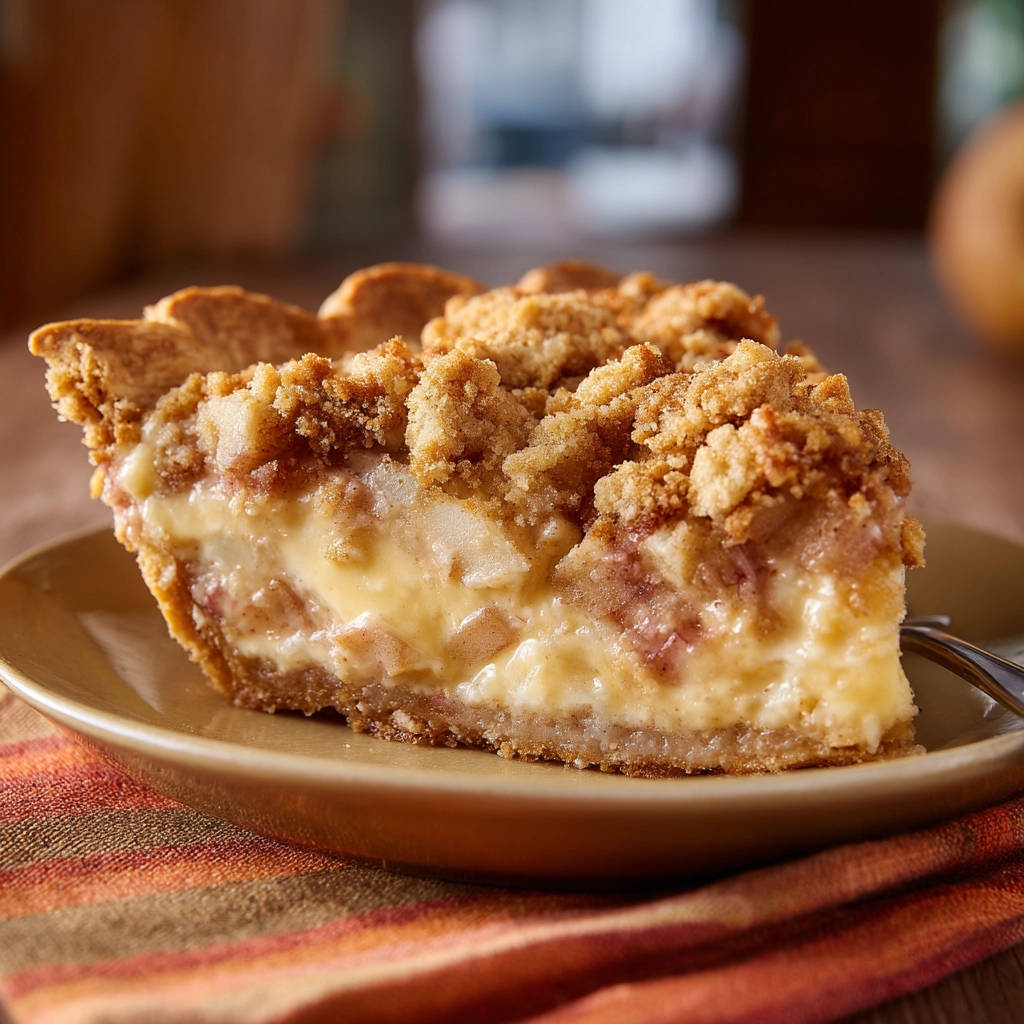
- Beautiful Presentation: With its golden crumble and bubbling filling, this pie looks as amazing as it tastes. It’s sure to impress!
Gathering Your Ingredients for Perfect Apple Crumble Cream Pie
Creating this layered masterpiece requires a few key players. Let’s break down the components and the ingredients you’ll need for each, along with a few tips for selecting the best.
We start with the foundation: a sturdy pie crust. For convenience and consistency, this recipe calls for a single prepared pie crust designed for a 9-inch pie plate. Using a good quality store-bought crust can save time, but if you have a favorite homemade recipe, feel free to use that! The key is selecting one intended for a standard 9-inch pie dish.
Next up, the star of the show: the apples! You’ll need about 6-8 medium apples, yielding roughly 6 cups once sliced. The type of apple you choose is important for both flavor and texture. A mix is often best. Consider using a combination of tart apples like Granny Smith for brightness and sweeter, firmer varieties like Honeycrisp, Fuji, or Gala that hold their shape well during baking. Avoid overly soft or mealy apples.
For the main apple filling, we’ll combine the sliced apples with:
- 1/2 cup granulated sugar: Provides sweetness to balance the tartness of the apples.
- 1/4 cup all-purpose flour: This is a crucial thickening agent. It helps absorb some of the apple juices released during baking, preventing the filling from becoming too watery and contributing to a better set.
- 1 teaspoon ground cinnamon: The quintessential apple pie spice, adding warmth and classic flavor.
- 1/4 teaspoon ground nutmeg (optional): Nutmeg complements cinnamon beautifully and adds another layer of aromatic spice. Feel free to omit if you’re not a fan, but a small pinch really enhances the overall flavor profile.
The creamy layer is where the magic happens! This smooth, rich addition adds a delightful contrast and helps with that perfect crust.
- 8 ounces cream cheese: Make sure it’s softened! This is key to getting a smooth, lump-free creamy layer. Leave it out at room temperature for about an hour before you start baking.
- 1/4 cup granulated sugar: Sweetens the cream cheese layer just enough to make it a decadent treat.
- 1 large egg: Acts as a binder, helping the cream cheese layer set up nicely during baking.
- 1/2 teaspoon vanilla extract: Enhances the sweetness and adds a lovely aromatic note to the creamy layer.
Finally, the irresistible crumble topping! This crunchy, buttery layer is the perfect finish.
- 1 cup all-purpose flour: Forms the base of the crumble.
- 1/2 cup packed light brown sugar: Adds moisture, a lovely caramel-like flavor, and contributes to that classic golden-brown color when baked. Make sure to pack it tightly in the measuring cup.
- 1/4 cup granulated sugar: Provides additional sweetness and helps create a crisp texture in the crumble.
- 1/2 cup cold unsalted butter: It’s absolutely essential that the butter is cold and cut into small pieces. Cold butter is key to achieving that desirable crumbly, tender texture in the topping. As you cut it into the dry ingredients, it creates small pockets that melt and steam as the topping bakes, resulting in those wonderful buttery crumbs.
Crafting Your Apple Crumble Cream Pie: Step-by-Step
Okay, let’s walk through how to bring all these delicious ingredients together to create your perfect pie. Pay close attention to the crust steps – that’s our secret weapon!
- Prepare for Baking: Begin by preheating your oven. Set it to 375 degrees F (190 degrees C). While the oven heats up, get your pie plate ready and make sure your cream cheese is softening on the counter if you haven’t already done so.
- The Anti-Soggy Bottom Master Step: This is the most important part for that crisp crust! Carefully place your prepared pie crust into a standard 9-inch pie plate, gently pressing it into the bottom and up the sides. Crimp or flute the edges however you like. Now, grab a sheet of parchment paper or aluminum foil and gently press it into the unbaked crust, lining the bottom and sides. This is going to hold your pie weights (or whatever you’re using). Fill the foil-lined crust evenly with pie weights, dried beans, or rice. This initial weight prevents the crust from shrinking or puffing up unevenly during the first bake. Place the pie plate on a baking sheet (this makes it easier to handle and catches any potential drips later) and bake in your preheated oven for 15 minutes. After 15 minutes, carefully remove the baking sheet from the oven and lift out the parchment paper along with the weights. You’ll see the crust is starting to look dry. Now, use a fork to pierce the bottom of the crust all over – this is called docking, and it allows steam to escape during the second round of par-baking, preventing bubbles. Put the crust back in the oven for another 5-7 minutes. Watch it closely during this second bake; you want the crust to look dry and lightly golden. This crucial partial baking step gives the bottom crust a head start on crisping up before the wet fillings are added.
- Prepare the Apple Filling: While your pie crust is working its magic in the oven, prepare the apple filling. In a large mixing bowl, combine your sliced apples, 1/2 cup of granulated sugar, 1/4 cup of all-purpose flour, the ground cinnamon, and the optional ground nutmeg. Gently toss everything together with a spoon or your hands, making sure the apples are evenly coated with the sugar, flour, and spices. The flour will help thicken the juices released by the apples as they bake.
- Mix the Creamy Layer: In a separate medium bowl, get your creamy layer ready. Add the softened cream cheese (remember, softened is key!), the 1/4 cup of granulated sugar, the large egg, and the vanilla extract. Use an electric mixer or a whisk to beat these ingredients together until the mixture is completely smooth and beautifully creamy. There shouldn’t be any lumps of cream cheese.
- Make the Crumble Topping: Grab a third bowl for the buttery crumble. Add the 1 cup of all-purpose flour, the packed light brown sugar, and the remaining 1/4 cup of granulated sugar. Whisk these dry ingredients together briefly. Now, add the small pieces of cold unsalted butter. Use a pastry blender, a fork, or your fingertips to cut the butter into the dry ingredients. Work the butter in until the mixture looks like coarse crumbs, with some pieces of butter still visible (about the size of small peas is ideal). Don’t overmix; you want that crumbly texture.
- Assemble Your Pie: Now for the fun part – putting it all together! Take your partially baked, golden-bottomed crust. Pour the smooth cream cheese mixture into the bottom of the crust and use a spatula or the back of a spoon to spread it out into an even layer. Next, carefully spoon the coated apple filling evenly over the cream cheese layer. Try to distribute the apples relatively evenly. Finally, sprinkle the prepared crumble topping generously and evenly over the apple layer. Make sure you get good coverage for that perfect crunchy top.
- Bake the Pie: Place the baking sheet with the assembled pie back into the preheated 375°F (190°C) oven. Bake for 45-60 minutes. Baking time can vary depending on your oven and the apples used. You’ll know the pie is done when the crumble topping is a lovely golden brown, and you can see the apple filling bubbling merrily around the edges of the pie. If the edges of your pie crust start to brown too quickly before the center is ready, you can loosely cover them with strips of aluminum foil. This shields the edges from the direct heat.
- Cool and Set: This step requires patience, but it’s absolutely essential! Once the pie is baked and looks perfect, carefully remove it from the oven (still on the baking sheet) and place it on a wire rack. Let the pie cool completely on the wire rack for at least 2-3 hours. This cooling time allows the filling, especially the creamy layer, to set up properly. Cutting into a hot or warm pie will result in a messy slice and can jeopardize that perfectly baked bottom crust. Letting it cool ensures clean slices and a stable pie.
Tips for Perfect Apple Crumble Cream Pie Every Time
Achieving pie perfection is within reach! Here are a few extra tips to help you get the best results with your Apple Crumble Cream Pie:
- Apple Variety Matters: As mentioned, using a mix of apples is highly recommended. Tart apples provide necessary acidity, while firmer, sweeter ones hold their shape and add sweetness.
- Don’t Skip the Par-Baking (Blind Baking): This is the absolute key to avoiding a soggy bottom. Follow step 2 precisely! It makes all the difference. Make sure the crust looks dry and lightly golden before adding the filling.
- Ensure Cream Cheese is Softened: Cold cream cheese will result in lumps, which won’t spread smoothly. Plan ahead and let it sit out or gently microwave it for a few seconds to soften it thoroughly.
- Cold Butter for Crumble: Just like with pie crust dough, cold butter is essential for a good crumble topping. It creates the right texture.
- Check for Doneness: The bubbling filling around the edges is a good indicator that the apples are cooked and the filling is hot, helping it to set as it cools. The crumble should be golden brown.
- Cooling is Non-Negotiable: Seriously, wait! Cutting too soon will lead to a runny mess. Allowing the pie to cool for at least 2-3 hours lets everything firm up.
- Make it Your Own: Feel free to add a pinch of ground ginger or a touch of cardamom to the apple mixture for a different spice profile. You could also add a handful of chopped nuts (like walnuts or pecans) to the crumble topping for extra crunch.
What to Serve With Apple Crumble Cream Pie
While this pie is utterly delicious on its own, a few additions can take it over the top:
- Vanilla Ice Cream: A classic pairing for a reason! The cold, melting ice cream against the warm pie is heavenly.
- Fresh Whipped Cream: A dollop of freshly whipped cream adds lightness and sweetness.
- Caramel Sauce: A drizzle of caramel sauce enhances the apple and brown sugar flavors beautifully. For another recipe featuring caramel, check out our Caramel Swirl Cookie Bars!
- A Hot Beverage: A warm cup of coffee or tea is the perfect accompaniment for a cozy slice.
Your Apple Crumble Cream Pie Questions Answered (FAQ)
Got questions about making this delightful pie? Here are some common ones:
Can I use a homemade pie crust instead of prepared?
Absolutely! If you have a go-to homemade pie crust recipe, feel free to use it. The crucial step of par-baking (Step 2 in the directions) still applies and is essential for preventing a soggy bottom, whether the crust is homemade or store-bought.
What are the best types of apples to use for this pie?
A mix of apples is generally recommended for the best flavor and texture. Using a combination of tart apples (like Granny Smith) and sweeter, firmer apples (like Honeycrisp, Fuji, Gala, or Braeburn) provides a nice balance of flavor and ensures the apples don’t turn to mush while baking. Using just one variety is fine, but aim for something relatively firm.
How do I store leftover Apple Crumble Cream Pie?
Leftover pie should be stored in the refrigerator. Cover it loosely with plastic wrap or aluminum foil, or place slices in an airtight container. It will keep well for 3-4 days.
Can I make this pie ahead of time?
Yes, you can prepare components ahead of time. You can make the crumble topping and store it in the refrigerator for a few days. The apple filling can be tossed together a few hours before baking. The cream cheese mixture is best made just before assembling. For the entire pie, you can assemble it after par-baking the crust, cover it loosely, and refrigerate for up to 24 hours before baking. You might need to add a few minutes to the baking time if baking from cold.
Why is there a cream cheese layer? Does it help with the soggy bottom?
The cream cheese layer serves a few purposes. It adds a wonderful, creamy richness and tang that contrasts beautifully with the spiced apples and crisp crumble. While the par-baking is the primary defense against a soggy bottom, the creamy layer can also act as a bit of a moisture barrier between the juicy fruit and the crust, further helping to keep that bottom flaky.
Enjoy Your Homemade Apple Crumble Cream Pie!
There you have it! Your guide to baking an absolutely stunning Apple Crumble Cream Pie, complete with the simple yet effective trick to ensure a perfectly crisp bottom crust every single time. The combination of warm spiced apples, creamy cheesecake-like layer, and buttery crumble is truly irresistible. It’s the kind of pie that brings people together and makes any occasion feel special.
Give this recipe a try, and let me know how it turns out! Did the anti-soggy bottom trick work for you? What are your favorite apple combinations? Share your thoughts and any photos in the comments below. Happy baking!
Apple Crumble Cream Pie
Course: DessertCuisine: AmericanDifficulty: medium8
servings25
minutes52
minutes650
kcal77
MinutesDiscover the trick to a perfect, non-soggy bottom Apple Crumble Cream Pie with a luscious creamy layer and sweet crumble topping. Get the recipe now!
Ingredients
1 prepared pie crust (for a 9-inch pie)
6 cups sliced apples (about 6-8 medium apples)
1/2 cup granulated sugar
1/4 cup all-purpose flour
1 teaspoon ground cinnamon
1/4 teaspoon ground nutmeg (optional)
For the creamy layer:
8 ounces cream cheese, softened
1/4 cup granulated sugar
1 large egg
1/2 teaspoon vanilla extract
For the crumble topping:
1 cup all-purpose flour
1/2 cup packed light brown sugar
1/4 cup granulated sugar
1/2 cup cold unsalted butter, cut into small pieces
Directions
- Preheat your oven to 375 degrees F (190 degrees C).
- Place the pie crust in a 9-inch pie plate. Crimp the edges as desired. Now for the anti-soggy bottom trick: line the unbaked crust with parchment paper or foil, pressing it gently against the sides and bottom. Fill the crust with pie weights, dried beans, or rice. Bake for 15 minutes. Carefully remove the parchment paper and weights. Pierce the bottom of the crust all over with a fork. Bake for another 5-7 minutes, until the crust looks dry and lightly golden. This crucial step of partial baking helps prevent the bottom from getting soggy later by giving it a head start.
- While the crust is partially baking, prepare the fillings. In a large bowl, combine the sliced apples, 1/2 cup granulated sugar, 1/4 cup flour, cinnamon, and nutmeg (if using). Toss gently to coat the apples evenly.
- In a separate medium bowl, beat together the softened cream cheese, 1/4 cup granulated sugar, egg, and vanilla extract until smooth and creamy.
- In a third bowl, make the crumble topping. Whisk together 1 cup flour, brown sugar, and 1/4 cup granulated sugar. Cut in the cold butter pieces using a pastry blender or your fingers until the mixture resembles coarse crumbs.
- Assemble the pie. Pour the cream cheese mixture into the bottom of the partially baked pie crust and spread it evenly. Spoon the apple filling evenly over the cream cheese layer. Scatter the crumble topping evenly over the apples.
- Place the pie on a baking sheet (to catch any potential drips) and bake in the preheated oven for 45-60 minutes, or until the crumble topping is golden brown and the filling is bubbly around the edges. If the pie crust edges start to brown too quickly, you can cover them loosely with strips of aluminum foil.
- Let the pie cool on a wire rack for at least 2-3 hours before slicing and serving. This allows the filling, especially the creamy layer, to set up properly, which also helps maintain the integrity of that perfectly baked bottom crust.
Notes
- To prevent a soggy bottom, ensure the partially baked crust is cooled slightly before adding the cream cheese layer. For a richer crumble, consider adding a pinch of salt to the topping mixture.