I remember the frustration of meticulously crafting a batch of eclairs, only to watch them deflate into sad, soggy puddles after leaving the oven. It was a common struggle, but years in the kitchen taught me a simple, yet game-changing secret that ensures my Perfect Chocolate Nut Eclairs emerge beautifully puffed and stable every single time.
This recipe isn’t just about making delectable pastries; it’s about mastering the art of choux pastry with a foolproof method that promises bakery-quality results, filled with rich chocolate pastry cream and a delightful nutty crunch.
Unlocking the “No-Collapse” Secret: Why This Recipe Stands Apart
Many home bakers shy away from eclairs due to the infamous collapse, but this recipe directly addresses that anxiety, ensuring your efforts are rewarded with stable, impressive pastries.
Say Goodbye to Collapsed Eclairs and Soggy Puffs
The pain of seeing your beautifully puffed choux pastry shrivel is real. Our method tackles this common issue head-on, delivering consistent results that hold their shape and delightful crispness.
The Science Behind Our Stable Choux Pastry Success
The magic lies in a precise drying process both on the stovetop and crucially, during the post-baking cool-down. This gradual drying allows the internal structure of the choux to firm up completely, preventing any sudden deflation once removed from the oven.
Beyond Basic: What Makes These Eclairs Truly Irresistible?
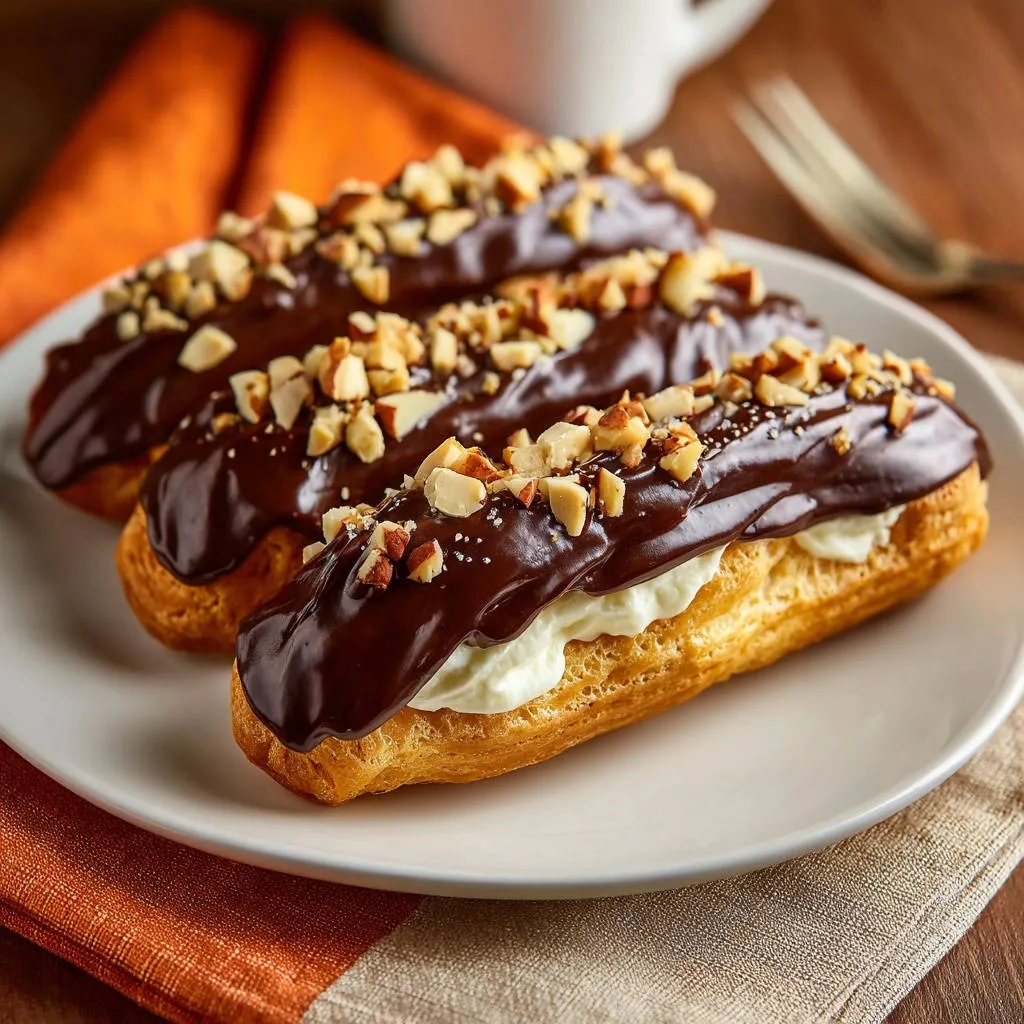
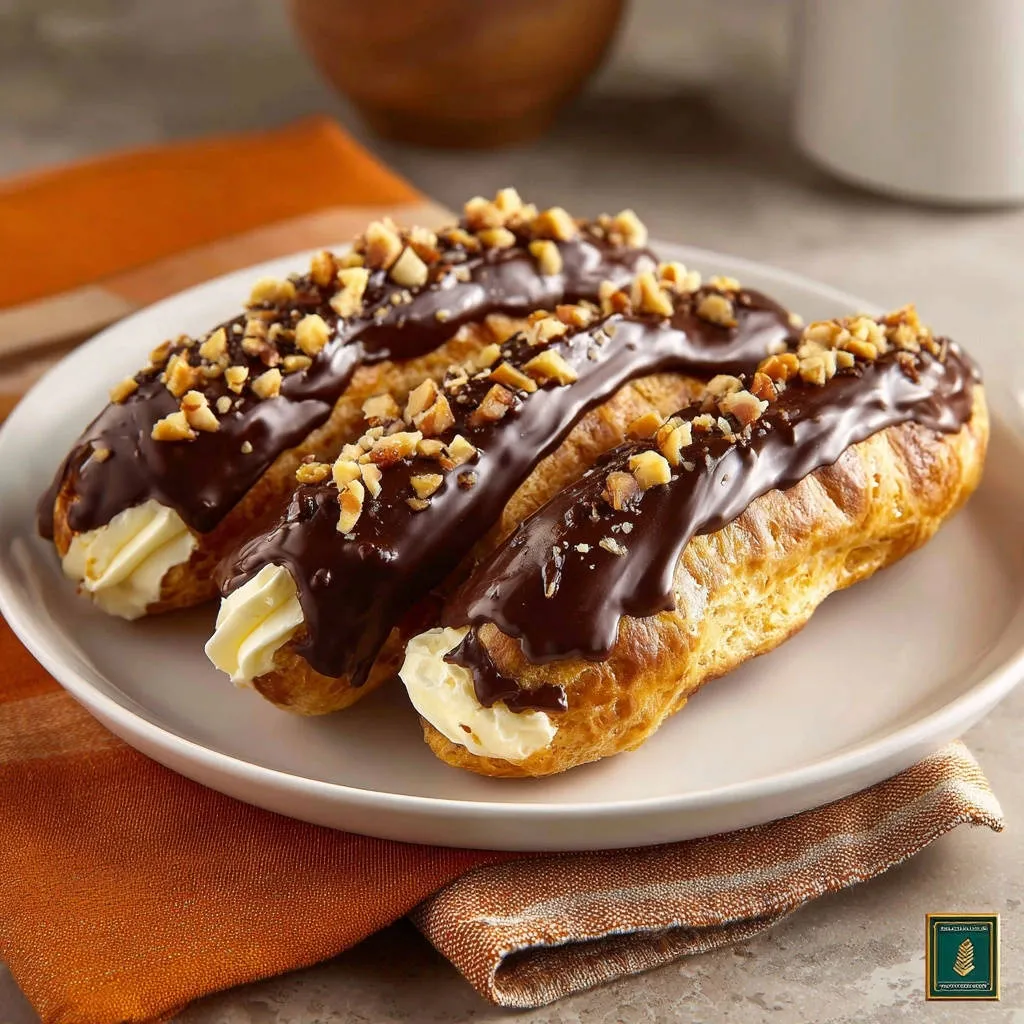
Beyond their structural integrity, these Perfect Chocolate Nut Eclairs boast a balanced sweetness, a luxurious, velvety pastry cream, and a satisfying textural contrast from the glossy chocolate glaze and toasted nuts. They’re a showstopper dessert that tastes as good as it looks.
Essential Tools for Eclair Success
Having the right equipment makes all the difference when crafting these delicate pastries. These tools simplify the process and contribute to consistently excellent results.
Must-Have Equipment for Perfect Puffs
Heavy-Bottomed Saucepan: Essential for even heat distribution when making the choux pastry, preventing scorching.
Wooden Spoon or Sturdy Spatula: Necessary for vigorously stirring the choux dough until it forms a smooth ball.
Electric Mixer (Stand or Handheld): While a wooden spoon works, an electric mixer makes incorporating the eggs into the choux pastry significantly easier and more efficient.
Piping Bags and Tips: A large plain tip (like Ateco 809) for the choux and a small plain or bismarck tip for the pastry cream are ideal for professional-looking eclairs.
Parchment Paper-Lined Baking Sheets: Prevents sticking and allows for easy removal of the baked eclairs.
Helpful Additions for a Smoother Process
Wire Rack: Ideal for cooling the baked eclairs and for setting the chocolate glaze evenly.
Double Boiler or Heatproof Bowl: Best for melting chocolate gently and preventing it from seizing.
Whisk: Essential for a smooth pastry cream, especially when tempering egg yolks.
The Core Ingredients for Irresistible Eclairs
Each ingredient plays a vital role in achieving the signature texture and rich flavor of these Perfect Chocolate Nut Eclairs.
Building the Foundation: Choux Pastry Essentials
Water: The liquid base that turns to steam, creating the hollow interior of the eclair.
Unsalted Butter: Adds richness and helps form the initial emulsion for the dough. Unsalted allows you to control the seasoning.
Salt: Balances the sweetness and enhances the overall flavor of the pastry.
All-Purpose Flour: Provides the structure for the choux pastry. Sifting is not necessary but ensure it’s accurately measured.
Large Eggs: Crucial for the texture and rise of the choux. They emulsify into the dough, providing moisture and helping the pastry puff.
Crafting Silky Smooth Pastry Cream
Milk: The primary liquid for the cream. Whole milk yields the richest, most luxurious result.
Granulated Sugar: Sweetens the cream and helps with its smooth texture.
Cornstarch: The essential thickening agent that gives pastry cream its classic, stable consistency.
Egg Yolks: Provide richness, color, and additional thickening power, contributing to a truly decadent cream.
Unsalted Butter: Stirred in at the end, it adds a beautiful sheen and extra richness to the finished cream.
Vanilla Extract: Use good quality pure vanilla extract for the best flavor. It’s a key aromatic component.
Glazing with Decadence and Nutty Crunch
Semi-Sweet Chocolate: Provides the classic chocolate flavor and creates a glossy, setting glaze. Choose a good quality baking chocolate for superior results.
Unsalted Butter or Neutral Oil: Added to the chocolate, it helps create a smoother, more fluid glaze that’s easy to dip and sets beautifully.
Chopped Toasted Nuts: Almonds or hazelnuts are traditional and add a fantastic textural contrast and nutty aroma. Toasting them beforehand significantly enhances their flavor.
Mastering Each Stage: A Step-by-Step Guide to Perfect Chocolate Nut Eclairs
- Prepare Your Workspace:
Preheat the oven to 400°F (200°C) and line baking sheets with parchment paper. This ensures you’re ready when the choux dough is perfect, as it’s best piped immediately.
- Boil and Combine:
In a medium saucepan, combine water, butter, and salt. Heat over medium heat until the butter is completely melted and the mixture comes to a vigorous rolling boil. This high heat is critical for immediate steam production.
- Incorporate the Flour:
Immediately remove the saucepan from the heat and add all the flour at once. Stir vigorously with a wooden spoon until a smooth dough forms that pulls away cleanly from the sides of the pan. This step is known as the panada.
- Dry Out the Dough:
Return the pan to low heat and cook, stirring constantly, for 1 to 2 minutes. This crucial step dries out the dough slightly, evaporating excess moisture, which is vital for proper puffing and preventing soggy eclairs.
- Cool and Incorporate Eggs:
Transfer the dough to a large bowl and let it cool for 5 minutes, stirring occasionally to release heat. Add eggs one at a time, beating well with a wooden spoon or electric mixer after each addition until fully incorporated and the dough is smooth and glossy. The dough should be thick but pipeable, forming a soft “V” when you lift the spoon.
- Pipe the Choux:
Transfer the dough to a piping bag fitted with a large plain tip. Pipe consistent 4 to 5-inch long strips onto the prepared baking sheets, leaving ample space between them for expansion. Aim for uniform size for even baking.
- Initial High Heat Bake:
Bake the eclairs at 400°F (200°C) for the initial 15 minutes. This provides an immediate burst of heat, creating significant steam inside the pastry for maximum puff and forming a crisp exterior.
- Reduce Heat and Continue Baking:
REDUCE the oven temperature to 350°F (175°C) and continue to bake for another 20 to 25 minutes. Continue until the eclairs are deeply golden brown and feel light and hollow when gently lifted. Do not open the oven door during this phase if possible.
- The “No-Collapse” Stabilization Step:
Crucially, turn off the oven completely. Open the oven door a few inches, propping it open with a wooden spoon if needed, and leave the eclairs inside for an additional 15 to 20 minutes to cool gradually. This allows them to dry out thoroughly and stabilize their structure, preventing the dreaded collapse upon exiting the oven. This step is essential for airy, crisp shells, much like achieving the perfect structure for perfect cream puffs.
- Prepare the Egg Mixture:
In a medium bowl, whisk together sugar, cornstarch, and egg yolks until the mixture is perfectly smooth and pale. This forms the thickening base for your decadent cream.
- Heat the Milk:
In a saucepan, heat milk over medium heat until it just begins to simmer, with small bubbles forming around the edges. Do not let it come to a rolling boil.
- Temper the Yolks:
Slowly pour about half of the hot milk into the egg yolk mixture while whisking constantly and vigorously. This tempering process gently raises the temperature of the yolks, preventing them from scrambling when added to the hot milk.
- Return to Pan and Thicken:
Pour the tempered mixture back into the saucepan with the remaining milk. Cook over medium heat, stirring constantly with a whisk, until the cream thickens significantly and boils. Continue to boil and stir for 1 minute to ensure it reaches its full thickening potential and loses any starchy taste.
- Finish and Chill:
Remove the saucepan from the heat, then stir in the 2 tablespoons of butter and vanilla extract until completely smooth and melted. Press plastic wrap directly onto the surface of the cream to prevent a skin from forming as it cools. Refrigerate until completely chilled and set, at least 2 hours, or ideally longer.
- Prepare Eclair Shells for Filling:
Once the eclairs are completely cool and the pastry cream is thoroughly chilled and firm, make a few small holes in the bottom of each eclair. You can use a skewer, the tip of a small knife, or a piping tip to create two or three entry points for the cream.
- Prepare Pastry Cream for Piping:
Whisk the chilled pastry cream vigorously until it is smooth and lightened. Transfer the whisked cream to a piping bag fitted with a small plain or bismarck tip, which is ideal for precise filling.
- Fill the Eclairs:
Pipe the pastry cream into the cooled eclairs through the holes until they feel generously filled and heavy. Ensure an even distribution of cream throughout the shell for a balanced bite.
- Melt the Chocolate Glaze:
In a heatproof bowl set over a saucepan of simmering water (creating a double boiler), melt the chopped semi-sweet chocolate and 1 tablespoon of butter or neutral oil, stirring gently until the mixture is completely smooth and glossy. The gentle heat ensures a perfect consistency.
- Dip and Glaze:
Remove the melted chocolate from the heat. Carefully dip the top of each filled eclair into the warm chocolate glaze, allowing any excess to drip off before turning it right side up.
- Add Nuts Immediately:
Immediately sprinkle the tops of the glazed eclairs with the chopped toasted nuts before the chocolate glaze begins to set. This ensures the nuts adhere firmly to the still-wet chocolate.
- Set and Serve:
Place the finished eclairs on a plate or a wire rack. Refrigerate for about 15 minutes to allow the chocolate glaze to fully set and firm up before serving. This brief chill also enhances the overall texture.
Creating the Foundation: The Choux Pastry Method
The Critical Bake: Achieving Puffy, Stable Shells (The “No-Collapse” Method)
Whipping Up Luxurious Pastry Cream
Assembling Your Eclairs: Filling with Finesse
Finishing Touch: The Glossy Chocolate Glaze and Nutty Topping
Expert Tips & Tricks for Eclair Perfection
Even with a solid recipe, a few insider tips can elevate your Perfect Chocolate Nut Eclairs from good to truly exceptional.
Choux Pastry Pointers for a Flawless Foundation
Don’t Skip Drying the Dough: The 1-2 minutes of cooking the dough on low heat after adding flour is critical. This moisture evaporation is what creates the steam inside the pastry for that signature puff and prevents sogginess. You should see a thin film on the bottom of the pan.
Incorporate Eggs Gradually: Adding eggs one at a time and beating thoroughly is key. The dough needs to absorb each egg completely to achieve the right consistency – thick enough to hold its shape but pipeable. Adding them too quickly can result in a greasy or overly wet dough.
Test the Choux Consistency: A good test is to lift the spoon or beater; the dough should form a “V” or “ribbon” that slowly falls back into the bowl. If it’s too stiff, add a tiny bit more beaten egg; if too runny, it might be challenging to pipe and could lead to flatter eclairs.
Baking Wisdom for Golden Shells
Resist Opening the Oven Door: Especially during the first phase of baking, avoid opening the oven door. This traps the steam critical for puffing. Only open minimally for the temperature change, and then for the final cooling step. Any sudden temperature drop can cause deflation.
Embrace the Gradual Cooling (The Secret!): The prolonged cooling in the turned-off oven with the door ajar is paramount. It allows the eclairs to dry out internally and firm up slowly, preventing the dreaded collapse upon exiting the oven. This is the “no-collapse” magic.
Pastry Cream Perfection
Temper Yolks Properly: Always slowly whisk a small amount of hot liquid into the egg yolks first before adding them to the main hot mixture. This gentle introduction prevents the eggs from scrambling and ensures a smooth, lump-free cream. Patience is key here.
Chill Thoroughly: Pastry cream needs ample time to chill and set properly. Don’t rush this step, as it affects the cream’s texture and pipeability. Two hours is a minimum, but overnight is even better for a firm, easy-to-pipe consistency.
Glazing and Finishing Touches
Work Quickly with Nuts: Once you dip the eclairs in the warm chocolate glaze, immediately sprinkle the nuts. The glaze sets quickly, so you want to ensure they adhere properly before it hardens. Have your nuts ready to go.
Don’t Overheat the Glaze: Overheated chocolate can seize, become dull, or burn. Use a double boiler or microwave in short 30-second bursts, stirring frequently, to achieve a smooth, glossy consistency without burning the chocolate. For another delightful chocolate treat, you might enjoy making a silky smooth chocolate mousse.
Eclair Emergency? Troubleshooting Common Issues
Even with the best intentions, baking can sometimes present challenges. Here’s how to navigate common eclair issues.
Why Did My Eclairs Collapse After Baking?
This is most often due to insufficient drying during either the stovetop cooking of the choux dough or, more commonly, the final cooling stage. Ensure you cook the choux dough long enough on the stovetop to dry it out, forming a film on the pan bottom.
Critically, follow the “no-collapse” method of cooling them gradually in the turned-off oven with the door slightly ajar. Underbaking can also be a culprit; make sure they are deeply golden and feel truly light and hollow before cooling.
My Pastry Cream is Lumpy/Too Thin!
Lumpy pastry cream usually indicates scrambled eggs from improper tempering or insufficient whisking during cooking. Ensure you slowly stream hot milk into the yolks while whisking constantly. If it’s too thin, it likely wasn’t cooked long enough; return it to medium heat and whisk vigorously until it thickens to a boil and holds its shape.
The Chocolate Glaze Isn’t Setting Properly
This could be due to too much added fat (butter or oil) or not enough chocolate, altering the chocolate’s setting properties. Ensure you’re using the correct ratio of chocolate to added fat as specified in the recipe.
Refrigerating the glazed eclairs for at least 15 minutes will help firm up the glaze quickly, allowing it to set completely for a crisp, shiny finish. For another rich chocolate experience, consider a deep dark chocolate layer cake.
Serving, Storing, and Making Ahead: Enjoying Your Eclairs
Once your Perfect Chocolate Nut Eclairs are complete, knowing how to best serve and store them ensures maximum enjoyment.
Best Ways to Serve Your Perfect Chocolate Nut Eclairs
For the best texture and flavor, serve eclairs chilled. This allows the pastry cream to remain firm and refreshing, providing a wonderful contrast to the crisp choux pastry. They make an exquisite dessert for special occasions, a delightful addition to a brunch spread, or an elevated treat for an afternoon tea.
How to Store Leftover Eclairs
Store assembled eclairs in an airtight container in the refrigerator for up to 2-3 days. While they are still delicious, the choux pastry can soften over time due to the moisture from the cream, so consuming them within the first day or two is ideal for peak crispness.
Can I Make Parts of the Eclairs in Advance?
Absolutely! This is a great strategy for breaking up the workload. The choux pastry shells can be baked and stored unfilled in an airtight container at room temperature for up to 1 day, or frozen for up to 1 month (thaw at room temperature before filling).
The pastry cream can be made 1-2 days in advance and stored tightly covered with plastic wrap directly on its surface in the refrigerator. Just whisk it vigorously before piping to restore its smooth texture.
Your Eclair Questions Answered (FAQs)
Here are some common questions about making these delectable chocolate nut eclairs, along with expert answers.
Can I use different types of nuts for the topping?
Yes, absolutely! While toasted hazelnuts and almonds are classic and provide a wonderful flavor, feel free to experiment with other finely chopped nuts like pistachios, walnuts, or pecans. Ensure they are toasted for maximum flavor and crunch.
Is there a dairy-free option for the pastry cream?
Making a dairy-free pastry cream is possible by substituting dairy milk with a neutral-flavored plant-based milk (like oat or almond milk, avoiding strongly flavored options) and using vegan butter. Be aware that the texture may vary slightly, sometimes being a bit softer, but it can still be delicious.
How do I know when the choux pastry is dry enough on the stovetop?
You’ll know the choux pastry is sufficiently dried when it pulls away cleanly from the sides and bottom of the pan, forming a cohesive ball. A thin film or crust may also form on the bottom of the saucepan, indicating that sufficient moisture has evaporated.
What if I don’t have a piping bag for the choux pastry or cream?
No piping bag? No problem! You can use a sturdy zip-top bag with one corner snipped off (snip a larger hole for the choux, a smaller one for the cream) to pipe both the choux pastry and the cream. For the choux, you can also use two spoons to dollop and shape the dough into eclair forms on the baking sheet, though they may not be as uniform in shape.
Can I make mini eclairs with this recipe?
Yes, you can easily adapt this recipe to make mini eclairs! Simply pipe shorter strips of choux pastry, around 2-3 inches in length, onto your baking sheet. Adjust the baking time accordingly, likely reducing it by 5-10 minutes for both stages, but still following the gradual cooling method in the turned-off oven to ensure they stay puffed and crisp.
Ready to Impress? Share Your Perfect Chocolate Nut Eclairs Masterpiece!
With this detailed guide and the invaluable “no-collapse” secret, you’re now equipped to create stunning, bakery-quality Perfect Chocolate Nut Eclairs right in your own kitchen. The satisfaction of biting into a perfectly airy, cream-filled, chocolate-glazed pastry that you made yourself is truly unparalleled.
Don’t hesitate to dive in and experience the joy of mastering this classic French dessert. We’d love to see your creations! Share your Perfect Chocolate Nut Eclairs photos and experiences with us on social media.

Perfect Chocolate Nut Eclairs
Course: PastryCuisine: French cuisineDifficulty: easy4
12-16 eclairs3
hours1
hour240
minutesFrench cuisine
Ingredients
1 cup water
1/2 cup unsalted butter (1 stick)
1/4 teaspoon salt
1 cup all-purpose flour
4 large eggs
1 and 1/2 cups milk
1/2 cup granulated sugar
1/4 cup cornstarch
2 large egg yolks
2 tablespoons unsalted butter
1 teaspoon vanilla extract
6 ounces semi-sweet chocolate, chopped
1 tablespoon unsalted butter or neutral oil
1/2 cup chopped toasted nuts (like almonds or hazelnuts)
Directions
- Prepare the Choux Pastry:
- Preheat oven to 400 degrees F (200 degrees C). Line baking sheets with parchment paper.
- In a medium saucepan, combine water, butter, and salt. Heat over medium heat until butter is melted and mixture comes to a rolling boil.
- Remove from heat and immediately add all the flour at once. Stir vigorously with a wooden spoon until a smooth dough forms that pulls away from the sides of the pan.
- Return pan to low heat and cook, stirring constantly, for 1 to 2 minutes to dry out the dough slightly. This is important for structure.
- Transfer dough to a large bowl and let cool for 5 minutes, stirring occasionally.
- Add eggs one at a time, beating well with a wooden spoon or electric mixer after each addition until fully incorporated and the dough is smooth and glossy. The dough should be thick but pipeable.
- Transfer dough to a piping bag fitted with a large plain tip. Pipe 4 to 5 inch long strips onto the prepared baking sheets, leaving space between them.
- Bake the Eclairs (The No-Collapse Trick):
- Bake at 400 degrees F (200 degrees C) for 15 minutes.
- REDUCE oven temperature to 350 degrees F (175 degrees C) and bake for another 20 to 25 minutes, until the eclairs are golden brown and feel light and hollow.
- This is the key step to prevent collapse: Turn off the oven, open the oven door a few inches, and leave the eclairs inside for an additional 15 to 20 minutes to cool gradually and dry out completely. This stabilizes the pastry structure.
- Make the Pastry Cream:
- In a medium bowl, whisk together sugar, cornstarch, and egg yolks until smooth.
- In a saucepan, heat milk over medium heat until it just begins to simmer.
- Slowly pour about half of the hot milk into the egg yolk mixture while whisking constantly to temper the yolks.
- Pour the tempered mixture back into the saucepan with the remaining milk.
- Cook over medium heat, stirring constantly, until the cream thickens significantly and boils. Continue to boil and stir for 1 minute.
- Remove from heat, stir in the 2 tablespoons butter and vanilla extract until smooth.
- Press plastic wrap directly onto the surface of the cream to prevent a skin from forming. Refrigerate until completely chilled and set, at least 2 hours.
- Assemble the Eclairs:
- Once the eclairs are cool and the pastry cream is chilled, make a few small holes in the bottom of each eclair using a skewer or small knife tip.
- Whisk the chilled pastry cream until smooth. Transfer to a piping bag fitted with a small plain or bismarck tip.
- Pipe the pastry cream into the cooled eclairs through the holes until filled.
- Make the Chocolate Glaze:
- In a heatproof bowl set over a saucepan of simmering water (double boiler), melt the chopped chocolate and 1 tablespoon butter or oil, stirring until smooth and glossy.
- Remove from heat. Dip the top of each filled eclair into the warm chocolate glaze.
- Immediately sprinkle the tops with chopped toasted nuts before the glaze sets.
- Place eclairs on a plate or wire rack and refrigerate for about 15 minutes to allow the glaze to set before serving.
Notes
- The gradual cooling step for the eclairs is crucial to prevent collapse.