There’s nothing more disheartening than looking forward to a delicious chicken dinner, only to find it tough and dry. I’ve been there countless times, but after perfecting a simple technique, my kitchen disappointment turned into pure joy. This recipe for Perfectly Glazed Chicken Breasts consistently delivers incredibly tender, juicy results, coated in a sticky, irresistible glaze that will make you wonder how you ever cooked chicken any other way.
Say Goodbye to Dry Chicken: Why This Recipe is a Game-Changer
The secret to succulent chicken often lies in the prep, not just the cooking. Many home cooks struggle with chicken breasts drying out, especially when pan-searing. This common issue stems from uneven thickness, leading parts of the chicken to overcook while others finish.
My game-changing trick ensures every piece of chicken cooks uniformly and stays unbelievably moist. We’ll flatten the chicken to an even thickness, allowing for quick, consistent cooking without a single dry spot. Coupled with a perfectly balanced glaze, you’ll achieve restaurant-quality results at home.
Flavor Architects: What You Need for Perfectly Glazed Chicken Breasts
The Star: Boneless, Skinless Chicken Breasts
Opt for good quality boneless, skinless chicken breasts, ideally organic or pasture-raised, for the best flavor and texture. Their consistent size helps with even cooking.
The Perfect Glaze Blend: Sweet, Savory, Smoky
The magic of these Perfectly Glazed Chicken Breasts comes from a harmonious blend of flavors. Soy sauce provides a savory depth and umami, while honey or brown sugar adds a beautiful sweetness and helps create that desirable sticky glaze.
Olive oil ensures the glaze adheres well and contributes to a rich mouthfeel. Garlic powder and smoked paprika introduce warm, aromatic notes, with the paprika adding a subtle, inviting smokiness that elevates the dish beyond basic chicken.
Fresh Finishes: Feta and Parsley
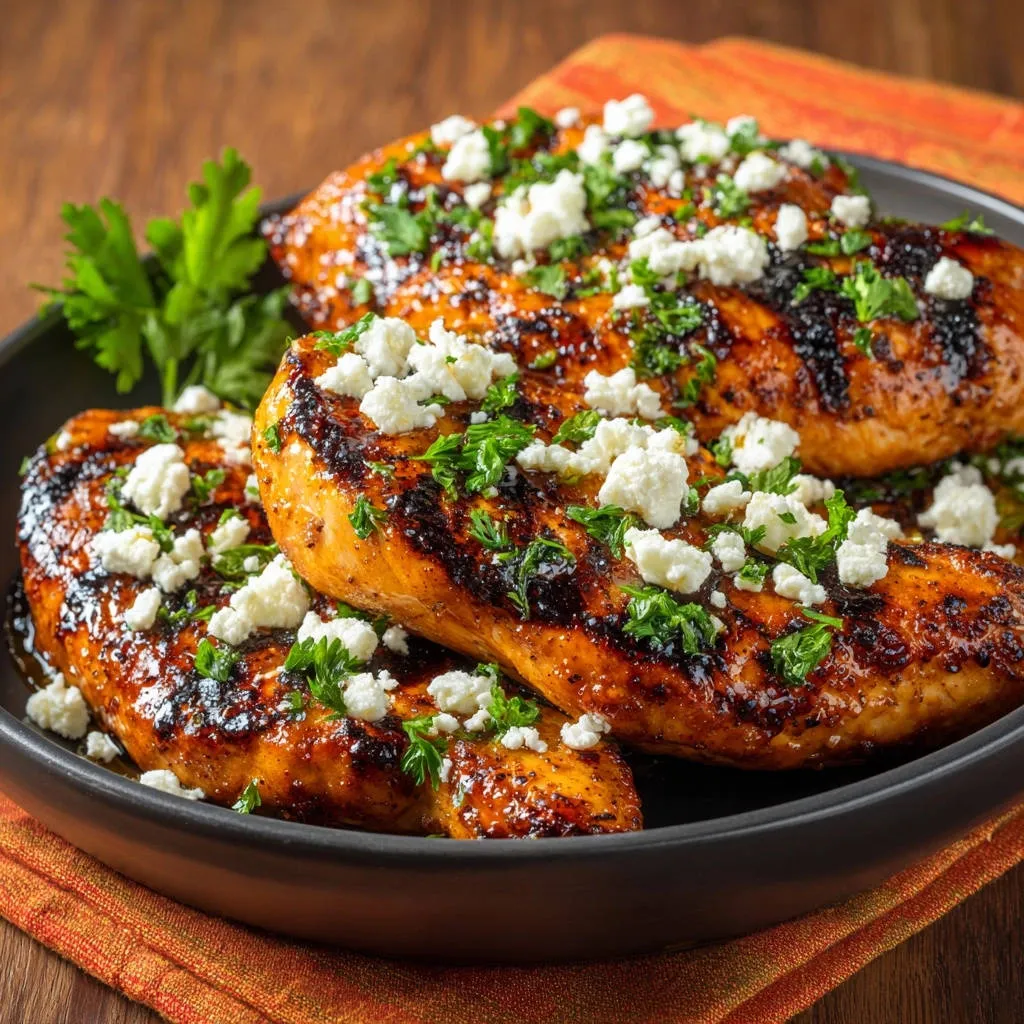
Crumbled feta cheese offers a tangy, salty counterpoint that cuts through the richness of the glaze. Fresh parsley brightens the dish with its herbaceous, clean flavor and vibrant green color.
Your Kitchen Arsenal: Tools for Glazed Chicken Success
Having the right tools makes all the difference in achieving perfect results with minimal fuss.
Pounding Perfection: The Meat Mallet
A meat mallet is essential for tenderizing and evening out the thickness of your chicken breasts. If you don’t have one, a heavy rolling pin or even a sturdy, flat-bottomed pan will work just as well.
Pan Power: Skillet vs. Grill Pan
A large, heavy-bottomed skillet, such as cast iron or stainless steel, is perfect for achieving a deep golden sear. A grill pan is an excellent alternative if you desire those appealing grill marks.
Temperature Takes All: Instant-Read Thermometer
This is your best friend for food safety and preventing dry chicken. An instant-read thermometer ensures your chicken is cooked through to 165°F (74°C) without overcooking, guaranteeing juiciness every time.
Mastering the Method: A Step-by-Step Guide to Perfectly Glazed Chicken
Follow these steps closely to create tender, juicy, and Perfectly Glazed Chicken Breasts.
Prep for Perfection: Pounding and Patting Dry
- Prepare Chicken: Place each boneless, skinless chicken breast between two sheets of plastic wrap or inside a large resealable bag. This keeps your workspace clean and the chicken protected during pounding.
Pound Evenly: Using a meat mallet or a heavy rolling pin, pound each chicken breast to an even 3/4-inch thickness. This step is crucial for promoting even cooking, preventing dry spots, and ensuring the chicken cooks quickly and uniformly. You’ll notice the chicken relaxes and tenderizes as you do this.
Pat Dry: Remove the chicken from the plastic wrap and pat them very dry with paper towels. A dry surface is critical for achieving a beautiful golden sear and prevents the chicken from steaming in the pan.
Whisking Wonders: Crafting Your Signature Glaze
- Combine Glaze Ingredients: In a small bowl, whisk together the soy sauce, honey (or brown sugar), 1 tablespoon of olive oil, garlic powder, smoked paprika, and black pepper. Stir until all ingredients are well combined and the honey or sugar is fully dissolved, creating a smooth, cohesive glaze mixture.
Searing for Success: Getting That Golden Crust
- Heat Pan: Heat a large skillet or grill pan over medium-high heat. Add a little extra olive oil to the pan, just enough to lightly coat the bottom, and heat until it shimmers. This indicates the pan is hot enough for an immediate sear.
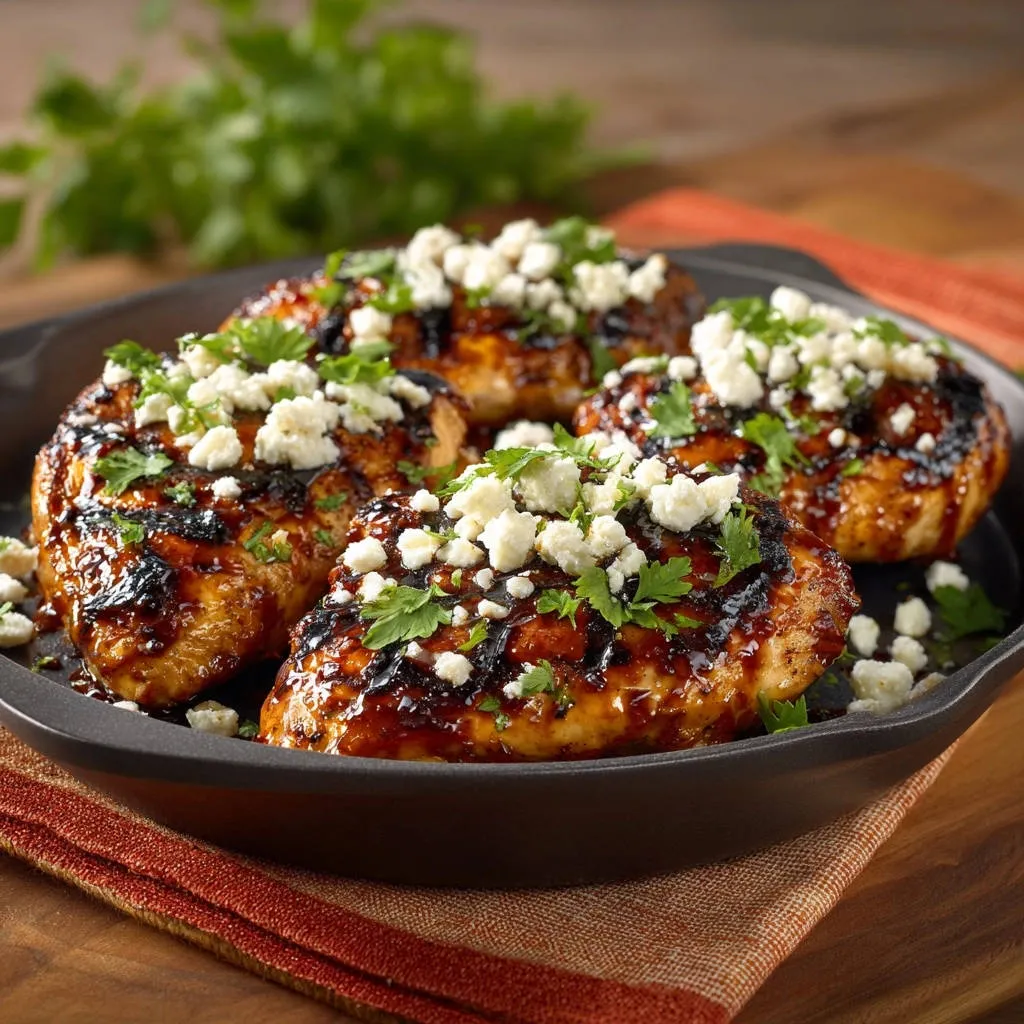
Sear Chicken: Carefully place the pounded chicken breasts in the hot pan. Cook for 4 to 6 minutes per side, or until they develop a beautiful deep golden-brown crust. The high heat creates that desirable caramelized exterior, locking in juices.
Cook Through: Turn the chicken only once during cooking to ensure you get excellent grill marks or a good, even sear. Cook until the internal temperature reaches 165°F (74°C) when measured with an instant-read thermometer.
The Glaze Reveal: Brushing on the Magic
- Apply Glaze: During the last 2 minutes of cooking, generously brush the prepared glaze over the chicken breasts. Allow the glaze to caramelize slightly on the surface, thickening and becoming wonderfully sticky and flavorful.
The Golden Rule: Resting for Juiciness
- Rest Chicken: Once cooked, remove the chicken from the pan and transfer it to a cutting board. Let it rest for 5 minutes before slicing or serving. This resting period is non-negotiable; it allows the juices to redistribute throughout the meat, keeping the chicken incredibly moist and tender.
Finishing Touches: Garnish and Serve
- Garnish: Serve the Perfectly Glazed Chicken Breasts immediately. Top generously with crumbled feta cheese and a sprinkle of fresh chopped parsley. These garnishes add fresh flavor and visual appeal.
Chef’s Secrets: Elevate Your Perfectly Glazed Chicken Breasts
Unlock even more flavor and perfection with these expert tips.
Don’t Skip the Pound!
Pounding chicken breast isn’t just for tenderizing; it’s about creating an even canvas. This ensures uniform cooking, preventing those dreaded dry edges while the thicker center finishes.
The Right Heat for the Right Sear
Achieving a shimmering oil and a hot pan is paramount. If the pan isn’t hot enough, your chicken will steam instead of sear, resulting in a pale, rubbery texture instead of that irresistible golden-brown crust.
Internal Temperature is Key
Always use an instant-read thermometer. Eye-balling doneness is a recipe for dry chicken. Pull the chicken off the heat when it hits 165°F (74°C) for perfect juiciness.
Resting is Non-Negotiable
Allowing chicken to rest for at least 5 minutes after cooking is vital. This brief pause allows the muscle fibers to relax and reabsorb juices, ensuring every bite is moist and flavorful.
Flavor Boosters & Variations
Consider adding a pinch of ginger powder to the glaze for an Asian-inspired twist. For a touch of heat, a tiny dash of cayenne pepper can be a delicious addition. You can also experiment with a spoonful of apricot jam in the glaze for a fruitier profile.
Common Challenges & Simple Solutions
Why is My Chicken Dry?
The most common culprit is overcooking or uneven thickness. Ensure you pound the chicken to a uniform 3/4-inch and use an instant-read thermometer to avoid exceeding 165°F (74°C).
My Glaze Isn’t Sticking/Caramelizing
This usually means the pan wasn’t hot enough when the glaze was applied, or it wasn’t given enough time (the last 2 minutes). Make sure the chicken is seared well before brushing on the glaze, and continue cooking briefly to allow it to thicken and coat.
Chicken is Unevenly Cooked
Uneven cooking directly relates to inconsistent chicken breast thickness. Pounding each piece to a uniform size is the definitive solution for this issue, ensuring every part cooks at the same rate.
Perfect Pairings: What to Serve with Glazed Chicken Breasts
These versatile Perfectly Glazed Chicken Breasts pair beautifully with a variety of sides, making them ideal for any meal.
Simple Sides for Busy Weeknights
For a quick and easy weeknight meal, serve with steamed rice or a simple green salad. Roasted asparagus or a quick sauté of baby bok choy complement the glaze without overpowering it. You might also consider our recipe for Crispy Roasted Cauliflower for a delightful textural contrast.
Elevated Options for Special Occasions
When you want to impress, pair with creamy mashed potatoes or a decadent potato gratin. Our Perfect Potato Gratin would be an exquisite match, soaking up the delicious pan juices.
Refreshing Salads and Grains
A light quinoa salad with fresh vegetables or a crisp, simple green salad that stays perfectly crispy offers a refreshing contrast. The bright flavors help balance the richness of the glaze, making for a well-rounded meal.
Plan Ahead: Storing and Reheating Your Glazed Chicken
Storing Leftovers Safely
Store leftover Perfectly Glazed Chicken Breasts in an airtight container in the refrigerator for up to 3-4 days. Ensure they are completely cooled before storing to prevent condensation.
Best Ways to Reheat Without Drying Out
To retain moisture, gently reheat the chicken in a lightly oiled skillet over medium-low heat. Add a tablespoon or two of water or chicken broth to the pan and cover, creating a steaming effect. You can also reheat in a preheated oven at 300°F (150°C) for 10-15 minutes, again, covered, until just warmed through.
Make-Ahead Tips for Easy Meal Prep
You can prepare the glaze mixture up to 3 days in advance and store it in the refrigerator. The chicken can be pounded and seasoned a day ahead, making weeknight dinner assembly even faster.
Your Top Questions About Perfectly Glazed Chicken Breasts, Answered!
Can I use bone-in chicken breasts for this recipe?
While you could, this recipe is specifically designed for boneless, skinless breasts due to the pounding method. Bone-in chicken will require a longer cooking time and may not yield the same even tenderness or quick glazing.
What if I don’t have a meat mallet?
No problem at all! A heavy rolling pin, a sturdy wine bottle, or even the bottom of a small, heavy saucepan can effectively pound the chicken to the desired thickness.
Can I use other sweeteners besides honey or brown sugar?
Yes, maple syrup or agave nectar can be used as alternatives, though they may slightly alter the flavor profile of the glaze. Honey and brown sugar offer that classic sticky sweetness for these Perfectly Glazed Chicken Breasts.
Is this recipe gluten-free?
To make this recipe gluten-free, substitute the regular soy sauce with tamari. All other ingredients are naturally gluten-free.
Can I grill the chicken instead of pan-frying it?
Absolutely! Grilled Perfectly Glazed Chicken Breasts are delicious. Follow the same pounding instructions, then grill over medium-high heat, brushing with the glaze during the last few minutes of cooking, just as you would in a skillet.
Ready to Create Your Own Perfectly Glazed Chicken Masterpiece?
You now have all the tools, tips, and techniques to transform ordinary chicken breasts into an extraordinary meal. This recipe isn’t just about cooking; it’s about mastering a technique that guarantees succulent, flavorful results every single time. Take the leap, try this recipe tonight, and prepare to impress yourself and your loved ones with these truly Perfectly Glazed Chicken Breasts. Happy cooking!

Perfectly Glazed Chicken Breasts
Course: Main CourseCuisine: American CuisineDifficulty: easy4
servings15
minutes12
minutes35
minutesAmerican Cuisine
Ingredients
4 boneless, skinless chicken breasts
1/4 cup soy sauce
2 tablespoons honey or brown sugar
1 tablespoon olive oil, plus more for cooking
1 teaspoon garlic powder
1/2 teaspoon smoked paprika
1/4 teaspoon black pepper
1/4 cup crumbled feta cheese
2 tablespoons fresh parsley, chopped
Directions
- Place each chicken breast between two sheets of plastic wrap or in a large resealable bag. Using a meat mallet or a heavy rolling pin, pound each chicken breast to an even 3/4-inch thickness. This is key for ensuring even cooking and preventing dry spots. Pat them very dry with paper towels.
- In a small bowl, whisk together the soy sauce, honey or brown sugar, 1 tablespoon olive oil, garlic powder, smoked paprika, and black pepper. This is your glaze.
- Heat a large skillet or grill pan over medium-high heat with a little olive oil until shimmering.
- Place the pounded chicken breasts in the hot pan. Cook for 4 to 6 minutes per side, or until deeply golden brown and cooked through, reaching an internal temperature of 165°F. Turn only once during cooking to get beautiful grill marks or a good sear.
- During the last 2 minutes of cooking, brush the chicken generously with the prepared glaze, allowing it to caramelize slightly on the surface.
- Remove chicken from the pan and let it rest on a cutting board for 5 minutes before serving. This resting period allows the juices to redistribute, keeping the chicken incredibly moist.
- Serve immediately, topped with crumbled feta cheese and chopped fresh parsley.
Notes
- Pounding chicken to even thickness and allowing it to rest are crucial for tenderness and moisture.