There’s nothing quite as disheartening as biting into what promises to be a luscious red velvet treat, only to find it dry and crumbly. My years in the kitchen have taught me that perfectly soft and chewy Red Velvet Thumbprint Cookies aren’t just a dream; they’re entirely achievable with a simple, game-changing technique. This recipe is specifically designed to banish dryness, ensuring every vibrant bite delivers that tender crumb and rich, creamy center you crave.
Say Goodbye to Dry Cookies: Why THIS Recipe Delivers Perfection
Many red velvet cookie recipes fall short, sacrificing moisture for that signature crimson hue. This recipe, however, prioritizes a melt-in-your-mouth texture without compromising on vibrant color or classic flavor.
Our “secret weapon” against dryness lies in precise measurements, strategic chilling, and, most importantly, a nuanced baking technique. We’ll guide you to achieve edges that are set, while the centers remain just soft enough to create that delightful chew.
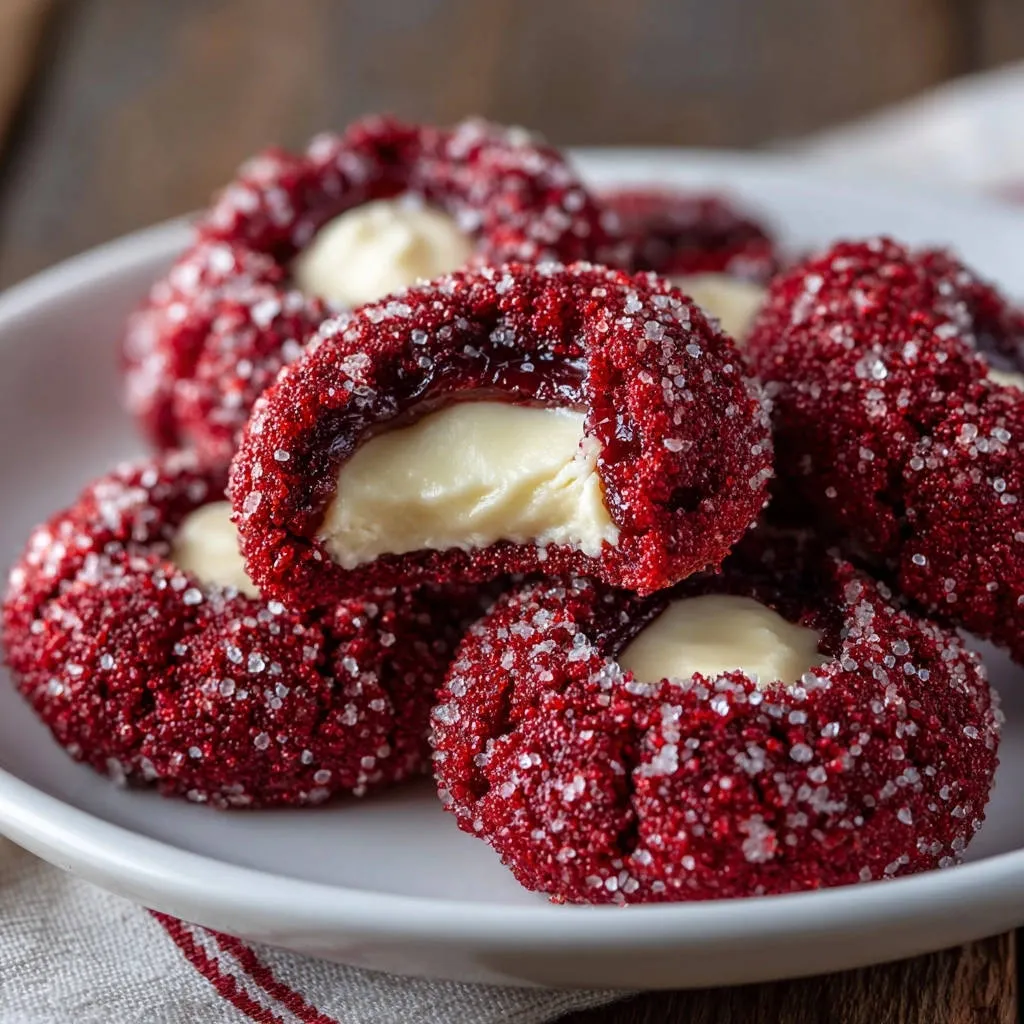
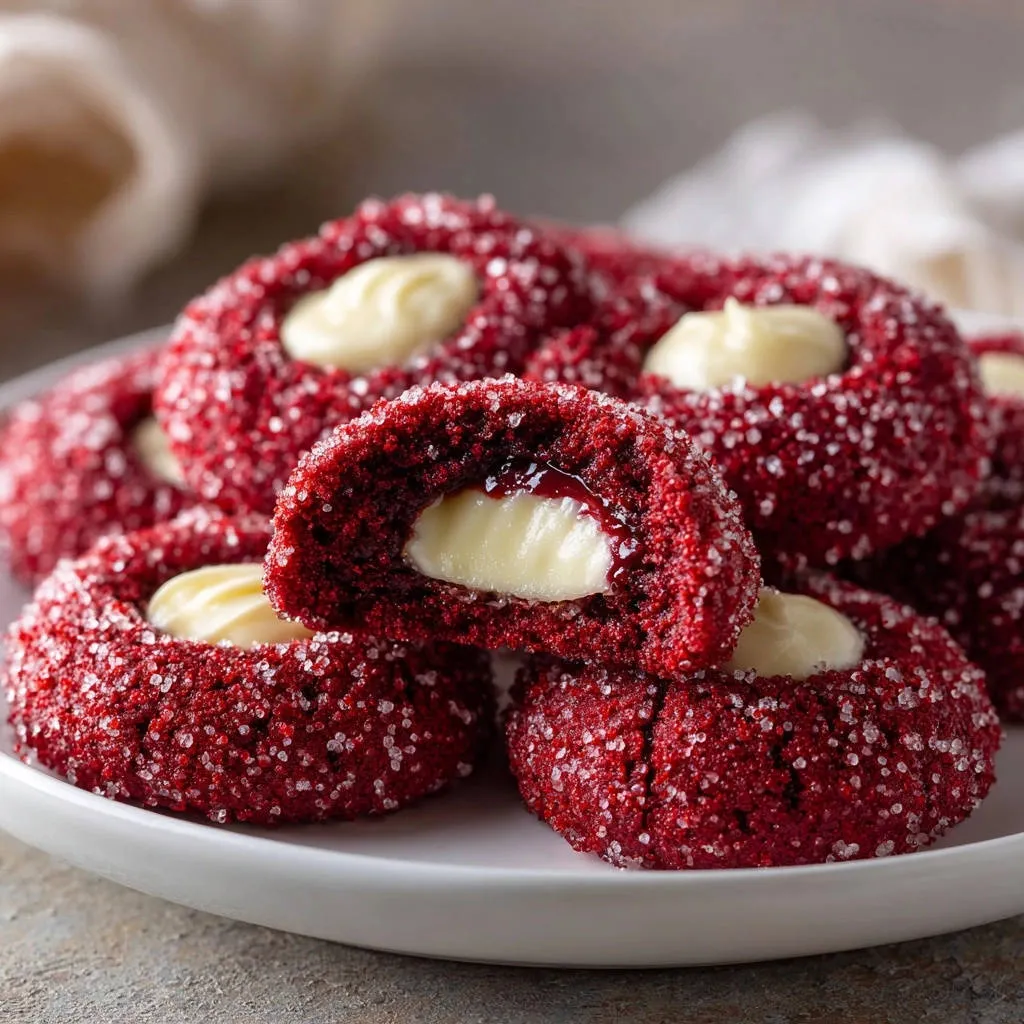
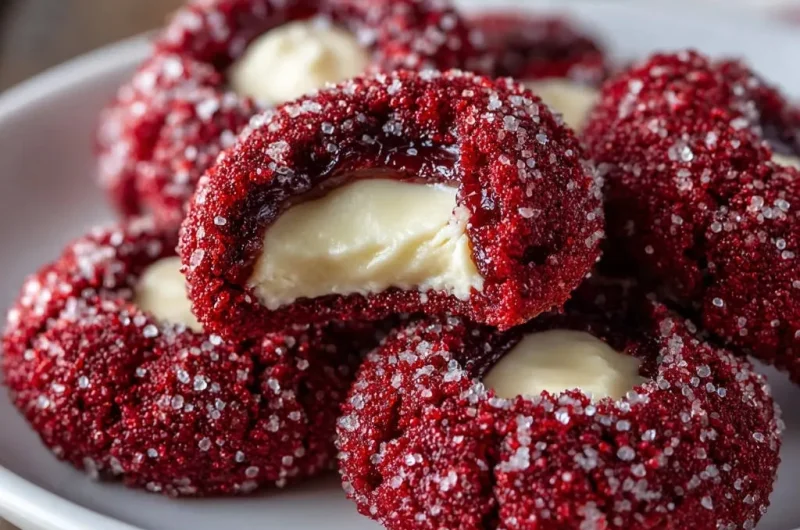
The result is a harmonious balance: a tender, slightly cocoa-kissed cookie base perfectly complementing a luscious, tangy cream cheese filling. These are the Red Velvet Thumbprint Cookies you’ve always dreamed of-moist, flavorful, and absolutely irresistible.
Gather Your Palette: Essential Ingredients for Vibrant Red Velvet Thumbprint Cookies
Quality ingredients are the foundation of any exceptional bake. Here’s what you’ll need to create your stunning Red Velvet Thumbprint Cookies, along with insights into why each element is crucial.
For the Irresistibly Soft Cookie Base
All-Purpose Flour: Provides the structure for our cookies. Precisely measuring it, preferably by weight, ensures a consistent and tender crumb, avoiding a dense or tough texture.
Unsweetened Cocoa Powder: This isn’t just for color; it’s the subtle backbone of red velvet flavor. Use good quality unsweetened cocoa for a richer, more authentic taste that complements the red dye.
Baking Soda: Our leavening agent, activated by the acidic buttermilk. It creates the tender, slightly lifted texture characteristic of red velvet.
Salt: Essential for balancing the sweetness and enhancing all the other flavors. Don’t skip it!
Unsalted Butter, Softened: Room temperature butter is critical for proper creaming with sugar. It incorporates air, leading to a lighter, softer cookie. Using unsalted butter allows you to control the overall salt content precisely.
Granulated Sugar: Sweetens the cookies and contributes to their spread and crispness on the edges, while helping to keep the interior soft. It also helps create that beautiful crackle when creamed with butter.
Large Eggs, at Room Temperature: Room temperature eggs emulsify better with the butter and sugar, creating a smoother, more uniform dough. They also add richness and moisture.
Vanilla Extract: A classic flavor enhancer that deepens the overall richness of the cookie and complements the cocoa.
Red Food Coloring: This is where the “red” in red velvet comes from! A high-quality gel food coloring will give the most vibrant results without needing excessive amounts that might affect flavor or texture.
Buttermilk: Provides essential moisture and a subtle tang that is a hallmark of true red velvet. Its acidity also reacts with the baking soda for lift. If you don’t have buttermilk, you can make a substitute by adding a tablespoon of lemon juice or white vinegar to regular milk and letting it sit for 5-10 minutes.
Additional Granulated Sugar (for rolling): Creates a beautiful sparkling exterior and a delightful slight crunch on the cookie’s surface.
Crafting the Creamy Dream: Filling Essentials
Cream Cheese, Softened: The star of the filling, offering its signature tangy, rich flavor. Ensure it’s fully softened to prevent lumps and achieve a silky-smooth texture.
Unsalted Butter, Softened: Adds richness and helps create the perfect creamy consistency for the filling. Like the cream cheese, softening it properly ensures a smooth blend.
Powdered Sugar, Sifted: Provides sweetness and body to the filling. Sifting is crucial here to prevent any grittiness and ensure a perfectly smooth, pipeable consistency.
Vanilla Extract: Enhances the sweet and tangy notes of the cream cheese, completing the classic red velvet flavor profile.
Equip Your Kitchen: Tools for Seamless Cookie Creation
Having the right tools at hand simplifies the baking process and contributes to perfect results. Here are the essentials for your Red Velvet Thumbprint Cookies.
Stand Mixer or Hand Mixer: Essential for creaming butter and sugar to airy perfection, and for whipping the cream cheese filling until it’s light and fluffy.
Parchment Paper-Lined Baking Sheets: Prevents sticking, ensures even baking, and makes for easy cleanup. A non-stick surface is vital for delicate cookies.
Wire Rack: Crucial for cooling cookies completely before filling. Proper cooling prevents condensation and helps the cookies set without becoming soggy.
Small Scoop or Tablespoon: For consistent cookie sizing, ensuring uniform baking and presentation. Consistency is key for a professional look.
Shallow Dish: Ideal for easily rolling cookie dough balls in granulated sugar, ensuring a thorough and even coating.
Small Spoon or Thumb: For creating the perfect indent in each cookie, ready to cradle that luscious cream cheese filling.
Your Hands-On Guide: Baking Red Velvet Thumbprint Cookies to Perfection
Follow these steps closely, paying attention to the details, and you’ll be rewarded with the best Red Velvet Thumbprint Cookies you’ve ever made.
- Prepare Dry Ingredients:
In a medium bowl, whisk together the flour, cocoa powder, baking soda, and salt. Set aside. This step ensures an even distribution of leavening and flavor throughout the cookie dough, preventing pockets of unmixed ingredients.
- Cream Butter and Sugar:
In a large bowl, using your stand or hand mixer, cream together the softened butter and granulated sugar until the mixture is light and fluffy, about 2-3 minutes. This process incorporates air into the butter, contributing significantly to a tender and soft cookie texture.
- Incorporate Eggs, Vanilla, and Color:
Beat in the eggs one at a time, mixing thoroughly after each addition until fully incorporated. Stir in the vanilla extract and red food coloring until the mixture is vibrantly red. The color will intensify during this stage, so aim for a rich hue.
- Combine Wet and Dry Mixtures:
Alternately add the whisked dry ingredients and buttermilk to the wet mixture, beginning and ending with the dry ingredients. Mix on low speed only until just combined. Crucially, do not overmix, as overworking the dough develops gluten, which can lead to a tough, dry cookie texture.
- Chill the Dough:
Cover the dough tightly with plastic wrap and refrigerate for at least 30 minutes, or up to 2 hours. Chilling is a vital step for these cookies, as it firms up the butter in the dough, making it much easier to handle and significantly preventing the cookies from spreading too much during baking.
- Prepare for Baking:
Preheat your oven to 375°F (190°C). Line baking sheets with parchment paper for easy release and consistent baking. Pour the additional 1/2 cup granulated sugar for rolling into a shallow dish, ready for coating.
- Shape and Sugar Coat:
Scoop out rounded tablespoons of dough and roll them into smooth, uniform balls. Roll each ball generously in the granulated sugar, ensuring it is fully coated for that beautiful sparkle and a delightful textural crunch. Place coated balls about 2 inches apart on the prepared baking sheets to allow for slight spreading.
- Create Indents:
Using your thumb or the back of a small measuring spoon (like a 1/2 teaspoon), gently make an indent in the center of each cookie ball. Be careful not to press all the way through to the baking sheet; you want to create a nice cavity for the filling.
- Bake to Perfection (Crucial Step!):
Bake for 8 to 10 minutes. This is arguably the most crucial step for preventing dryness: the cookies are done when the edges are just set and lightly browned, but the centers still look slightly soft and puffy. They will continue to firm up as they cool on the hot baking sheet. Overbaking even by a minute or two can result in disappointingly dry cookies.
- Prepare Cream Cheese Filling:
While the cookies cool completely on a wire rack, prepare the cream cheese filling. In a medium bowl, beat together the softened cream cheese and softened butter until smooth and creamy. Gradually add the sifted powdered sugar, a cup at a time, beating until fully incorporated and fluffy. Stir in the vanilla extract until just combined, ensuring a uniform, luscious consistency.
- Fill and Serve:
Once the cookies are completely cool to the touch, spoon or pipe the prepared cream cheese filling into the indents of each cookie. A piping bag with a round tip offers the neatest presentation. Serve immediately or store as directed below for continued freshness.
Beyond the Basics: Expert Tips for Your Best Red Velvet Thumbprint Cookies
Elevate your baking with these insider tips, ensuring every batch of Red Velvet Thumbprint Cookies is a triumph of flavor and texture.
The Chilling Advantage: Don’t skip chilling the dough! This step is paramount. It firms up the butter, which prevents excessive spreading during baking, resulting in beautifully shaped thumbprints. Cold dough is also much easier to roll and indent without sticking.
Mastering the Bake Time: This is the single most important factor for achieving a moist, chewy cookie. Watch your cookies closely! They are done when the edges are set and barely golden, but the centers still look slightly soft or even underbaked. Pull them out of the oven a minute early rather than a minute late, as carryover heat will continue to cook them on the baking sheet.
No Overmixing!: Once you combine the wet and dry ingredients, mix only until they are just incorporated. Overworking the dough develops gluten, which leads to a tough, dry, and less tender cookie texture. A light hand here is key.
Room Temperature Ingredients are Key: Ensure your butter, eggs, and cream cheese are at true room temperature. This allows them to cream together properly, creating a smooth batter and a perfectly emulsified, lump-free filling. Cold ingredients don’t blend uniformly.
Sift Your Powdered Sugar: For the cream cheese filling, sifting powdered sugar is not optional if you desire a perfectly smooth, lump-free consistency. This simple step makes a huge difference in the final texture of your filling.
Troubleshooting Your Bake: Common Cookie Conundrums Solved
Even experienced bakers face challenges. Here’s how to address common issues when making Red Velvet Thumbprint Cookies.
Why Are My Cookies Dry or Crumbly?
The most common culprit is overbaking. Ensure you pull them from the oven when the edges are set but the centers still look soft. Another reason could be overmixing the dough, which develops too much gluten, or using too much flour.
My Cookies Spread Too Much!
Insufficient chilling time is usually the cause. Make sure your dough is adequately chilled (at least 30 minutes, up to 2 hours) before rolling and baking. Also, ensure your butter wasn’t too soft when creamed, or that your oven temperature is accurate and not too low.
My Cream Cheese Filling is Lumpy.
This is almost always due to cold cream cheese or butter. Ensure both are properly softened to room temperature before beating. Sifting your powdered sugar is also critical to prevent lumps from the start.
My Red Velvet Color Isn’t Vibrant Enough.
The type and amount of food coloring matter. Gel food coloring provides a much more intense color with less liquid compared to liquid dyes. Add enough to achieve your desired vibrant hue, typically 2 tablespoons or more of liquid coloring, or a few drops of gel.
Keeping Them Fresh: Storage and Make-Ahead Tips
Plan your baking schedule and ensure your Red Velvet Thumbprint Cookies remain delightful long after they’re baked.
Proper Storage for Peak Freshness
Once filled, Red Velvet Thumbprint Cookies with cream cheese filling must be stored in an airtight container in the refrigerator. They will remain fresh and delicious for up to 3-4 days. For optimal taste and texture, allow them to come to room temperature for about 15-20 minutes before serving.
Unfilled cookies can be stored in an airtight container at room temperature for up to 5 days, or frozen for longer. This provides flexibility if you want to bake the cookies ahead and fill them closer to serving time.
Can You Make These Ahead?
Absolutely! The cookie dough can be made up to 2-3 days in advance and stored tightly covered in the refrigerator. When ready to bake, let it sit at room temperature for about 15-20 minutes to soften slightly before scooping and rolling.
The cream cheese filling can also be prepared 1-2 days ahead and stored in an airtight container in the refrigerator. Before using, let it sit at room temperature for 30 minutes and then re-whip it briefly to restore its fluffy texture.
Your Top Questions Answered About Red Velvet Thumbprint Cookies
Curious about more specifics? Here are answers to common questions about these delightful Red Velvet Thumbprint Cookies.
Can I Use Different Food Coloring?
While the classic is red, you can certainly experiment with other food colorings! Imagine blue velvet for a baby shower or green velvet for St. Patrick’s Day. The flavor profile will remain the same, just the visual appeal changes.
Can I Make These Gluten-Free?
Yes, you can! For a gluten-free version, substitute the all-purpose flour with a high-quality gluten-free all-purpose baking blend that contains xanthan gum. You might notice a slight difference in texture, but the results are generally very good. Ensure your other ingredients are also certified gluten-free.
What’s the Best Way to Get a Deep Red Color?
For the most intense and deep red, opt for a gel or paste food coloring. These are much more concentrated than liquid food dyes, requiring less to achieve a vibrant hue without thinning your dough. Good quality brands often offer a “super red” or “no-taste red” specifically for these purposes. You can also explore other amazing baked treats like our amazing chewy spiced molasses cookies for different vibrant colors naturally!
Can I Freeze Red Velvet Thumbprint Cookies?
You can freeze the baked, unfilled cookies for up to 3 months. Once completely cool, arrange them in a single layer on a baking sheet to flash freeze for an hour, then transfer to an airtight freezer-safe container or bag. Thaw at room temperature before filling. The cream cheese filling can also be frozen separately, but it’s best to re-whip it after thawing to restore its texture, similar to our creamy caramel crumble cheesecake bars.
Are There Any Substitutions for Buttermilk?
If you don’t have buttermilk, you can easily make a homemade version. For 1/2 cup of buttermilk, measure 1/2 cup of regular milk (dairy or non-dairy) and stir in 1/2 tablespoon of lemon juice or white vinegar. Let it sit for 5-10 minutes until it slightly curdles. This simple trick works perfectly to activate the baking soda and provide that signature tang.
Ready to Indulge? Your Red Velvet Masterpiece Awaits!
With this comprehensive guide, you now possess all the knowledge and expert tips needed to create truly exceptional Red Velvet Thumbprint Cookies. These vibrant, tender, and perfectly filled treats are more than just a dessert; they’re a celebration of classic flavors and textures.
Go ahead, gather your ingredients, follow these steps with confidence, and prepare to delight your taste buds and those of your loved ones. We’d love to see your beautiful creations, so don’t forget to share your photos and tell us how much you enjoyed baking these delectable cookies!
Red Velvet Thumbprint Cookies
Course: DessertCuisine: American CuisineDifficulty: easy4
30-36 cookies45
minutes10
minutes60
minutesAmerican Cuisine
Ingredients
For the Cookies:
2 and 1/4 cups all purpose flour
1/4 cup unsweetened cocoa powder
1 teaspoon baking soda
1/2 teaspoon salt
1 cup unsalted butter, softened
1 and 1/2 cups granulated sugar
2 large eggs, at room temperature
1 teaspoon vanilla extract
2 tablespoons red food coloring
1/2 cup buttermilk
1/2 cup granulated sugar (for rolling)
For the Cream Cheese Filling:
8 ounces cream cheese, softened
1/2 cup unsalted butter, softened
4 cups powdered sugar, sifted
1 teaspoon vanilla extract
Directions
- In a medium bowl, whisk together the flour, cocoa powder, baking soda, and salt. Set aside.
- In a large bowl, cream together the softened butter and granulated sugar until light and fluffy. This should take about 2 to 3 minutes.
- Beat in the eggs one at a time, mixing well after each addition. Stir in the vanilla extract and red food coloring. The mixture will look vibrantly red.
- Alternately add the dry ingredients and buttermilk to the wet mixture, beginning and ending with the dry ingredients. Mix on low speed until just combined. Do not overmix; overmixing can develop too much gluten and lead to dry cookies. Cover the dough and refrigerate for at least 30 minutes, or up to 2 hours. Chilling is key for the dough to be firm enough to handle and helps prevent spreading.
- Preheat your oven to 375 degrees Fahrenheit (190 degrees Celsius). Line baking sheets with parchment paper. Place the additional 1/2 cup granulated sugar for rolling in a shallow dish.
- Scoop out rounded tablespoons of dough and roll them into smooth balls. Roll each ball generously in the granulated sugar, ensuring it’s fully coated. Place the coated balls onto the prepared baking sheets, spaced about 2 inches apart.
- Using your thumb or the back of a small spoon, gently make an indent in the center of each cookie ball. Be careful not to press all the way through.
- Bake for 8 to 10 minutes. This is the crucial step to prevent dryness. The cookies are done when the edges are set and lightly browned, but the centers still look slightly soft. They will continue to set as they cool. Overbaking even by a minute or two can lead to dry cookies.
- While the cookies cool completely on a wire rack, prepare the cream cheese filling. In a medium bowl, beat together the softened cream cheese and softened butter until smooth and creamy. Gradually add the sifted powdered sugar, a cup at a time, beating until fully incorporated and fluffy. Stir in the vanilla extract.
- Once the cookies are completely cool, spoon or pipe the cream cheese filling into the indents of each cookie. Serve immediately or store in an airtight container in the refrigerator.
Notes
- Do not overmix or overbake for best results.