
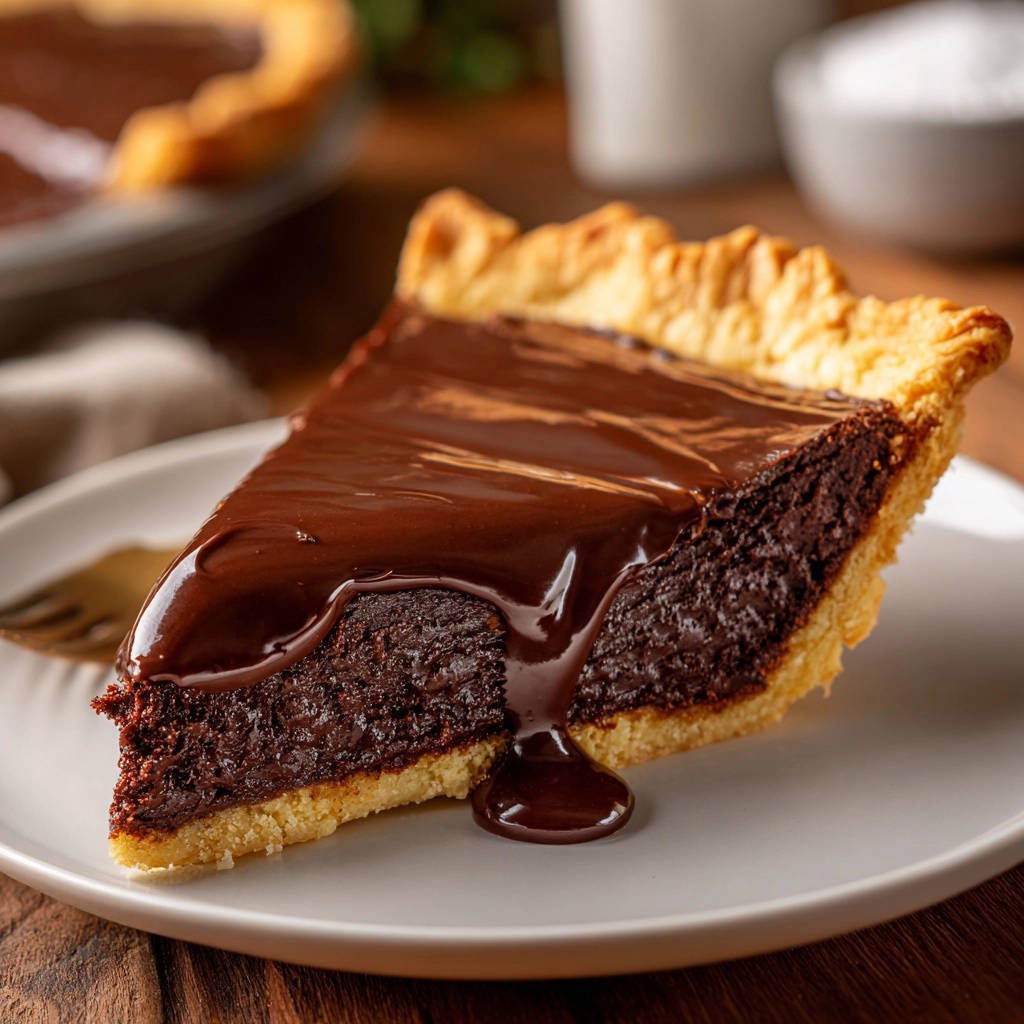
Welcome back to the blog, fellow dessert lovers! Today, we’re tackling a classic that can sometimes be a little… finicky. We’re talking about Rich Chocolate Pie. You know the feeling, right? You spend time making a beautiful pie, maybe for a special occasion or just because you deserve a treat, you slice into it, and instead of a perfectly set, luxurious filling, you get a chocolatey puddle. It’s happened to the best of us! But what if I told you there’s a simple method to achieve a guaranteed-to-set, wonderfully rich chocolate pie filling every single time? Get ready, because this is it. Say goodbye to runny pie woes and hello to sliceable, decadent bliss.
Why You’ll Love This Rich Chocolate Pie Recipe
This isn’t just another chocolate pie recipe; it’s the recipe if you crave that intense chocolate flavor paired with a smooth, creamy texture that holds its shape beautifully. Here’s why this one will become your go-to:
- Perfectly Set Filling: The primary reason this recipe stands out. We use a reliable combination of thickeners and techniques that ensure a firm, sliceable pie without being rubbery.
- Deep, Decadent Chocolate Flavor: Using unsweetened cocoa powder cooked into the custard base provides a rich, satisfying chocolate taste that isn’t overly sweet.
- Velvety Smooth Texture: The combination of whole milk, half-and-half (or cream), butter, and eggs creates a silky, luscious filling that melts in your mouth.
- Easy to Follow: Despite the impressive result, the steps are straightforward and don’t require any fancy techniques.
- Classic Comfort: Sometimes, you just need a classic, comforting dessert, and a slice of perfectly made chocolate pie fits the bill perfectly.
Gathering Your Ingredients for Perfect Rich Chocolate Pie
Creating this glorious Rich Chocolate Pie starts with assembling the right cast of characters. Each ingredient plays a vital role in achieving that perfect balance of flavor, richness, and structure. Think of these as the building blocks for your decadent dessert masterpiece.
The Essential Base and Thickener
Our filling relies on a classic custard base, fortified with key thickeners to prevent that dreaded runny outcome. You’ll need:
- Granulated Sugar (1 1/2 cups): Provides sweetness to balance the bitterness of the cocoa.
- Unsweetened Cocoa Powder (1/2 cup): The source of our deep chocolate flavor. Opt for a good quality unsweetened cocoa for the best results. Dutch-process cocoa often provides a smoother, less acidic flavor, but natural unsweetened cocoa works well too and can enhance the chocolatey depth.
- Cornstarch (1/4 cup): This is our primary thickening agent and a key player in ensuring the filling sets firmly. When cooked properly with liquid and heat, cornstarch creates a stable gel structure.
- Salt (1/2 teaspoon): A small but mighty addition! Salt enhances the chocolate flavor and balances the sweetness, making the pie taste even richer and more complex.
The Liquid Foundation
These dairy ingredients and eggs create the creamy, smooth body of the custard:
- Large Eggs (3, lightly beaten): Eggs contribute to the richness and also act as a secondary thickener when gently heated (like in a custard). Lightly beating them first helps them incorporate smoothly into the mixture, preventing scrambled egg bits.
- Whole Milk (2 cups): Provides the main liquid base and adds richness. Using whole milk contributes to the creamy texture.
- Half-and-Half or Heavy Cream (1/2 cup): This is where extra luxury comes in! Adding half-and-half or heavy cream boosts the fat content, resulting in a truly decadent and velvety smooth filling.
Finishing Touches
These final additions take the flavor and texture over the top:
- Unsalted Butter (2 tablespoons): Stirred in at the end, butter adds glossiness to the filling, enriches the texture, and carries flavor beautifully. Using unsalted butter gives you control over the saltiness of the final dish.
- Vanilla Extract (1 teaspoon): Vanilla is a magical ingredient that complements and enhances chocolate flavor, adding warmth and complexity.
- Pre-baked 9-inch Pie Crust (1): A sturdy, flaky vessel is essential for holding our luscious filling. Using a pre-baked crust saves time and ensures you don’t end up with a soggy bottom from the wet filling. If you’re a fan of homemade crusts, ensure it’s fully baked and cooled before pouring in the filling. For tips on achieving a perfect crust, you might find helpful information in recipes like our classic Key Lime Pie or Ultimate Anti-Soggy Bottom Apple Pie guides, though this recipe specifically calls for pre-baking.
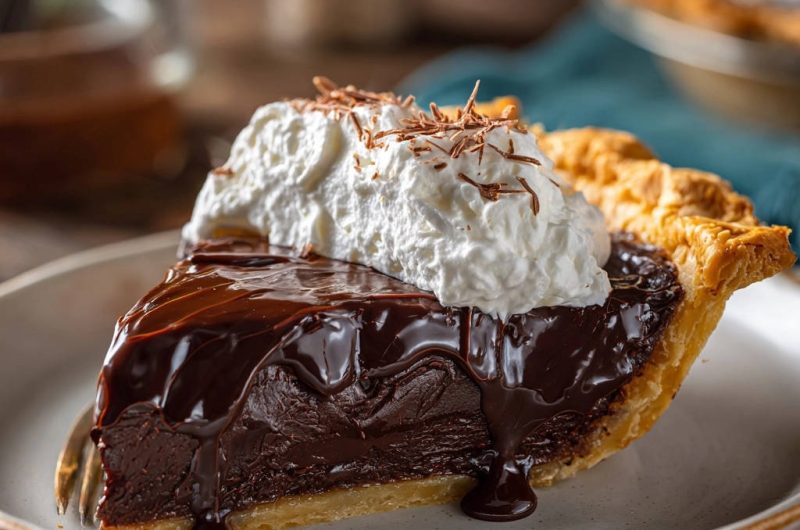
For the Whipped Topping
No Rich Chocolate Pie is complete without a cloud of fresh whipped cream! You’ll need:
- Heavy Cream (1 1/2 cups): The foundation of fluffy whipped cream. Make sure it’s very cold for the best whipping results.
- Powdered Sugar (1/4 cup): Adds just the right amount of sweetness without making the cream grainy.
- Vanilla Extract (1/2 teaspoon): A touch of vanilla enhances the cream’s flavor.
- Chocolate Shavings (for garnish): An optional but highly recommended final flourish for that extra touch of elegance and chocolatey goodness.
Crafting Your Rich Chocolate Pie: Step-by-Step
Now that we have our ingredients ready, let’s walk through the process of making this fail-proof Rich Chocolate Pie. The key here is attention to detail, especially during the cooking and chilling phases. Follow these steps carefully, and you’ll be rewarded with a dessert masterpiece!
Combine the Dry Ingredients: Start by grabbing a medium-sized saucepan – one that’s large enough to hold your entire filling mixture. Into this pan, whisk together the granulated sugar, unsweetened cocoa powder, cornstarch, and salt. Whisk them thoroughly to break up any lumps, especially in the cocoa and cornstarch. This step is important to ensure the thickener and flavorings are evenly distributed before adding the liquid.
Prepare the Wet Ingredients: In a separate medium bowl, whisk together your lightly beaten eggs, whole milk, and half-and-half (or heavy cream if you’re using that). Combine them well until the mixture is uniform in color and consistency. Having this mixture ready before you start cooking is crucial.
Combine Wet and Dry Mixtures: This step requires a little patience and whisking! Gradually pour the liquid mixture from the bowl into the saucepan with the dry ingredients. As you pour, continuously whisk the mixture in the saucepan. Start with just a little liquid to create a smooth paste, then gradually add the rest, whisking constantly until everything is fully incorporated and there are no dry pockets or lumps. You want a completely smooth, chocolate-colored liquid before it goes on the heat.
Cook the Filling to Thicken: Place the saucepan over medium heat on your stovetop. Now comes a very important, and often underestimated, part: you must cook the mixture while stirring constantly with a whisk. The goal is to prevent scorching on the bottom (chocolate burns easily!) and to ensure the cornstarch fully activates and thickens the custard evenly. This process usually takes between 8 to 10 minutes. You’ll notice the mixture getting noticeably thicker, clinging to the whisk and bubbling gently. Keep stirring and scraping the bottom and sides of the pan.
Ensure the Cornstarch is Fully Cooked: Once the filling has thickened significantly and is gently bubbling, don’t stop stirring yet! Continue to cook and stir for an additional 1 minute. This extra minute is absolutely critical. It ensures the cornstarch is completely cooked out, which prevents a starchy flavor and guarantees that the pie will set properly in the refrigerator. Keep that whisk moving!
Finish the Filling: Remove the saucepan from the heat as soon as that extra minute of bubbling is up. Immediately stir in the unsalted butter and the vanilla extract. Stir until the butter is completely melted into the hot filling and you can no longer see any streaks of butter. The vanilla should be stirred in last to preserve its delicate flavor, as heat can cause it to evaporate.
Fill the Pie Crust: Carefully pour the hot, smooth filling into your pre-baked 9-inch pie crust. A heatproof spatula can help you get every last bit out of the pan. Gently smooth the top surface of the filling with the spatula to create an even layer. Avoid shaking the pie excessively, as this can sometimes disrupt the setting process later.
Prevent a Skin: To avoid a rubbery skin forming on top of your beautiful filling as it cools, take a piece of plastic wrap and place it directly onto the surface of the hot filling. Press it down gently so it touches every part of the surface, sealing it off from the air.
Cooling Down: Let the pie sit on a wire rack at room temperature for about an hour. This initial cooling period helps the pie begin the setting process gradually before moving it to the colder environment of the refrigerator. A wire rack allows air to circulate underneath, helping it cool more evenly.
Chill Until Set: This is perhaps the most crucial step for ensuring your Rich Chocolate Pie lives up to its name and doesn’t turn into soup when sliced. Transfer the partially cooled pie to the refrigerator. It needs to chill for a minimum of 4 hours, but for the absolute best, most reliable set, chilling it overnight is highly recommended. This extended time in the cold allows the cornstarch structure to fully firm up.
Prepare the Topping: Just before you’re ready to serve your perfectly chilled pie, make the whipped cream. Use a chilled bowl (popping your mixing bowl in the freezer for 10-15 minutes before starting helps immensely!). Pour in the cold heavy cream, powdered sugar, and vanilla extract. Using an electric mixer (or vigorous whisking!), beat on high speed until stiff peaks form. This means when you lift the beater, the cream holds its shape firmly.
Decorate and Garnish: Gently peel the plastic wrap off the chilled pie. Spoon or pipe the freshly made whipped cream decoratively onto the top of the pie. If you like, you can use a piping bag with a star tip for a classic look. Finish with a sprinkle of chocolate shavings for extra visual appeal and a hint more chocolate flavor.
Slice and Serve: Your Rich Chocolate Pie is now ready! Use a sharp knife that has been run under hot water and wiped dry between slices for the cleanest cuts. Serve immediately and enjoy the fruits of your labor – a perfectly set, undeniably decadent chocolate pie.
Tips for Perfect Rich Chocolate Pie Every Time
Achieving a perfect Rich Chocolate Pie is absolutely within your reach! Here are a few extra tips and tricks to help you nail it every single time:
- Don’t Skimp on Cooking Time: That extra minute of bubbling after the filling thickens is essential for activating the cornstarch fully. Don’t rush this step!
- Whisk Constantly: Seriously, set aside distractions during the cooking phase. Constant stirring prevents scorching and ensures smooth, even thickening.
- Chill, Chill, Chill: The filling needs ample time in the refrigerator to set. While 4 hours is the minimum, overnight chilling guarantees the best results. Plan ahead!
- Use Good Quality Ingredients: The flavor of this pie really shines through. Use good quality unsweetened cocoa powder and fresh dairy for the best taste.
- Serving Temperature: Chocolate pie is best served cold, straight from the refrigerator.
- Variations: Want to add a little something extra? A pinch of espresso powder added with the dry ingredients can deepen the chocolate flavor. Or try a different garnish like fresh raspberries or a drizzle of caramel sauce. If you love caramel, you might enjoy checking out our recipes for Caramel Swirl Cookie Bars or Individual Caramel Cream Bites.
What to Serve With Your Rich Chocolate Pie
This Rich Chocolate Pie is absolutely stunning on its own, especially crowned with that fresh whipped cream and chocolate shavings. However, if you’re serving it as part of a larger dessert spread or simply want to offer a little something extra, here are a few ideas:
A simple berry coulis adds a lovely tart counterpoint to the richness of the chocolate. A scoop of vanilla bean ice cream is always a classic pairing, offering a delightful temperature contrast. Or, for a truly decadent experience, serve it alongside a cup of hot coffee or your favorite tea.
Your Rich Chocolate Pie Questions Answered (FAQ)
Got questions about making this decadent dessert? Here are some common queries and their answers to help you succeed!
How do I know the filling is thick enough?
The filling is thick enough when it coats the back of a spoon (you can draw a line through it with your finger and it holds its shape) and has come to a gentle boil, thickening significantly. Remember, the crucial part is cooking it for a full minute after it thickens and boils to ensure the cornstarch is fully activated for setting.
Can I make the filling ahead of time?
Yes, absolutely! The filling is actually meant to be made ahead of time as it requires significant chilling. You can make the filling, pour it into the crust, cover, and chill it overnight. The whipped cream topping is best made just before serving, however.
Why did my pie not set?
The most common reasons a cornstarch-thickened filling doesn’t set are not cooking it long enough or not chilling it for sufficient time. Ensure you cooked it for the full 8-10 minutes until thickened and bubbling, plus the additional 1 minute of cooking while bubbling. Also, make sure it chills for at least 4 hours, preferably overnight, in the refrigerator.
Can I use a homemade pie crust?
Yes, you absolutely can! Just make sure the homemade crust is fully pre-baked and cooled before you pour in the hot filling. This prevents a soggy bottom crust. If you’re looking for other delicious dessert ideas using different types of crusts or bases, you might enjoy our Coconut Caramel Chocolate Cheesecake or Easy Glazed Fritter Bites.
How should I store leftover Rich Chocolate Pie?
Store any leftover pie covered loosely with plastic wrap or in an airtight container in the refrigerator for up to 3-4 days. The whipped cream topping is best when fresh, so if you anticipate leftovers, you might consider topping individual slices rather than the whole pie.
Enjoy Your Homemade Rich Chocolate Pie!
There you have it – the secrets to a truly rich, decadent, and perfectly set chocolate pie. No more disappointing runny fillings! This recipe delivers on flavor, texture, and reliability, making it perfect for holidays, celebrations, or just because you’re craving a slice of chocolatey heaven. We hope you try it and fall in love with how simple it is to get it right every time.
If you make this Rich Chocolate Pie, be sure to let us know how it turned out in the comments below! We love hearing about your kitchen successes. Happy baking!
Rich Chocolate Pie
Course: DessertCuisine: AmericanDifficulty: medium8
servings5
minutes6
minutes750
kcal11
MinutesMake the perfect Rich Chocolate Pie with a filling that actually sets! This recipe guarantees a decadent, smooth, and sliceable chocolate pie every time.
Ingredients
1 pre-baked 9-inch pie crust
1 1/2 cups granulated sugar
1/2 cup unsweetened cocoa powder
1/4 cup cornstarch
1/2 teaspoon salt
3 large eggs, lightly beaten
2 cups whole milk
1/2 cup half-and-half or heavy cream
2 tablespoons unsalted butter
1 teaspoon vanilla extract
For topping:
1 1/2 cups heavy cream
1/4 cup powdered sugar
1/2 teaspoon vanilla extract
Chocolate shavings for garnish
Directions
- In a medium saucepan, whisk together the sugar, cocoa powder, cornstarch, and salt.
- In a separate bowl, whisk together the beaten eggs, milk, and half-and-half.
- Gradually whisk the liquid mixture into the dry ingredients in the saucepan until smooth.
- Place the saucepan over medium heat. Cook, stirring constantly with a whisk, until the mixture thickens significantly and comes to a gentle boil. This usually takes about 8 to 10 minutes. It’s crucial to keep stirring to prevent scorching and ensure the cornstarch activates properly, which is the key to the filling setting.
- Once thickened and bubbling gently, continue to cook and stir for 1 minute more to ensure the cornstarch is fully cooked and the pie will set.
- Remove the saucepan from the heat. Stir in the butter and vanilla extract until the butter is completely melted and incorporated.
- Pour the hot filling into the pre-baked pie crust. Smooth the top with a spatula.
- Place a piece of plastic wrap directly onto the surface of the filling to prevent a skin from forming.
- Let the pie cool on a wire rack for about an hour, then transfer it to the refrigerator.
- Chill the pie for at least 4 hours, or preferably overnight, until the filling is completely set and firm. This extended chill time is essential for the filling to solidify properly.
- Before serving, make the whipped cream. In a chilled bowl, beat the heavy cream, powdered sugar, and vanilla extract with an electric mixer on high speed until stiff peaks form.
- Remove the plastic wrap from the chilled pie. Spoon or pipe the whipped cream onto the pie. Garnish with chocolate shavings.
- Slice and serve the perfectly set chocolate pie.
Notes
- Ensure your whisk is constantly moving to prevent lumps and scorching. Don’t rush the thickening process; a gentle bubble indicates the cornstarch is activating properly.