
Making Salted Caramel Chocolate Cookies used to be a challenge for me, especially getting that caramel just right-soft, chewy, and perfectly adhered without sticking to teeth or sliding off. I’ve finally perfected a foolproof method that guarantees a stable, luscious caramel layer every single time.
This recipe transforms a classic favorite into an irresistible masterpiece, delivering that ideal balance of sweet and salty with a dreamy texture. Get ready to bake the most stunning and delicious Salted Caramel Chocolate Cookies that everyone will rave about.
The Caramel Secret: Why These Cookies Will Be Your New Favorite
Say Goodbye to Sticky Situations
Many recipes for caramel cookies struggle with sticky, messy caramel that oozes off the cookie or becomes too hard to chew. This recipe eliminates those frustrations with a precise technique for melting the caramel candies.
The key is controlling the ratio of heavy cream to caramel, creating a layer that sets beautifully and maintains its perfect chewiness without being a sticky nuisance.
A Symphony of Textures and Flavors
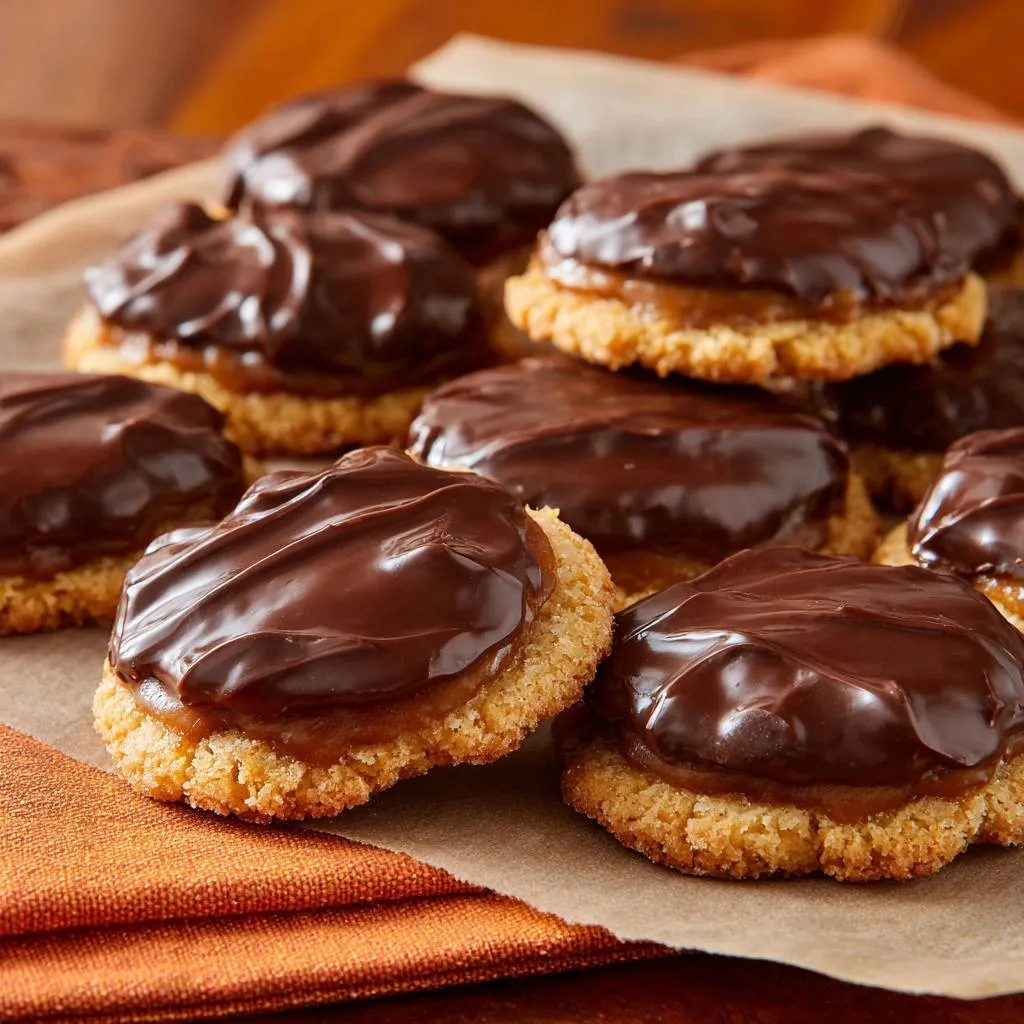
Imagine a soft, perfectly baked cookie base that yields to a rich, gooey, and slightly salty caramel center. This is all crowned with a smooth layer of decadent chocolate, creating a multi-layered sensory experience.
Each bite of these Salted Caramel Chocolate Cookies delivers a harmonious blend of sweet, salty, chewy, and tender, making them utterly addictive.
Effortless Elegance for Any Occasion
Despite their sophisticated appearance and incredible flavor, these homemade cookies are surprisingly straightforward to make.
They are ideal for elevating a casual gathering, impressing guests, or simply indulging in a moment of pure bliss. These caramel dessert treats offer impressive results with manageable steps.
Building Your Batch: Ingredients for Heavenly Salted Caramel Chocolate Cookies
The Dough Foundation
All-purpose flour provides the necessary structure, while baking soda ensures a soft, tender crumb.
The combination of granulated and light brown sugar contributes to both sweetness and chewiness.
Softened unsalted butter creates a rich base, and a large egg, along with vanilla extract, adds essential moisture and flavor, making these truly delightful chewy cookies.
Caramel’s Star Role: The Secret to Success
Soft caramel candies are key for the luscious, chew-friendly caramel layer that won’t stick or slide.
The heavy cream, added in precise amounts, is the crucial element for a perfectly pourable yet setting caramel.
Flaky sea salt is essential for balancing the sweetness and enhancing the caramel’s depth, delivering that iconic sweet and salty contrast.
The Decadent Chocolate Finish
Semi-sweet chocolate chips provide the rich, classic chocolate topping that beautifully complements the caramel.
A small amount of additional heavy cream helps create a smooth, glossy chocolate for easy drizzling and a perfect set.
Baking Bliss: Crafting Your Salted Caramel Chocolate Cookies, Step by Step
- Prepare Your Workspace:
Preheat your oven to 375°F (190°C) and line baking sheets with parchment paper. This simple step is vital for preventing sticking and ensuring easy removal of your delicate cookies.
- Combine the Dry Ingredients:
In a medium bowl, whisk together the all-purpose flour, baking soda, and salt. Setting this aside ensures it’s uniformly mixed and ready for gradual incorporation into the wet ingredients.
- Cream Wet Ingredients:
In a large bowl, cream together the softened unsalted butter, granulated sugar, and light brown sugar until the mixture is light and fluffy. This step incorporates air, which is crucial for achieving a tender cookie texture.
Next, beat in the large egg and vanilla extract until they are thoroughly combined, adding essential moisture and a rich aromatic flavor to your cookie dough.
- Mix Dough Until Just Combined:
Gradually add the whisked dry ingredients to the wet ingredients, mixing on low speed until they are just combined. It is absolutely crucial not to overmix the dough, as overmixing can develop too much gluten and result in tough, rather than tender, cookies.
- Shape and Flatten the Dough:
Roll the dough into 1-inch balls and space them about 2 inches apart on your prepared baking sheets. Lightly flatten each ball with the palm of your hand; this simple action helps them bake evenly and gives them a classic cookie shape.
- Bake to Perfection (and Patience!):
Bake for 8 to 10 minutes, or until the edges appear lightly golden. It’s normal for the centers to still look soft; this indicates a perfectly chewy cookie once cooled.
Crucially, let the cookies cool on the baking sheets for 5 minutes before carefully transferring them to a wire rack to cool completely. This firming-up period is absolutely essential for the caramel layer’s success, preventing it from melting or sliding.
- Master the Melted Caramel Layer:
Once the cookies are completely cool, combine unwrapped soft caramel candies with 2 tablespoons of heavy cream in a microwave-safe bowl. Microwave on high for 1 minute, then stir well to begin the melting process.
Continue to microwave in 30-second intervals, stirring thoroughly after each, until the caramels are completely melted and smooth. Stir in the ½ teaspoon of flaky sea salt, ensuring it’s evenly distributed for that perfect salty kick.
The key here is achieving a smooth, pourable consistency that isn’t too thin; this ensures the caramel sets perfectly on the cookie without oozing or becoming too hard, making these non-sticky caramel treats.
- Apply and Set the Caramel:
Spoon approximately 1 teaspoon of the melted caramel mixture onto the center of each cooled cookie, gently spreading it to create an even layer. Work efficiently as the caramel will begin to set.
Allow the caramel to set on the cookies for about 15-20 minutes at room temperature, or until it’s slightly firm to the touch. This step ensures proper adhesion before the chocolate is added, preventing any messy overlaps.
- Prepare the Glossy Chocolate Topping:
While the caramel is setting, combine the semi-sweet chocolate chips and the remaining 1 tablespoon of heavy cream in a separate microwave-safe bowl. Microwave on high for 30 seconds, then stir.
Continue to microwave in 15-second intervals, stirring after each, until the chocolate is completely melted and smooth. This creates a beautiful, drizzle-ready consistency for your chocolate topping.
- Drizzle and Decorate:
Drizzle or dollop the melted chocolate over the set caramel layer on each cookie. For a decorative touch and professional finish, you can use the back of a spoon to create elegant swirls in the chocolate.
- Final Set and Storage:
Let the cookies sit at room temperature until the chocolate has fully set, which typically takes about 30-60 minutes. Alternatively, if you’re in a hurry, refrigerate them for 15 minutes to speed up the setting process.
Store your finished Salted Caramel Chocolate Cookies in an airtight container at room temperature to maintain their freshness and perfect texture. These homemade cookies are best enjoyed within a few days.
Unlock Perfection: Expert Tips for Your Salted Caramel Chocolate Cookies
Chill Your Dough (Optional, but Recommended): While not strictly required by the recipe, chilling your cookie dough for 30 minutes to an hour can help prevent excessive spreading and yield a thicker, chewier cookie. This is a pro tip for consistent baking success.
Don’t Overmix the Dough: Overmixing develops gluten, which can result in tough cookies. Mix only until the dry ingredients are just incorporated into the wet. Stop as soon as no dry streaks remain.
Use a Cookie Scoop for Consistency: A 1-inch cookie scoop will ensure all your cookies are uniform in size, leading to even baking and a professional appearance. This makes portioning quick and clean.
Cool Cookies Completely Before Caramel: This is the most critical tip for perfectly setting caramel. If the cookies are even slightly warm, the caramel will melt and slide off, creating a sticky mess. Patience here pays off immensely.
Watch the Caramel Consistency: When melting the caramels, err on the side of slightly thicker rather than too thin. If it’s too thin, it will run off the cookie. A little extra heavy cream (added a tiny bit at a time) can thin it, but proceed cautiously.
For a Faster Set: If you’re short on time, you can refrigerate the cookies for 5-10 minutes after applying the caramel, and again after applying the chocolate, to speed up setting. This quickens the process without compromising quality.
Experiment with Chocolate: While semi-sweet is classic, feel free to try milk chocolate for a sweeter profile or dark chocolate for a richer, more intense flavor. White chocolate could also create a stunning visual contrast for your chocolate treats.
Essential Tools for Your Cookie Creation Journey
Parchment Paper: Absolutely essential for preventing sticking and ensuring easy removal of delicate cookies from the baking sheet. It makes cleanup a breeze too.
Mixing Bowls (Medium and Large): You’ll need separate bowls for whisking dry ingredients and creaming wet ones, and then a larger one for combining the dough.
Electric Mixer (Stand or Handheld): While not strictly necessary, an electric mixer makes creaming butter and sugar much easier and more efficient, ensuring a light and fluffy base.
Wire Cooling Rack: Crucial for allowing cookies to cool completely and evenly, preventing soggy bottoms and ensuring proper airflow for setting the caramel.
Microwave-Safe Bowls: Perfect for melting the caramel and chocolate safely and effectively in short, controlled bursts.
Small Spoons or Squeeze Bottles: Ideal for precisely applying and drizzling the caramel and chocolate layers, allowing for neat and professional results.
Common Questions & Quick Fixes for Your Cookies
My Cookies Are Spreading Too Much!
This can happen if your butter was too soft, your oven wasn’t hot enough, or your dough wasn’t chilled. Ensure your butter is softened but still cool to the touch, and verify your oven temperature with an oven thermometer for accuracy.
If the dough feels excessively soft, try chilling it for at least 30 minutes before shaping and baking. This helps solidify the fats and reduces spread.
The Caramel is Too Runny or Too Hard!
If your caramel is too runny, you may have added too much heavy cream. To fix this, try adding a few more unwrapped caramel candies and melting them in to thicken the mixture slightly.
If the caramel becomes too hard, microwave it in short 5-second bursts, stirring vigorously after each, until it reaches the desired smooth and pourable consistency. Patience and gentle reheating are key here.
My Chocolate Topping is Cracking!
This usually happens if the chocolate is too thick when applied or if the cookies are too cold. Ensure your chocolate is smooth and pourable; you can add a tiny bit more cream (1/4 teaspoon at a time) if it’s too stiff.
Also, make sure the cookies are at room temperature when drizzling the chocolate. Rapid temperature changes can cause the chocolate to contract and crack.
Storing & Savoring: Keeping Your Salted Caramel Chocolate Cookies Fresh
Optimal Freshness & Storage
To keep your Salted Caramel Chocolate Cookies at their absolute best, store them in an airtight container at room temperature. They will remain wonderfully fresh and delicious for up to 3-4 days, maintaining their soft and chewy texture.
For extended storage, you can refrigerate them for up to a week. Just remember to bring them back to room temperature before serving for the optimal soft caramel and chewy cookie texture.
Make-Ahead Magic
The cookie dough itself can be prepared in advance and refrigerated for up to 2-3 days before baking. Simply let it come to room temperature slightly before rolling and baking as usual.
Baked cookies, without the caramel and chocolate layers, can be frozen for up to 2 months. Thaw them thoroughly, then add the caramel and chocolate layers fresh for optimal results, ensuring your chocolate treats are always at their peak.
Your Salted Caramel Chocolate Cookies Questions Answered
Can I use store-bought caramel sauce instead of candies?
While convenient, most store-bought caramel sauces are too thin and will likely run off the cookies, failing to set properly. This recipe specifically calls for soft caramel candies and a small, precise amount of heavy cream to achieve the perfect consistency that sets beautifully on the cookie without oozing. For best results and that signature non-sticky caramel, stick to the recipe’s method.
If you’re looking for more delicious ideas with a homemade caramel element, you might enjoy our Creamy Caramel Crumble Cheesecake Bars.
What’s the best way to melt the chocolate?
Microwaving in short intervals (as outlined in the recipe) is the quickest and most efficient method. Alternatively, you can melt the chocolate chips and cream in a double boiler set over simmering water, stirring until smooth. Ensure no water gets into the chocolate, as even a drop can cause it to seize and become unusable.
Can I make these gluten-free?
Yes, you absolutely can! To make these gluten-free, substitute the all-purpose flour with a high-quality 1:1 gluten-free baking flour blend. For the best structural results, ensure your chosen blend contains xanthan gum. The baking time might vary slightly, so keep a close eye on the cookies as they bake for proper doneness.
How important is the flaky sea salt?
Flaky sea salt is incredibly important and often underestimated! It’s crucial for balancing the sweetness of both the caramel and chocolate, elevating the overall flavor profile from merely sweet to wonderfully complex. Don’t skip it-it adds a sophisticated touch that truly makes the “salted caramel” aspect of these chewy cookies shine, transforming them into truly exceptional sweet and salty treats.
If you love the combination of salted caramel and chocolate, you might also be interested in our recipe for Salted Caramel Chocolate Cupcakes.
Ready to Indulge? Share Your Salted Caramel Chocolate Cookies Masterpiece!
You’ve now unlocked the secret to creating truly unforgettable Salted Caramel Chocolate Cookies – ones with that dreamy, non-sticky caramel and rich chocolate finish. This recipe isn’t just about baking; it’s about creating moments of pure joy, whether for a quiet evening treat or a show-stopping dessert for guests.
So, preheat your oven, gather your ingredients, and get ready to experience cookie perfection. We’d love to see your creations! Share your pictures and tag us on social media.

Salted Caramel Chocolate Cookies
Course: DessertCuisine: American CuisineDifficulty: easy4
about 3 dozen cookies30
minutes10
minutes60
minutesAmerican Cuisine
Ingredients
1 1/2 cups all-purpose flour
1/2 teaspoon baking soda
1/4 teaspoon salt
1/2 cup (1 stick) unsalted butter, softened
1/2 cup granulated sugar
1/4 cup packed light brown sugar
1 large egg
1 teaspoon vanilla extract
1 (11 ounce) bag soft caramel candies, unwrapped (about 48 pieces)
3 tablespoons heavy cream, divided
1/2 teaspoon flaky sea salt, plus more for sprinkling
1 cup semi-sweet chocolate chips
Directions
- Preheat oven to 375 degrees F (190 degrees C). Line baking sheets with parchment paper.
- In a medium bowl, whisk together the flour, baking soda, and salt. Set aside.
- In a large bowl, cream together the softened butter, granulated sugar, and brown sugar until light and fluffy. Beat in the egg and vanilla extract until well combined.
- Gradually add the dry ingredients to the wet ingredients, mixing on low speed until just combined. Do not overmix.
- Roll the dough into 1-inch balls and place them about 2 inches apart on the prepared baking sheets. Lightly flatten each ball with the palm of your hand.
- Bake for 8 to 10 minutes, or until the edges are lightly golden. The centers may still look soft. Let cookies cool on the baking sheets for 5 minutes before transferring them to a wire rack to cool completely. This is crucial for the caramel layer.
- Once the cookies are completely cool, prepare the caramel. In a microwave-safe bowl, combine the unwrapped caramel candies and 2 tablespoons of the heavy cream. Microwave on high for 1 minute, then stir well. Continue to microwave in 30-second intervals, stirring after each, until the caramels are completely melted and smooth. Stir in the 1/2 teaspoon of flaky sea salt. The key is to melt the caramels with just enough cream to make them smooth and pourable, but not too thin, ensuring they set perfectly on the cookie without oozing or becoming too hard.
- Spoon about 1 teaspoon of the melted caramel mixture onto the center of each cooled cookie, spreading it gently to create an even layer. Let the caramel set on the cookies for about 15-20 minutes at room temperature, or until slightly firm to the touch. This allows the caramel to adhere properly before the chocolate layer is added.
- While the caramel is setting, prepare the chocolate topping. In a separate microwave-safe bowl, combine the chocolate chips and the remaining 1 tablespoon of heavy cream. Microwave on high for 30 seconds, then stir. Continue to microwave in 15-second intervals, stirring after each, until the chocolate is melted and smooth.
- Drizzle or dollop the melted chocolate over the set caramel layer on each cookie. If desired, use the back of a spoon to create decorative swirls.
- Let the cookies sit at room temperature until the chocolate has set, about 30-60 minutes, or refrigerate for 15 minutes to speed up the process. Store in an airtight container at room temperature.
Notes
- Ensure cookies are completely cool before applying caramel. Adjust caramel consistency carefully to prevent oozing or hardness.