You’ve finally finished shredding that beautiful, tender beef, but the moment it hits the tortilla, disaster strikes. Within seconds, the corn base turns into a soggy, structural mess that falls apart before it even reaches your mouth. It’s the ultimate frustration for any taco lover who wants that authentic street-style experience at home.
The problem isn’t your beef; it’s the physics of moisture. Traditional corn tortillas are incredibly porous, acting like a sponge for the delicious juices we work so hard to create. To fix this, we have to change how we treat the tortilla, moving away from simple warming and toward a specific fat-sealing technique that creates a crisp, hydrophobic barrier.
The secret to a taco that holds its weight is using the rendered beef fat as a sealant. By dipping the tortilla in the red tallow skimmed from the slow cooker and searing it on a high-heat griddle, you fry the outer layer of the masa. This creates a crunchy shield that keeps the meat’s juices from soaking through, ensuring every bite stays intact from the plate to your palate.
The Anatomy of Authentic Beef Barbacoa
Barbacoa has deep roots in traditional pit-cooking, where meat was wrapped in agave leaves and buried over hot coals for a slow, smoky transformation. While most of us don’t have a fire pit in the backyard, the slow cooker does a fantastic job of mimicking that gentle, consistent heat. It allows the meat to bathe in its own juices until the fibers simply give up and melt.
For this recipe, beef chuck roast is the undisputed king. You want a cut with plenty of connective tissue and intramuscular fat. As the beef cooks for eight hours, that tough collagen breaks down into silky gelatin, which provides the mouthfeel we crave. Leaner cuts like sirloin will just turn out dry and stringy, so stick with the well-marbled chuck for the best results.
Essential Components for the Braising Liquid
The braising liquid is where the soul of the dish lives. We aren’t just boiling meat; we’re creating a complex, aromatic environment. Guajillo chiles are the star here, providing a deep reddish hue and a mild, tea-like earthiness. They don’t bring much heat, so don’t worry about making the dish too spicy for the family.
Apple cider vinegar plays a vital role by providing the acidity needed to cut through the heavy fats of the beef. It also helps tenderize the muscle fibers during the long cook. Meanwhile, the cumin, oregano, and smoked paprika bloom in the heat, releasing oils that permeate every inch of the roast. Using high-quality beef broth ensures the base has enough salt and body to support these bold spices.
Selecting and Preparing Dried Guajillo Chiles
When buying dried chiles, look for ones that are still slightly pliable, like a large raisin. If they shatter when you touch them, they’re likely too old. Start by pulling off the stems and shaking out the seeds, as the seeds can introduce a bitter note you don’t want in your sauce. Simmering them in broth for ten minutes is a non-negotiable step; it softens the tough skins so they blend into a perfectly smooth velvet rather than leaving gritty bits in your tacos.
Phase One: Developing Deep Maillard Flavors
Before the beef ever touches the slow cooker, it needs a serious sear. This is where you build the Maillard reaction, creating those complex, savory flavors that a slow cooker alone cannot produce. Use a heavy skillet and get it screaming hot. If you see steam instead of hearing a loud sizzle, your pan isn’t hot enough or you’ve crowded it too much.
Work in batches to ensure every side of the beef chunks develops a dark, mahogany crust. This crust eventually dissolves into the braising liquid, darkening the sauce and adding a roasted depth of flavor. If you skip this step, your barbacoa will taste “boiled” rather than “braised,” missing that essential savory punch.
Phase Two: The Low and Slow Transformation
Once the beef and the blended chile sauce are in the slow cooker, your biggest job is to leave it alone. Every time you lift the lid to “check” on the progress, you release the built-up steam and drop the internal temperature significantly. This can add thirty minutes of cook time for every peek you take.
The magic happens around the six-to-eight-hour mark on the low setting. This is when the internal temperature of the beef stays high enough for the collagen to fully convert into gelatin. You’ll know it’s ready when a fork slides into the center of a chunk with zero resistance. If the meat feels “bouncy” or tough, it simply needs more time in the heat.
The Science of the Anti-Soggy Tortilla Hack
Most people just microwave their tortillas or give them a quick toss on a dry pan. This leaves the corn masa wide open to absorb liquid. Our “Anti-Soggy Hack” uses the principle of lipid barriers. By saturating the surface of the tortilla with beef fat before hitting the heat, you are essentially waterproofing the corn.
The fat fills the microscopic gaps in the masa. When it hits the hot griddle, it fries the exterior, creating a rigid, golden shell. This shell acts as a hydrophobic barrier. Even if your beef is incredibly juicy, the liquid can’t penetrate the fried fat layer easily, giving you a taco that stays crunchy and firm until the very last bite.
Harvesting the Liquid Gold: Reserved Beef Fat
After the beef is done, you’ll notice a layer of bright red oil floating on top of the liquid. Don’t you dare throw that away! This is “liquid gold,” packed with the concentrated flavor of the chiles, spices, and beef. Use a wide spoon to gently skim this fat into a small bowl. This tallow is what we use to coat the tortillas, providing far more flavor than any store-bought vegetable oil ever could.
Step-by-Step: Searing the Moisture Barrier
Heat your griddle to medium-high. You want it hot enough that the fat sizzles instantly. Take your corn tortilla and give it a quick dip into the reserved fat, or use a pastry brush to coat both sides. Lay it flat on the griddle and let it work its magic for about 45 to 60 seconds.
You are looking for the edges to start curling slightly and for dark golden spots to appear. Flip it and repeat. You’ll feel the tortilla go from soft and floppy to stiff and resilient. This change in texture is the signal that your moisture barrier is successfully “set” and ready for the heavy lifting of the beef filling.
Assembling Tacos for Maximum Structural Integrity
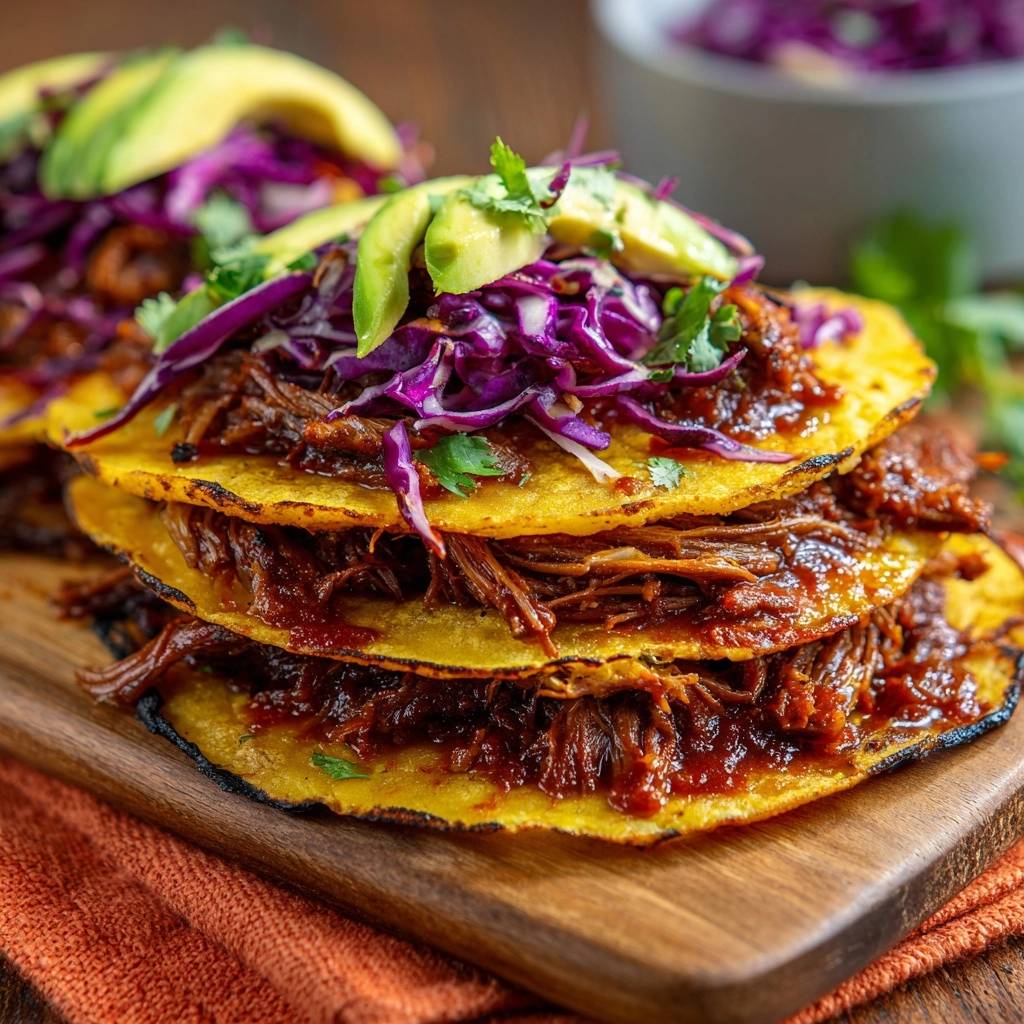
Layering matters more than you think. Even with our fat-sealing hack, we want to be smart. Start by placing the shredded beef on the tortilla while it’s still on the griddle for a few seconds. This helps any excess moisture evaporate. However, the real pro move is the “cabbage buffer.”
Place a small bed of the lime-tossed red cabbage down first, then the beef. The cabbage provides a secondary physical barrier and a crunch that contrasts with the tender meat. Top it with the avocado and cilantro last. By keeping the wettest ingredients (the beef) slightly separated from the tortilla by the cabbage, you extend the life of that crunch even further.
Troubleshooting Common Barbacoa Texture Issues
If your beef comes out of the slow cooker and feels tough or “rubbery,” it almost always means it hasn’t cooked long enough. Put the lid back on and give it another hour. On the flip side, if your sauce feels too thin and watery, don’t panic. Simply pour the liquid into a saucepan and simmer it on the stove for ten minutes to reduce and concentrate the flavors before tossing it back with the meat.
If your tortillas are cracking when you try to fold them, they might be a bit dry or old. A quick fix is to steam them for 10 seconds in a damp paper towel before you do the fat-dipping step. This rehydrates the masa, making it flexible enough to handle the searing process without splitting down the middle.
Optimal Side Dishes and Texture Pairings
Since this barbacoa is rich, fatty, and savory, you need sides that provide a sharp “zip” to cleanse the palate. Pickled red onions are a classic choice because their bright acidity and crunch cut right through the beef tallow. Radishes are another great addition, offering a peppery bite and a cooling effect.
Avoid serving these with heavy, cheesy beans or overly creamy sides that might make the meal feel too weighted down. A simple, bright lime-based slaw or a zesty fruit salsa with mango and lime can provide the perfect balance. The goal is to keep the flavors high-contrast so every bite of the beef feels as impactful as the first.
Storage and Reheating Without Losing the Crunch
The shredded beef actually tastes better the next day as the spices continue to meld. Store the beef in its juices in an airtight container for up to four days. However, do not prep the tortillas in advance. The “Anti-Soggy Hack” must be done right before you eat to ensure that maximum crunch.
When reheating the beef, use a skillet instead of a microwave. This allows you to crisp up the edges of the shredded meat, almost like carnitas, which adds another layer of texture. Once the meat is hot and slightly crispy, proceed with the fat-dipping and tortilla-searing steps as if you were making them fresh for the first time.
How should I store leftovers and can I freeze this?
Store the shredded beef in its cooking liquid in an airtight container in the refrigerator for up to 4 days. The liquid keeps the meat from drying out during storage. You can also freeze the beef for up to 3 months. To freeze, let the meat cool completely and place it in a heavy-duty freezer bag with some of the juices. Thaw overnight in the fridge before reheating in a skillet. Do not freeze the tortillas or the cabbage slaw, as they will lose their texture.
Why was my beef still tough after 8 hours in the slow cooker?
Tough beef is usually a sign that the collagen hasn’t had enough time or heat to break down into gelatin. This can happen if your slow cooker runs cool or if the beef chunks were cut too large. Ensure you are using a well-marbled chuck roast. If it’s still tough, simply cook it for another 60 to 90 minutes. It will eventually reach that “fall-apart” stage. Also, avoid opening the lid frequently, as this drops the temperature and stalls the tenderizing process.
Can I use flour tortillas instead of corn?
You can use flour tortillas, but the “Anti-Soggy Hack” works best with corn. Corn tortillas are more porous and benefit significantly from the fat-sealing technique. Flour tortillas have a different protein structure and tend to get soft and gummy when greasy rather than crisp. If you must use flour, skip the fat-dipping and just char them quickly over an open flame or a dry pan to give them some structural integrity.
What can I use if I can’t find dried Guajillo chiles?
If Guajillo chiles aren’t available, dried Ancho chiles are the best substitute. Anchos are slightly sweeter and darker with a bit more “raisin” flavor, but they provide a similar mild heat level. You can also use a combination of Ancho and a little bit of New Mexico chile pods. If you can’t find dried chiles at all, you can substitute with 3 tablespoons of high-quality chili powder, though you will lose some of the authentic depth and texture of the sauce.
Can I make this in a pressure cooker to save time?
Yes, you can make the beef in a pressure cooker. Follow the searing and sauce-making steps as written. Cook the beef on High Pressure for 45 to 60 minutes, then allow for a natural pressure release for at least 15 minutes. While this saves time, the slow cooker often results in a slightly better fat separation, which makes skimming the “liquid gold” for the tortilla hack much easier. If using a pressure cooker, you may need to simmer the sauce afterward to thicken it.
Why did my tortillas crumble or break apart on the griddle?
Tortillas usually crumble if they are too dry or if they aren’t “fresh” enough. Corn tortillas need a little moisture to stay flexible. If yours are breaking, try steaming them briefly in the microwave under a damp paper towel for 10 seconds before dipping them in the beef fat. This makes the masa pliable. Also, ensure your griddle is hot enough; if the tortilla sits too long on a lukewarm pan, it can dry out and become brittle before it actually crisps up.
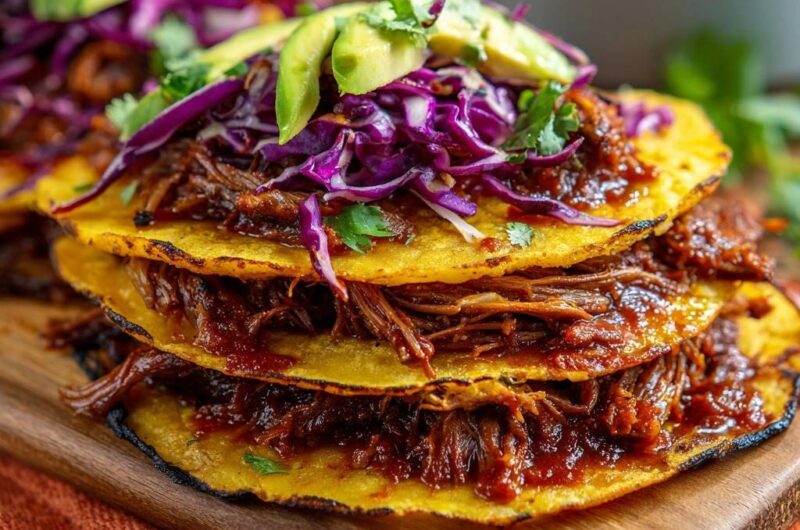
Slow-Cooked Beef Barbacoa Tacos with Anti-Soggy Tortilla Hack
Course: Main CourseCuisine: Mexican-AmericanDifficulty: easy6
servings20
minutes8
hours480
Minutes410
kcalMexican-American
Ingredients
3 pounds beef chuck roast, trimmed and cut into 3-inch chunks
3 dried guajillo chiles, stems and seeds removed
1 cup beef broth
4 cloves garlic, minced
2 tablespoons apple cider vinegar
1 tablespoon ground cumin
1 tablespoon dried oregano
1 teaspoon smoked paprika
12 to 15 small yellow corn tortillas
2 cups shredded red cabbage (tossed with a squeeze of lime and salt)
2 large avocados, sliced
Fresh cilantro for garnish
2 tablespoons vegetable oil (for searing beef)
Salt and black pepper to taste
Directions
- Sear the Beef: Heat 2 tablespoons of oil in a large skillet over high heat. Season beef chunks heavily with salt and pepper. Sear until a deep brown crust forms on all sides. Transfer beef to the slow cooker.
- Prepare the Braising Liquid: In a small saucepan, simmer the dried chiles in the beef broth for 10 minutes until soft. Transfer the chiles and broth to a blender; add garlic, vinegar, cumin, oregano, and paprika. Blend until completely smooth.
- Slow Cook: Pour the blended sauce over the beef in the slow cooker. Cover and cook on Low for 8 hours (or High for 4-5 hours) until the beef is fork-tender.
- Shred and Reduce: Remove the beef and shred it with two forks. Skim the red fat from the top of the cooking liquid and reserve it in a small bowl. Return the shredded beef to the slow cooker to soak in the remaining juices for 15 minutes.
- The Anti-Soggy Hack: Heat a large non-stick skillet or cast-iron griddle over medium-high heat. Take a corn tortilla and lightly dip both sides into the reserved beef fat (or brush it on). Place the tortilla on the hot griddle.
- Crisp the Base: Sear the tortilla for 45-60 seconds per side until the edges are slightly charred and the surface is golden and stiff. This creates the “moisture barrier.”
- Assemble: While the tortilla is still on the griddle, place a generous portion of beef on top. Allow the bottom to crisp further for 20 seconds.
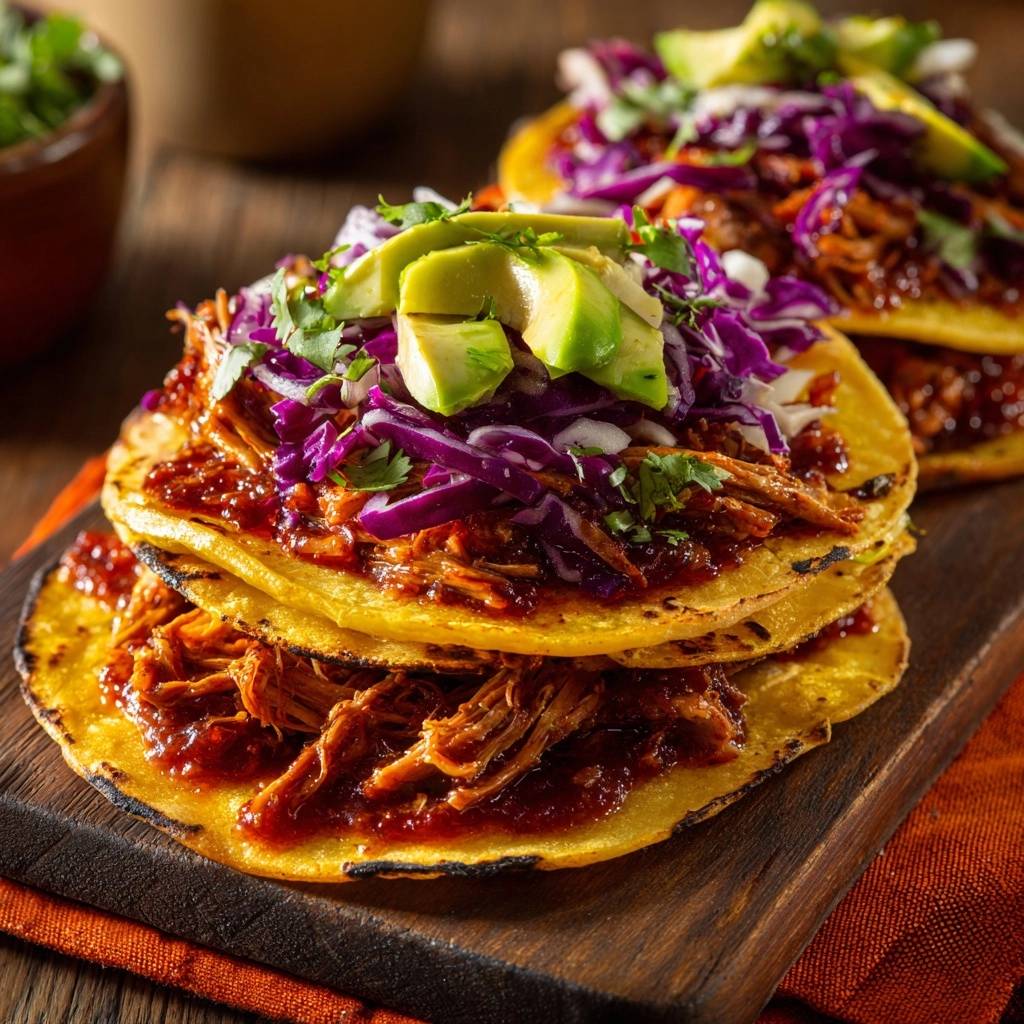
- Garnish: Remove from heat and stack or serve open-faced. Top immediately with the lime-tossed red cabbage, fresh avocado slices, and cilantro. The cabbage acts as a secondary buffer, keeping the creamy avocado from softening the crisp tortilla. Serve immediately.
Notes
- The red cabbage tossed with lime and salt acts as a secondary buffer to protect the tortilla’s crispness from the creamy avocado.