There’s something undeniably magical about a beautiful, towering strawberry layer cake. The combination of sweet, juicy berries, fluffy cream, and soft cake layers just screams celebration, sunshine, and pure joy. But let’s be honest, we’ve all been there. You spend time assembling this gorgeous creation, dreaming of perfect slices, only to find the next day that those lovely layers have turned into a sad, soggy mess, especially where the strawberries touch the cake. It’s happened to me more times than I care to admit!
For years, I struggled with this common cake conundrum. How do you get that vibrant burst of fresh strawberry flavor nestled between tender cake layers without the inevitable moisture transfer that leads to sogginess? I tried everything from barrier layers to different cake types. Then, I discovered a simple, game-changing trick. It’s not complicated, but it makes all the difference, ensuring your Strawberry Layer Cake stays beautifully soft and never soggy, even on day two (if it lasts that long!).
This recipe uses that secret weapon to deliver a truly delightful dessert experience. It’s a classic flavor combination elevated by a technique that guarantees success. If you’ve ever been disappointed by a mushy strawberry cake, get ready to bake a winner!
Why This Strawberry Layer Cake is a Keeper
Forget past soggy cake traumas! This method guarantees a delightful experience from the first slice to the last. Here’s why this particular Strawberry Layer Cake recipe is about to become your new favorite:
- Absolutely No Soggy Cake Layers: This is the star of the show! The simple, yet effective, trick prevents the strawberries from releasing their excess liquid into the delicate cake, keeping everything perfectly textured.
- Bursting with Fresh Strawberry Flavor: By properly preparing the berries, you intensify their natural sweetness and taste, making the filling incredibly flavorful.
- Light and Dreamy Whipped Cream: The fresh, homemade whipped cream filling is the ideal counterpart to the berries and cake – airy, not too sweet, and utterly delicious.
- Simple to Assemble: Using pre-baked cake layers keeps the process straightforward and accessible, even for beginner bakers.
- Looks Impressive: Despite its simplicity, a layered cake always looks stunning on the dessert table, perfect for birthdays, holidays, or just because!
Gathering Your Ingredients for Strawberry Layer Cake
Creating this beautiful cake starts with selecting quality ingredients. Each component plays a crucial role, from the foundation provided by the cake layers to the bright, fresh flavor of the berries and the creamy richness of the whipped topping. Here’s a look at what you’ll need, along with a few notes on selection and purpose:
At the heart of this recipe are the cake layers themselves. We start with:
- 2 pre-baked 8×8 inch sponge cake layers (or equivalent): The type of cake is important here! A light, airy sponge cake works best because it’s less dense than something like a pound cake, meaning it’s less likely to absorb moisture from the filling. You can use your favorite homemade sponge or vanilla cake recipe, baked in two separate 8-inch square pans (or round pans if you prefer), or high-quality store-bought layers for convenience. If you’re looking for a good base cake recipe, mastering light and fluffy layers is key! Consider practicing with recipes like our Fluffy Vanilla Cupcakes batter baked into thin layers as a starting point, then adapt it to a full cake.
Next, we focus on the star fruit:
- 4 cups fresh strawberries, hulled and sliced: Choose ripe, vibrant red strawberries. Avoid berries that are bruised or soft. Four cups might seem like a lot, but you’ll use a generous amount in both the filling and for decorating the top, ensuring plenty of berry goodness in every bite. Slicing them ensures even distribution and better flavor release during the crucial preparation step.
For preparing the strawberries and creating the creamy filling, you’ll need:
- 1/4 cup granulated sugar: This isn’t just for sweetness; it plays a vital role in drawing out the excess moisture from the strawberries, a technique known as maceration.
- 2 cups heavy whipping cream, cold: Ensure your cream is very cold straight from the refrigerator. Cold cream whips up much better and holds its shape, giving you a stable, fluffy filling and frosting. Heavy cream has a high fat content, which is essential for achieving stiff peaks.
- 1/2 cup powdered sugar: Also known as confectioners’ sugar, this finely ground sugar dissolves easily into the cold cream, sweetening it without leaving a grainy texture.
- 1 teaspoon vanilla extract: Use a good quality pure vanilla extract to enhance the flavor of the whipped cream. It adds a warm, aromatic note that complements the fresh strawberries beautifully.
Finally, for that perfect finishing touch:
- 1/2 cup streusel or fine cake crumbs for topping: This adds a lovely textural contrast to the soft cake and cream. You can use leftover crumbs from trimming your cake layers, make a simple crumble topping, or even use crushed cookies like shortbread or graham crackers for a different flavor profile. It acts as a decorative element and can also provide a slight barrier on top, though the main sogginess prevention happens with the berries themselves.
Crafting Your Soggy-Proof Strawberry Layer Cake: Step-by-Step
Ready to banish soggy cake layers forever? This process is incredibly simple, focusing on one key technique that makes all the difference. Follow these steps, and you’ll be rewarded with a moist, flavorful cake that holds up beautifully.
- Prepare the Star Berries: Begin by taking your hulled and sliced fresh strawberries and placing them gently into a medium-sized bowl. Sprinkle the 1/4 cup of granulated sugar evenly over the fruit. Now, using a spoon or spatula, carefully stir the strawberries to ensure each slice is lightly coated in sugar. The sugar isn’t just for sweetness here; it starts the magical process of maceration. Leave the strawberries to sit at room temperature. As they rest, the sugar will begin to draw out the natural juices from the fruit. You’ll notice a syrupy liquid forming in the bottom of the bowl within 20 to 30 minutes. This is exactly what you want to see happening!
- Implement the Soggy-Proof Secret: This is the critical step you absolutely do not want to skip! After your strawberries have had their 20-30 minute rest and have released a good amount of liquid, it’s time to deal with that moisture. Carefully pour the contents of the bowl into a fine-mesh sieve set over another bowl or the sink. Let the strawberries drain for a few minutes, gently shaking the sieve occasionally to help the liquid escape. The goal is to remove the vast majority of this excess strawberry juice. It’s this liquid that would otherwise soak into your cake layers and make them mushy. You can reserve a tablespoon or two of the juice if you like, maybe to brush onto the cake layers for extra flavor (use sparingly!), but discard the rest. Your strawberries will look slightly less plump, but they will still be incredibly flavorful and, most importantly, they won’t waterlog your cake!
- Whip Up the Cloud-Like Cream: While your strawberries are taking their juice break and draining, get started on the dreamy whipped cream filling. Grab a large mixing bowl and pour in the 2 cups of cold heavy whipping cream. Add the 1/2 cup of powdered sugar and the teaspoon of vanilla extract. Using an electric mixer (handheld or stand mixer with a whisk attachment), start beating the mixture on a low speed to prevent splashing, then gradually increase the speed to high. Continue beating until stiff peaks form. Stiff peaks mean that when you lift the whisk out of the cream, the peaks stand straight up without drooping. Be careful not to overbeat, or you’ll end up with butter!
- Lay the Foundation: Choose your serving plate or cake stand – something that will hold your beautiful creation. Carefully place one of your pre-baked cake layers onto the center of the plate. This is your base.
- Spread the First Layer of Cream: Take about half of the freshly whipped cream and dollop it onto the center of the first cake layer. Use an offset spatula or the back of a spoon to gently and evenly spread the cream almost to the edges of the cake layer. Aim for a relatively smooth, consistent layer.
- Add the First Layer of Prepared Berries: Now, take about half of your well-drained strawberry slices. Scatter them evenly over the layer of whipped cream. Try to distribute them so you get berries in every bite, but avoid piling them too high, especially around the edges. Remember, these strawberries have been prepped not to leak!
- Add the Second Cake Layer & More Cream/Berries: Very gently lift the second cake layer and carefully place it directly on top of the strawberry and cream layer. Try to align it as best you can with the bottom layer. Now, spread the remaining whipped cream evenly over the top of this second cake layer, just like you did with the first. Finally, arrange the rest of your drained strawberry slices over the top cream layer. You can get creative here! Pile some berries decoratively in the center, create swirls in the cream, or arrange them in a pattern.
- The Crumble Finish: Take your streusel or fine cake crumbs and generously sprinkle them all over the top of the cake, focusing on the cream and berries. This adds a delightful crunch and a finished look.
- Chill Time is Essential: Once the cake is assembled and topped, resist the urge to cut into it immediately! Covering it lightly, carefully place the cake in the refrigerator for at least 1 hour. This chilling time is crucial. It allows the whipped cream to set properly, helps the flavors meld, and lets the cake layers firm up slightly after assembly. A longer chill (2-3 hours) is even better for easier slicing. Enjoy your creation, knowing it will be perfectly textured and never soggy!
Tips for Perfect Strawberry Layer Cake Every Time
Making a show-stopping strawberry layer cake that stays pristine is easier than you think, especially with our no-soggy secret! Here are a few extra tips to ensure your cake turns out perfectly every single time:
- Choose Your Cake Base Wisely: As mentioned in the ingredients section, a lighter cake like sponge or classic vanilla works best. Denser cakes tend to absorb more moisture. Ensure your cake layers are completely cooled before assembling; warm cake will melt the whipped cream.
- Don’t Skimp on the Draining: Seriously, this is the key. Let those strawberries sit and release their juices, and then drain them thoroughly. This single step is your absolute best defense against a soggy cake.
- Strawberries at Their Peak: Use the freshest, most in-season strawberries you can find. Not only will they taste better, but they’ll also respond better to the maceration process.
- Cold Cream is Your Friend: Always start with very cold heavy whipping cream. If your kitchen is warm, you might even want to chill your mixing bowl and whisk for a few minutes before whipping. This helps the cream whip up faster and achieve those sturdy stiff peaks needed to hold the cake together.
- Whip Cream Just Right: Watch the cream carefully as you whip it. It goes from soft peaks to stiff peaks quickly. Overwhipping will turn it grainy or even into butter. Stop as soon as stiff peaks form.
- Chill Time is Not Optional: Giving the cake at least an hour (or more!) in the refrigerator allows the whipped cream to set and the cake layers to firm up slightly. This makes slicing much cleaner and ensures the cake holds its structure.
- Serving: This cake is best served cold straight from the refrigerator.
- Get Creative with Topping: If you don’t have streusel, finely crushed cookies (like shortbread or vanilla wafers) or toasted coconut flakes can make wonderful alternatives for the topping, adding texture and flavor.
- Storage: Store any leftover cake in an airtight container in the refrigerator for up to 1-2 days. Thanks to the draining trick, it should remain delightfully non-soggy!
- Explore Other Layered Cakes: Once you’ve mastered this strawberry delight, you might feel inspired to tackle other layered creations. We have recipes for other fantastic options like our Raspberry Layer Cake or even something richer like a Deep Dark Chocolate Layer Cake. The principles of good cake assembly apply across the board!
What to Serve With This Delightful Cake
This Strawberry Layer Cake is a showstopper all on its own, perfect for concluding a meal or as the centerpiece of a celebration. However, sometimes a little something extra can make the moment even more special.
A simple cup of tea or freshly brewed coffee is the classic pairing, offering a comforting warmth against the cool, fruity sweetness of the cake. For a truly indulgent experience, a small scoop of high-quality vanilla ice cream or a dollop of extra whipped cream alongside a slice is absolute perfection. The clean, simple flavors allow the star of the show – the strawberry cake – to truly shine.
Your Strawberry Layer Cake Questions Answered (FAQ)
Got questions about making the perfect, non-soggy Strawberry Layer Cake? Here are some common queries and their answers to help you along the way.
Can I use frozen strawberries for this recipe?
While frozen strawberries are convenient, they release a significant amount of liquid when thawed, much more than fresh berries, even after draining. For this specific recipe and the goal of preventing sogginess, fresh strawberries are highly recommended. They hold their shape better and the maceration/draining process works optimally with their texture.
Can I bake the cake layers from scratch instead of using pre-baked?
Absolutely! Using your favorite homemade recipe for a light vanilla or sponge cake is a fantastic option. The key is to ensure the cake layers are completely cooled to room temperature before you begin assembly. Warm cake will cause the whipped cream to melt and can still contribute to sogginess.
How long will this cake last in the refrigerator?
Thanks to the draining method, this cake holds up better than those made with undrained berries. When stored properly in an airtight container in the refrigerator, it’s best enjoyed within 1 to 2 days. While it might still be edible after that, the texture is at its peak within the first couple of days.
Can I use a different type of frosting, like buttercream?
Yes, you can use other frostings like a cream cheese frosting or vanilla buttercream if you prefer. However, fresh whipped cream is a traditional pairing for strawberry shortcake-style desserts due to its lightness. If you use a denser frosting like buttercream, the draining step for the strawberries becomes even more critical, as you don’t have the airy whipped cream to potentially absorb any residual moisture.
What can I use for the topping if I don’t have streusel?
No problem! You can use finely ground cake crumbs left over from leveling your cake layers, or pulse some vanilla wafers or shortbread cookies in a food processor until they form fine crumbs. Toasted coconut flakes also make a wonderful and flavorful topping alternative.
Is macerating the strawberries really necessary?
Yes, it is! Macerating with sugar draws out excess moisture before the strawberries go into the cake. This is the fundamental step that prevents that moisture from migrating into your cake layers and causing them to become soggy. Simply slicing and adding them directly will almost certainly lead to a mushy cake.
Can I add other fruits?
This technique is primarily designed for strawberries, as they release a significant amount of water. Adding other high-moisture fruits alongside the drained strawberries might reintroduce sogginess issues. If you want to add other fruits, consider serving them on the side.
However, if you enjoy combining berries, you might like other dessert ideas like Strawberry Crumble Parfaits which handle fruit moisture differently, or perhaps explore recipes that pair strawberries with less watery fruits.
Enjoy Your Homemade Strawberry Layer Cake!
There you have it – the secret to a beautiful, fresh, and perfectly textured Strawberry Layer Cake that defies the common problem of sogginess. This recipe is a testament to how a simple technique can elevate a classic dessert to new heights. The bright flavor of the drained strawberries concentrated with sweetness, paired with the light, fluffy whipped cream and tender cake, is a truly delightful experience.
Whether you’re making it for a special occasion or just to satisfy a craving for something sweet and fruity, this cake is sure to impress. The best part? You can enjoy leftovers without the dreaded mush factor! So go ahead, grab those berries, whip that cream, and create this sensational dessert.
I would absolutely love to hear how your cake turns out! Please leave a comment below if you try the recipe or if you have any questions. Don’t forget to share your beautiful creation with friends and family!
Strawberry Layer Cake

Ingredients
- 2 pre-baked 8×8 inch sponge cake layers (or equivalent)
- 4 cups fresh strawberries, hulled and sliced
- 1/4 cup granulated sugar
- 2 cups heavy whipping cream, cold
- 1/2 cup powdered sugar
- 1 teaspoon vanilla extract
- 1/2 cup streusel or fine cake crumbs for topping
Directions
- Place the sliced strawberries in a bowl. Sprinkle the granulated sugar over the strawberries. Stir gently to coat. Let the strawberries sit at room temperature for 20-30 minutes.
- This is the key step to prevent sogginess: After the strawberries have released their juices, carefully drain off the excess liquid from the bowl. Reserve a tablespoon or two of the juice if desired, but discard the rest. This removes the moisture that would make your cake soggy.
- While the strawberries are macerating and draining, prepare the cream filling. In a large bowl, beat the cold heavy whipping cream with powdered sugar and vanilla extract until stiff peaks form.
- Place one cake layer on your serving plate or dish. Spread about half of the whipped cream evenly over the cake layer.
- Arrange about half of the drained strawberries over the cream layer.
- Carefully place the second cake layer on top. Spread the remaining whipped cream over the second cake layer.
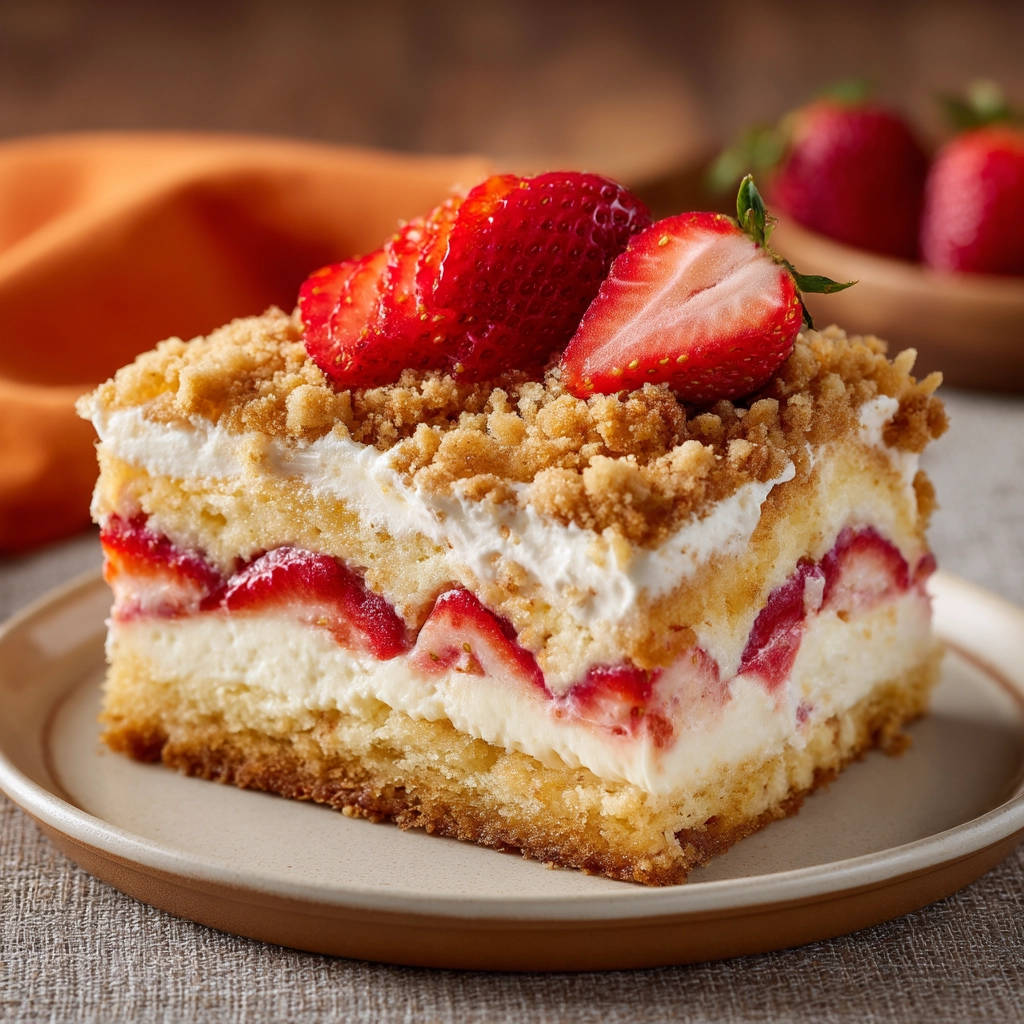
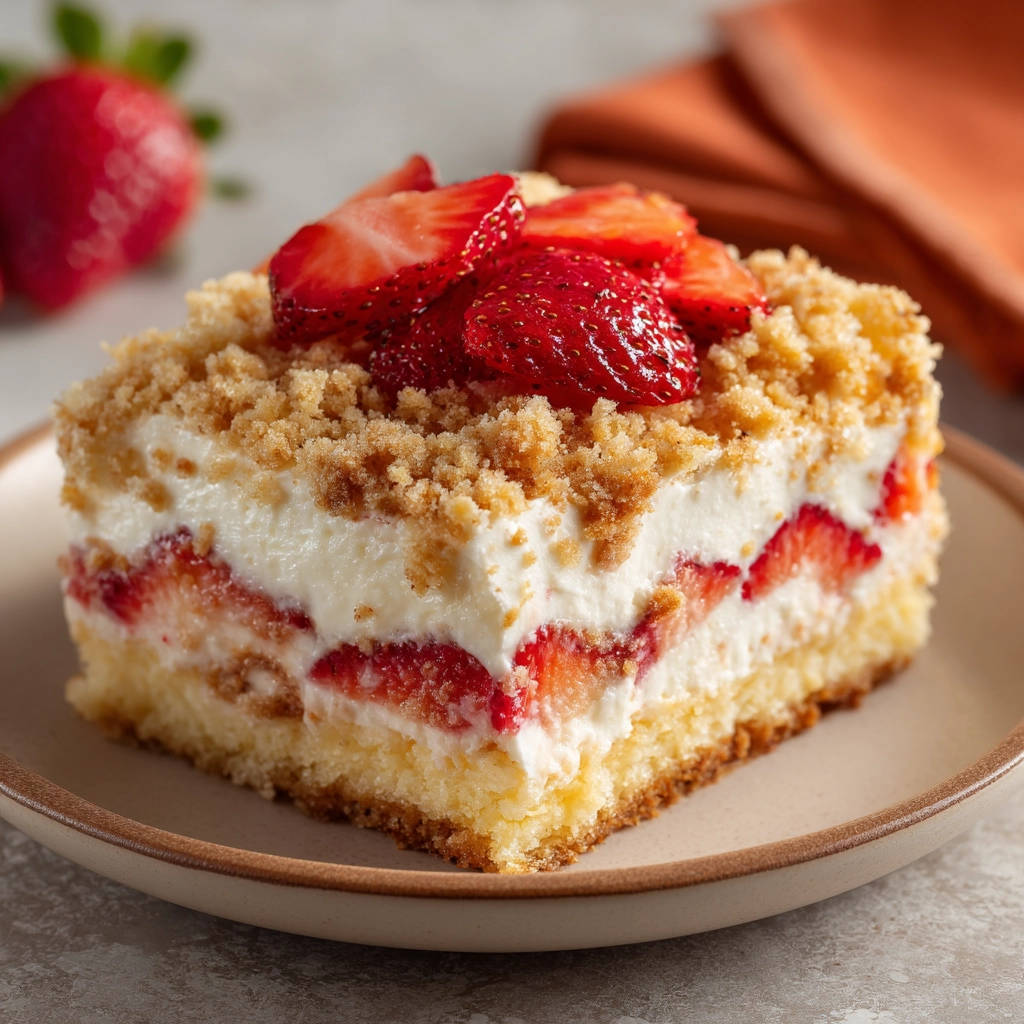
- Arrange the rest of the drained strawberries over the top cream layer. You can add a swirl of whipped cream on top and pile fresh strawberries decoratively as shown in the image.
- Sprinkle the streusel or cake crumbs generously over the top of the cake.
- Refrigerate the cake for at least 1 hour before slicing to allow it to set. Enjoy your perfectly textured, never-soggy strawberry cake!