We’ve all been there. You spend two hours in the kitchen, layering noodles and cheese with love, only to pull a tray out of the oven that looks more like a soup than a pasta bake. When you go to serve that first slice, the layers slide apart, leaving a puddle of watery red liquid at the bottom of the dish. It’s frustrating, messy, and honestly, a little heartbreaking after all that work.
This recipe changes the game by focusing on architectural integrity and moisture control. We aren’t just making dinner; we’re engineering a tall, sturdy, and incredibly meaty masterpiece that stays exactly where you put it. By using a high meat-to-sauce ratio and a stabilized cheese binder, you’ll finally achieve those clean, professional-looking layers that stand tall on the plate.
The secret to this “Anti-Soggy Bottom” success lies in the double-reduction of your sauce and the specific type of cheese you choose. I’ve found that most home cooks fail because they introduce too much water through fresh cheeses or thin sauces. If you follow these structural rules, you’ll get a lasagna that is dense, rich, and perfectly sliceable every single time.
The Science of Moisture Control in Pasta Bakes
Lasagna often fails because of basic physics. When you heat up ingredients like ricotta, marinara, and meat, they release steam and liquid. In a cramped baking dish, that steam has nowhere to go, so it condenses back into water, creating a soggy mess between the layers.
Total Moisture Management is the philosophy we use to combat this. Therefore, we must proactively remove water at every stage of the cooking process. By reducing the sauce until it’s thick and chunky, we ensure the noodles absorb flavor rather than drowning in excess liquid.
Furthermore, the structural integrity of your slice depends on how well the layers bond together. If there is a film of water between the pasta and the meat, the layers will simply slide off each other. We want a cohesive unit that behaves like a single, delicious brick of pasta and beef.

Why Low-Moisture Mozzarella is Non-Negotiable
While fresh buffalo mozzarella is delicious on a Margherita pizza, it is the enemy of a structural lasagna. Fresh mozzarella is packed with water and whey, which it happily releases the moment it hits 375°F. This results in a white, watery pool on top of your beautiful meal.
Instead, you must use low-moisture, part-skim, or whole-milk block mozzarella. This cheese is specifically cured to have a lower water content, which means it provides that iconic “cheese pull” stretch without the soup. It acts as a glue, binding the top layers together into a golden, bubbly crust.
In addition, the protein structure in low-moisture mozzarella is much tighter. This allows it to brown beautifully under the heat of the oven. You get those crispy, charred edges that everyone fights over, rather than a pale, rubbery layer of melted cheese.
The Role of the Egg as a Structural Binder
Ricotta cheese is naturally grainy and wet. If you spread it into a lasagna on its own, it often “weeps” during the baking process, releasing liquid into the surrounding meat sauce. This is why we introduce a large, lightly beaten egg into the mix.
The egg acts as a culinary mortar. As the lasagna bakes, the egg proteins denature and set, creating a firm, custard-like texture within the ricotta layer. This prevents the cheese from spreading or leaking, ensuring that your white layers stay distinct and creamy.
Moreover, the egg helps the ricotta hold its shape when you finally cut into the dish. Instead of the cheese oozing out the sides, it stays firmly tucked between the noodles. It’s a small addition that makes a massive difference in the final presentation.
Essential Components for the Ultimate Meaty Lasagna
Quality ingredients are the foundation of this build. I recommend using lean ground beef, specifically an 85/15 or 90/10 blend. While fat usually equals flavor, too much rendered fat in a lasagna will lead to a greasy mouthfeel and a slippery structure.
The sauce is equally important. Since we are aiming for a thick, meaty ragu, start with a high-quality, thick marinara. Avoid the watery, budget brands that are mostly corn syrup and tomato juice. You want a sauce that already has some body to it before you even start the reduction process.
Lastly, don’t forget the Parmesan. Freshly grated Parmesan adds a salty, nutty punch that pre-shredded versions simply can’t match. The starch in freshly grated cheese also helps thicken the ricotta mixture even further, adding another layer of moisture control.
Selecting the Right Oven-Ready Noodles
Oven-ready, or “no-boil,” noodles have come a long way. In this specific recipe, they are actually superior to traditional boiled noodles. Because they are dry when they go into the oven, they act like a sponge, soaking up any residual moisture from the meat sauce.
However, you must be careful with your layering. If you overlap the noodles too much, the sauce can’t reach the middle sections, leaving you with hard, crunchy spots. Aim for a slight touch at the edges rather than a full overlap to ensure even hydration.
In addition, these noodles provide a much firmer “bite” than traditional pasta. They hold their shape under the weight of two pounds of beef and four cups of cheese. This structural strength is exactly what we need for a lasagna that stands four inches tall.
Aromatics and Umami Boosters
Garlic, dried oregano, and red pepper flakes provide the aromatic backbone of this dish. I prefer dried oregano over fresh here because it stands up better to the long, high-heat baking process. It provides a deep, earthy flavor that permeates the meat.
The red pepper flakes don’t necessarily make the dish “spicy,” but they provide a subtle warmth that cuts through the richness of the cheese. It’s all about balance. You want the savory beef to be the star, supported by these classic Italian herbs.
Furthermore, the minced garlic should be fresh. Avoid the jarred stuff in oil, as it lacks the pungent bite needed to season two pounds of beef. When you fry the garlic with the tomato paste, the aroma will tell you exactly when it’s ready for the sauce.
The Double-Reduction Meat Sauce Technique
The most common mistake people make is adding the sauce to the meat and calling it a day. To get that “Ultimate” status, we use a double-reduction. First, we brown the beef until it’s deeply caramelized, which creates the Maillard reaction and builds a foundation of flavor.
Crucially, you must drain every drop of rendered fat and liquid from the pan after browning. If you leave that liquid in, it will end up at the bottom of your baking dish. Once the meat is dry and crumbly, you are ready to build the actual sauce.
Therefore, the second reduction happens once the marinara is added. We simmer the mixture uncovered. This allows the steam to escape, concentrating the tomato flavor and ensuring the sauce is thick enough to “stand up” on its own.
The Pinçage Method: Transforming Tomato Paste
Pinçage is a fancy French term for a very simple, high-impact trick. After browning the meat and draining the fat, push the beef to the edges of the pan. Drop your tomato paste and garlic right into the center of the hot metal.
Fry the paste for about two minutes. You’ll notice it changes from a bright, acidic red to a deep, dark brick color. This process removes the “tinny” metallic taste of the paste and unlocks a massive amount of umami. It also acts as a natural thickener for the entire ragu.
Once the paste is fragrant and dark, stir it back into the meat. This ensures that every morsel of beef is coated in a concentrated tomato essence. It’s the difference between a sauce that tastes like it came from a jar and one that tastes like it simmered all day.
Simmering for Density and Flavor Concentration
After adding the marinara and herbs, let the sauce simmer uncovered for at least 15 to 20 minutes. You aren’t just heating it up; you are actively removing water. Watch as the sauce transforms from a runny liquid into a thick, chunky ragu.
You’ll know it’s ready when you can drag a spoon through the middle of the pan and the sauce doesn’t immediately rush back to fill the gap. It should cling to the meat. This density is what prevents the noodles from sliding around during assembly.
In addition, this simmer time allows the dried oregano and red pepper flakes to hydrate and release their oils. The flavor becomes more cohesive and rounded. It’s a small investment of time that pays off in every single bite.
Step-by-Step: Building the Structural Layers
Assembly is where the engineering comes to life. Start with a very thin layer of sauce on the bottom of your 9×13 dish. This isn’t for flavor; it’s a sacrificial layer that prevents the bottom noodles from sticking to the glass or ceramic.
Next, lay down your first set of noodles. Spread one-third of your ricotta-egg mixture over the pasta. Because the mixture is thick, you might need to use the back of a spoon to gently dollop and spread it. Follow this with a dense layer of meat sauce and a handful of mozzarella.
Repeat this cadence two more times. As you build, gently press down on the layers with your palms. This removes air pockets and helps the ingredients bond. For the final top layer, finish with the remaining meat sauce, a heavy blanket of mozzarella, and that extra Parmesan for a salty crust.
Achieving the Professional Golden Crust
The baking process happens in two distinct stages. First, cover the dish tightly with foil. This traps the steam from the sauce, which is necessary to fully hydrate and cook the oven-ready noodles. Without the foil, the top would burn before the pasta was soft.
After 30 minutes, remove the foil. This is the “unveiling” where the real magic happens. The final 15 to 20 minutes of uncovered baking allow the moisture on the surface to evaporate, letting the cheese brown and bubble.
Look for the edges to get slightly charred and crispy. That deep golden-brown color on top is a sign of flavor. If the cheese is just melted and white, it hasn’t developed its full potential. Don’t be afraid of a little color!
Troubleshooting the Perfect Slice
If you notice the top of your lasagna is browning too quickly while the center still feels cold, simply tent a piece of foil loosely over the top. This protects the cheese while allowing the heat to continue penetrating the dense middle layers.
To check if the noodles are done, poke a toothpick or a thin knife into the center. It should slide through with zero resistance. If you feel a “crunch” or a firm stop, the noodles need another five minutes under the foil to finish hydrating.
Furthermore, keep an eye on the bubbling. You want to see thick, slow bubbles around the edges of the dish. This indicates that the internal temperature has reached a point where the egg in the ricotta has set and the cheese is fully integrated.
The 20-Minute Resting Mandate
I cannot stress this enough: do not cut the lasagna the moment it comes out of the oven. I know it smells incredible, but if you cut it now, it will collapse. The fats are still liquid, and the starches haven’t had time to firm up.
During the 20-minute rest, a process called carryover cooking finishes the job. The internal temperature stabilizes, and the sauces begin to “set.” Think of it like letting a steak rest, but for pasta. This is the secret to getting those tall, clean-cut slices you see in magazines.
Once the time is up, use a very sharp knife to cut all the way through the layers. Use a wide spatula to lift the slice out. You’ll be amazed at how the lasagna holds its shape, showing off every distinct layer of meat, pasta, and creamy cheese.
Make-Ahead Strategies and Freezing Protocols
Lasagna is the ultimate make-ahead meal. You can assemble the entire dish, cover it tightly, and keep it in the fridge for up to 24 hours before baking. In fact, many people find the flavor improves as the herbs have more time to meld with the meat.
If you want to freeze it, I recommend freezing it unbaked. Wrap the dish in a double layer of plastic wrap and then a layer of heavy-duty foil. It will stay fresh for up to three months. Just remember to thaw it completely in the fridge for 24 hours before baking.
For pre-baked leftovers, freeze individual slices in airtight containers. This makes for a perfect “grab-and-go” lunch. Because we’ve controlled the moisture so well, the lasagna won’t turn into a soggy mess when it’s reheated in the microwave.
Reheating Without Drying Out the Meat
When reheating a whole tray, cover it with foil and bake at 350°F until the center is hot. To prevent the meat from drying out, you can add a teaspoon of water to the corner of the dish before covering. This creates a small amount of steam to keep things succulent.
For individual slices, the microwave works great, but the oven is better. If using a microwave, cover the slice with a damp paper towel. This mimics the steam effect and keeps the noodles from getting “leathery” around the edges.
In addition, if you find the cheese has lost its stretch after reheating, a tiny sprinkle of fresh mozzarella on top during the last minute of heating can revive that gooey texture. It’s a simple trick that makes leftovers feel brand new.
Expert Tips for Customizing Your Layers
Once you master the “Anti-Soggy” base, you can start getting creative. If you want to add vegetables, like mushrooms or spinach, you must cook them first. Mushrooms should be sautéed until they release all their water and turn brown.
For spinach, blanch it and then squeeze it in a kitchen towel until it is bone-dry. If you skip this, the vegetables will dump water into your lasagna, ruining all your hard work. Always remember: if an ingredient has water, get it out before it goes in the dish.
You can also experiment with the meat. While this recipe uses beef, a mix of ground beef and ground lamb can add a sophisticated, earthy flavor. Just ensure you follow the same browning and draining rules to keep the fat content in check.
What to Serve with a Heavy Meat Lasagna
Because this lasagna is so rich and dense, you want side dishes that provide contrast. A heavy, starchy side like garlic bread is traditional, but a bright, acidic salad is often a better partner. It cleanses the palate between those cheesy bites.
A simple arugula salad with a sharp lemon vinaigrette and shaved parmesan is perfect. The peppery greens and the hit of citrus cut right through the fat of the beef and mozzarella. It makes the whole meal feel lighter and more balanced.
Alternatively, try some charred broccolini with plenty of garlic and a squeeze of lemon. The slight bitterness of the charred greens works beautifully with the sweet tomato sauce. Avoid heavy cream-based sides, as the lasagna already has plenty of dairy to go around.
Frequently Asked Questions
Can I use ground lamb or turkey instead of beef?
Yes, you can certainly swap the meat. If you use ground turkey, be aware that it has much less fat, so you might need an extra tablespoon of olive oil to prevent it from sticking. If using lamb, follow the draining instructions strictly, as lamb can be quite oily. The goal is always to have “dry” cooked meat before adding the sauce.
Why did my lasagna still turn out watery?
This usually happens for two reasons: the sauce wasn’t reduced enough or you used fresh mozzarella. Ensure your meat sauce is thick and chunky, not runny. Also, double-check that you didn’t overlap the oven-ready noodles too much, as they need space to absorb the liquid. Finally, make sure you didn’t skip the 20-minute rest period!
Do I really need to use the egg in the ricotta?
While you can leave it out, I highly recommend keeping it. The egg is the primary structural binder for the cheese layer. Without it, the ricotta will be much softer and more likely to ooze out when you cut the lasagna. The egg doesn’t change the flavor, but it significantly improves the “sliceability” of the final dish.
Can I use traditional noodles instead of oven-ready?
You can, but you must boil them to “al dente” first. After boiling, lay them out flat on clean kitchen towels and pat them completely dry. If you put wet, boiled noodles into the lasagna, you are introducing extra moisture that will lead to a soggy bottom. Oven-ready noodles are generally easier for maintaining structure.
How do I prevent the cheese from sticking to the foil?
This is a common frustration! The easiest fix is to lightly spray the underside of the aluminum foil with non-stick cooking oil before covering the dish. Additionally, try to “tent” the foil slightly so it isn’t resting directly on the cheese. This ensures that when you pull the foil off, the cheese stays on the lasagna where it belongs.
Ultimate Meaty Lasagna
Course: Main CourseCuisine: Italian-AmericanDifficulty: easy8
servings25
minutes1
hour85
MinutesItalian-American
Ingredients
2 lbs lean ground beef (85/15 or 90/10)
1 jar (24 oz) high-quality marinara sauce
2 tablespoons tomato paste
1 tablespoon olive oil
3 cloves garlic, minced
1 teaspoon dried oregano
1/2 teaspoon red pepper flakes
15 oz whole milk ricotta cheese
1 large egg, lightly beaten
1/2 cup grated Parmesan cheese, divided
4 cups shredded low-moisture mozzarella cheese (do not use fresh buffalo mozzarella as it releases too much water)
1 box (9 oz) oven-ready lasagna noodles
Fresh flat-leaf parsley for garnish
Directions
- Preheat your oven to 375°F (190°C).
- In a large skillet or Dutch oven, heat olive oil over medium-high heat. Add the ground beef and cook until deeply browned. Crucial: Drain all rendered fat and liquid from the pan.
- Push the meat to the sides and add the tomato paste and minced garlic to the center. Fry the paste for 2 minutes until it turns a deep brick red. This “pinçage” technique thickens the base and adds umami.
- Stir in the marinara sauce, oregano, and red pepper flakes. Simmer uncovered over medium-low heat for 15-20 minutes. The sauce should be thick and chunky, sticking to the meat rather than pooling.
- In a medium bowl, combine the ricotta cheese, the beaten egg, and 1/4 cup of the grated Parmesan. The egg acts as a structural stabilizer to prevent the cheese layers from weeping during the bake.
- To assemble, spread 1/2 cup of the meat sauce thinly on the bottom of a 9×13 baking dish. Top with a layer of noodles (do not overlap them significantly).
- Spread 1/3 of the ricotta mixture over the noodles, followed by a dense layer of the thickened meat sauce and a generous sprinkle of mozzarella.
- Repeat the layers (Noodles -> Ricotta -> Meat -> Mozzarella) two more times. For the final top layer, place noodles, the remaining meat sauce, the rest of the mozzarella, and the remaining 1/4 cup of Parmesan.
- Cover the dish tightly with aluminum foil, ensuring the foil doesn’t touch the cheese (spray the underside of the foil with oil if necessary).
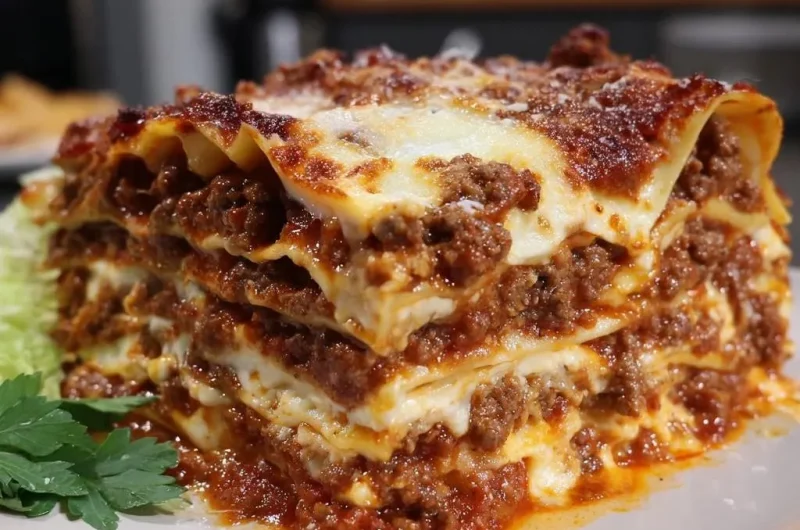
- Bake for 30 minutes. Remove the foil and bake for an additional 15-20 minutes until the top is deeply golden brown and the edges are slightly charred and crispy, matching the visual profile of a professional bake.
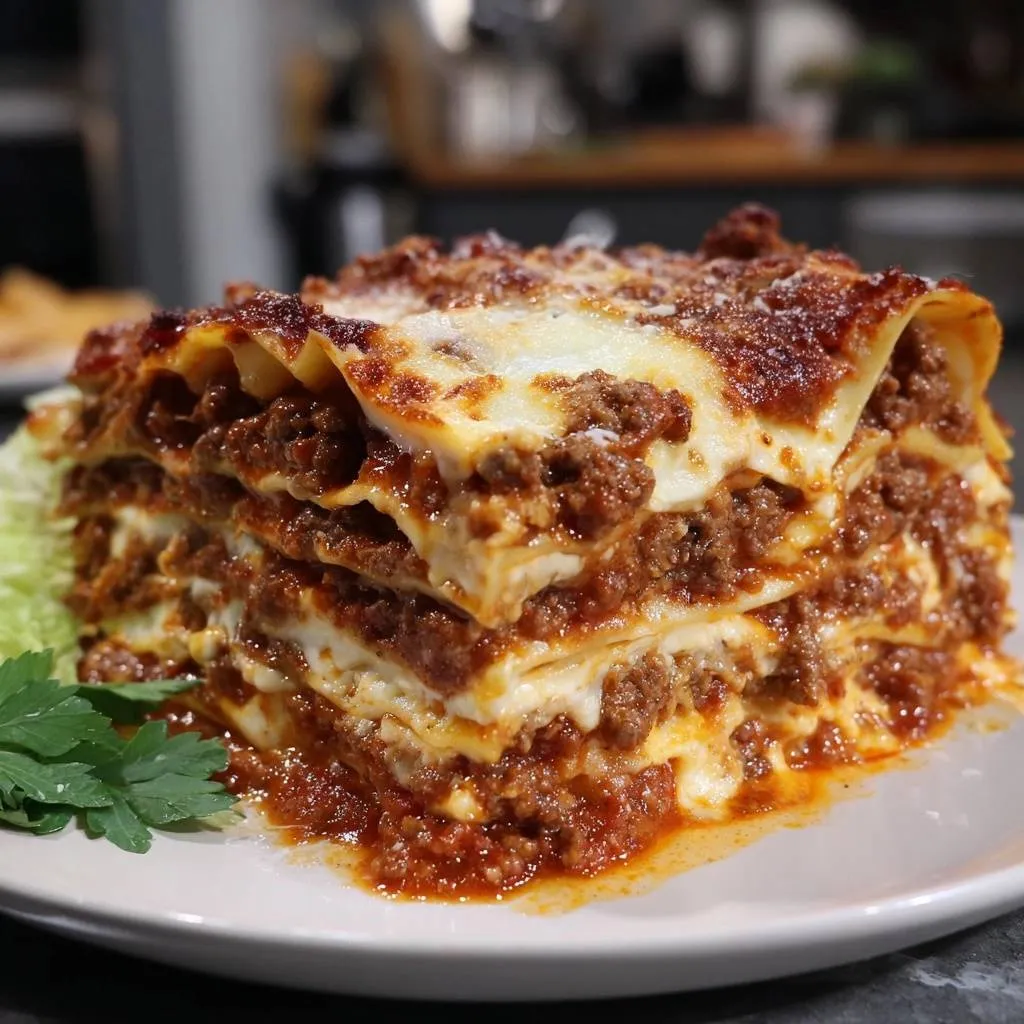
- The Most Important Step: Let the lasagna rest for 20 minutes before slicing. This allows the internal temperature to stabilize and the sauces to set, ensuring the tall, clean-cut layers seen in the image. Garnish with fresh parsley and serve.
Notes
- Crucial steps include draining all fat from the beef, frying the tomato paste to thicken the base, and letting the lasagna rest for 20 minutes before slicing to ensure clean layers. Do not use fresh buffalo mozzarella as it contains too much water.