
We’ve all been there. You spend an hour meticulously layering pasta, cheese, and sauce, only to pull a bubbling tray out of the oven that looks more like a soup than a casserole. When you try to serve it, the layers slide apart, leaving a puddle of green-tinted water on the plate. It’s the ultimate kitchen heartbreak.
The secret to a professional-grade slice isn’t just about the ingredients; it’s about moisture management. This recipe focuses on an “Anti-Soggy” philosophy that treats every layer as a structural component. By controlling the water content of your greens and the density of your meat ragu, you’ll create a lasagna that stands tall and proud.
I’ve found that the real trick lies in the spinach-to-cheese ratio. Most people use too much ricotta and not enough binder, leading to a weeping filling. By using a bone-dry spinach “mat” reinforced with a lightly beaten egg, we create a firm, flavorful foundation that grips the noodles and prevents the dreaded “lasagna slide.”
The Physics of a Perfect Lasagna Slice
Creating a lasagna with vertical stability is a lesson in food science. Vegetables like spinach are essentially water reservoirs; when they hit the heat of the oven, their cell walls collapse and release liquid. If that liquid has nowhere to go, it pools between your pasta sheets, acting as a lubricant that makes your layers slip.
Ricotta cheese poses a similar challenge because it contains whey, which separates during the baking process. To combat this, we treat the spinach and ricotta mixture as a structural mat. This dense layer acts as a sponge in reverse, holding its shape while the egg proteins coagulate to lock everything in place.
Vertical stability also depends on the viscosity of your meat sauce. A thin, watery marinara will soak into the noodles and make them mushy. By simmering the beef and sauce until it reaches a thick, jammy consistency, you ensure the sauce stays where you put it, providing height and flavor without the mess.
Essential Components for the Ultimate Spinach and Beef Lasagna
Quality ingredients are the building blocks of this dish. I recommend using 1.5 pounds of lean ground beef to ensure the meat layers are substantial enough to support the weight of the cheese. If you use too little meat, the lasagna feels flimsy; if you use too much fat, the dish becomes greasy.
The egg is perhaps the most underrated ingredient in this lineup. It acts as a protein binder for the ricotta, turning a soft cheese into a stable filling that won’t ooze out when you cut into it. Without the egg, the middle of your lasagna will always be a bit unstable.
I always reach for wavy lasagna noodles for this specific build. Those ruffled edges aren’t just for looks; they create tiny pockets that trap the sauce and cheese. This mechanical “grip” is essential for keeping the pasta from sliding off the meat ragu during the transition from oven to plate.
Selecting the Right Beef and Marinara
Go for a 90/10 or 93/7 lean-to-fat ratio for your beef. Since we are layering this in a deep dish, any excess grease will have nowhere to escape and will eventually pool at the bottom. Even with lean beef, you must drain the fat thoroughly after browning to keep the flavors clean.
Your choice of marinara is equally vital. Look for a “thick and chunky” variety rather than a smooth, thin sauce. We are going to simmer this sauce with the beef for 15 minutes. This reduction phase isn’t just for flavor; it’s a technical step to evaporate excess steam and concentrate the sugars in the tomatoes.
The Ricotta and Spinach Structural Blend
Whole milk ricotta is non-negotiable here. Low-fat versions often contain more stabilizers and water, which can lead to a grainy texture once baked. The fat in whole milk ricotta provides a creamy mouthfeel that balances the earthy, iron-rich flavor of the spinach.
The spinach must be “bone-dry.” I’m not talking about a quick squeeze with your hands. You need to wrap that thawed spinach in a clean kitchen towel and wring it until your knuckles turn white. If you think you’ve squeezed enough, squeeze it one more time just to be sure.
The Anti-Soggy Technique: Prepping Your Ingredients
The “Wring-Out” method is the cornerstone of this recipe. Frozen spinach is actually better than fresh for this specific application because the freezing process breaks down the plant’s cell walls. This allows you to extract far more water than you ever could with fresh leaves, resulting in a more concentrated flavor.
When browning your beef, don’t rush the process. Let the meat get a nice sear in the pan before breaking it up. This Maillard reaction adds a savory depth that carries through the entire dish. Once the beef is browned and the garlic is fragrant, the “Thorough Drain” phase begins.
I like to tilt my skillet and use a large spoon to press the meat against the side, forcing out every drop of rendered fat. Only after the meat is dry should you add your marinara and spices. This prevents an oil slick from forming on top of your beautiful cheese crust later on.
Step-by-Step: Constructing High-Density Layers
Assembly is where the magic happens. You want to think like an architect. Each layer needs to be level and compressed to ensure there are no air pockets. Air pockets lead to uneven cooking and can cause the lasagna to collapse once it’s sliced.
Foundation and the First Noodle Tier
Start with a very thin layer of meat sauce on the bottom of your 9×13 dish. This isn’t meant to be a layer of food; it’s an adhesive. It prevents the bottom noodles from sticking to the glass and provides just enough moisture to keep them tender.
Lay your first three or four noodles down, overlapping them slightly. You want edge-to-edge coverage so the filling doesn’t leak underneath. If your noodles are a bit long, trim them to fit the dish perfectly rather than crowding them against the sides.
Applying the Spinach-Ricotta Structural Mat
Spread half of your spinach and ricotta mixture over the noodles. Aim for a consistent 1/2-inch thickness. Because the mixture is so thick and dry, you might need to use the back of a large spoon or an offset spatula to press it into the corners.
The parmesan cheese mixed into this layer acts as a secondary binder. As it melts and then cools, it helps “glue” the spinach and ricotta to the pasta sheets. This is the “grip” factor that keeps your vertical layers perfectly aligned when you lift a slice out of the pan.
The Meat Ragu and Mozzarella Mid-Section
Next, add a generous portion of your thickened meat sauce. Spread it evenly, then sprinkle a layer of mozzarella. Don’t just dump the cheese in the middle; sprinkle it all the way to the edges. This ensures that every bite has that gooey, stretchy texture we all crave.
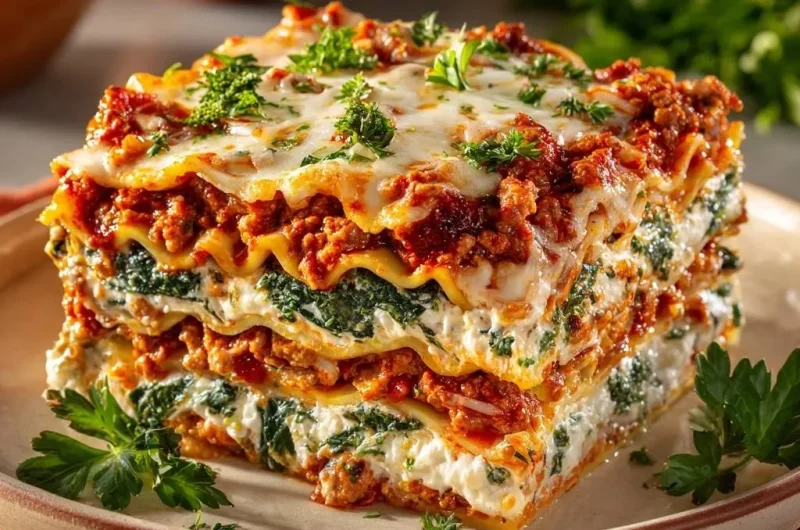
Repeat the process one more time. By the time you reach the top layer of noodles, the lasagna should be nearly level with the top of the baking dish. This high-density stacking is what gives the final product its impressive, restaurant-style height.
The Art of the Golden Cheese Crust
The final topping is a mixture of mozzarella for meltability and parmesan for a salty, golden crust. I like to use a heavy hand here. The cheese acts as a seal, trapping the moisture inside the lower layers while it browns into a delicious canopy.
When you cover the dish with foil, make sure to “tent” it. If the foil touches the cheese, it will pull that beautiful crust right off when you remove it halfway through baking. I usually give the foil a little fold in the center to create a dome over the cheese.
Removing the foil for the last 20 minutes is crucial. This is when the excess steam finally escapes and the cheese undergoes its final transformation. You’re looking for deep golden-brown spots and bubbles that move slowly, indicating the sauce underneath has thickened perfectly.
Thermal Setting: Why the 20-Minute Rest is Mandatory
I know it’s tempting to dive in the second the timer goes off. The smell is incredible, and the cheese is calling your name. But if you cut it now, the lasagna will lose its structural integrity and slump into a pile of pasta and sauce. You must wait.
During this 20-minute rest, carryover cooking continues to firm up the egg and cheese. The fats begin to slightly solidify, and the pasta absorbs any remaining stray moisture. This “setting” period is the difference between a messy plate and a clean, vertical slice that shows off every single layer.
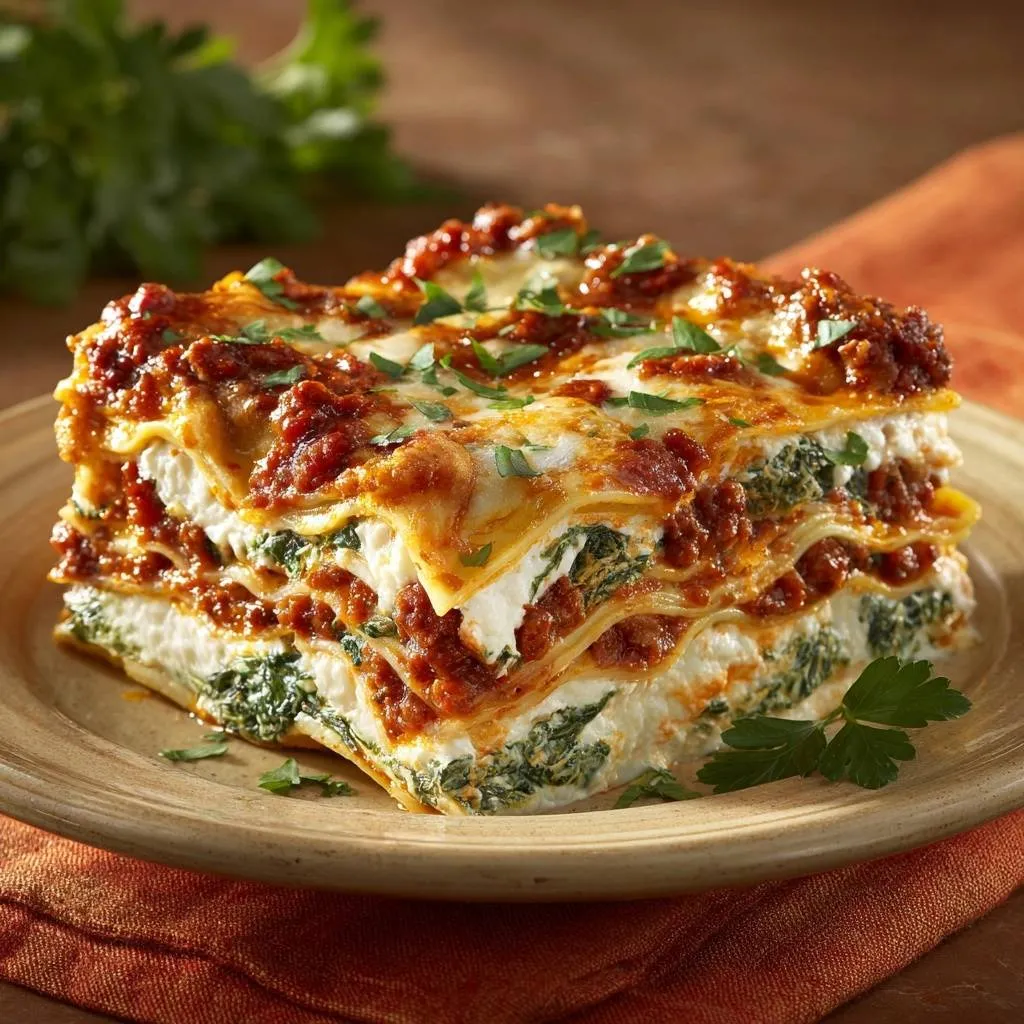
Think of it as the final stage of cooking. As the temperature drops slightly, the proteins in the ricotta and egg bond together. When you finally make that first cut, the knife should glide through the layers cleanly, revealing the beautiful green and red stripes inside.
Troubleshooting Common Lasagna Failures
If your noodles end up rubbery, you likely undercooked them before assembly or didn’t use enough sauce to provide steam during the bake. Always cook your noodles to a firm al dente; they will finish softening in the oven as they absorb the tomato juices.
Excessive oil is almost always a result of not draining the beef well enough. If you see orange oil pooling on top of your cheese, you can gently blot it with a paper towel, but the best fix is to be more aggressive with the draining process during the prep stage.
A sliding top layer usually happens when there is too much sauce between the final noodle and the top cheese. To prevent this, make sure your top layer of sauce is spread thin and the cheese is applied heavily enough to weigh the noodle down and fuse it to the layer below.
Make-Ahead Strategies and Freezing Protocols
Lasagna is actually better the next day. You can assemble the entire dish 24 hours in advance and keep it in the fridge. This gives the flavors time to meld and the noodles time to settle. Just add about 10 minutes to the covered baking time if you’re starting from a cold dish.
For freezing, I recommend freezing the lasagna unbaked. Wrap it tightly in plastic wrap and then foil to prevent freezer burn. When you’re ready to eat, let it thaw completely in the refrigerator for 24 hours before baking as directed. This ensures the moisture-lock technique still works.
If you have leftovers, they freeze beautifully in individual portions. I like to wrap single slices in parchment paper and then put them in a freezer bag. They reheat perfectly in the microwave or a toaster oven, maintaining their height and flavor for a quick weeknight meal.
Expert Tips for Enhanced Flavor Profiles
While structure is key, flavor is the soul of the dish. I love adding a pinch of red pepper flakes to the meat sauce. It doesn’t make the lasagna “spicy” in a traditional sense, but it cuts through the richness of the beef and cheese, providing a subtle warmth that keeps you coming back for more.
Fresh curly parsley is my go-to garnish. It adds a bright, grassy note that wakes up the palate after all that heavy cheese. Don’t be afraid to garnish heavily; the pop of green against the golden cheese makes the dish look as good as it tastes.
For an extra layer of flavor, try a “Garlic Infusion.” Before browning your beef, sauté the minced garlic in a tablespoon of olive oil for just 30 seconds until it’s fragrant. This perfumes the oil and ensures the garlic flavor is evenly distributed throughout the meat ragu.
What to Serve with a Heavy Meat and Spinach Pasta
Since this lasagna is incredibly rich and dense, you want side dishes that offer high acidity and crunch. A simple arugula salad with a lemon-vinaigrette is the perfect companion. The peppery bite of the greens and the sharp citrus dressing help cleanse your palate between bites of cheesy pasta.
Roasted balsamic vegetables, like broccoli or asparagus, also work well. The tang of the vinegar complements the savory beef. I usually avoid heavy garlic breads with this specific recipe because the lasagna itself is so filling, but a light, crusty sourdough is great for mopping up any stray sauce.
Frequently Asked Questions
Can I use fresh spinach instead of frozen?
You can, but it requires a lot of work. You would need to sauté about two pounds of fresh spinach to get the same volume as a 20 oz frozen bag. Fresh spinach also holds onto its moisture differently, so you would still need to squeeze it bone-dry after cooking. Frozen is much more efficient for this recipe.
What is the best substitute for Ricotta?
Small-curd cottage cheese is the most common substitute. However, cottage cheese is much more watery than ricotta. If you use it, you must strain it through a fine-mesh sieve or cheesecloth for at least an hour to remove the excess liquid, or your lasagna will end up soggy despite your best efforts.
Why did my cheese turn brown too fast?
This usually happens if your oven rack is too high. The top of the lasagna is too close to the heating element. If you notice the cheese browning before the 25-minute mark, simply tent it with foil again or move the rack to the middle or lower third of the oven for the remainder of the bake.
Can I use “No-Boil” noodles for this specific recipe?
I don’t recommend them for this version. No-boil noodles are designed to absorb moisture from the sauce to cook. Because our meat ragu is thickened and our spinach is bone-dry, there might not be enough free liquid for the no-boil noodles to soften properly, which could result in a crunchy, undercooked texture.
Ultimate Spinach and Beef Lasagna
Course: Main CourseCuisine: Italian-AmericanDifficulty: easy8
servings30
minutes45
minutes75
MinutesItalian-American
Ingredients
1.5 pounds lean ground beef (increased for the thick meat layers shown)
1 jar (24 oz) thick, chunky marinara sauce
12-15 wavy lasagna noodles, cooked al dente
20 oz whole milk ricotta cheese
20 oz frozen chopped spinach, thawed and squeezed bone-dry
3 cups shredded mozzarella cheese
3/4 cup grated parmesan cheese
1 large egg, lightly beaten
3 cloves garlic, minced
1 teaspoon dried oregano
1/2 teaspoon red pepper flakes
Fresh curly parsley for garnish
Directions
- Preheat your oven to 375 degrees F (190 degrees C).
- In a large skillet, brown the ground beef and minced garlic over medium-high heat until fully browned. Drain the excess fat thoroughly-this is vital for a clean slice. Stir in the marinara sauce, oregano, and red pepper flakes. Simmer uncovered for 15 minutes to reduce the sauce into a thick, meaty ragu.
- The Anti-Soggy Secret: Place your thawed spinach in a clean kitchen towel and wring it out with all your strength until absolutely no more water drips out. In a medium bowl, combine the bone-dry spinach, ricotta, egg, and 1/2 cup of the parmesan. The egg and the high spinach-to-cheese ratio create a structural “mat” that prevents the layers from sliding or weeping.
- Layering for Height (As pictured): Spread a very thin layer of meat sauce in the bottom of a 9×13 inch baking dish.
- Place a layer of noodles over the sauce. Spread a thick, 1/2-inch layer of the spinach-ricotta mixture. Top with a generous layer of the thick meat sauce and a sprinkle of mozzarella.
- Repeat the layers: noodles, remaining spinach-ricotta mixture, meat sauce, and mozzarella.
- Finish with a final layer of noodles. Top with the remaining meat sauce, then a heavy layer of mozzarella and the remaining parmesan cheese.
- Cover the dish loosely with foil (ensure it doesn’t touch the cheese). Bake for 25 minutes. Remove the foil and bake for another 20 minutes until the cheese is deeply golden and bubbly.
- Crucial Step: Let the lasagna rest for at least 20 minutes before slicing. This allows the proteins in the cheese and egg to set, ensuring the tall, clean-cut vertical layers shown in the image. Garnish heavily with fresh chopped curly parsley and serve.
Notes
- The secret to the perfect slice is wringing the spinach in a kitchen towel until no water remains and allowing the lasagna to rest for 20 minutes after baking to let the layers set.