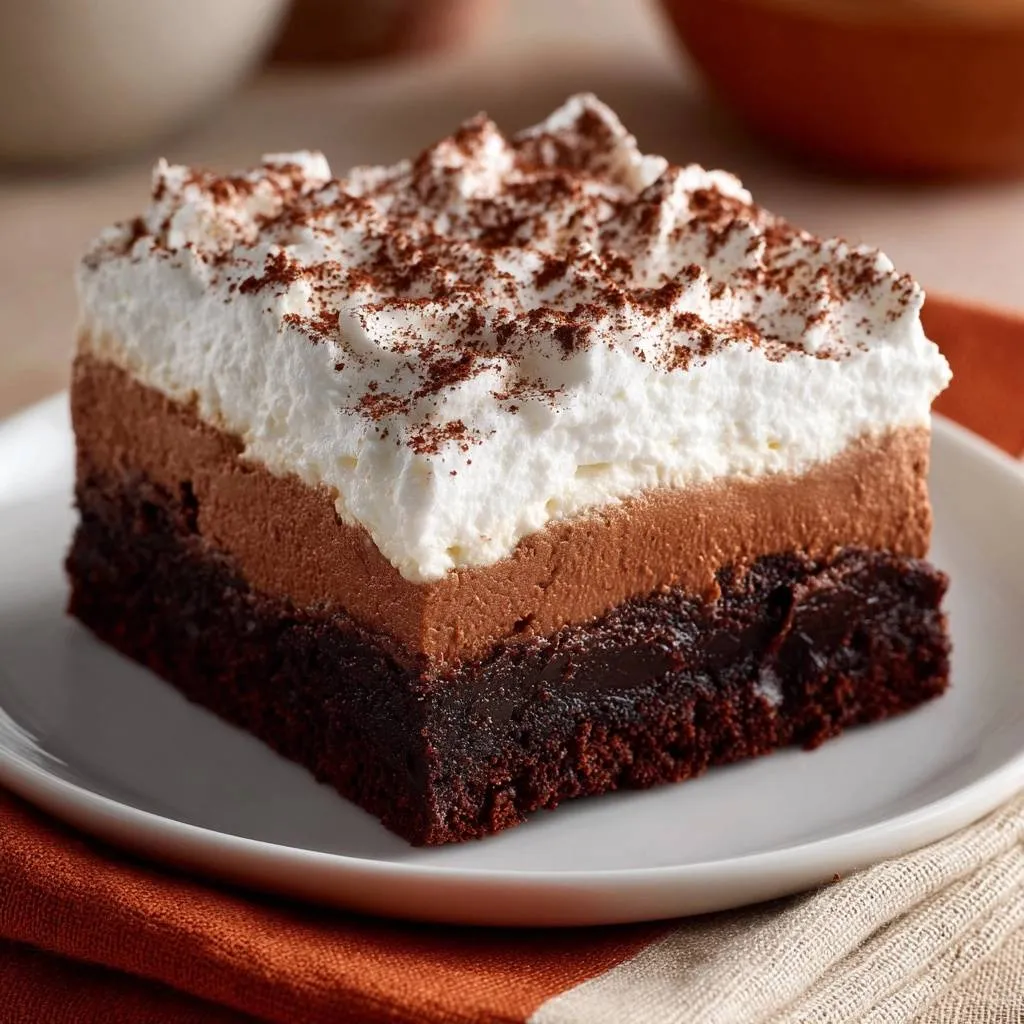
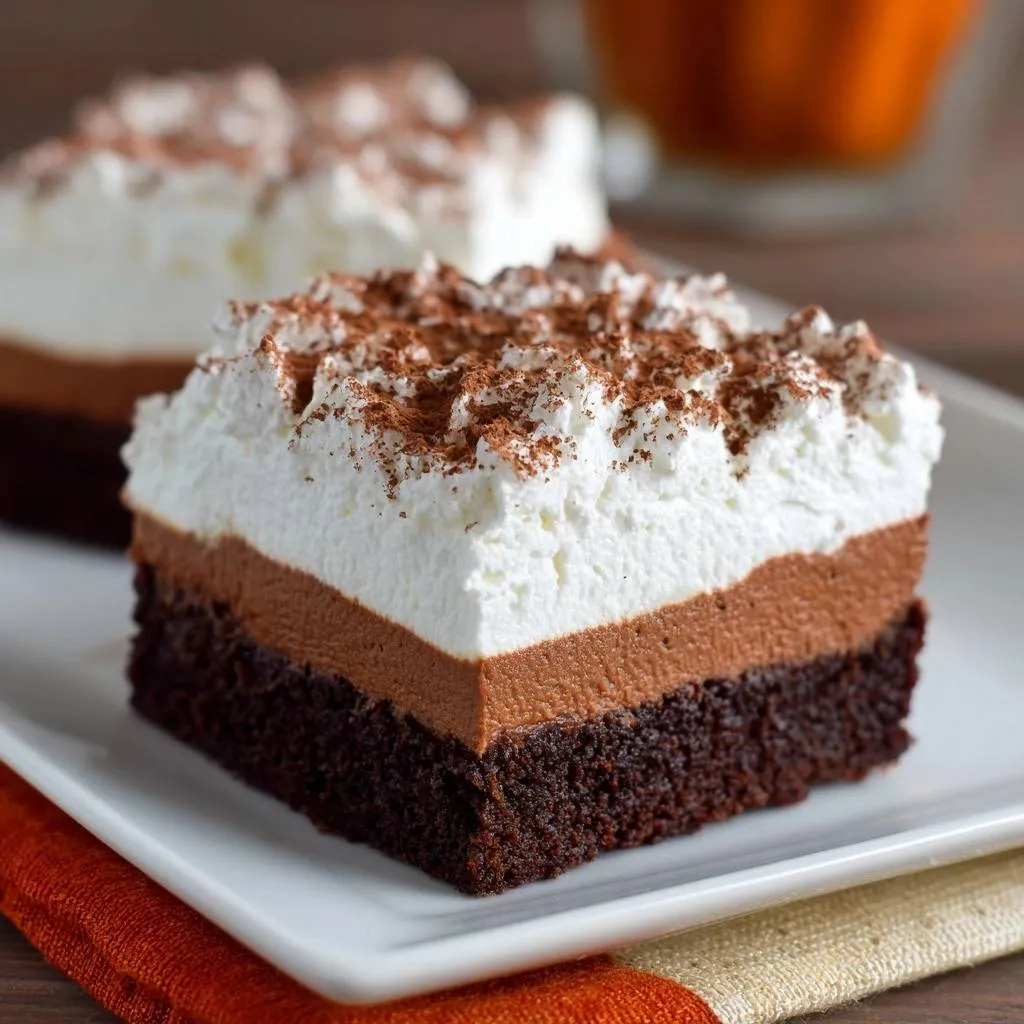
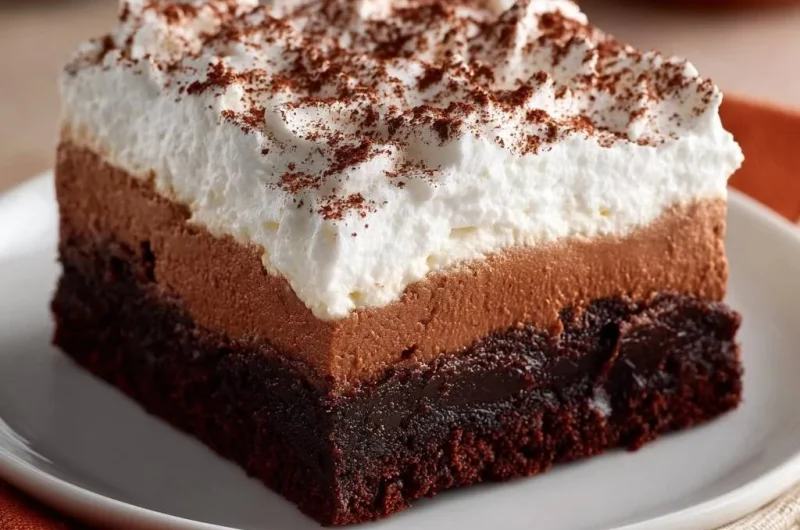
Ever sliced into a chocolate layered dessert only to watch it slump into a gooey, watery mess? You know the frustration, those runny layers that ruin the whole thing. But these Triple Chocolate Layer Bars fix that with a smart multi-stage chilling method. They deliver firm, distinct layers every time: a fudgy brownie base, silky chocolate mousse, and a stable whipped topping that holds up perfectly.
That’s why this recipe stands out. It takes the classic chocolate bar idea and makes it foolproof for clean cuts. You’ll get 24 bars from a 9×13 dish, with about 20 minutes prep, 25 minutes bake, and 4 hours chill time total. Perfect for parties since they feed a crowd and look impressive without the hassle.
Here’s the expertise kicker: chill the brownie base fully for one hour before adding mousse. That simple step creates a solid foundation, preventing the top layers from sinking in. Oh man, that first bite? Fudgy chew meets creamy silk, all in a slice that doesn’t fall apart. Pure chocolate heaven.
Triple Chocolate Layer Bars Ingredients Breakdown
Brownie Base Components
Melted butter kicks off the brownie base with 1 cup, giving you that dense, fudgy texture instead of a cakey one. Creaming butter and sugar makes lighter brownies, but melting here traps moisture for chewiness. In addition, 1 1/2 cups granulated sugar tenderizes while balancing the 3/4 cup unsweetened cocoa powder’s deep bitterness.
Three large eggs bind everything, and 1 teaspoon vanilla extract adds warmth. You’ll need 1 cup all-purpose flour for structure; it absorbs just right without toughness. Finally, 1/2 teaspoon salt sharpens flavors. Pro tip: use Dutch-processed cocoa if you want richer color, but natural works fine too.
Chocolate Mousse Layer Essentials
For the mousse, divide 2 cups heavy whipping cream: one cup steams to melt 12 oz chopped semi-sweet chocolate perfectly. Steaming, not boiling, keeps the ganache stable without seizing. Semi-sweet balances the sweetness from 1/4 cup powdered sugar and 1 teaspoon vanilla.
Heavy cream’s high fat content emulsifies smoothly. Therefore, chop chocolate finely for even melting. Folding technique matters here; it preserves air for lightness. No heavy cream? Full-fat coconut milk swaps in, but chill it first.
Whipped Cream Topping Ingredients
The topping uses 2 cups heavy whipping cream, whipped with 1/4 cup powdered sugar and 1 teaspoon vanilla to stiff peaks. Powdered sugar’s cornstarch stabilizes foam, preventing collapse. Chill your bowl and beaters first for faster volume.
Dust with 2 tablespoons sifted unsweetened cocoa powder at the end. Sifting avoids lumps, so it dusts evenly. This layer seals the deal for a professional finish.
Science of Stable Triple Chocolate Layers
Brownie Fudgy Set Chemistry
Egg proteins coagulate at 350°F, setting the brownie’s structure without cakiness. Sugar dissolves into syrupy tenderness during baking. However, the Maillard reaction crisps edges while keeping the center fudgy.
Full cooling, about 1 hour, solidifies fats and starch. This prevents the warm base from melting the mousse above. Therefore, patience here ensures no sinking layers.
Underbake slightly for fudginess; a toothpick should have moist crumbs, not batter. That chemistry delivers the perfect chew.
Mousse Ganache Emulsification
The mousse forms a fat-in-water emulsion when hot cream melts chocolate. Heavy cream’s 36-40% fat stabilizes it. Cool the ganache to room temp before folding in whipped cream, or it deflates.
Chilling then crystallizes fats, firming the layer. In addition, whipping incorporates air bubbles trapped by proteins. This multi-step process locks in silkiness without runniness.
Whipped Cream Peak Stability
Whipping denatures cream proteins, creating a foam that traps air. Stiff peaks mean it’s ready; push further and it turns buttery. Therefore, watch closely and stop at soft ripples folding over.
Multi-stage chilling prevents weeping by firming each layer sequentially. Cold temps stabilize the structure overall.
Equipment for Triple Chocolate Layer Bars
Baking Dish and Prep Tools
A 9×13 metal baking dish conducts heat evenly for a fudgy center without hot spots. Glass takes longer and risks underdone edges. Grease with butter or spray; parchment eases removal but grease prevents sticking anyway.
Use a whisk for wet ingredients to aerate lightly, then a spatula to fold in dries. This avoids overmixing toughness.
Mixing and Chilling Essentials
Microwave-safe bowls heat cream precisely without scorching. A stand mixer whips efficiently for stiff peaks. Cover with plastic wrap during chills to block condensation that causes weeping.
Pro tip: press wrap directly on surfaces for airtight seal.
Building Triple Chocolate Layer Bars: Phase 1
Prepping and Baking Brownie Base
Preheat oven to 350°F and grease your 9×13 dish. Whisk 1 cup melted butter with 1 1/2 cups sugar until smooth and glossy. Add 3 eggs and 1 teaspoon vanilla; whisk vigorously for 1 minute to emulsify.
Fold in 1 cup flour, 3/4 cup cocoa, and 1/2 teaspoon salt just until no streaks remain. Spread evenly; it will be thick. Bake 20-25 minutes until edges pull away and center looks set but fudgy. Toothpick test: moist crumbs, not wet batter.
Cool completely, at least 1 hour. Room temp firmness stops it from softening upper layers. You’ll smell that rich chocolate aroma filling your kitchen.
Phase 2: Chocolate Mousse Layer Assembly
Ganache Creation and Whipping
Microwave 1 cup heavy cream until steaming, about 1 minute. Pour over 12 oz chopped semi-sweet chocolate in a bowl. Let sit 2 minutes, then stir until glossy and smooth. Cool 20 minutes to room temp; it thickens slightly.
Whip remaining 1 cup cream with 1/4 cup powdered sugar and 1 teaspoon vanilla to stiff peaks. Gently fold into chocolate in thirds. Spread evenly over cooled brownie; the chill below acts as a moisture barrier.
Cover and chill 1 hour until firm to touch. This step prevents sinking and weeping later. Smooth texture transformation feels like velvet.
Phase 3: Whipped Topping and Final Set
Topping Whip and Cocoa Finish
Chill bowl and beaters, then whip 2 cups heavy cream with 1/4 cup powdered sugar and 1 teaspoon vanilla to stiff peaks. Spread gently over set mousse; use an offset spatula for evenness.
Sift 2 tablespoons cocoa powder over top. Cover and chill 2 hours or overnight. Final set ensures sliceable firmness; cut with a hot knife for clean edges. Wipe blade between cuts.
Avoiding Runny Triple Chocolate Layers
Chilling Sequence Mistakes
Skipping the 1-hour brownie cool lets residual heat melt mousse, causing sinking. Overheating ganache above room temp deflates folds. Room-temp assembly softens everything into mush.
Fix by restarting chills. Always cover to block fridge humidity. Therefore, follow sequence strictly for stability.
Mixing and Texture Pitfalls
Overmixing brownie develops gluten for toughness. Underwhipped toppings collapse under weight. High humidity softens foams; bake on dry days or use AC.
Salvage runny mousse by rechilling 30 minutes extra. Stir gently to preserve air.
Make-Ahead Guide for Triple Chocolate Bars
Storage and Freezing Methods
Store covered in fridge up to 4 days; plastic wrap then foil works best. Freeze the whole pan or wrap individual bars tightly in plastic and foil for up to 2 months. Thaw overnight in fridge to retain creaminess.
Fats recrystallize properly on slow thaw, keeping textures firm. Avoid countertop thaw to prevent weeping.
Flavor Twists on Triple Chocolate Bars
Nutty and Fruity Variations
Fold 1/2 cup chopped hazelnuts or almonds into brownie batter for crunch. Swirl 1/4 cup raspberry puree into mousse for tart contrast; chill extra 30 minutes to firm.
Add 1 teaspoon espresso powder to ganache for depth. Swap semi-sweet for white chocolate in mousse, reducing sugar by 2 tablespoons. Layers stay firm with same chills.
Pairing Triple Chocolate Layer Bars
Beverage and Side Matches
Black coffee cuts richness perfectly. Hot tea balances sweetness too. Pair with fresh berries or a scoop of vanilla ice cream for contrast.
Seasonal fruit salad lightens it up. Cut smaller portions since it’s decadent; one bar satisfies.
Troubleshooting Triple Chocolate Bars
Why Layers Weep or Sink
Condensation from uncovered chilling adds moisture. Short chill times don’t firm fats. Prevent by pressing plastic wrap on surfaces and extending times 30 minutes.
Soggy Base or Grainy Mousse
Brownie undercooling absorbs moisture. Grainy mousse comes from lumpy chocolate; chop fine and stir fully. Whip errors deflate; refold gently if needed.
Deflated Topping Issues
Overbeating shows grainy butter bits; start over with fresh cream. Warm ingredients prevent peaks. Add 1 teaspoon cornstarch to sugar for extra stabilizer next time.
Common Questions on Triple Chocolate Layer Bars
Can I Use Milk Chocolate?
Yes, milk chocolate works in the mousse, but it’s sweeter, so cut powdered sugar to 2 tablespoons. Texture holds firm with same chilling. Flavor shifts creamier, less intense bitterness.
How Long Do Bars Last?
Fridge storage gives 4 days covered tightly; watch for softened texture or off smells. Freeze up to 2 months wrapped well. Thaw in fridge; discard if weeping excessively or moldy.
Gluten-Free Triple Chocolate Adaptation?
Swap 1 cup all-purpose flour for 1:1 gluten-free blend. Add 1/4 teaspoon xanthan gum to brownie for binding. Chills keep layers stable; taste identical.
Why Chill Between Layers?
Chilling firms each layer’s fats, creating barriers against melting or weeping. Brownie sets structure, mousse crystallizes, topping stabilizes. Skips lead to runny collapses; science ensures clean slices.
Scale Recipe for Smaller Batch?
Halve everything for an 8×8 dish. Bake brownie 18-22 minutes, chill times same. Yields 12 bars; adjust proportionally for freshness.
Triple Chocolate Layer Bars
Course: DessertCuisine: AmericanDifficulty: easy24
bars30
minutes25
minutes240
Minutes450
kcalAmerican
Ingredients
For the brownie base:
1 cup unsalted butter, melted
1 1/2 cups granulated sugar
3 large eggs
1 teaspoon vanilla extract
1 cup all-purpose flour
3/4 cup unsweetened cocoa powder
1/2 teaspoon salt
For the chocolate mousse layer:
2 cups heavy whipping cream, divided
12 oz semi-sweet chocolate, chopped
1/4 cup powdered sugar
1 teaspoon vanilla extract
For the whipped cream topping:
2 cups heavy whipping cream
1/4 cup powdered sugar
1 teaspoon vanilla extract
2 tablespoons unsweetened cocoa powder, for dusting
Directions
- Preheat oven to 350 degrees F. Grease a 9×13-inch baking dish.
- Make the brownie base: In a large bowl, whisk melted butter and sugar until smooth. Add eggs and vanilla, whisking well. Stir in flour, cocoa, and salt until just combined. Spread evenly in the dish. Bake 20-25 minutes until set but fudgy. Cool completely, about 1 hour.
- Make the chocolate mousse layer (the runny-layer killer starts here): Heat 1 cup heavy cream in microwave until steaming (not boiling), about 1 minute. Pour over chopped chocolate in a bowl; let sit 2 minutes, then stir until smooth. Cool to room temperature, about 20 minutes. In another bowl, whip remaining 1 cup heavy cream with powdered sugar and vanilla to stiff peaks. Gently fold into cooled chocolate mixture until uniform.
- Spread mousse evenly over cooled brownie. Critical no-runny step: Cover and chill 1 hour until firm. This locks in the mousse texture before the top layer hits.
- Make the whipped cream topping: Whip heavy cream, powdered sugar, and vanilla to stiff peaks. Spread over set mousse layer. Dust with cocoa powder.
- Final no-runny lock-in: Cover and chill entire dessert at least 2 hours (or overnight). The multi-stage chilling prevents layers from softening or weeping, ensuring perfect, sliceable firmness. Cut into bars and serve cold. Store covered in fridge up to 4 days.
Notes
- Critical steps for no-runny layers: Chill brownie base completely (1 hour), chill mousse layer 1 hour after adding, and final chill at least 2 hours or overnight. Serve cold for perfect slices. Store covered in fridge up to 4 days.