I’ve whipped up countless no-bake desserts, and the biggest frustration is always the same: a delicious concept that crumbles when you try to slice it. That’s precisely why this recipe for Tropical No-Bake Pineapple Bars is a true game-changer, designed to yield perfectly firm, beautifully sliceable bars every single time.
These bars deliver a burst of sunny, tropical flavor that holds its shape, making them ideal for any gathering or a delightful treat.
The Game-Changer: Why These Pineapple Bars Always Hold Their Shape
What sets these tropical no-bake pineapple bars apart is their unmatched reliability. You can count on perfectly firm and sliceable squares, ensuring your dessert presentation is always on point.
Beyond their structure, these bars boast a vibrant, fresh tropical flavor that genuinely pops. It’s a taste of sunshine in every bite, perfect for warm weather or when you need a bright pick-me-up.
The beauty of this recipe lies in its incredible ease and speed. With no baking required, prep time is minimal, allowing you to create an impressive dessert without heating up your kitchen.
This recipe also keeps kitchen cleanup to a minimum. The simple process means fewer dishes and less fuss, letting you enjoy your creation sooner.
Ultimately, these bars are a guaranteed crowd-pleaser. Their refreshing taste and delightful texture make them an instant hit at potlucks, parties, or family dinners.
Your Kitchen Toolkit: Essential Gear for No-Bake Success
To ensure your tropical no-bake pineapple bars come together seamlessly, gather a few key tools.
A sturdy 9×13 inch baking dish is essential for forming and chilling your bars evenly.
You’ll need both large and medium mixing bowls for preparing the crust and the filling components.
An electric mixer, either hand-held or stand, is crucial for achieving a smooth and fluffy cream cheese filling without lumps.
A flexible spatula will help you effectively spread the filling and scrape down the sides of your mixing bowl.
Crucially, a fine mesh sieve or cheesecloth is vital for thoroughly draining the crushed pineapple, a key step for firm bars.
The Building Blocks of Bliss: Key Ingredients for Tropical No-Bake Pineapple Bars
For the Golden Graham Cracker Crust
Graham cracker crumbs form the buttery, crisp base. Ensure they are finely crushed for a uniform texture.
Granulated sugar adds a touch of sweetness, balancing the richness of the butter and creating a pleasant crunch.
Melted unsalted butter binds the crumbs together. Using the correct amount is vital for a crust that holds its shape without being greasy or too crumbly.
The Creamy, Dreamy Filling Base
Softened cream cheese is the heart of the filling. It must be at room temperature to beat smoothly and prevent any lumps, ensuring a silky, consistent texture.
Powdered sugar sweetens the filling while also contributing to its smooth, dissolvable texture, avoiding any granular feel.
Vanilla extract enhances the overall flavor profile, adding a warm, classic aroma that complements the tropical notes.
The Star: Crushed Pineapple (And Why Draining is Non-Negotiable)
Crushed pineapple brings the quintessential tropical flavor and a pleasant chewiness. However, its high water content is the number one enemy of firm no-bake bars.
Thoroughly draining the pineapple is absolutely critical. Excess moisture will prevent your bars from setting properly, resulting in a soft, sloppy dessert. This step alone dictates the firmness of your final product.
Lightening the Load: Thawed Whipped Topping
Thawed whipped topping introduces a light, airy texture to the rich cream cheese filling. It helps achieve a stable yet delightfully fluffy consistency that holds its shape when chilled.
Garnish for a Grand Finale
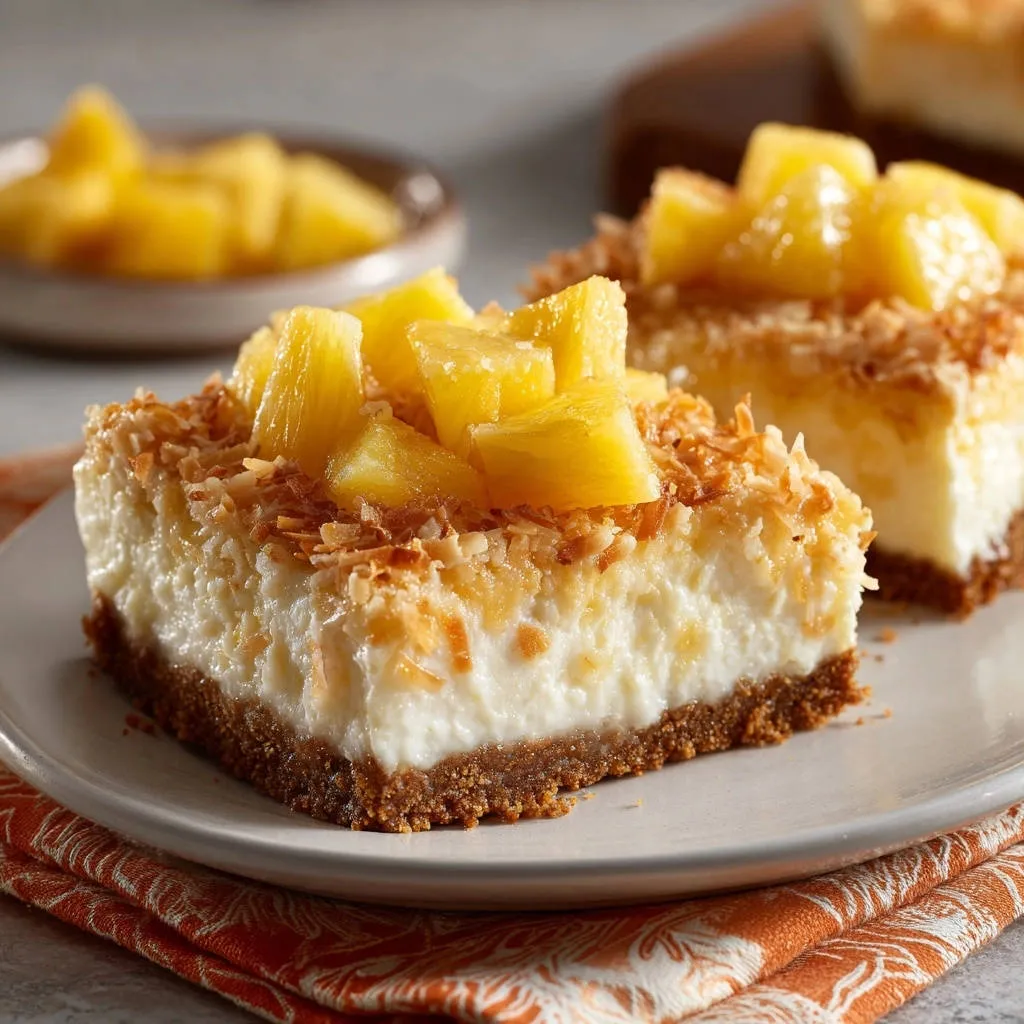
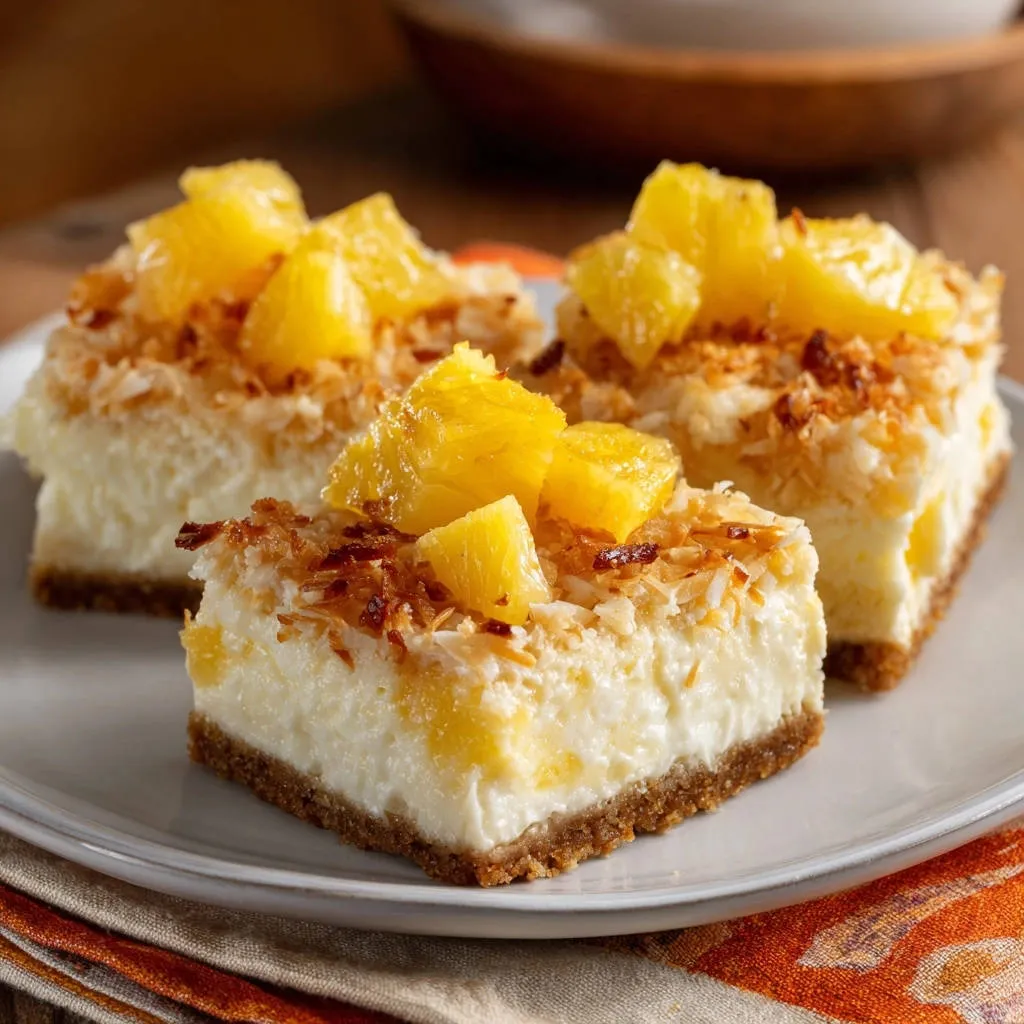
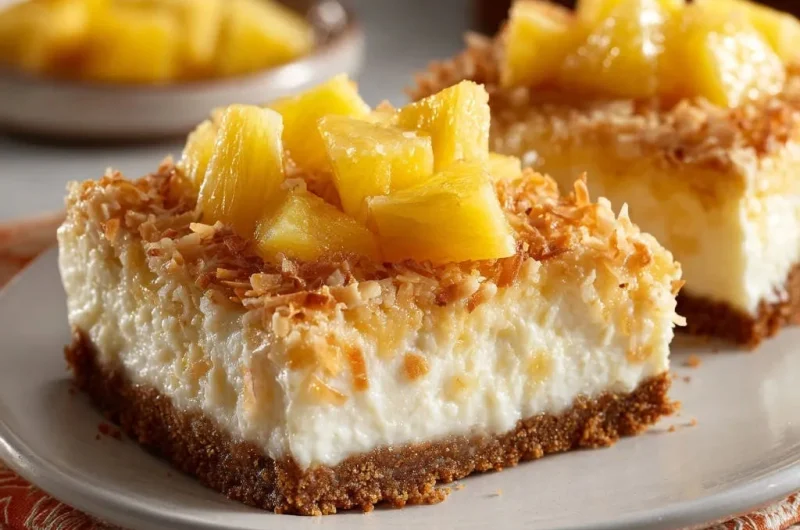
Shredded toasted coconut adds a beautiful visual appeal and a nutty, slightly crunchy texture that complements the pineapple perfectly.
Diced fresh or canned pineapple chunks provide bursts of fresh fruit flavor and a lovely textural contrast, making each bite even more enjoyable.
Crafting Perfection: Your Step-by-Step Guide to Tropical No-Bake Pineapple Bars
- Crust Creation: The Foundation of Firmness
In a medium bowl, combine the graham cracker crumbs and granulated sugar. Pour in the melted butter and mix thoroughly until the crumbs are evenly moistened.
Press this mixture firmly and evenly into the bottom of a 9×13 inch baking dish. Use the back of a spoon or your hand to compact it well. Place the crust in the refrigerator to chill while you prepare the filling; this initial chill helps it set and prevents sogginess.
- Whipping Up the Velvety Filling Base
In a large mixing bowl, using an electric mixer, beat the softened cream cheese on medium speed until it is completely smooth and creamy, with no lumps.
Gradually add the powdered sugar and vanilla extract, continuing to beat until the mixture is light, fluffy, and well combined, approximately 2-3 minutes.
- The Firmness Factor: Draining Your Pineapple Like a Pro
This is the most crucial step for ensuring your bars set firmly. Open your can of crushed pineapple and drain it extremely thoroughly. You need to press out as much liquid as humanly possible.
Methods for draining include using a fine mesh sieve (pressing down with a spoon), placing the pineapple in a cheesecloth and squeezing vigorously, or pressing it between layers of paper towels until no more moisture comes out. The drier the pineapple, the firmer and more sliceable your bars will be.
Gently fold the thoroughly drained crushed pineapple into the cream cheese mixture until it is just combined. Avoid overmixing, which can break down the cream cheese texture.
- Folding in the Fluffy Whipped Topping
Once the pineapple is folded in, gently incorporate the thawed whipped topping into the cream cheese mixture. Use a spatula and fold until no white streaks of whipped topping remain.
It’s important not to overmix at this stage, as overmixing can deflate the whipped topping and reduce the airy texture of the filling.
- Assembly and the Chill: Patience for Perfect Setting
Pour the prepared cream cheese filling evenly over the chilled graham cracker crust in the baking dish. Use a spatula to spread it smoothly to the edges.
Cover the dish tightly with plastic wrap and refrigerate for at least 4 hours. For the absolute best, firmest results, chilling the bars overnight is highly recommended.
This extended chilling time is vital for firmness, allowing all the components to set completely and bond together.
- The Grand Reveal: Garnish and Serve
Once the tropical no-bake pineapple bars are firmly set, carefully slice them into neat squares. A warm knife can help achieve cleaner cuts.
Top each square generously with a sprinkle of shredded toasted coconut and a few pieces of diced pineapple chunks just before serving for ultimate freshness and appeal.
Chef’s Secrets & Pro Tips for Unbeatable No-Bake Pineapple Bars
Mastering the Pineapple Drain: Your Firmness Guarantee
The single most important factor for firm bars is a truly dry pineapple. Don’t just pour it into a sieve; actively press, squeeze, and even use paper towels to absorb every last drop of moisture. Think of it as extracting pineapple essence, not just liquid.
You’ll be surprised how much liquid comes out even after an initial drain. This diligent effort prevents a soggy filling and ensures your bars hold their structure perfectly.
The Power of Proper Chilling Time
Patience is truly a virtue when making no-bake desserts. The minimum 4-hour chill allows the fat in the cream cheese and butter to solidify, and the sugar to create a stable matrix.
Chilling overnight is ideal because it gives the ingredients ample time to fully meld and achieve their maximum firmness, making for effortless slicing and a delightful texture.
Softened Cream Cheese for a Silky Smooth Filling
Always bring your cream cheese to room temperature before beating. Cold cream cheese will result in a lumpy filling, no matter how long you beat it.
Softened cream cheese whips up beautifully, creating a light, airy, and truly silky-smooth base for your bars that incorporates other ingredients flawlessly.
Gentle Folding for an Airy Texture
When incorporating the drained pineapple and especially the whipped topping, use a gentle folding motion with a spatula. Avoid vigorous stirring or beating.
This technique preserves the airiness of the whipped topping and the creaminess of the cheese mixture, ensuring a light rather than dense texture.
Toasting Coconut for Enhanced Flavor and Texture
Toasting the shredded coconut before using it as a garnish unlocks its full aroma and adds a delightful crunch. Spread it in a single layer on a baking sheet and toast in a preheated oven at 300°F (150°C) for 5-10 minutes, stirring occasionally, until golden brown.
Alternatively, toast it in a dry skillet over medium-low heat, stirring constantly, until fragrant and lightly browned. This extra step elevates the flavor immensely.
Solved: Common Questions & Troubleshooting Your No-Bake Pineapple Bars
Why are my bars too soft or falling apart?
The primary culprit is almost always insufficient pineapple draining. Too much moisture prevents the filling from setting properly. Always squeeze out every last drop of liquid from the crushed pineapple.
Another common reason is not enough chilling time. These bars require ample time in the refrigerator, ideally overnight, to set completely and achieve their desired firmness.
My crust is crumbly and doesn’t hold together.
This issue typically stems from not enough melted butter in the graham cracker mixture, which is essential for binding the crumbs.
Additionally, ensure you press the crust mixture firmly and evenly into the baking dish. Compacting it well helps it to solidify into a stable base once chilled.
My cream cheese filling is lumpy.
Lumpy filling usually means your cream cheese wasn’t softened enough before beating. Cold cream cheese doesn’t incorporate smoothly and will remain lumpy.
Ensure your cream cheese is at room temperature and beat it alone until perfectly smooth before adding any other ingredients to prevent a grainy texture.
Keeping Them Fresh: Storage & Make-Ahead Tips
How to Store Leftover Tropical No-Bake Pineapple Bars
Store any leftover tropical no-bake pineapple bars in an airtight container in the refrigerator. This prevents them from drying out and absorbing other fridge odors.
They will remain fresh and delicious for up to 3-4 days, maintaining their firm texture and vibrant flavor.
Can I Make These Ahead of Time?
Absolutely! These tropical no-bake pineapple bars are an excellent make-ahead dessert. Preparing them the day before allows for the ideal overnight chilling, which significantly improves their firmness and ease of slicing.
Simply assemble, chill overnight, and then slice and garnish just before serving.
Serving Up Sunshine: Perfect Pairings for Your Pineapple Bars
These tropical no-bake pineapple bars are delightful on their own, but a few simple additions can elevate the experience even further.
For a truly decadent treat, serve each bar with a small scoop of high-quality vanilla bean ice cream, allowing it to slowly melt into the refreshing pineapple goodness.
A delicate dollop of extra whipped cream on top can add an extra layer of lightness and visual appeal.
For a bright zing, a tiny sprinkle of fresh lime zest over each bar can enhance the tropical notes beautifully.
Pair these sunshine-filled bars with a refreshing glass of iced tea, a sparkling lemonade, or even a layered tropical slushy for a complete warm-weather dessert experience.
Your Questions Answered: FAQs About Tropical No-Bake Pineapple Bars
Can I use fresh pineapple instead of canned crushed pineapple?
While possible, using fresh pineapple requires even more meticulous preparation. Fresh pineapple contains more water and specific enzymes that can affect the setting of dairy, so it must be very finely diced and pressed exceptionally dry to prevent a soft outcome.
Is there a gluten-free option for the crust?
Yes, you can easily substitute gluten-free graham cracker crumbs for a gluten-free crust. Alternatively, a crust made from crushed gluten-free vanilla wafers or a simple nut-based crust using almond flour and butter can also work wonderfully.
Can I substitute other fruits in this no-bake bar recipe?
While this recipe excels with pineapple, you can experiment with other fruits, but careful consideration of their water content is key. Fruits like very thoroughly drained berries, peaches, or mangoes could work if they are finely chopped and pressed exceptionally dry to avoid making the bars too soft. For more no-bake inspiration, you might enjoy trying our Amazing No-Bake Peanut Butter Bars.
How do I prevent the graham cracker crust from becoming soggy?
Ensure your graham cracker crust is well-chilled before adding the filling. The most critical factor, however, is the thorough draining of the pineapple; excess moisture from the filling is the primary cause of a soggy crust over time.
Ready to Delight? Share Your Tropical No-Bake Pineapple Bars Masterpiece!
Now that you have all the insider tips and tricks, you’re ready to create the perfect batch of Tropical No-Bake Pineapple Bars that will impress everyone with their vibrant flavor and flawless firmness.
Imagine the smiles these golden, sun-kissed treats will bring to your table. We encourage you to try this recipe, savor every delightful bite, and share your delicious results with your loved ones!
Tropical No-Bake Pineapple Bars
Course: DessertCuisine: American CuisineDifficulty: easy12
bars30
minutesAmerican Cuisine
Ingredients
1 and 1/2 cups graham cracker crumbs
1/4 cup granulated sugar
1/2 cup unsalted butter, melted
2 (8 ounce) packages cream cheese, softened
1 cup powdered sugar
1 teaspoon vanilla extract
1 (8 ounce) container whipped topping, thawed
1 (20 ounce) can crushed pineapple, extra thoroughly drained
1/2 cup shredded toasted coconut, for topping
1 cup diced fresh or canned pineapple chunks, for topping
Directions
- Prepare the crust: In a medium bowl, combine the graham cracker crumbs and granulated sugar. Pour in the melted butter and mix until well combined and moist. Press this mixture evenly into the bottom of a 9×13 inch baking dish. Place the crust in the refrigerator to chill while you prepare the filling.
- Prepare the filling: In a large mixing bowl, beat the softened cream cheese until smooth and creamy. Gradually add the powdered sugar and vanilla extract, beating until well combined and fluffy.
- Incorporate the pineapple: This is where the magic happens for a firm set! Open your can of crushed pineapple and drain it extremely thoroughly. You want to press out as much liquid as possible. You can use a fine mesh sieve, a cheesecloth, or even press it between paper towels. The drier the pineapple, the firmer your bars will be. Gently fold the thoroughly drained crushed pineapple into the cream cheese mixture until just combined.
- Add whipped topping: Gently fold in the thawed whipped topping until no streaks remain. Do not overmix.
- Assemble and chill: Pour the cream cheese filling evenly over the chilled graham cracker crust. Spread it out with a spatula. Cover the dish with plastic wrap and refrigerate for at least 4 hours, or preferably overnight, to allow the bars to set completely. This extended chilling time is vital for firmness.
- Garnish and serve: Once the bars are firmly set, slice them into squares. Top each square generously with toasted coconut and diced pineapple chunks before serving.
Notes
- Thoroughly draining the crushed pineapple is key for firm, sliceable bars.