We’ve all been there, right? The anticipation builds as a glorious plate of loaded nachos hits the table. You reach for that chip at the bottom, piled high with toppings, only to find it’s succumbed to the moisture and turned into a sad, floppy, unappetizing mess. It’s truly a nacho nightmare!
But what if I told you there’s a simple, game-changing trick that guarantees crispy tortilla chips under all that glorious cheesy, meaty goodness every single time? No more soggy bottoms, no more disappointment! This Mexican-inspired favorite is about to become your go-to party snack, weeknight indulgence, or anytime craving fulfiller.
My journey to perfect, crispy loaded beef nachos involved a bit of trial and error, but the secret I discovered is incredibly straightforward: intelligent layering followed by baking. It might sound simple, but the technique makes all the difference. Get ready for a mountain of flavorful, satisfying, and wonderfully crisp nachos!
Why This Loaded Beef Nachos Recipe is a Winner
Beyond the crucial no-soggy-chip guarantee, this recipe stands out for several delicious reasons:
- Maximum Crispiness: The unique layering method ensures every chip gets a chance to crisp up in the oven while still being fully loaded.
- Perfectly Seasoned Beef: The ground beef is infused with classic taco seasoning, creating a deeply flavorful base for your nachos.
- Customizable: While we’re focusing on a classic loaded setup, this recipe is a fantastic canvas for adding your favorite toppings.
- Quick & Easy: From start to finish, you can have a massive platter of crave-worthy nachos ready in under 30 minutes.
- Crowd-Pleaser: Seriously, who doesn’t love a big plate of hot, cheesy, loaded beef nachos? This is guaranteed to disappear fast at any gathering.
What You’ll Need for Your Crispy Nachos
Gathering the right ingredients is the first step to nacho success. This recipe uses staple items you likely have or can easily find, focusing on fresh flavors and textures that hold up to the baking process. The combination creates a balance of savory, spicy, and cheesy notes that are truly irresistible.
- Tortilla Chips: You’ll need one large bag, typically around 10-12 ounces. Choose sturdy, restaurant-style chips that can handle the weight and heat. Thinner chips are more prone to breaking and might not get as crispy.
- Vegetable Oil: Just a tablespoon is needed to cook the ground beef. Any neutral cooking oil will work.
- Ground Beef: One pound of lean ground beef provides the hearty protein base. For a vegetarian option, simply substitute with your favorite vegetarian crumbles, prepared according to package directions, often just needing heating and seasoning.
- Taco Seasoning: A standard 1-ounce packet is your flavor shortcut. It contains a blend of chili powder, cumin, paprika, garlic powder, onion powder, and sometimes a little kick of cayenne.
- Water: A small amount of water helps the taco seasoning distribute evenly and creates a slightly saucy coating on the beef, which clings nicely to the chips without making them wet.
- Chunky Salsa: One cup of your favorite chunky salsa adds moisture, freshness, and acidity. The “chunky” part is key; excess liquid can lead to sogginess, so a thicker salsa works best. Mild, medium, or hot – pick your preferred heat level!
- Chopped Pickled Jalapeno Slices or Mild Green Chiles: Half a cup gives you that classic nacho tang and a touch of heat. Pickled jalapenos bring a vinegary bite, while mild green chiles offer a softer flavor and less heat. Choose based on your spice tolerance.
- Shredded Cheese: Two cups, about 8 ounces, of shredded Monterey Jack or a Mexican blend cheese is perfect for melting. Monterey Jack melts beautifully and has a mild, creamy flavor. A Mexican blend often includes cheddar and other cheeses for added depth. Pre-shredded cheese is convenient, but shredding your own from a block often melts smoother.
- Green Onions: Two to three green onions, chopped, are sprinkled on at the very end. They add a fresh, crisp, oniony bite and a pop of color that balances the richness of the cheese and meat.
Crafting Your Perfect Loaded Beef Nachos: A Detailed Guide
Alright, let’s get to the fun part – assembling these glorious nachos! Remember, the magic is in the layering and baking. Follow these steps carefully, and you’ll be rewarded with that coveted crisp-to-melted ratio.
Prepare for Baking: Start by preheating your oven to 375 degrees Fahrenheit (190 degrees Celsius). Getting the oven to temperature is essential for quickly melting the cheese and crisping the chips without overcooking the toppings. Grab a large oven-safe platter or a sturdy baking sheet with a rim. The size should allow you to spread the chips out as much as possible.
Cook the Beef: Heat the tablespoon of vegetable oil in a large skillet over medium-high heat. Add the pound of ground beef (or vegetarian crumbles). Use a spoon or meat chopper to break the meat into small, uniform pieces as it cooks. Continue cooking until the beef is completely browned, with no pink remaining. This ensures a good texture and renders out excess fat. Once browned, carefully drain off any excess grease from the skillet. This step is important for preventing the meat mixture from being too oily, which can contribute to soggy chips.
Season the Meat: Reduce the heat slightly and stir the packet of taco seasoning into the cooked beef. Pour in the half cup of water. Bring the mixture to a gentle simmer, then reduce the heat to low. Let it cook for about 5 to 7 minutes, stirring occasionally, until the liquid has thickened slightly and the seasoning has coated the meat evenly. The water helps activate the spices and creates a flavorful coating that adheres well. Remove the skillet from the heat once thickened.
Build the First Layer: The Foundation: This is where the no-soggy-chip trick begins! Arrange approximately half of the tortilla chips in a single layer on your prepared oven-safe platter or baking sheet. Don’t pile them up yet! A single layer allows the heat to circulate and crisp the chips from below. This strategic base layer is absolutely crucial for providing a crispy foundation under all the toppings.
Add the First Round of Toppings: Sprinkle about half of the cooked, seasoned meat mixture evenly over the single layer of chips. Try to get some meat on most of the chips. Next, dollop about half of the chunky salsa over the meat. Then, sprinkle half of the chopped pickled jalapenos or mild green chiles over the salsa and meat. Distributing these flavorful, moisture-carrying ingredients across two layers, rather than piling them all on top, helps manage moisture.
Layer on the First Half of Cheese: Now, sprinkle about half of the shredded cheese evenly over the toppings. This cheese layer isn’t just for delicious meltiness; it also acts as a protective barrier, helping to shield the bottom layer of chips from the moisture of the meat and salsa as they heat up in the oven.
Add the Second Chip Layer: Gently place the remaining tortilla chips on top of the first layer of toppings and cheese. Spread them out as much as possible. Aim for a mostly even layer, avoiding creating a massive mound in the center, which can lead to uneven cooking and melting.
Distribute the Remaining Toppings: Sprinkle the rest of the seasoned meat mixture, dollop the remaining salsa, and scatter the rest of the chopped jalapenos or green chiles over the second layer of chips.
Pile on the Rest of the Cheese: Now it’s time for the grand finale of layering! Generously cover the entire top of the nachos with the remaining shredded cheese. Make sure you get cheese onto most of the chips and toppings. This top layer of cheese will melt into a glorious, gooey blanket, holding everything together and protecting the layers below.
Bake Until Bubbly and Crisp: Carefully place the platter or baking sheet into your preheated oven. Bake for 8 to 12 minutes. Keep a close eye on them! You’re looking for the cheese to be completely melted and bubbly, and the edges of the chips around the perimeter to look lightly golden and crisp. Baking at this temperature for a relatively short time melts the cheese while simultaneously crisping the chips underneath and around the edges. The exact time will depend on your oven and how loaded your nachos are.
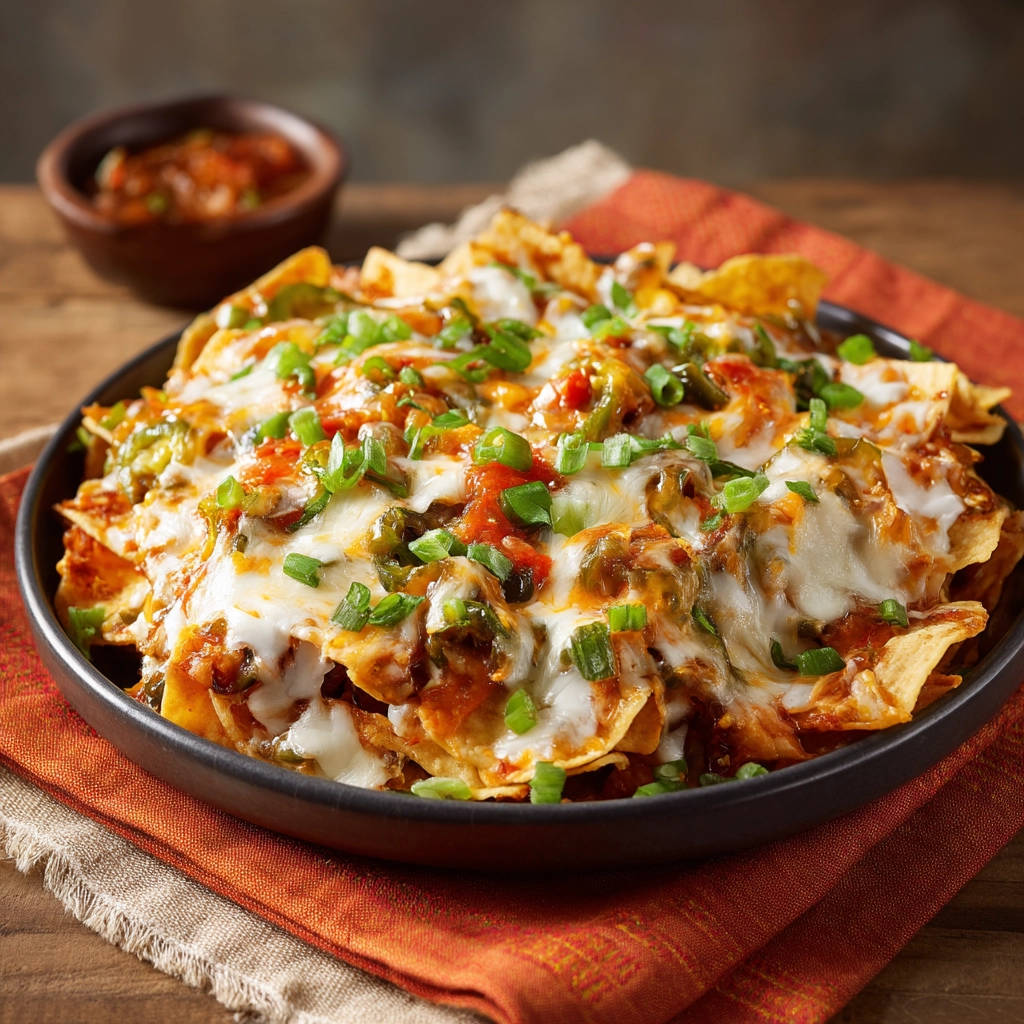
Finish with Freshness: Once the nachos are out of the oven, immediately sprinkle the chopped green onions over the hot, melted cheese and toppings. The heat will soften them slightly and release their fresh aroma.
Serve Immediately: The absolute best way to enjoy these loaded beef nachos is piping hot, straight from the oven, while the cheese is perfectly gooey and the chips are still wonderfully crisp. Don’t wait – dig in!
Tips for Nacho Perfection
Want to take your loaded beef nachos from great to absolutely legendary? Here are a few extra pointers and ideas:
- Chip Quality Matters: As mentioned, sturdy, thicker tortilla chips are your friend. Avoid very thin or flimsy chips, as they are more likely to break and become soggy regardless of the layering trick.
- Don’t Overload: While they are “loaded” nachos, avoid piling toppings excessively high in one spot. Spreading the ingredients out over the two layers helps manage moisture and promotes even cooking.
- Optional Toppings: The provided recipe is a fantastic base, but feel free to add more! Classic additions include a dollop of sour cream, spoonfuls of fresh pico de gallo, sliced black olives, or creamy avocado slices or guacamole. Add these after baking to keep them fresh and cool.
- Spice it Up: For extra heat, use a spicier taco seasoning, a hot salsa, add a pinch of cayenne pepper to the beef, or include extra pickled jalapenos. You could even drizzle a little hot sauce over the finished plate.
- Cheese Choice: While Monterey Jack and Mexican blend are recommended for their meltiness, you could also use cheddar, Colby Jack, or a blend of your favorites. The key is using a cheese that melts well.
- Partial Make-Ahead: You can cook and season the ground beef ahead of time and store it in the refrigerator. Reheat it gently before assembling the nachos. This saves a step just before baking.
- Serving Platter: Using an oven-safe platter means you can bake and serve on the same dish, minimizing cleanup. Make sure it’s large enough!
Serving Suggestions
Loaded Beef Nachos are often a meal in themselves, perfect for a casual dinner, game day, or movie night. However, they also pair wonderfully with a few simple sides to round out the experience.
Consider serving them alongside a light and refreshing salad to balance the richness. A simple green salad with a zesty lime dressing or a vibrant marinated tomato salad would be lovely. If you’re looking for more Mexican-inspired sides, a small serving of Mexican rice or a side of black or refried beans are classic companions.
Loaded Beef Nachos FAQs
Let’s address some common questions you might have about making the ultimate crispy loaded beef nachos.
Can I make the meat mixture ahead of time?
Absolutely! Cooking the seasoned ground beef can be done a day or two in advance. Store it in an airtight container in the refrigerator. When you’re ready to make the nachos, gently reheat the meat in a skillet or microwave before layering it onto the chips.
What’s the best way to reheat leftover nachos?
Reheating nachos without them turning into a total soggy mess is tricky, but possible! The best method is often in a preheated oven or air fryer at a lower temperature (around 300-325°F or 150-160°C) for just a few minutes until the cheese is re-melted and the chips are warm. Microwaving is generally discouraged unless you really don’t mind softness.
Can I use a different type of meat?
Yes! Ground chicken or turkey are excellent leaner alternatives to ground beef and work very well with taco seasoning. As mentioned in the ingredients, vegetarian crumbles are also a fantastic swap for a meat-free version.
How do I make these nachos spicier?
If you love heat, there are several ways to amp it up! Use a hot variety of taco seasoning. Choose a spicier salsa. Increase the amount of pickled jalapenos, or use a hotter variety like serranos (use sparingly!). You could also add a pinch of cayenne pepper to the meat mixture or drizzle a spicy cheese sauce or hot sauce over the finished nachos.
Why does this layering method prevent soggy chips?
The key is creating a structure where the moisture from the meat and salsa doesn’t sit directly on the bottom layer of chips. By layering chips, then toppings, then cheese (acting as a shield), and repeating, you distribute the moisture sources. Baking in the oven allows the heat to reach the chips from all sides, including underneath, helping them stay crisp even as the cheese melts and the toppings warm through. It’s all about thermal dynamics and moisture management!
Ready to Make Crispy Loaded Beef Nachos?
Say goodbye to soggy nacho disappointments forever! With this simple layering and baking technique, you’re just minutes away from a platter of loaded beef nachos that are perfectly crispy, cheesy, and utterly delicious.
Whether you’re hosting a game night, looking for an easy dinner, or just seriously craving some nachos, this recipe delivers on flavor and texture. Give it a try, and prepare to be amazed by the difference!
Did you try this recipe? How did your crispy nachos turn out? Let me know in the comments below! Your feedback helps me create even better recipes for you. Happy cooking!
Loaded Beef Nachos

Ingredients
- 1 large bag (about 10-12 ounces) tortilla chips
- 1 tablespoon vegetable oil
- 1 pound ground beef (or vegetarian crumbles)
- 1 packet (about 1 ounce) taco seasoning
- 1/2 cup water
- 1 cup chunky salsa
- 1/2 cup chopped pickled jalapeno slices or mild green chiles
- 2 cups (about 8 ounces) shredded Monterey Jack or Mexican blend cheese
- 2-3 green onions, chopped
Directions
- Preheat your oven to 375 degrees F (190 degrees C).
- Heat the vegetable oil in a large skillet over medium high heat. Add the ground beef and cook, breaking it up with a spoon, until browned. Drain off any excess grease.
- Stir in the taco seasoning and water. Bring to a simmer, then reduce heat and cook for 5-7 minutes, or until the sauce has thickened slightly. Remove from heat.
- Arrange about half of the tortilla chips in a single layer on a large oven-safe platter or baking sheet. This strategic base layer is key to avoiding sogginess.
- Sprinkle about half of the cooked meat mixture evenly over the chip layer. Dollop about half of the salsa and sprinkle half of the chopped jalapenos over the meat.
- Sprinkle about half of the shredded cheese over the toppings. The cheese helps create a protective layer.
- Gently add the remaining tortilla chips on top of the first layer, spreading them out as much as possible without piling too high.
- Distribute the remaining meat mixture, salsa, and jalapenos over the second layer of chips.
- Generously cover the top with the remaining shredded cheese, making sure to get cheese onto most of the chips and toppings.
- Place the platter or baking sheet in the preheated oven. Bake for 8-12 minutes, or until the cheese is completely melted and bubbly and the edges of the chips are lightly golden and crisp. Baking helps crisp the chips as the cheese melts.
- Carefully remove from the oven. Sprinkle the chopped green onions over the hot nachos immediately.
- Serve right away while the cheese is perfectly melted and the chips are still wonderfully crisp.