Baking homemade cookies can sometimes feel like a gamble, often leading to treats that are either too crumbly or unexpectedly cakey, rather than delightfully chewy. I understand that frustration completely, as I spent years perfecting the art of the ultimate soft-centered, slightly crisp-edged cookie. This recipe for Marbled Chocolate Vanilla Swirl Cookies is my absolute guarantee for that elusive perfect texture, every single time.
You’re about to discover the secrets to creating beautifully balanced, irresistible cookies that are as stunning to look at as they are delicious to eat.
The Secret to Unforgettable Marbled Swirl Cookies
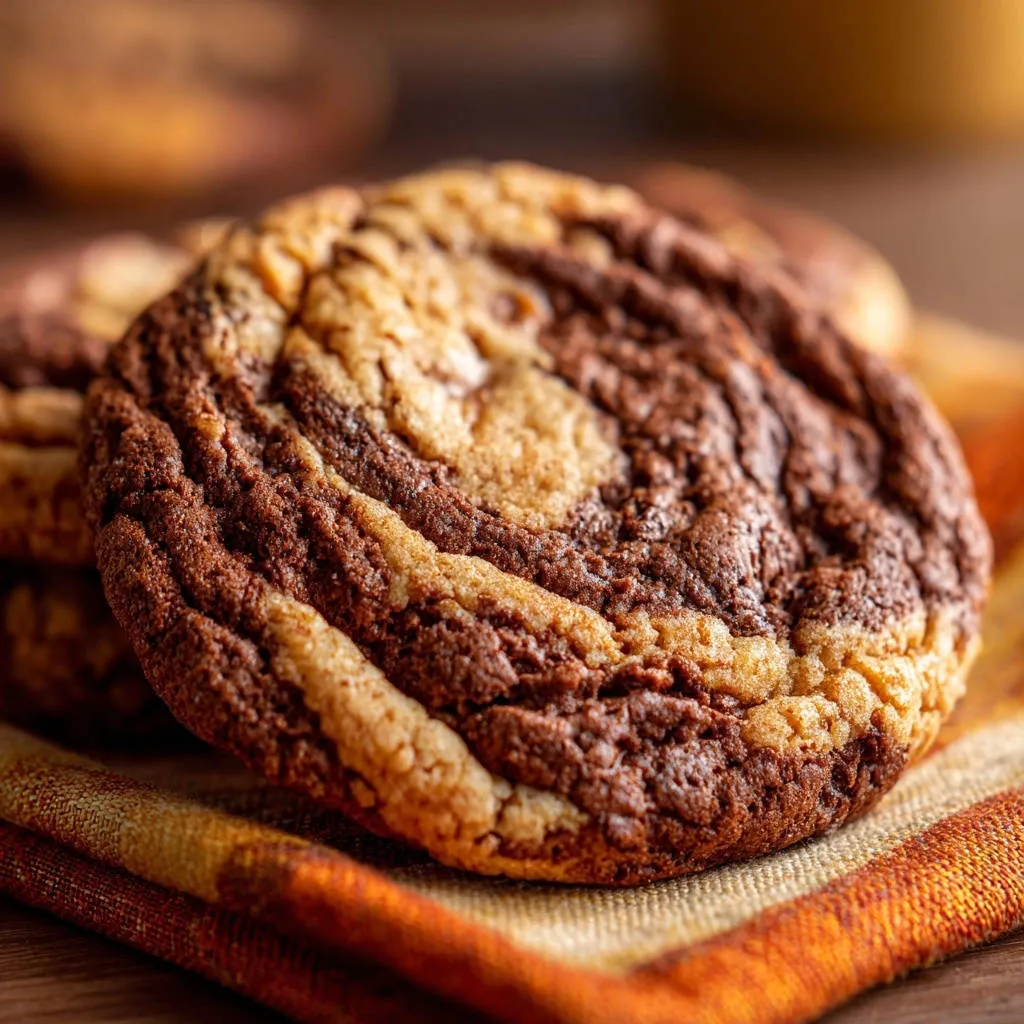
These aren’t just any cookies; they’re a symphony of rich chocolate and creamy vanilla, expertly swirled to create a visual and culinary masterpiece. Every bite offers a delightful contrast in both flavor and texture. This recipe stands out because it systematically addresses common cookie pitfalls, ensuring a consistently superior result.
Decoding the Perfect Texture: Soft, Chewy, and Crisp
Achieving the ideal cookie texture is a delicate balance, and this recipe nails it perfectly. You’ll find a wonderfully soft, moist interior that practically melts in your mouth, perfectly complemented by edges that are just crisp enough. This specific combination creates an addictive chewiness that keeps you reaching for another.
Why This Recipe Solves Common Cookie Woes
Many cookie recipes fall short, producing cookies that spread excessively, turn dry, or become too cakey. Our meticulous process, especially the chilling step, prevents unwanted spread and locks in moisture. This results in cookies that hold their beautiful marbled shape and maintain a tender, moist crumb, never dry or crumbly.
Crafting Flavor: Essential Ingredients for Your Swirl Cookies
The magic of these Marbled Chocolate Vanilla Swirl Cookies begins with selecting the right ingredients and understanding their unique roles. Each component is chosen to contribute to both the exquisite flavor and the desired chewy texture.
Flour and Leavening: The Foundation
All-purpose flour provides the necessary structure for our cookies, giving them shape without being overly dense. Baking soda acts as the primary leavening agent, ensuring a soft rise and contributing to that desirable chewy texture.
A touch of salt is crucial, balancing the sweetness and enhancing all the other flavors. Properly whisking these dry ingredients together ensures they are evenly distributed throughout the dough.
The Butter and Sugar Blend: Key to Texture
Softened unsalted butter is foundational for a rich, tender cookie. Creaming it with both granulated and light brown sugar creates the airy base that will translate into a soft chew.
Granulated sugar contributes to a slight crispness on the cookie’s exterior, while packed light brown sugar is essential for moisture and a deep, caramel-like chewiness. The molasses in brown sugar also prevents excessive spreading.
Eggs and Vanilla: Binding and Aroma
Large eggs serve as vital binders, adding moisture and richness to the dough. Incorporating them one at a time ensures proper emulsification, leading to a smoother, more cohesive batter.
Pure vanilla extract is the star flavoring for the vanilla portion of the cookie, providing a warm, aromatic foundation. Its presence elevates the overall taste experience, creating a comforting aroma during baking.
Unsweetened Cocoa: Achieving Rich Chocolate
Unsweetened cocoa powder is key to creating a deep, intense chocolate flavor in half of our dough. Using unsweetened ensures you control the sweetness level, allowing the pure cocoa notes to shine through.
This creates a beautiful contrast with the vanilla dough, both visually and in taste. The quality of your cocoa can significantly impact the richness of the chocolate swirl.
Essential Tools for Marbled Cookie Mastery
Having the right equipment at hand makes the baking process smoother and more enjoyable. These tools are standard for most kitchens, ensuring an accessible and fun baking experience.
Standard Baking Equipment Checklist
Medium and Large Mixing Bowls: Essential for separating wet and dry ingredients and later, the two dough flavors.
Electric Mixer: A hand mixer or stand mixer is indispensable for creaming butter and sugars until light and fluffy.
Measuring Cups and Spoons: Accuracy in measurements ensures the perfect cookie texture and flavor balance.
Parchment Paper: Lines baking sheets, preventing sticking and making cleanup a breeze. It also helps with even baking.
Baking Sheets: Sturdy sheets ensure even heat distribution for perfectly baked cookies.
Wire Cooling Rack: Allows air circulation around the cookies, preventing sogginess and promoting even cooling.
Optional Tools for Easier Swirling
Cookie Scoop: Ensures consistently sized cookies, which leads to uniform baking and a professional appearance.
Butter Knife or Skewer: These simple tools are perfect for creating the distinctive marble swirl pattern in your dough.
Your Step-by-Step Guide to Marbled Chocolate Vanilla Swirl Cookies
Preparing Your Dry Ingredients
In a medium bowl, combine your all-purpose flour, baking soda, and salt. Give them a good whisk to ensure everything is thoroughly mixed. This step is crucial for even leavening and seasoning throughout your cookies.
Creaming Butter and Sugars for Fluffiness
In a large bowl, cream together the softened unsalted butter, granulated sugar, and light brown sugar using an electric mixer. Beat them on medium-high speed for about 2 to 3 minutes until the mixture is light, fluffy, and noticeably paler in color. This aeration creates the foundational texture for your wonderfully chewy cookies.
Incorporating Wet and Dry Perfectly
Add the large eggs to your creamed mixture, one at a time, beating well after each addition to fully incorporate them. Stir in the vanilla extract for that classic sweet aroma. Next, gradually add your prepared dry ingredients to the wet mixture, mixing on low speed only until just combined.
Overmixing at this stage can develop too much gluten, resulting in tough cookies, so stop as soon as no streaks of flour remain.
Dividing and Infusing the Dough
Carefully divide your prepared cookie dough evenly into two separate bowls. To one bowl, add the unsweetened cocoa powder and mix it gently until the cocoa is fully incorporated, transforming it into a rich chocolate dough. Leave the other half as your bright vanilla dough.
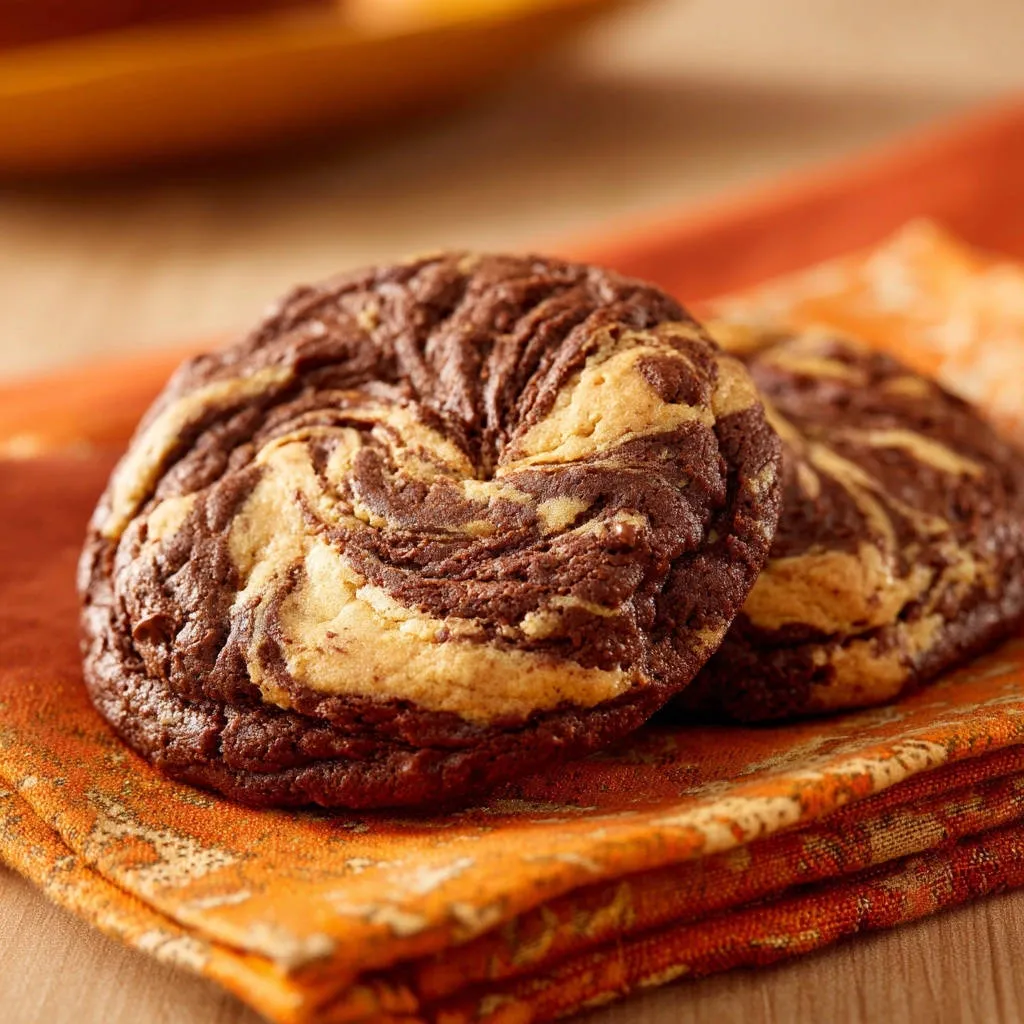
Mastering the Marble Swirl Technique
To achieve that stunning marble effect, take small, alternating spoonfuls of vanilla dough and chocolate dough and place them randomly onto a parchment-lined baking sheet. Aim for roughly 2 tablespoons of dough per cookie, placing them about 2 inches apart to allow for spread.
Gently swirl the two doughs together with the tip of a butter knife or a skewer just a few times. The key is to create a marbled look, not to fully blend them into a single color; less is definitely more here for defined swirls.
The Chilling Secret: Why it’s Non-Negotiable
This is the absolute secret for preventing excessive spread and developing that incredible chewy texture: once your dough balls are arranged on the baking sheet, place the entire sheet into the refrigerator. Chill the cookie dough for at least 30 minutes.
This vital step allows the butter to re-solidify, creating a more stable cookie that will spread less and bake up thicker and chewier. It truly makes all the difference in achieving perfect Marbled Chocolate Vanilla Swirl Cookies.
Preheating Your Oven Correctly
While your cookie dough is chilling, preheat your oven to 375 degrees Fahrenheit (190 degrees Celsius). Allowing the oven to come to full temperature before baking ensures consistent heat, which is crucial for even baking and proper cookie development.
Baking for Chewy Perfection (Don’t Overbake!)
Bake one sheet of cookies at a time for 9 to 11 minutes. Keep a close eye on them; you want the edges to be lightly golden and set, but the centers should still look slightly soft and even a little underdone. This “underbaked” appearance is exactly what guarantees a chewy, moist interior.
Overbaking is the quickest way to end up with dry, crispy cookies, so pull them out as soon as the edges are golden.
Cooling for Optimal Texture
Once baked, remove the cookies from the oven and let them cool on the baking sheet for a crucial 5 minutes. This allows the cookies to continue setting and firming up without overbaking.
After 5 minutes, carefully transfer them to a wire rack to cool completely. This prevents condensation and keeps the bottoms from getting soggy, ensuring a perfectly textured Marbled Chocolate Vanilla Swirl Cookie.
Unlock Pro-Level Cookie Secrets
Even with a foolproof recipe, a few insider tips can elevate your Marbled Chocolate Vanilla Swirl Cookies from great to truly exceptional. These professional insights will give you an edge in the kitchen.
Optimal Chilling for No-Spread Cookies
While 30 minutes is the minimum, chilling your dough for an hour or even overnight can further enhance chewiness and prevent spreading. For ultimate no-spread results, consider forming your dough balls and chilling them thoroughly, then freezing for 10-15 minutes just before baking.
Recognizing “Done” (and Avoiding Overbaking)
The visual cue for perfectly baked cookies is subtle but important. Look for a slight puffiness in the center, and edges that have turned a light golden-brown. The very center should still look soft, even slightly wet, and will firm up as it cools.
Resist the urge to bake longer if the centers look too soft, as this is precisely what delivers that coveted chewy texture.
Perfecting the Swirl Pattern
For truly distinct swirls, focus on minimal manipulation. After placing alternating dollops, take your knife or skewer and make only 2-3 gentle passes through the dough. Think of it more as creating a delicate ‘S’ shape or figure-eight rather than fully mixing.
The less you swirl, the more defined your beautiful vanilla and chocolate marbling will be. A light hand is key.
Ingredient Substitutions and Variations
While this recipe is optimized for success, you can experiment. For instance, you could use a mix of dark and milk chocolate cocoa for a different flavor profile. Consider adding a pinch of espresso powder to the chocolate dough to deepen its flavor without adding a coffee taste.
While this recipe focuses on classic flavors, feel free to get creative with other extracts or even sprinkles for special occasions.
Common Cookie Conundrums Solved
Even experienced bakers sometimes encounter hiccups. Here are solutions to common issues you might face when making your Marbled Chocolate Vanilla Swirl Cookies.
My Cookies Spreading Too Much?
Excessive spreading is typically due to butter that is too soft or insufficient chilling. Ensure your butter is softened, but not melted or greasy. Always follow the minimum 30-minute chilling time, or even longer for best results, especially in warm kitchens.
Additionally, an inaccurate oven temperature (too low) can cause spreading, so ensure your oven is fully preheated and consider using an oven thermometer for accuracy.
Why Are My Cookies Dry/Crumbly?
The most common culprit for dry or crumbly cookies is overbaking. Watch the baking time carefully and err on the side of slightly underbaking for optimal chewiness. Another factor could be too much flour, so always measure it correctly, ideally by weight for precision.
My Swirls Aren’t Defined!
If your marbling isn’t popping, you’re likely overmixing the two doughs. The goal is a subtle swirl, not a full blend. Use just a few gentle passes with your knife or skewer to create distinct lines of chocolate and vanilla, leaving plenty of contrast.
Enjoying and Storing Your Marbled Masterpiece
Once you’ve baked your perfect Marbled Chocolate Vanilla Swirl Cookies, you’ll want to enjoy them at their best and know how to keep them fresh.
Creative Serving Suggestions
These cookies are wonderful on their own, especially with a tall glass of cold milk or a warm cup of coffee or tea. For an extra decadent treat, serve them slightly warm with a scoop of vanilla bean ice cream or a drizzle of chocolate fudge sauce. They also make a fantastic addition to any dessert platter.
Best Practices for Storing Freshness
To maintain their optimal soft and chewy texture, store your baked Marbled Chocolate Vanilla Swirl Cookies in an airtight container at room temperature. They will remain fresh and delicious for up to 3-4 days. For extended freshness, you can also freeze the baked cookies for up to 2 months.
Freezing Dough for Later Indulgence
One of the best ways to enjoy fresh-baked cookies anytime is to freeze the unbaked dough. Simply form the swirled dough into balls, place them on a parchment-lined baking sheet, and freeze until solid. Transfer the frozen dough balls to an airtight freezer-safe bag.
When ready to bake, place frozen dough balls on a baking sheet and bake as directed, adding 1-2 minutes to the baking time. This method ensures warm, fresh cookies whenever the craving strikes, just like our perfectly chewy oatmeal cranberry cookies.
Your Marbled Swirl Cookie Questions Answered
Here are some common questions to help you master these delightful cookies.
Can I Use Different Flavorings?
Absolutely! While vanilla is classic, you could experiment with almond extract in the vanilla dough for a nutty twist, or a hint of peppermint extract in the chocolate dough for a festive treat. For other dessert inspirations, you might enjoy our recipe for decadent chocolate brownies which offers a different take on rich chocolate.
Is Chilling Really Necessary?
Yes, the chilling step is crucial for this Marbled Chocolate Vanilla Swirl Cookies recipe. It allows the butter to firm up, which prevents the cookies from spreading too much in the oven. More importantly, it helps the flavors meld and develops that wonderful chewy texture we’re aiming for.
How Long Do Marbled Chocolate Vanilla Swirl Cookies Last?
When stored properly in an airtight container at room temperature, your baked Marbled Chocolate Vanilla Swirl Cookies will stay fresh and delicious for 3 to 4 days. If you keep them in the refrigerator, they can last up to a week, though they’re best at room temperature.
Can I Make These Cookies Gluten-Free?
Yes, you can often adapt this recipe to be gluten-free. Substitute the all-purpose flour with a 1:1 gluten-free baking flour blend that contains xanthan gum. You might notice a slight difference in texture, but the results are generally very good. Always ensure your other ingredients are certified gluten-free as well.
Ready to Bake Your Best Swirl Cookies Yet?
You now have all the knowledge, tips, and expert guidance to bake truly exceptional Marbled Chocolate Vanilla Swirl Cookies. This recipe is more than just instructions; it’s a pathway to baking confidence and delicious satisfaction.
Don’t just make cookies; create a masterpiece that will impress everyone who tastes them. Happy baking, and don’t forget to share your beautifully swirled creations!

Marbled Chocolate Vanilla Swirl Cookies
Course: DessertCuisine: American CuisineDifficulty: easy4
24-30 cookies20
minutes10
minutes60
minutesAmerican Cuisine
Ingredients
2 1/4 cups all-purpose flour
1 teaspoon baking soda
1/2 teaspoon salt
1 cup (2 sticks) unsalted butter, softened
3/4 cup granulated sugar
1 cup light brown sugar, packed
2 large eggs
2 teaspoons vanilla extract
1/4 cup unsweetened cocoa powder
Directions
- In a medium bowl, whisk together the flour, baking soda, and salt. Set aside.
- In a large bowl, using an electric mixer, cream together the softened butter, granulated sugar, and light brown sugar until light and fluffy, about 2 to 3 minutes.
- Beat in the eggs one at a time, mixing well after each addition. Stir in the vanilla extract.
- Gradually add the dry ingredients to the wet ingredients, mixing on low speed until just combined. Do not overmix.
- Divide the dough evenly into two separate bowls. To one bowl, add the unsweetened cocoa powder and mix until fully incorporated, forming the chocolate dough. Leave the other bowl as vanilla dough.
- To create the marble swirl, take small, alternating spoonfuls of vanilla and chocolate dough and randomly place them onto a parchment-lined baking sheet. Gently swirl the two doughs together with a butter knife or skewer just a few times, being careful not to overmix them into a single color. Aim for 2 tablespoons of dough per cookie.
- This is the secret for that guaranteed chewy texture: Place the prepared dough balls onto the baking sheet, ensuring they are at least 2 inches apart. Now, chill the cookie dough on the baking sheet in the refrigerator for at least 30 minutes. This step is crucial for preventing spread and developing that perfect chew.
- Preheat your oven to 375 degrees Fahrenheit (190 degrees Celsius) while the dough chills.
- Bake one sheet at a time for 9 to 11 minutes, or until the edges are lightly golden and set, but the centers still look slightly soft and underdone. Do not overbake! This is key to keeping them chewy.
- Remove from the oven and let the cookies cool on the baking sheet for 5 minutes before transferring them to a wire rack to cool completely. This allows them to finish setting without becoming dry.
Notes
- Chilling the dough is crucial for chewiness and preventing spread. Avoid overbaking for a soft, chewy center.