
We’ve all been there: biting into a chicken skewer hoping for perfection, only to find it dry and disappointing. But I’ve discovered the simple secret to crafting incredibly tender and juicy Lemon Garlic Chicken Skewers every single time you cook them at home.
It’s all about a brilliant two-step process: a flavor-infusing marinade and a quick, strategic cook that locks in moisture. Prepare for skewers bursting with bright, aromatic flavor that are a joy to eat.
Why This Lemon Garlic Chicken Skewers Recipe Will Be Your New Favorite
Unlocking the Secret to Perfectly Tender & Juicy Chicken
The magic starts with a thoughtful marinade. Lemon juice tenderizes the chicken, while olive oil and spices infuse deep flavor.
Combined with a quick, high-heat cooking method, this recipe ensures each bite of your lemon garlic chicken is succulent, never dry.
Effortless Elegance: Quick Prep for Busy Weeknights
Don’t let the impressive presentation fool you; these Lemon Garlic Chicken Skewers are surprisingly easy to prepare. They require minimal active cooking time, making them a fantastic choice for busy weeknight dinners.
They’re also perfect for spontaneous backyard gatherings when you want maximum flavor with minimal fuss.
A Versatile Dish That Always Impresses
These flavorful skewers are incredibly versatile. They can be the star of a hearty meal, a delightful appetizer, or a vibrant addition to salads and grain bowls.
The bright Mediterranean flavors appeal to a wide range of palates, guaranteeing rave reviews from family and friends.
The Essential Ingredients for Flavorful Skewers
Choosing Your Chicken: Breast vs. Thighs
We recommend boneless, skinless chicken breast, cut into 1-inch cubes. It’s a lean protein that cooks quickly and absorbs the marinade beautifully.
If you prefer, boneless, skinless chicken thighs can also be used. They offer a slightly richer flavor and are more forgiving if you accidentally overcook them slightly.
The Dynamic Duo: Fresh Lemon & Garlic
Fresh lemon juice is indispensable. It brightens the flavor, cuts through richness, and acts as a natural tenderizer in the marinade.
Minced garlic provides a pungent, aromatic foundation. We use it both in the marinade for depth and as a fresh topping for an invigorating burst of flavor after cooking.
Aromatic Herbs & Pantry Staples
Olive oil carries the flavors and prevents the chicken from sticking. Dried oregano adds a classic, earthy Mediterranean note to the marinade.
Salt and black pepper are crucial for foundational seasoning. Finally, fresh parsley adds a vibrant, herbaceous finish and a pop of color to the dish.
Essential Tools for Skewer Success
Skewers: Wooden, Metal, and How to Prep Them
Wooden skewers are affordable and disposable, making cleanup easy. Remember to soak them in water for at least 30 minutes before use to prevent burning on the grill or in the pan.
Metal skewers are reusable and conduct heat efficiently, ensuring even cooking. They don’t require soaking but can get very hot, so handle them with care.
Your Cooking Method: Grill Pan, Outdoor Grill, or Oven
A grill pan is perfect for achieving beautiful char marks and a smoky flavor indoors. An outdoor grill offers that classic barbecue taste and excellent searing.
Alternatively, you can bake or broil these skewers in the oven. Broiling will give you some char, while baking provides a more even, gentle cook without the distinct grill marks.
Basic Kitchen Gear
You’ll need a couple of mixing bowls for marinating and preparing the fresh topping. Tongs are essential for safely turning the skewers during cooking.
Most importantly, a reliable meat thermometer ensures your chicken is cooked to a safe internal temperature of 165°F (74°C) without becoming overdone and dry.
Step-by-Step: Crafting Your Juicy Lemon Garlic Chicken Skewers
The Flavor Infusion: Marinating Your Chicken to Perfection
In a medium bowl, combine the 1.5 pounds of chicken cubes with 2 cloves of minced garlic, 1/4 cup fresh lemon juice, 2 tablespoons olive oil, 1 teaspoon dried oregano, 1/2 teaspoon salt, and 1/4 teaspoon black pepper.
Toss everything thoroughly until all the chicken pieces are well coated. This marination step is your first defense against dryness, infusing the chicken with bright flavors and tenderizing the meat.
Cover the bowl and refrigerate the chicken for at least 30 minutes, or up to 4 hours, allowing the flavors to meld and penetrate.
Preparing for the Heat: Skewer Threading Techniques
Preheat your grill pan or heavy-bottomed skillet over medium-high heat while you prepare the skewers. If using wooden skewers, ensure they’ve been soaking for at least 30 minutes.
Carefully thread the marinated chicken onto the soaked wooden or metal skewers. Leave a small space between each piece of chicken to ensure even cooking and proper browning.
This spacing is crucial, preventing the chicken from steaming and allowing heat to circulate, which keeps the chicken tender and develops delicious char marks.
The Quick Sear: Achieving Golden Char & Locking in Juices
Lightly brush the hot grill pan or skillet with a little extra olive oil. Place the chicken skewers on the hot pan, being careful not to overcrowd it.
Cook for 3-4 minutes per side, turning occasionally, until the chicken is beautifully cooked through and boasts appealing char marks. The key here is quick, high-heat cooking to sear the outside rapidly, effectively locking in all those precious juices.
Always confirm doneness with a meat thermometer; it should read 165°F (74°C) at the thickest part of the chicken, ensuring safety without overcooking.
The Fresh Finish: Aromatic Topping for a Burst of Flavor
Once cooked, transfer the hot skewers to a clean plate. In a small bowl, combine the remaining 2 cloves of minced garlic with 1 tablespoon of the chopped fresh parsley.
Sprinkle this aromatic mixture generously over the warm skewers. This fresh garlic-herb topping adds a vibrant burst of flavor and a touch of moisture, enhancing the overall taste and aroma.
Presenting Your Masterpiece: Garnish and Serve
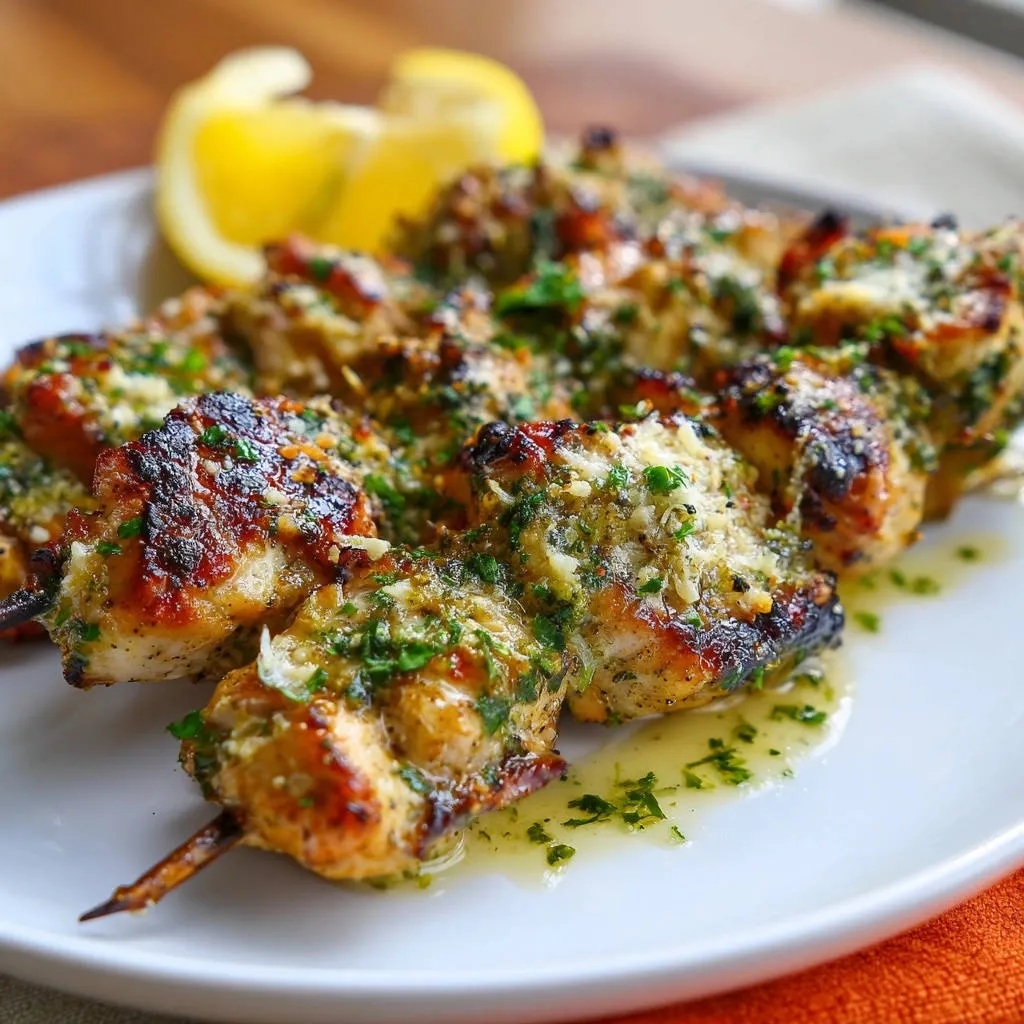
Garnish the finished Lemon Garlic Chicken Skewers with the remaining chopped parsley. A few fresh lemon wedges alongside offer a refreshing squeeze of extra citrus for serving.
Serve these perfectly juicy grilled chicken skewers immediately to enjoy their optimal flavor and texture. They are at their best straight off the heat.
Expert Tips & Tricks for Next-Level Skewers
Mastering the Marination Time
Marinating for at least 30 minutes is sufficient for flavor, but 2-4 hours is ideal for deeper infusion and tenderization. Avoid marinating with lemon juice for much longer than 4 hours, as the acid can start to break down the chicken’s texture too much, making it slightly mushy.
The Importance of Soaked Skewers
If you’re using wooden skewers, soaking them in water for a minimum of 30 minutes is non-negotiable. This prevents them from burning, charring, or splintering while cooking, keeping your focus on the chicken.
Don’t Overcrowd the Pan!
It’s tempting to cook all the skewers at once, but overcrowding your grill pan or skillet is a common mistake. Too many skewers at once will lower the pan’s temperature, causing the chicken to steam instead of sear.
Cook in batches if necessary, ensuring each skewer gets direct heat for that irresistible golden-brown char and juicy interior.
Internal Temperature is Key: A Chef’s Best Friend
Overcooking is the primary reason for dry chicken. Invest in a good instant-read meat thermometer and use it.
Cook until the thickest part of the chicken reaches precisely 165°F (74°C), then remove it from the heat immediately. This ensures safe eating and maximum juiciness.
Adding Zest for Extra Brightness
For an even more intense lemon aroma and flavor, consider adding a pinch of finely grated lemon zest to your marinade. You can also sprinkle a little fresh zest over the cooked skewers along with the parsley for a brighter finish.
Troubleshooting Common Skewer Challenges
Why are my chicken skewers dry?
Dry chicken skewers are usually a result of overcooking. Always use a meat thermometer to ensure the chicken reaches exactly 165°F (74°C) and no more.
Also, ensure you marinate for the minimum recommended time, as this helps tenderize the meat and locks in moisture. Cutting chicken into uniform pieces also promotes even cooking.
My wooden skewers keep burning!
The solution is simple: thoroughly soak your wooden skewers in water for at least 30 minutes before threading the chicken. This saturates the wood, making it much more resistant to burning.
If burning continues, or if you cook frequently, consider switching to reusable metal skewers, which eliminate this problem entirely.
The chicken isn’t cooking evenly.
Unevenly cooked chicken often stems from inconsistent piece sizes. Cut your chicken breast into uniform 1-inch cubes for predictable cooking times.
Another culprit is overcrowding the pan, which lowers the cooking temperature. Cook the skewers in batches if needed, giving each piece adequate space and direct heat for consistent doneness.
Frequently Asked Questions About Lemon Garlic Chicken Skewers
Can I prepare the chicken ahead of time?
Absolutely! You can marinate the chicken for up to 4 hours in the refrigerator. For ultimate convenience, thread the chicken onto the skewers up to an hour before you plan to cook them, keeping them covered and chilled.
What are good side dishes to serve?
These Lemon Garlic Chicken Skewers pair beautifully with light and fresh sides. Try them alongside a vibrant simple summer tomato salad, fluffy couscous, or a generous portion of crispy roasted cauliflower.
Can I make this recipe dairy-free or gluten-free?
Yes, this recipe is naturally both dairy-free and gluten-free, making it a wonderful and inclusive option for guests with various dietary needs.
How long do leftovers last?
Cooked Lemon Garlic Chicken Skewers can be stored in an airtight container in the refrigerator for up to 3-4 days. For best results, remove the chicken from the skewers before storing.
Serving Suggestions & Creative Pairings
Vibrant Salads and Roasted Vegetables
Complement the bright flavors of these skewers with a refreshing green salad tossed in a light vinaigrette. Roasted asparagus, zucchini, or bell peppers make excellent, easy-to-prepare vegetable sides that roast quickly alongside your chicken.
Grains and Starches for a Complete Meal
For a more substantial meal, serve your skewers over a bed of fluffy white rice, quinoa, or herbed couscous. Warm pita bread or a side of crispy garlic parmesan potato wedges also provide satisfying starch components.
Complementary Sauces and Dips
While delicious on their own, a light dipping sauce can elevate these skewers further. Consider a simple homemade tzatziki or a cool cucumber-dill yogurt sauce. A drizzle of extra fresh lemon juice or a simple herb-infused olive oil also works wonders.
Storing & Reheating Your Delicious Skewers
Proper Storage for Freshness
Allow any leftover chicken skewers to cool completely before storing. For optimal freshness and to prevent them from drying out, it’s best to remove the chicken pieces from the skewers.
Store the chicken in an airtight container in the refrigerator, and ensure it’s placed in the fridge within two hours of cooking.
Best Practices for Reheating
To reheat, place the chicken pieces in a single layer on a baking sheet and warm gently in a preheated oven at 300°F (150°C) until just heated through.
Alternatively, a skillet with a splash of broth or water over medium-low heat can help retain moisture. Avoid high heat or prolonged microwave reheating, as this can dry out the chicken.
Your New Go-To Recipe: Enjoy & Share!
Once you taste the vibrant flavors and experience the tender perfection of these Lemon Garlic Chicken Skewers, you’ll understand why this recipe is a keeper. It’s a culinary triumph that brings gourmet taste to your everyday table.
Don’t forget to try this exceptional recipe and share your culinary successes with us! We love seeing your creations, and who knows, your delicious Lemon Garlic Chicken Skewers might just inspire others!

Lemon Garlic Chicken Skewers
Course: Main CourseCuisine: Mediterranean cuisineDifficulty: easy4
servings (8-10 skewers)45
minutes12
minutes60
minutesMediterranean cuisine
Ingredients
1.5 pounds boneless, skinless chicken breast, cut into 1-inch cubes
4 cloves garlic, minced (divided)
1/4 cup fresh parsley, chopped (divided)
1/4 cup fresh lemon juice (from 1-2 lemons)
2 tablespoons olive oil
1 teaspoon dried oregano
1/2 teaspoon salt
1/4 teaspoon black pepper
8-10 wooden skewers, soaked in water for 30 minutes
Directions
- In a medium bowl, combine the chicken cubes, 2 cloves of minced garlic, lemon juice, olive oil, dried oregano, salt, and black pepper. Toss well to ensure all chicken pieces are coated. This crucial marination step is your first line of defense against dryness, infusing flavor and tenderizing the meat. Cover the bowl and refrigerate for at least 30 minutes, or up to 4 hours.
- Preheat a grill pan or large heavy-bottomed skillet over medium-high heat. While the pan heats, thread the marinated chicken onto the soaked wooden skewers, leaving a small space between each piece to ensure even cooking. This prevents steaming and allows for proper browning and quick heat penetration, keeping the chicken tender.
- Lightly brush the hot grill pan or skillet with a little extra olive oil. Place the chicken skewers on the hot pan, being careful not to overcrowd it. Cook for 3-4 minutes per side, turning occasionally, until the chicken is cooked through and has beautiful char marks. The key here is quick, high-heat cooking to sear the outside and lock in juices, preventing the chicken from drying out. A meat thermometer should read 165°F (74°C) at the thickest part.
- Once cooked, transfer the skewers to a clean plate. In a small bowl, combine the remaining 2 cloves of minced garlic and 1 tablespoon of the chopped fresh parsley. Sprinkle this mixture over the warm skewers. This fresh garlic-herb topping adds a burst of flavor and a touch of moisture after cooking.
- Garnish with the remaining chopped parsley and a lemon wedge for serving. Serve immediately and enjoy your perfectly juicy chicken skewers!
Notes
- Soak wooden skewers for at least 30 minutes to prevent burning on the grill or pan.