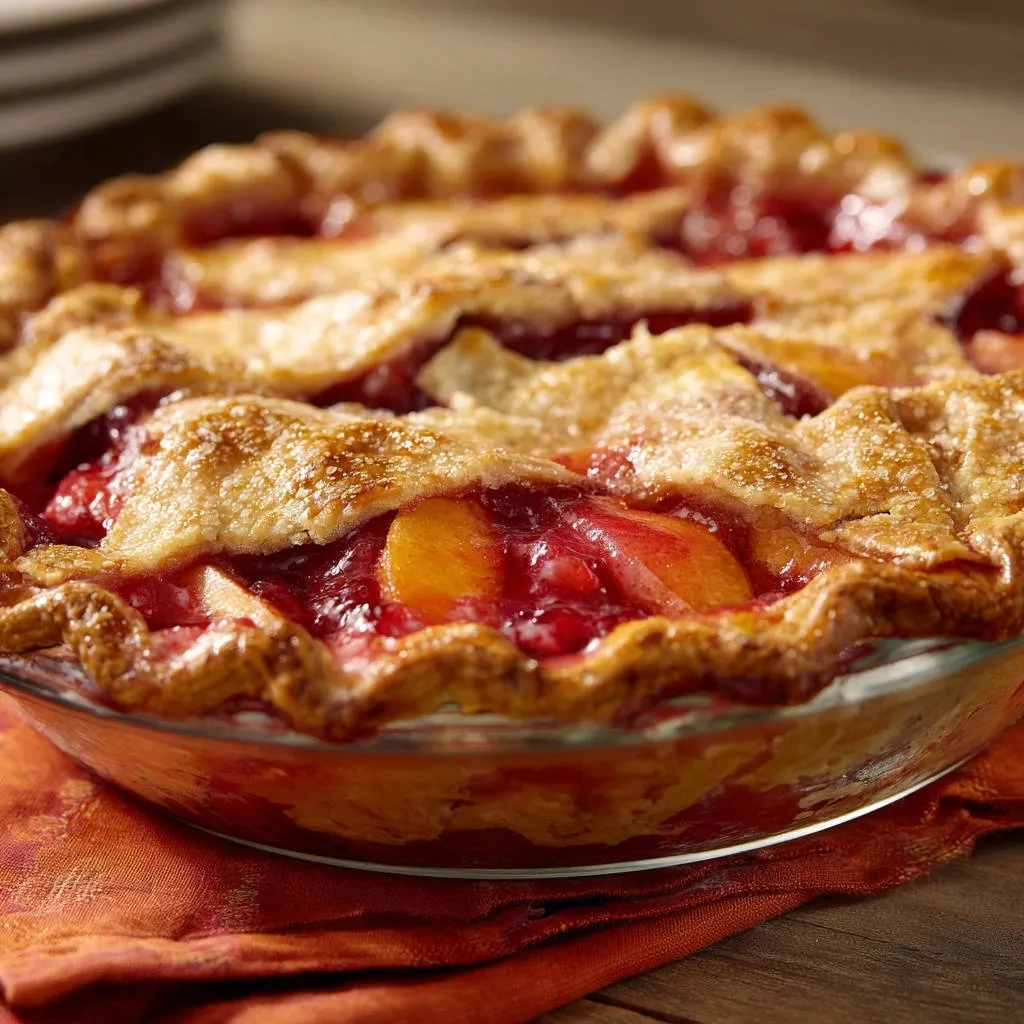
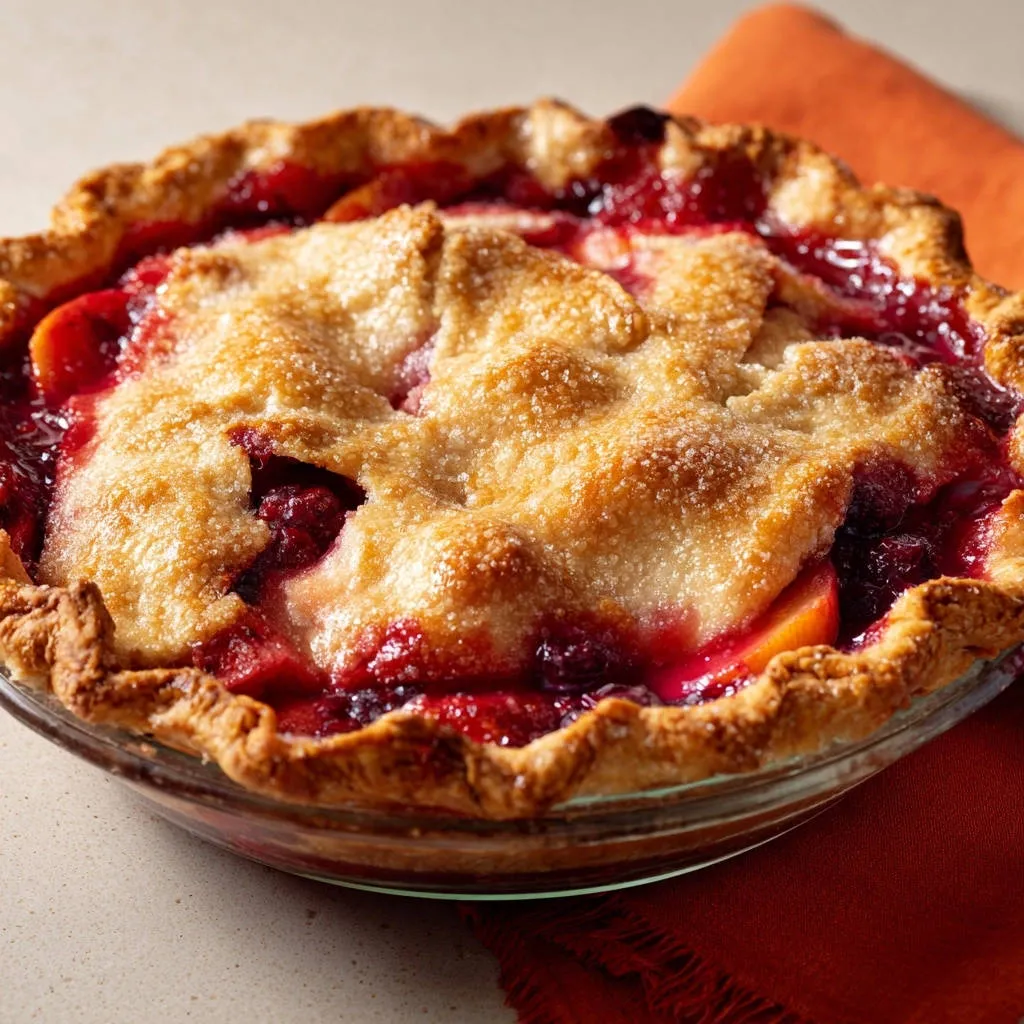
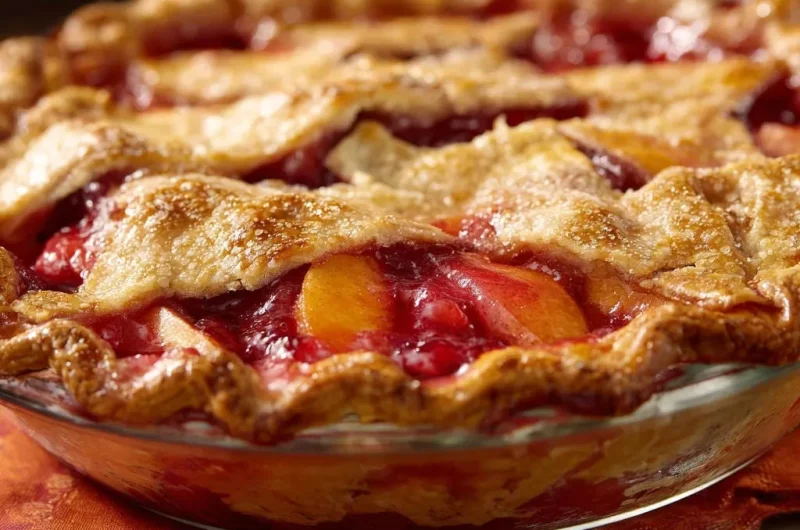
There’s nothing quite like the disappointment of cutting into a beautiful pie, only to find the fruit filling swimming in a watery mess. I’ve been there too many times! This recipe for Homemade Peach Berry Pie is the culmination of years of perfecting a perfectly set, vibrantly flavorful fruit filling that holds its shape beautifully every single slice.
Get ready to master a true dessert classic, ensuring every forkful delivers that ideal balance of sweet, tart, and tender fruit encased in a golden, flaky crust. This isn’t just a recipe; it’s your secret weapon for pie perfection.
The Secret Sauce: Why This Homemade Peach Berry Pie Excels
No More Soggy Bottoms: The Cornstarch Advantage
Cornstarch is the unsung hero in this Homemade Peach Berry Pie, acting as our thickening “secret weapon.” It rapidly gelatinizes when heated, effectively binding the fruit juices to create a thick, luscious filling.
Using the precise amount ensures your pie filling is never watery, providing that ideal, spoonable consistency that truly elevates the fruit flavors without any excess liquid.
The Magic of the Mixed Fruit Medley
The combination of sweet, juicy peaches and bright, slightly tart berries (like raspberries or cherries) creates a dynamic flavor profile that’s simply irresistible. Peaches offer a soft, fragrant base, while berries burst with tangy notes, preventing the pie from being overly sweet.
Selecting ripe, high-quality fruit is paramount; perfectly ripe peaches offer the best texture and sweetness, complementing the vibrant tartness of fresh berries.
The Crucial Cooling Period: Patience Pays Off
While the aroma of a freshly baked pie is tempting, the 3-4 hour cooling time is absolutely non-negotiable for this Homemade Peach Berry Pie. This extended rest allows the cornstarch to fully set and the filling to firm up properly.
Skipping this step will inevitably lead to a runny filling, even if baked perfectly. Patience truly delivers that clean, perfect slice every time.
Gather Your Goodies: Building Blocks for Your Perfect Pie
The Flaky Foundation: Pie Dough Essentials
A double-crust pie dough forms the backbone of our delicious pie. Whether you opt for a quality store-bought brand for convenience or use your favorite homemade recipe, ensure it’s well-chilled.
Keeping the dough cold is crucial for manageability and for achieving that desirable flaky texture. Cold dough prevents butter from melting too quickly, creating steam pockets during baking.
Sweet & Tangy Harmony: The Fruit Filling Stars
Our star ingredients are 4 cups of mixed fruit, ideally sliced peaches and whole raspberries or pitted cherries. Choose peaches that are ripe but still firm, offering sweetness and structural integrity.
Fresh berries provide a delightful tart counterpoint. Feel free to use other berries like blueberries or blackberries depending on what’s in season or your preference.
The Thickening Agent & Flavor Boosters
Granulated sugar (3/4 cup) sweetens the fruit, and you can adjust the quantity based on your fruit’s natural sweetness. Our “secret weapon,” 1/4 cup cornstarch, guarantees a thick, set filling.
A tablespoon of fresh lemon juice brightens the fruit flavors, preventing the pie from tasting flat, while 1/4 teaspoon of salt balances the sweetness, enhancing the overall taste profile.
Finishing Touches: Butter, Egg Wash, & Coarse Sugar
Small pieces of unsalted butter, dotted over the fruit filling, melt into the pie, adding richness and a subtle creaminess. A beaten egg forms an egg wash, brushed over the top crust.
This wash creates a beautiful golden-brown, glossy finish. Coarse sugar, sprinkled on top, adds a delightful sparkle and a textural crunch to every bite of your Homemade Peach Berry Pie.
Essential Gear: Tools for a Seamless Pie-Making Experience
Baking Essentials
9-inch Pie Dish: This standard size is perfect for creating a classic fruit pie, ensuring even baking and a beautiful presentation.
Baking Sheet: Essential for placing under the pie during baking, it catches any potential drips and prevents a messy oven.
Large Mixing Bowl: Used for gently combining all the fruit filling ingredients, ensuring everything is evenly coated.
Measuring Cups & Spoons: For precise ingredient measurements, crucial for the right balance of flavors and textures.
Dough & Assembly Aids
Rolling Pin: Necessary for uniformly rolling out your pie dough discs, ensuring an even crust thickness.
Pastry Brush: Ideal for applying the egg wash evenly over the top crust, contributing to that desired golden-brown finish.
Knife or Pastry Wheel: Used for cutting precise strips for a lattice top or creating steam vents in a solid top crust.
Aluminum Foil: A crucial preventative measure to protect pie crust edges from over-browning during the longer bake time.
Your Path to Perfection: Crafting Your Homemade Peach Berry Pie
Setting the Stage: Oven Prep & Crust Laying
- Preheat Oven & Prep First Crust:
Set your oven to 425°F (220°C). Roll out one pie dough disc and gently fit it into a 9-inch pie dish, leaving a 1-inch overhang. Chill in the refrigerator while you prepare the filling.
The Heart of the Pie: Building the Flavorful Filling
- Combine Fruit & Thickening Agents:
In a large bowl, gently combine the mixed fruit, granulated sugar, cornstarch, lemon juice, and salt.
Stir very gently until the fruit is evenly coated. This ensures the cornstarch is distributed for optimal thickening and prevents a watery filling.
- Fill the Crust:
Pour the prepared fruit mixture into your chilled pie crust. Evenly dot the top of the fruit filling with the small pieces of unsalted butter.
The Art of the Top Crust: Lattice or Solid
- Prepare Second Crust:
Roll out the second pie dough disc.
Decide if you want to cut it into even strips for a decorative lattice top or place it whole over the filling and cut steam vents.
- Seal & Crimp:
If making a lattice, weave the strips carefully. For a solid top, place it over the filling and make several slits. Trim and crimp the edges of both crusts together firmly to seal the pie.
The Golden Finish: Egg Wash & Bake Initiation
- Apply Egg Wash & Sugar:
Brush the entire top crust with the beaten egg wash, which helps achieve a beautiful golden-brown color.
Sprinkle generously with coarse sugar for added sparkle and crunch.
- Initial High-Heat Bake:
Place the pie on a baking sheet to catch any potential drips. Bake for an initial 15 minutes at 425°F (220°C).
This high heat helps to set the crust quickly and ensures a crisp bottom.
The Long Bake & The Crucial Cool Down
- Reduce Heat & Continue Baking:
Reduce the oven temperature to 375°F (190°C). Continue baking for another 35-45 minutes, or until the crust is deeply golden brown and the filling is visibly bubbly and thick around the edges.
If the crust edges start to brown too quickly, loosely cover them with aluminum foil to prevent burning. The bubbling is a key indicator the thickener is working.
- The Essential Cooling Period:
Transfer the baked pie to a wire rack and cool completely for at least 3-4 hours before slicing and serving.
This resting time is absolutely critical for the fruit filling to fully set and thicken, ensuring perfect, clean slices of your Homemade Peach Berry Pie.
Chef’s Secrets: Elevating Your Peach Berry Pie Game
Mastering Your Pie Dough
Keep it Cold: Ensure your pie dough is very cold when working with it, from rolling to transferring. This prevents it from shrinking in the oven and helps achieve that coveted flaky, tender crust.
Don’t Overwork: Handle pie dough minimally and gently. Overworking develops gluten, which can lead to a tough, unappetizing crust. Work quickly and precisely.
Perfecting Your Fruit Filling
Fruit Choice Matters: Use ripe but firm peaches for the best texture and flavor that holds up to baking. Don’t be afraid to experiment with other berries like blueberries, blackberries, or even a mix for a truly custom peach berry pie.
Taste and Adjust Sweetness: Always taste your fruit mixture before adding it to the crust. If your fruit is particularly sweet or tart, adjust the sugar accordingly, adding a tablespoon more or less as needed.
Baking & Presentation Pointers
Prevent Over-Browning: Always keep aluminum foil handy. As soon as your crust edges reach a beautiful golden color, tent them lightly with foil to protect them from burning while the rest of the pie finishes baking.
Know When It’s Done: Look for a deeply golden-brown crust, especially on the bottom. Crucially, the filling should be visibly bubbling vigorously in the center, not just at the edges. This bubbling indicates the cornstarch has fully activated.
Solving Common Pie Puzzles: Troubleshooting Your Bake
Cause: Often due to an underbaked bottom crust, or excessive moisture from the fruit not being properly thickened.
Solution: Ensure your pie bakes long enough for the bottom crust to fully cook and become golden. Baking on a hot baking sheet helps conduct heat to the bottom. The essential cooling period allows the filling to set, preventing moisture from seeping into the crust.
Cause: Thin crust edges or a hot spot in your oven can cause the edges to brown much quicker than the center.
Solution: Loosely tent the edges of your Homemade Peach Berry Pie with aluminum foil as soon as they reach your desired golden color. A reusable pie shield is also an excellent investment for consistent results.
Cause: Insufficient cornstarch for the juiciness of the fruit, or failing to allow adequate cooling time for the thickener to fully set.
Solution: Stick precisely to the recipe’s cornstarch amount, or slightly increase it (by 1-2 teaspoons) if your fruit is exceptionally juicy. Most importantly, absolutely do not skip the 3-4 hour cooling period; it’s non-negotiable for a perfectly set filling.
The Dreaded Soggy Bottom
Crust Edges Burning Too Fast
Runny or Underset Filling
Beyond the Oven: Serving & Storing Your Delicious Pie
Perfect Pairings: What to Serve With Pie
A warm slice of Homemade Peach Berry Pie is heavenly on its own, but it truly shines with simple accompaniments. A scoop of creamy vanilla bean ice cream creates a delightful contrast of warm and cold.
Alternatively, a dollop of freshly whipped cream adds a luscious, airy touch. A light dusting of powdered sugar can also elevate its visual appeal and add a hint of extra sweetness.
Storing Your Leftovers Safely
If your pie is completely cooled, it can be stored loosely covered at room temperature for up to 24 hours. For longer storage, or if your kitchen is warm, refrigerate the pie.
Covered loosely with plastic wrap or foil, it will stay fresh in the refrigerator for up to 3-4 days. Allow refrigerated slices to come to room temperature or gently reheat before serving for the best flavor and texture.
Make-Ahead & Freezing Options
You can prepare the entire Homemade Peach Berry Pie ahead of time and freeze it unbaked for future enjoyment. Assemble the pie completely, then wrap it tightly in plastic wrap and then foil.
Freeze for up to 3 months. When ready to bake, place the frozen pie directly into a preheated oven (no thawing needed), increasing baking time by about 20-30 minutes. Baked pies can also be frozen, wrapped tightly, for up to 1-2 months; thaw in the refrigerator overnight.
Your Peach Berry Pie Questions, Answered!
Can I Use Frozen Fruit for This Recipe?
Yes, you can absolutely use frozen fruit for this Homemade Peach Berry Pie! Do not thaw the fruit beforehand; add it directly to the cornstarch mixture while frozen.
Frozen fruit releases more liquid, so you might consider adding an extra teaspoon of cornstarch to ensure a perfectly set filling. Bake as directed, adjusting the time if needed.
What If I Don’t Have Cornstarch?
If you don’t have cornstarch, you can substitute it with tapioca starch or all-purpose flour. For tapioca starch, use the same amount as cornstarch. For flour, you’ll need to use about double the amount (1/2 cup) for similar thickening power, but it will result in a slightly cloudier filling.
Tapioca starch yields a clearer, glossier filling, similar to cornstarch. Both alternatives will work beautifully in your peach berry pie.
How Long Does Homemade Peach Berry Pie Last?
A properly cooled and stored Homemade Peach Berry Pie will last about 1 day at room temperature, provided it’s in a cool, dry place. When refrigerated, covered loosely, it will remain fresh and delicious for 3-4 days.
For optimal enjoyment, allow slices to warm slightly before serving after refrigeration.
Can I Make This Pie Gluten-Free?
Yes, you can easily make this peach berry pie gluten-free! Simply use your favorite store-bought gluten-free pie crust or prepare a homemade gluten-free pie dough recipe.
Ensure all other ingredients are naturally gluten-free. The filling recipe itself is already gluten-free, so the only substitution needed is for the crust.
Ready to Create Your Own Pie Legacy?
Now you have all the knowledge and expert tips to bake a truly exceptional Homemade Peach Berry Pie that is perfectly set, wonderfully flavorful, and never soggy. This recipe is more than just ingredients and steps; it’s a guide to creating memorable moments and earning rave reviews.
Gather your ingredients, embrace the process, and get ready to enjoy the ultimate slice of summer. Don’t be shy-share your pie creations with us!
Homemade Peach Berry Pie
Course: DessertCuisine: American CuisineDifficulty: easy8
servings30
minutes50
minutes60
minutesAmerican Cuisine
Ingredients
1 double crust pie dough, chilled (store-bought or your favorite recipe)
4 cups mixed fruit (sliced peaches and whole raspberries or pitted cherries)
3/4 cup granulated sugar (adjust to fruit sweetness)
1/4 cup cornstarch (the secret weapon for thickening)
1 tablespoon fresh lemon juice
1/4 teaspoon salt
2 tablespoons unsalted butter, cut into small pieces
1 large egg, beaten (for egg wash)
1 tablespoon coarse sugar, for sprinkling
Directions
- Preheat your oven to 425 degrees Fahrenheit. Roll out one pie dough disc and gently fit it into a 9-inch pie dish. Trim the edges, leaving about a 1-inch overhang. Chill in the refrigerator.
- In a large bowl, combine the mixed fruit, granulated sugar, cornstarch, lemon juice, and salt. Stir gently until the fruit is evenly coated with the cornstarch mixture. This step is crucial for achieving a thick, luscious filling without excess liquid.
- Pour the fruit mixture into the chilled pie crust. Dot the top of the fruit with the small pieces of butter.
- Roll out the second pie dough disc. Cut it into even strips for a lattice top, or place it whole over the filling and cut steam vents. Weave the lattice strips over the filling. Trim and crimp the edges of both crusts together to seal.
- Brush the top crust with the beaten egg wash and sprinkle with coarse sugar.
- Place the pie on a baking sheet to catch any drips, then bake for 15 minutes at 425 degrees Fahrenheit.
- Reduce the oven temperature to 375 degrees Fahrenheit and continue baking for another 35-45 minutes, or until the crust is golden brown and the filling is bubbly and thick. If the crust starts to brown too quickly, loosely cover the edges with aluminum foil.
- Cool the pie completely on a wire rack for at least 3-4 hours before slicing and serving. This resting period is essential for the filling to fully set and thicken.
Notes
- Cooling completely for 3-4 hours is crucial for the filling to fully set and thicken.