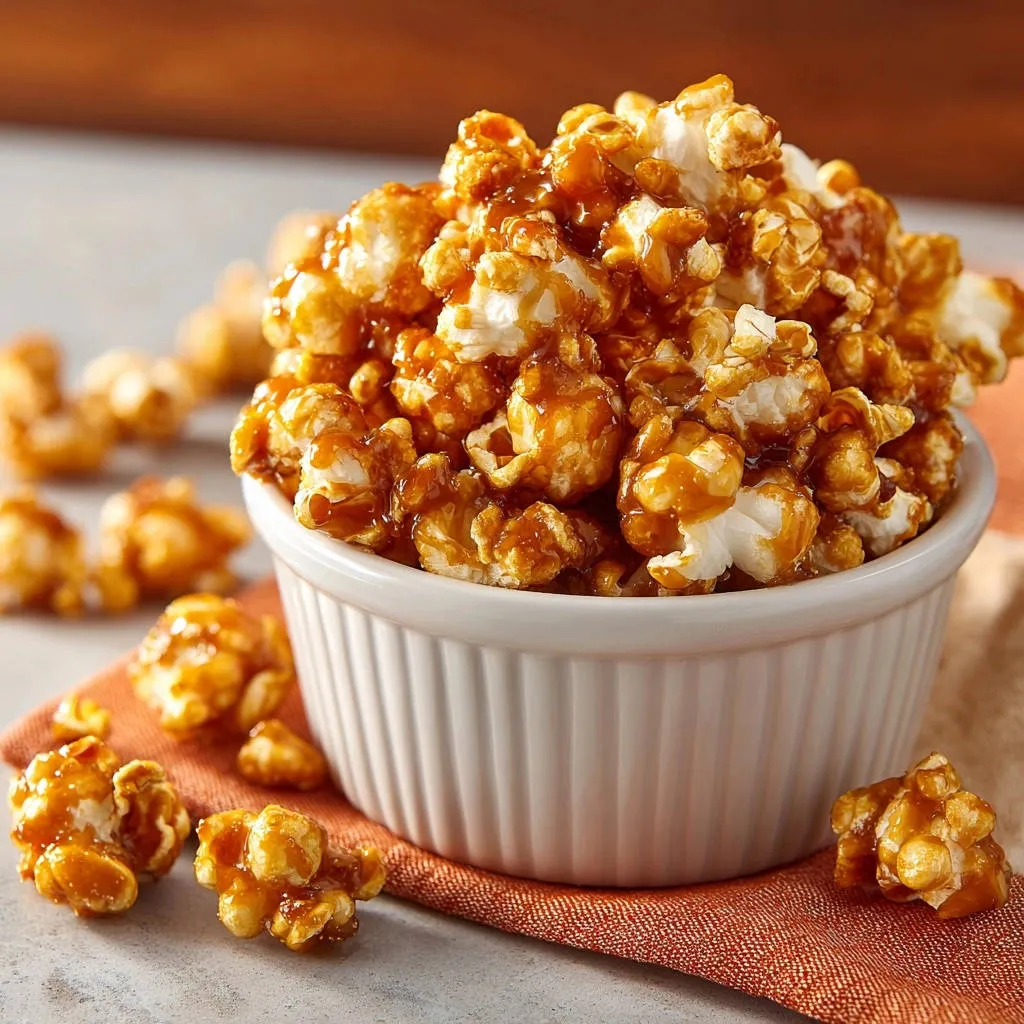
For years, I struggled to achieve that perfect, non-sticky batch of Classic Caramel Popcorn at home, often ending up with a frustrating, sugary clump. My secret, discovered through countless trials, ensures every kernel is individually coated, perfectly crisp, and never sticky. Get ready for homemade caramel popcorn bliss that will impress everyone.
The Secret to Perfectly Coated, Clump-Free Caramel Popcorn
Why This Recipe Stands Out From the Rest
This recipe provides truly superior results. The key lies in a specific ingredient and precise timing, leading to a caramel that wraps each popcorn kernel without fusing them into an unmanageable block.
You’ll achieve a consistent, satisfying crunch with every bite. The texture is light, airy, and wonderfully crisp, making it an absolute joy to eat.
A Crowd-Pleaser for Any Occasion
Whether you’re hosting a movie night, looking for a unique homemade gift, or simply craving a sweet and salty snack, this classic caramel popcorn is always a hit.
It’s the ultimate treat that brings smiles to faces, perfect for parties, holiday gatherings, or a quiet evening at home.
Gathering Your Sweet & Salty Cast: Essential Ingredients
The Popcorn Base: Light & Airy Foundations
Unpopped Popcorn Kernels (1/2 cup): The foundation of our crispy caramel popcorn. Choose good quality kernels for optimal expansion and a fluffy texture.
It’s crucial to pop these without any oil, butter, or salt. An air popper is ideal for this, ensuring a neutral base for our rich caramel coating.
Crafting the Caramel: Sweetness and Structure
Granulated Sugar (1 cup): Provides the primary sweetness and caramel flavor. Its crystallization is controlled by other ingredients to ensure a smooth texture.
Unsalted Butter (1/2 cup / 1 stick): Adds richness, depth of flavor, and contributes to the creamy consistency of the caramel. Using unsalted allows you to control the overall saltiness.
Light Corn Syrup (1/4 cup): This is vital for preventing sugar crystallization, ensuring a smooth, pliable caramel. It’s a non-negotiable for that perfectly chewy, yet crisp, classic caramel popcorn texture.
Heavy Cream (1/4 cup): Contributes to the caramel’s luscious creaminess and helps achieve that signature rich flavor. It makes the caramel softer and more approachable.
Fine Sea Salt (1/2 teaspoon): Balances the sweetness beautifully and enhances all the flavors. Don’t skip this; the salt makes the caramel truly sing.
Vanilla Extract (1 teaspoon): Added at the very end for aromatic depth. It complements the caramel’s sweetness and adds a warm, inviting note.
The Magic Ingredient: Baking Soda Explained
Baking Soda (1/2 teaspoon): This is the game-changer for non-sticky caramel popcorn. When added to the hot caramel, it reacts to create tiny carbon dioxide bubbles.
These bubbles aerate the caramel, making it lighter, less dense, and easier to coat the popcorn evenly. Most importantly, it prevents the caramel from becoming a sticky, hard candy that’s impossible to separate.
Essential Tools for Your Caramel Popcorn Journey
Must-Have Kitchen Gadgets for Success
Heavy-Bottomed Saucepan: Crucial for even heat distribution, preventing the caramel from burning at the bottom while cooking.
Candy Thermometer: Absolutely essential for precise temperature control. Reaching 250°F ensures the caramel sets correctly for the perfect snap.
Very Large Heatproof Bowl: You’ll need ample space to toss the popped popcorn with the hot caramel quickly and efficiently.
Large Baking Sheets (2): Necessary for spreading the coated popcorn in a single layer, allowing it to bake evenly and crisp up.
Parchment Paper or Silicone Baking Mats: Non-negotiable for easy release. Caramel is incredibly sticky, and these liners ensure your popcorn doesn’t fuse to the pan.
Optional Aids for Perfection
Heatproof Spatula or Wooden Spoon: Ideal for gently folding and stirring the popcorn in the hot caramel. It helps distribute the coating evenly without crushing the popcorn.
Step-by-Step to Irresistible Classic Caramel Popcorn Perfection
Preparing Your Popcorn Base
Begin by popping your 1/2 cup of unpopped popcorn kernels. Use an air popper, stovetop, or microwave, but avoid adding any butter or salt. We want a clean, neutral base.
Once popped, immediately transfer the fluffy popcorn to a very large heatproof bowl. This ensures it’s ready for the caramel as soon as it’s cooked.
Setting Up for Success: Oven & Pans
Preheat your oven to 250°F (120°C). This low heat is critical for baking the caramel onto the popcorn, allowing it to crisp up without burning.
Line two large baking sheets with parchment paper or silicone baking mats. This prevents the sticky caramel from adhering to your pans and makes cleanup a breeze.
Mastering the Caramel Sauce on the Stovetop
In a heavy-bottomed saucepan, combine the granulated sugar, unsalted butter, light corn syrup, heavy cream, and fine sea salt. Place the pan over medium heat.
Stir constantly at first, until the butter is fully melted and the sugar has completely dissolved. This initial stirring prevents the sugar from crystalizing on the bottom of the pan.
Once dissolved, stop stirring. Bring the mixture to a rolling boil and continue to boil, without stirring, for about 5 to 7 minutes. Watch for a rich amber color and use a candy thermometer to ensure it reaches exactly 250°F (120°C).
The Transformative Baking Soda Stir
As soon as the caramel hits 250°F, immediately remove the saucepan from the heat. Work quickly from this point forward.
Add the vanilla extract and, most importantly, the baking soda to the hot caramel. Stir vigorously and continuously until the baking soda is fully incorporated.
The caramel will foam up significantly, becoming lighter in color and texture. This aeration is the “secret trick” that prevents stickiness and clumping, making this classic caramel popcorn truly special. For more insights on achieving perfect textures with sugar, consider exploring tips for foolproof honeycomb bites that never stick.
Coating and Spreading for Crispy Goodness
Without delay, pour the hot, foamed caramel over the popped popcorn in the large bowl. Speed is key here, as the caramel begins to set quickly.
Using a heatproof spatula or wooden spoon, gently yet quickly fold and stir the popcorn, striving to coat every kernel as evenly as possible. You’ll need to work fast.
Immediately spread the coated popcorn in a single layer onto your prepared baking sheets. Ensure the popcorn is not crowded; good air circulation is vital for a crispy result.
Baking for Optimal Crunch
Transfer the baking sheets to the preheated oven and bake for 15 minutes. This low-temperature baking step helps dry out the caramel, leading to a crisper texture.
After 15 minutes, remove the sheets and gently stir the popcorn on each pan. This redistributes the kernels and ensures even drying and crisping.
Return the baking sheets to the oven and bake for another 15 minutes. This second bake is crucial for achieving that ultimate, satisfying crunch for your homemade caramel popcorn.
Cooling and Breaking Apart
Once the baking time is complete, remove the caramel popcorn from the oven. Let it cool completely on the parchment paper on the baking sheets.
As it cools, the caramel will harden and crisp up. Resist the urge to touch it until fully cooled!
Once completely cool, break apart any pieces that are still stuck together into individual or small clusters. Your perfect classic caramel popcorn is ready!
Chef’s Secrets: Elevate Your Caramel Popcorn Game
Achieving Even Coating Every Time
Work quickly! Have your popcorn ready in the large bowl before you even start the caramel. The moment the baking soda is mixed in, you have a very short window to coat.
Use two spatulas or spoons to toss the popcorn from the bottom up, ensuring the caramel reaches all kernels. Gentle but thorough movements are best.
Temperature Control for Flawless Caramel
A candy thermometer is truly your best friend for caramel. It removes all guesswork and guarantees the caramel reaches the precise stage for perfect setting.
If you don’t have one, boil until the caramel is a rich, deep amber color. Test a tiny drop in cold water; it should form a firm, brittle thread. However, for consistent results, investing in a thermometer is highly recommended.
Preventing Sticking to Your Baking Sheets
Always use parchment paper or silicone baking mats. There’s no substitute. Without them, the caramel will bond to your baking sheets, making removal and cleanup incredibly difficult.
Flavor Variations to Customize Your Treat
Once cooled, drizzle your classic caramel popcorn with melted chocolate for an extra layer of decadence. A mix of milk and dark chocolate is particularly delightful.
Add a sprinkle of flaky sea salt right after pouring the caramel over the popcorn for an enhanced sweet and salty experience.
Consider mixing in roasted nuts like pecans or almonds after the popcorn is coated but before baking, adding a satisfying crunch and nutty flavor.
Problem Solved: Common Caramel Popcorn Woes
My Classic Caramel Popcorn is Sticky or Chewy!
This is often due to the caramel not being cooked to a high enough temperature. It needs to reach 250°F (120°C) to achieve the correct firmness.
Another culprit might be insufficient or inadequately mixed baking soda. Ensure you stir it vigorously until fully incorporated and the caramel visibly foams up.
Why Did My Caramel Crystalize or Seize?
Crystallization can occur if sugar crystals cling to the sides of your saucepan and fall back into the boiling caramel. Avoid stirring after the mixture comes to a boil.
You can gently brush down the sides of the pan with a wet pastry brush if you see crystals forming. Using corn syrup is also key to preventing this issue.
The Caramel Didn’t Coat Evenly on All Kernels
Working too slowly is the main reason for uneven coating. Caramel sets quickly once removed from heat, especially after the baking soda is added.
Ensure your popcorn is in a very large bowl, giving you plenty of space to toss and coat rapidly. Have everything prepped and ready before you start cooking the caramel.
Enjoying and Preserving Your Classic Caramel Popcorn
Creative Serving Suggestions
Serve your classic caramel popcorn in individual snack bags for parties or as delightful homemade gifts. It’s a charming presentation that everyone appreciates.
Beyond snacking, try it as a topping for vanilla ice cream, added to a dessert charcuterie board, or mixed into a trail mix for a sweet boost. For another delightful caramel treat, consider our ultimate blended caramel chocolate treat.
Optimal Storage for Freshness
To maintain its crispness and prevent stickiness, always store homemade caramel popcorn in an airtight container at room temperature.
Moisture is the enemy of crispy popcorn. Avoid refrigeration, as it can make the caramel sticky.
Can I Make This Classic Caramel Popcorn Ahead?
Absolutely! This classic caramel popcorn is perfect for making ahead. Its quality holds up wonderfully when stored correctly.
It can stay fresh and crisp for up to a week in a well-sealed, airtight container, making it ideal for meal prep or planning for events.
Your Top Questions About Classic Caramel Popcorn Answered
Is it possible to make this recipe dairy-free?
Yes, you can substitute the butter with a high-quality dairy-free butter alternative and the heavy cream with full-fat canned coconut milk (refrigerated so the thick cream separates). Be aware that the flavor profile may be slightly different but still delicious.
Can I use microwave popcorn instead of popping kernels?
While technically possible, it’s not recommended. Microwave popcorn often contains added butter, salt, or artificial flavors that can interfere with the caramel’s adhesion and flavor. For the best classic caramel popcorn, pop plain kernels.
How do I know when the caramel is ready without a candy thermometer?
Without a thermometer, rely on visual cues. The caramel should turn a rich, deep amber color, resembling a penny. For a simple test, drop a tiny bit into a glass of very cold water; it should immediately harden into a brittle thread that snaps when bent.
Why does my caramel popcorn clump together even with baking soda?
If clumping still occurs, you might not be stirring the baking soda vigorously enough or for long enough, preventing full aeration. Also, ensure you spread the coated popcorn immediately onto baking sheets in a single layer to cool and bake individually.
Ready to Share Your Classic Caramel Popcorn Masterpiece?
There’s immense satisfaction in creating this perfect Classic Caramel Popcorn. It’s a simple pleasure that delivers big on flavor and texture, transforming ordinary popcorn into an extraordinary treat.
I encourage you to try this recipe and experience the magic of clump-free, crispy caramel goodness for yourself. Share your delightful batches with friends and family, or simply savor every single bite. Happy popping!

Classic Caramel Popcorn
Course: SnacksCuisine: American CuisineDifficulty: easy4
10-12 cups15
minutes40
minutes60
minutesAmerican Cuisine
Ingredients
1/2 cup unpopped popcorn kernels (yields about 10-12 cups popped)
1 cup granulated sugar
1/2 cup (1 stick) unsalted butter
1/4 cup light corn syrup
1/4 cup heavy cream
1/2 teaspoon fine sea salt
1 teaspoon vanilla extract
1/2 teaspoon baking soda
Directions
- Pop the popcorn kernels using your preferred method (air popper, stovetop, or microwave without added butter/salt). Set aside in a very large heatproof bowl.
- Preheat your oven to 250 degrees Fahrenheit. Prepare two large baking sheets by lining them with parchment paper or silicone baking mats.
- In a heavy-bottomed saucepan, combine the granulated sugar, butter, light corn syrup, heavy cream, and salt. Cook over medium heat, stirring constantly until the butter melts and the sugar dissolves.
- Once the sugar is dissolved, stop stirring and bring the mixture to a boil. Allow it to boil, without stirring, for about 5 to 7 minutes, or until the caramel reaches 250 degrees Fahrenheit on a candy thermometer. It should be a rich amber color.
- Carefully remove the saucepan from the heat. Immediately add the vanilla extract and the baking soda to the hot caramel. Stir vigorously until the baking soda is fully incorporated. The mixture will foam up significantly and become lighter in color and texture. This is the key step to preventing stickiness and clumping!
- Quickly pour the hot, foamed caramel over the popped popcorn in the large bowl. Use a heatproof spatula or wooden spoon to gently fold and stir the popcorn, coating as evenly as possible. Work quickly as the caramel will start to set.
- Immediately spread the coated popcorn in a single layer onto the prepared baking sheets. Ensure the popcorn is not crowded to allow for proper air circulation.
- Bake for 15 minutes, then gently stir the popcorn on the baking sheets to redistribute and ensure even drying. Return to the oven and bake for another 15 minutes.
- Remove the baking sheets from the oven and let the caramel popcorn cool completely on the parchment paper. As it cools, the caramel will harden and crisp up. Once fully cooled, break apart any pieces that are still stuck together. Store in an airtight container at room temperature.
Notes
- Adding baking soda to the hot caramel is crucial for preventing stickiness and achieving light, crisp popcorn. Allow to cool completely for best results.