Oh, sweet treats! They have a special place in my heart and, let’s be honest, my dessert plate. There’s nothing quite like biting into a homemade baked good that’s tender, flavorful, and utterly satisfying. However, I think we’ve all been there – excited about a beautiful batch of bars, only to find they’ve turned dry and crumbly faster than you can say “coconut.” It’s a baking heartache!
For years, I wrestled with making coconut bars that stayed wonderfully moist beyond day one. They’d look perfect coming out of the oven, but the next day? Crumb city. It felt like a baking mystery I just couldn’t solve. But through trial and error, and a little bit of kitchen magic, I finally cracked the code.
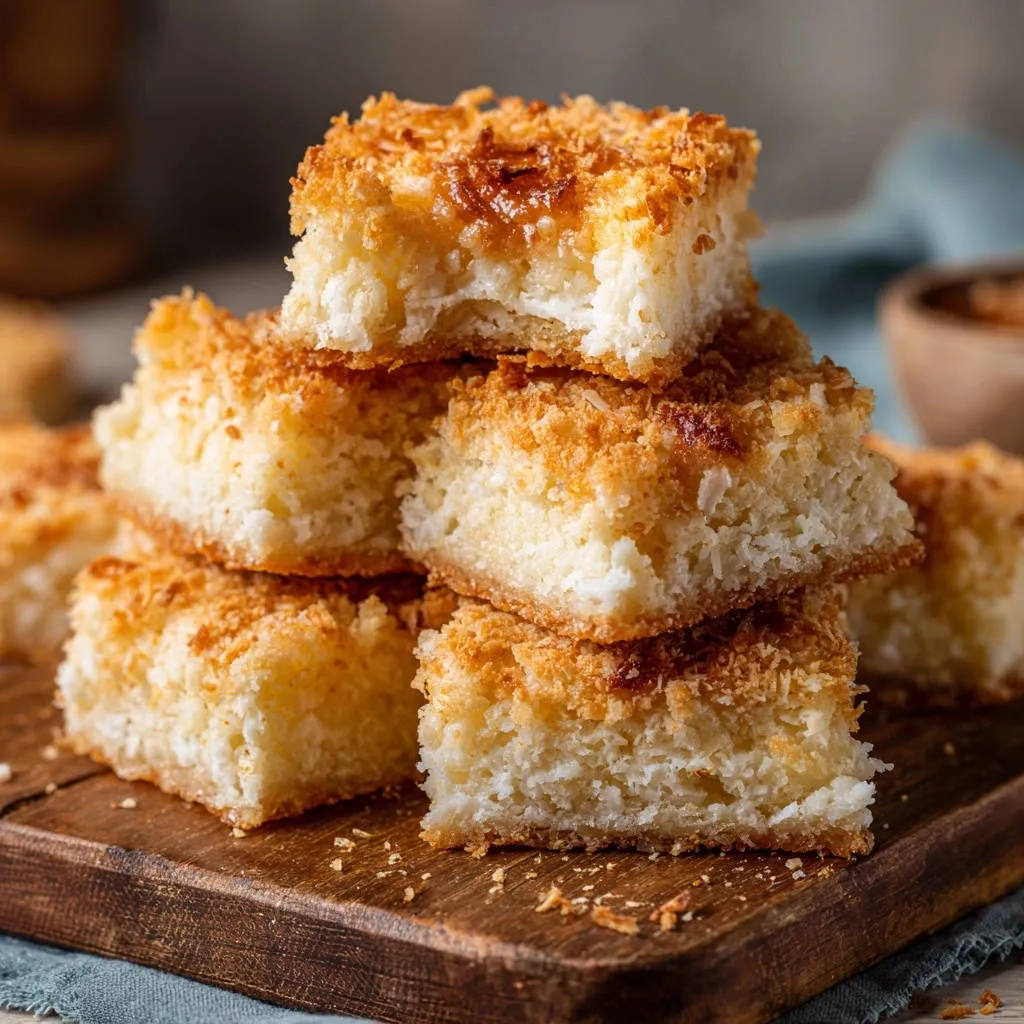
The secret lies not just in the ingredients, but in a simple, specific technique and, most importantly, knowing exactly when to pull them from the oven. This recipe for Classic Coconut Bars is truly guaranteed moist every single time. Forget dry, disappointing bars; these are tender, chewy, and packed with sweet coconut flavor. Just like the perfect ones you envision!
Reasons These Classic Coconut Bars Are a Keeper
So, what makes this recipe stand out from the rest? It’s more than just avoiding dryness (though that’s a huge win!). These bars offer a delightful combination of textures and tastes that make them irresistible.
- Unbeatable Moisture: This is the star feature. Thanks to the careful balance of ingredients and the key baking tip, these bars remain soft and chewy for days.
- Perfect Texture Contrast: You get a buttery, slightly crumbly base and topping paired with a gooey, sweet, and chewy coconut filling. It’s a dream combination!
- Simple & Straightforward: Despite the impressive result, the process is quite simple. If you can mix and press dough, you can make these bars.
- Nostalgic Flavor: The classic combination of butter, sugar, vanilla, and sweetened coconut evokes warm, comforting memories.
- Crowd-Pleasing: Coconut bars are a beloved treat that appeals to almost everyone. They’re perfect for parties, potlucks, or just a quiet afternoon snack.
These aren’t just any coconut bars; they’re the moist, tender, and flavorful ones you’ve been dreaming of. Let’s gather what you’ll need to make this deliciousness happen.
Gathering Your Ingredients for Moist Classic Coconut Bars
Before you even preheat the oven, let’s talk about the simple heroes that come together to create these incredible bars. Each ingredient plays a vital role in achieving that perfect balance of flavor and, crucially, moisture.
- Unsalted Butter: We start with a stick of unsalted butter, softened to room temperature. Softened butter is essential for properly creaming with the sugar, creating that airy foundation for our dough. Using unsalted gives you control over the saltiness.
- Granulated Sugar: Standard white granulated sugar provides sweetness and also works with the butter to create the structure of the dough.
- Large Egg: One large egg helps bind the dough together, adds richness, and contributes to the tender texture of the base.
- Vanilla Extract: A teaspoon of good quality vanilla extract enhances all the other flavors and adds that warm, classic baked good aroma.
- All Purpose Flour: The backbone of our dough, all-purpose flour provides structure. Measure it correctly by spooning it into your measuring cup and leveling off, rather than scooping directly from the bag, to avoid using too much.
- Baking Powder: Just a touch of baking powder gives the dough a little lift, ensuring the base isn’t overly dense.
- Salt: A quarter teaspoon of salt is crucial for balancing the sweetness and bringing out the flavors of the butter and coconut. Don’t skip it!
- Sweetened Condensed Milk: This is the magical ingredient that ensures our coconut filling is outrageously rich, sweet, and incredibly moist. It binds the coconut together while providing a creamy, chewy texture after baking. Make sure you grab sweetened condensed milk, not evaporated milk!
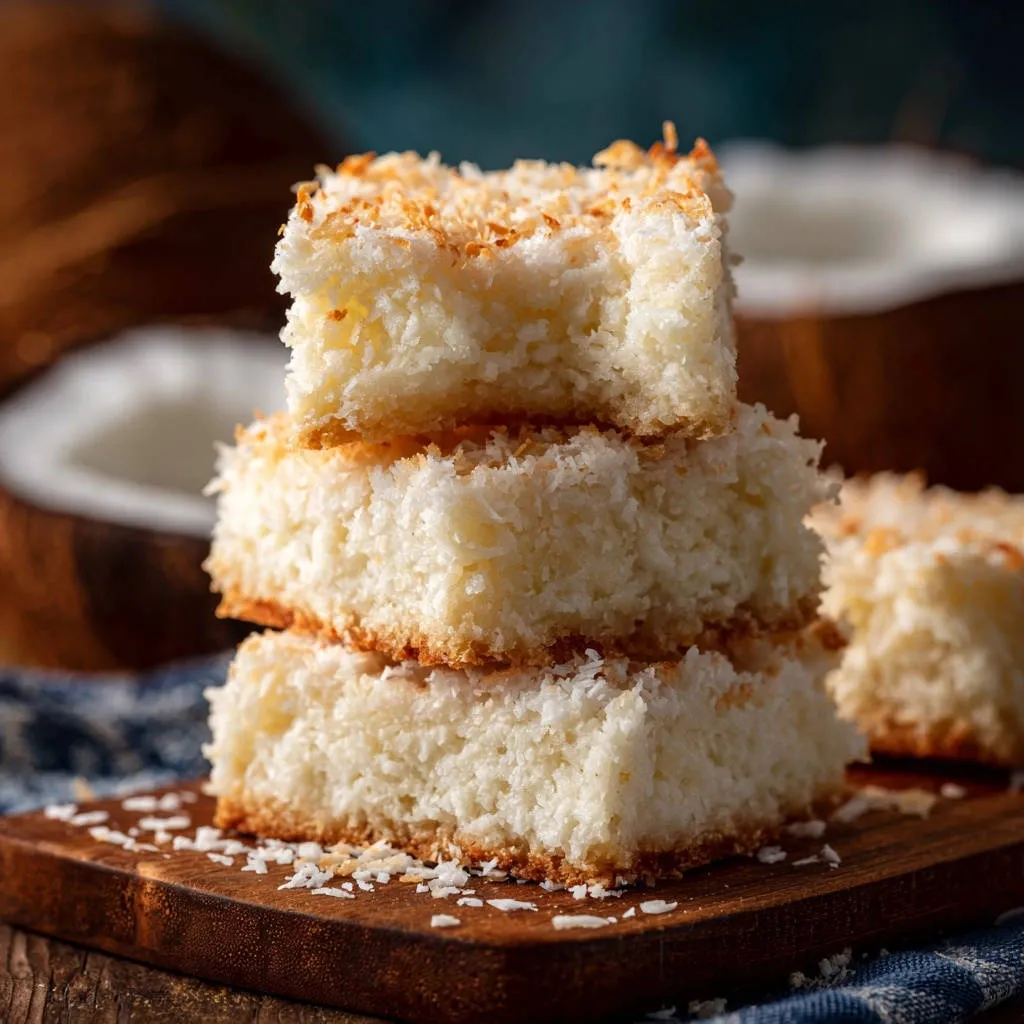
- Shredded Sweetened Coconut: Three generous cups of shredded sweetened coconut are the star of the filling. The sweetness in this type of coconut is key to the classic flavor and helps create that wonderfully chewy texture when combined with the condensed milk.
Having your ingredients ready and measured before you start makes the process much smoother and more enjoyable.
Crafting Your Classic Coconut Bars: Step-by-Step for Moisture Success
Ready to bake some seriously delicious and moist coconut bars? Follow these steps closely, paying special attention to the timing and visual cues, as they are key to achieving that guaranteed tenderness.
- Prepare Your Baking Pan and Preheat: First things first, get your oven ready. Preheat it to 350 degrees F (175 degrees C). While the oven heats, prepare an 8×8 inch baking pan. This recipe works best in this size pan to get the right thickness and filling-to-crust ratio. Make sure to grease and flour the pan thoroughly. Greasing prevents sticking, and a light dusting of flour after greasing ensures those edges release beautifully.
- Creaming the Base: In a large bowl, your softened butter and granulated sugar are up first. Cream them together using an electric mixer (handheld or stand) until the mixture becomes light and fluffy. This step incorporates air, which helps create a tender cookie base. Next, beat in the large egg and the vanilla extract until everything is well combined and smooth. Scrape down the sides of the bowl as needed to ensure everything gets mixed evenly.
- Adding Dry Ingredients: In a separate, medium-sized bowl, whisk together your all-purpose flour, baking powder, and salt. Whisking dry ingredients ensures they are evenly distributed throughout the flour. Now, gradually add this dry mixture to your wet ingredients in the large bowl. Mix on a low speed, or by hand, just until everything is combined. The dough will look quite thick and might even seem a little crumbly at this stage – that’s exactly what you want! Be careful not to overmix, as this can develop the gluten too much and lead to tough bars.
- Form the Base Layer: Take about two-thirds of the prepared dough. Press this portion evenly into the bottom of your greased and floured 8×8 inch baking pan. Use your fingers, the bottom of a glass, or a flat spatula to get a nice, compact, and even layer. This forms the sturdy and delicious base for your bars.
- Prepare the Coconut Filling: Grab a small bowl. Combine the sweetened condensed milk and the shredded sweetened coconut. Stir them together until all the coconut is coated in that thick, sweet milk. This simple mixture transforms into the gooey, chewy center as it bakes.
- Layer the Filling: Carefully and evenly spread the coconut-condensed milk mixture over the pressed dough base in the pan. Get it right into the corners. This sweet, sticky layer is where a lot of the moisture magic happens!
- Add the Crumble Topping: Now, take the remaining one-third of the dough. Crumble it evenly over the top of the coconut layer. Don’t worry about perfection here; uneven crumbs add wonderful texture to the finished bars.
- The Crucial Baking Step: Place the pan in your preheated oven. Bake for 25 to 30 minutes. This is the most critical step for moisture control! You are looking for the edges of the bars to be lightly golden brown and the top crumbled layer to look toasted. The center may still look slightly soft, and that’s okay! Do not overbake! Overbaking is the main culprit behind dry coconut bars. Baking just until set and lightly golden ensures the condensed milk stays creamy and luscious and the base remains tender, actively preventing that dreaded dryness. Keep a close eye on them, especially in the last few minutes.
- Cool Completely: Once baked, remove the pan from the oven and place it on a wire rack. Now comes the hardest part: patience! You MUST let the bars cool completely in the pan before attempting to cut them. This step is non-negotiable for achieving the perfect soft and chewy texture. As the bars cool, the moisture from the condensed milk and the heat redistributes throughout the layers, setting the filling and ensuring the base remains tender. Trying to cut them warm will result in a gooey mess and drier bars in the long run. Once fully cooled (this can take a couple of hours), you can cut them into squares using a sharp knife.
Following these steps, especially the baking and cooling cues, will yield the most wonderfully moist and delicious classic coconut bars you’ve ever made!
Tips for Perfect Classic Coconut Bars Every Time
Making these bars is straightforward, but a few extra tips can elevate your results from great to absolutely perfect:
- Properly Softened Butter: This is key for the dough texture. If your butter is too cold, it won’t cream properly. If it’s melted, your dough will be greasy. It should be soft enough that your finger makes an indentation easily, but not so soft that it’s greasy.
- Measure Flour Accurately: As mentioned earlier, spooning and leveling flour prevents packing too much into the cup, which can lead to a dry, dense base.
- Don’t Overmix the Dough: Once the dry ingredients are added, mix only until the flour streaks disappear. Overmixing develops gluten, resulting in a tougher bar.
- Know Your Oven: Oven temperatures can vary. Using an oven thermometer is a great way to ensure your oven is accurately preheating to 350°F (175°C).
- Watch the Edges, Not Just the Clock: While the time range is a guide (25-30 minutes), the visual cue of lightly golden edges and toasted topping is the most reliable indicator that they are done.
- Allow Full Cooling: I can’t stress this enough! Cooling completely is vital for texture. Resist the urge to cut into them warm.
- Getting Clean Cuts: Use a sharp knife. For extra clean cuts, you can chill the cooled bars in the refrigerator for about 30-60 minutes before slicing. Wipe the knife blade clean between cuts if the filling is sticky.
Classic Coconut Bar Variations
While the classic version is amazing, you can easily add your own twist:
- Chocolate Lovers: Sprinkle chocolate chips (milk, dark, or white) over the coconut layer before adding the crumble topping. Chocolate and coconut are a match made in heaven!
- Nutty Addition: Add chopped pecans or walnuts to the coconut filling or sprinkle them over the top crumble for extra crunch.
- Citrus Zest: A bit of finely grated orange or lemon zest added to the dough or the coconut filling can add a lovely bright note.
Storage
Store cooled and cut coconut bars in an airtight container at room temperature for up to 3-4 days. For longer storage, you can refrigerate them for up to a week or freeze them. To freeze, wrap individual bars or the entire slab tightly in plastic wrap, then place in a freezer-safe bag or container for up to 2-3 months. Thaw at room temperature.
Serving Suggestions for Classic Coconut Bars
These delicious, moist bars are perfect enjoyed on their own as a simple snack or dessert. Their sweet, chewy nature makes them wonderful alongside a hot cup of coffee or tea. For a more indulgent treat, you can serve them slightly warmed with a scoop of vanilla ice cream. They also make a fantastic addition to a dessert platter, sitting proudly next to treats like Mini Cheesecakes or Classic Powdered Sugar Cookies.
Because they travel well and keep their moisture, they are ideal for bake sales, picnics, or taking to a friend’s house. If you enjoy baking different kinds of bars, you might also love our recipe for Simple Sugar Cookie Bars, which are equally easy and delightful!
Your Classic Coconut Bar Questions Answered (FAQ)
Have a few questions popping up as you read through the recipe? Let’s address some common ones to help ensure your baking success.
Why did my coconut bars turn out dry?
The most common reason for dry coconut bars is overbaking. The sweetened condensed milk filling sets relatively quickly, and the edges of the crust will turn golden before the entire pan looks completely firm. Bake only until the edges are lightly golden and the top crumble is toasted. Removing them when they seem just set in the center is key. Also, not letting them cool completely in the pan can affect the final texture and moisture distribution.
Can I use unsweetened coconut?
While you could technically use unsweetened shredded coconut, this recipe is specifically designed for sweetened shredded coconut. Sweetened coconut contains added sugar and moisture that is crucial for achieving the correct chewy texture and sweetness in the filling when combined with the condensed milk. Using unsweetened coconut will result in a less sweet, potentially drier, and less chewy filling.
Can I make these bars in a different size pan?
This recipe is formulated for an 8×8 inch pan. Using a larger pan (like a 9×13 inch) will result in thinner bars that will bake much faster and are much more prone to drying out. You would need to double the recipe for a 9×13 pan, and you would still need to be very careful with baking time, watching for those visual cues.
How do I know if my butter is properly softened?
Softened butter should be pliable but still hold its shape. If you gently press it with your finger, it should leave an indentation without your finger going straight through. It should NOT be greasy or melted in any way. If it’s too hard, microwave it in 5-second increments, turning it each time, until it reaches the right consistency. If it’s too soft or melted, pop it in the fridge for a few minutes until it firms up.
Can I use different types of fat besides butter?
Butter provides a unique flavor and tender texture to the crust. While you could experiment with shortening or margarine, the results will differ. For the best classic flavor and texture, stick with unsalted butter.
Why is cooling completely in the pan so important?
During the cooling process, the residual heat in the pan continues to gently cook the bars, and more importantly, the moisture from the gooey filling redistributes throughout the crust. This allows the bars to set properly and become soft, chewy, and moist. Cutting them warm disrupts this process, leading to a messy filling and a higher likelihood of a dry crust.
Can I add a glaze or frosting?
While these bars are wonderful as is, a simple drizzle of melted chocolate or a thin powdered sugar glaze mixed with a little milk or coconut milk could add an extra touch of sweetness and visual appeal. Just be sure the bars are completely cooled before adding any topping.
Enjoy Your Homemade Classic Coconut Bars!
There you have it – the secret to truly moist and irresistible Classic Coconut Bars. This recipe takes the guesswork out of baking and delivers a delightful treat that’s perfect for any occasion. The combination of the buttery base, gooey coconut filling, and crumbly topping is simply divine.
Give this recipe a try, and I’m confident it will become your new go-to for coconut bars. Say goodbye to dry and crumbly, and hello to perfectly moist, tender, and flavorful goodness!
Did you make these bars? I’d love to hear how they turned out! Leave a comment below and let me know what you thought. Happy baking!
Classic Coconut Bars

Ingredients
- 1/2 cup unsalted butter, softened
- 1/2 cup granulated sugar
- 1 large egg
- 1 teaspoon vanilla extract
- 1 1/2 cups all purpose flour
- 1 teaspoon baking powder
- 1/4 teaspoon salt
- 1 cup sweetened condensed milk
- 3 cups shredded sweetened coconut
Directions
- Preheat oven to 350 degrees F (175 degrees C). Grease and flour an 8×8 inch baking pan.
- In a large bowl, cream together the softened butter and granulated sugar until light and fluffy. Beat in the egg and vanilla extract.
- In a separate medium bowl, whisk together the all purpose flour, baking powder, and salt. Gradually add the dry ingredients to the wet ingredients, mixing until just combined. The dough will be thick.
- Press about two-thirds of the dough evenly into the bottom of the prepared baking pan to form the base.
- In a small bowl, combine the sweetened condensed milk and shredded sweetened coconut. Spread this mixture evenly over the dough base in the pan.
- Crumble the remaining dough evenly over the coconut layer.
- Bake for 25-30 minutes, or until the edges are light golden brown and the top coconut layer is toasted. This is the key step for moisture control; do not overbake past this point! Baking just until set and lightly golden ensures the condensed milk remains creamy and the base stays tender, preventing dryness.
- Let the bars cool completely in the pan on a wire rack before cutting into squares. This allows the moisture to redistribute, resulting in a perfectly soft and chewy texture.