Oh, the joy of a perfectly fried cheese bite! That moment when you bite through the golden, crunchy coating and are met with a warm, gooey, stretchy center. It’s pure snack heaven. But let’s be honest, getting there can sometimes feel like a kitchen nightmare. I can’t tell you how many times I’ve watched my hopeful cheese bites melt into a disappointing, oily puddle in the fryer. It’s heartbreaking!
For years, I struggled with cheese leakage, soggy coatings, or cheese that just didn’t get warm enough before the outside burned. I tried different temperatures, different cheeses, different breadings. Nothing seemed to work consistently. But after much trial and error, I discovered the simple trick that changed everything. It’s a game-changer for achieving perfectly crispy fried cheese bites with that dreamy, melty interior, every single time. You’re about to unlock the secret!
Why You’ll Absolutely Love These Crispy Fried Cheese Bites
Beyond solving the dreaded cheese leakage issue, these little bites are guaranteed crowd-pleasers. Here’s why they’ll become your go-to appetizer or snack:
- Guaranteed No Leaks: This recipe focuses on one crucial step that prevents the cheese from escaping into the oil. Say goodbye to oily messes!
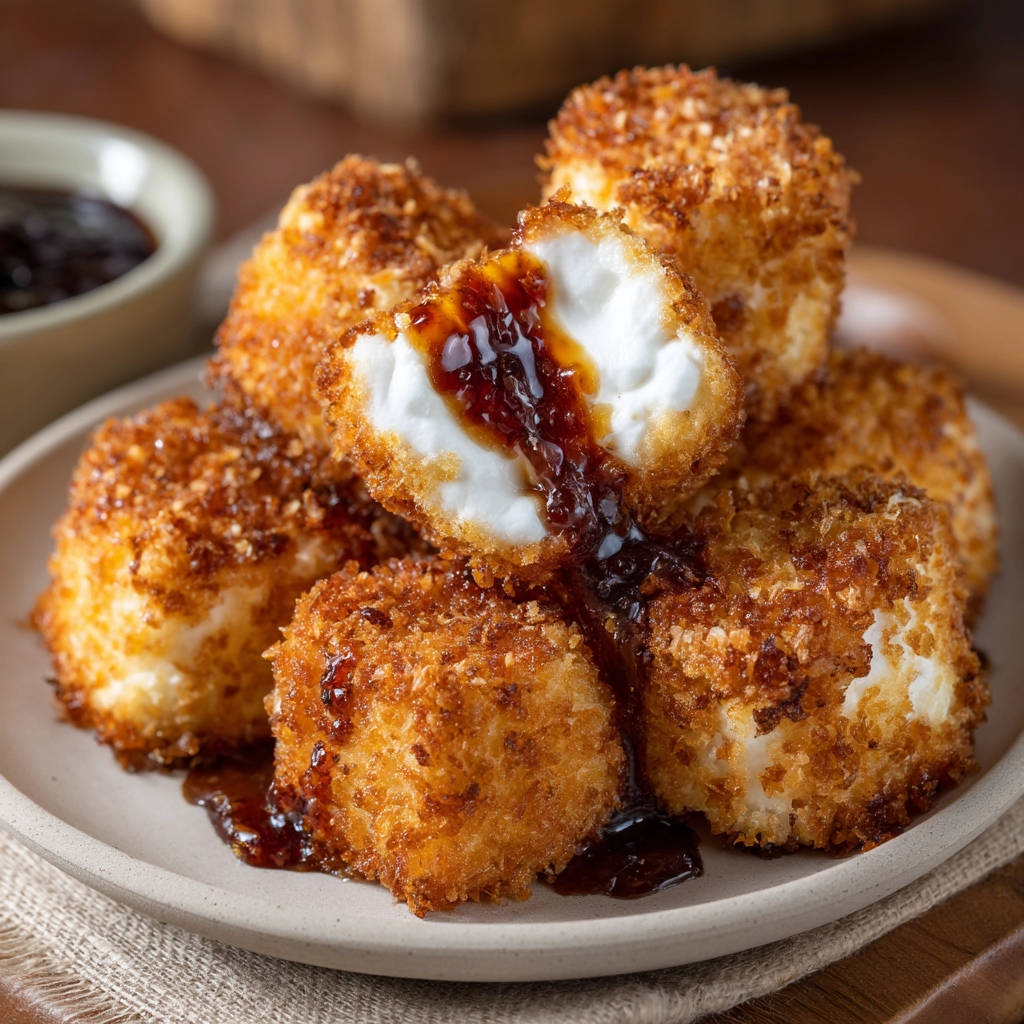
- Ultimate Texture Contrast: You get an intensely crispy, golden exterior thanks to the double breading and the right frying technique. This is perfectly complemented by the warm, soft, and delightfully gooey cheese inside.
- Simple Ingredients: You don’t need fancy ingredients. The list is short, sweet, and likely items you already have on hand.
- Quick to Fry: Once prepped, frying takes just minutes, meaning you can have these ready for unexpected guests or a sudden craving.
- Versatile Serving: Pair them with sweet or savory dips – they work beautifully with so many different sauces.
Whether you’re hosting a party, looking for a fun weekend project, or just need a delicious snack to cure a craving, these crispy fried cheese bites are an absolute winner. Forget the frustration of failed attempts; this method is foolproof.
Gathering Your Ingredients for Crispy Fried Cheese Bites
One of the best things about this recipe is how few ingredients you actually need. The magic isn’t in a long list, but in how we prepare and use these simple components. Each element plays a vital role in creating that perfect fried cheese experience – from the cheese itself to the coating that locks in all that goodness.
- 8 ounces log-style cheese, cold: The type of cheese you choose here is key! The “log-style” description is important because it refers to cheeses that hold their shape well when cold and cut, like goat cheese or cream cheese. These firm logs are easier to slice uniformly and manage during the breading and freezing process compared to softer, spreadable cheeses or block cheeses that might crumble when cold. Using it cold is also essential for getting clean cuts.
- 1/2 cup all-purpose flour: This is the first layer of our breading shield. The flour helps to dry the surface of the cheese slightly, giving the egg wash something to really cling to. This initial coating is critical for building a solid base for the subsequent layers.
- 2 large eggs, beaten: Eggs act as the binder, the sticky layer that connects the flour to the breadcrumbs. Whisking them well creates a smooth liquid that evenly coats the floured cheese pieces, ensuring the panko adheres properly.
- 1 cup panko breadcrumbs: For maximum crispiness, panko is the absolute best choice. These Japanese-style breadcrumbs are larger and flakier than standard breadcrumbs, resulting in a lighter, airier, and significantly crunchier coating when fried. They are paramount to achieving that satisfying shatter when you bite into one of these treats.
- Vegetable oil, for frying: You’ll need enough oil to submerge the cheese bites, typically about 2 inches deep in your frying pot. Vegetable oil is a great neutral option with a high smoke point, making it suitable for frying at the required temperature without imparting unwanted flavors. Other neutral oils like canola or peanut oil also work well.
- Sweet sauce or jam, for serving: While the cheese bites are delicious on their own, pairing them with a sweet counterpoint is traditional and creates a delightful flavor combination. Think raspberry jam, fig spread, hot honey, or a sweet chili sauce.
See? A short and sweet list! But it’s the combination of these humble ingredients, handled with the right technique, that leads to truly spectacular crispy fried cheese bites.

Crafting Your Crispy Fried Cheese Bites: Step-by-Step
Alright, let’s get to the magic! The process for making these no-fail fried cheese bites is straightforward, but paying attention to a couple of key steps will ensure your success. Follow these steps carefully, and you’ll be enjoying perfectly crispy, gooey cheese in no time!
Prep the Cheese: Start with your log-style cheese straight from the refrigerator – remember, cold is your friend here! Use a sharp knife to carefully cut the cheese log into pieces about 1 inch thick. You can cut them into rounds if using a cylindrical log, or squares if starting with a brick. Aim for relatively uniform sizes so they fry evenly. Place these cut cheese pieces onto a small baking sheet that you’ve lined with parchment paper. This prevents sticking and makes the next step easier.
The Critical Freeze: This is THE trick! Slide that baking sheet with your cheese pieces into the freezer. Let them freeze solid for at least 1 hour. Don’t rush this part! Freezing the cheese creates a firm core that gives the breading time to crisp up in the hot oil before the inside melts completely. This prevents the cheese from bursting through its coating prematurely. It’s a simple step, but absolutely crucial for success.
Set Up Your Breading Station: While the cheese is freezing, get your breading station ready. Grab three shallow dishes or pie plates. Put the all-purpose flour in the first dish. Pour the beaten eggs into the second dish. Add the panko breadcrumbs to the third dish. Having everything ready in a line makes the breading process smooth and efficient.
First Pass of Breading: Once the cheese is frozen solid, work quickly to keep it cold. Take a cheese piece and first dredge it completely in the flour, tapping off any excess. You want a light, even coating. Then, dip the floured piece into the beaten egg wash, allowing any excess egg to drip back into the dish. Finally, transfer the egg-coated piece to the panko breadcrumbs and generously coat it, gently pressing the panko onto all sides to ensure it sticks well.
Double Down on Crispiness (and Security!): For an extra sturdy and super crispy coating, we’re going to double-bread them. Carefully dip each breaded cheese piece back into the egg wash for a second time. Let the excess egg drip off. Immediately return the piece to the panko breadcrumbs and coat it again thoroughly, pressing gently to build up a thick, even layer of panko. This double layer provides an extra barrier against leaks and delivers that ultimate crunch.
Chill Out: Return the double-breaded cheese bites to the parchment-lined baking sheet. Place the sheet back into the refrigerator for at least 30 minutes. This chilling step helps the breading adhere firmly to the cheese and ensures the bites are nice and cold going into the hot oil, again helping to prevent leaks and promote even frying.
Heat the Oil: Pour your vegetable oil into a medium heavy-bottomed pot or Dutch oven. You need enough oil to reach a depth of about 2 inches. Place the pot over medium-high heat and let the oil heat up. The ideal temperature for frying is around 350 degrees Fahrenheit (175 degrees Celsius). Using a kitchen thermometer is the most accurate way to check. If you don’t have one, you can test the oil by dropping a few panko crumbs into it. They should sizzle vigorously and turn golden brown within just a few seconds if the oil is ready.
Fry in Batches: Once the oil is at the correct temperature, carefully add the chilled, breaded cheese bites to the hot oil. Add them in small batches, making sure not to overcrowd the pot. Crowding the pot lowers the oil temperature, leading to greasy, less crispy results and increasing the chance of cheese leakage. Fry only as many as comfortably fit in a single layer with space around them.
Watch Them Turn Golden: Fry the cheese bites for about 1 to 2 minutes per side, or until they are deeply golden brown and look wonderfully crispy all over. They fry very quickly because of the high heat and the frozen core, so keep a close eye on them! The short frying time ensures the outside gets crispy before the frozen inside has a chance to melt completely and leak out. Use tongs or a slotted spoon to gently turn them to ensure even browning.
Drain and Serve: Use a slotted spoon to carefully remove the fried cheese bites from the hot oil. Let any excess oil drip back into the pot for a moment. Transfer the finished bites to a plate that you’ve lined with paper towels. This helps drain off any remaining surface oil, keeping them extra crispy.
Enjoy Immediately: These are best served hot and fresh, right after frying, while the coating is at its crispiest and the inside is perfectly melty. A drizzle or side of your favorite sweet sauce or jam is the classic pairing that elevates these simple bites into something truly special. Don’t wait – dig in!
Tips for Perfect Crispy Fried Cheese Bites Every Time
Following the steps above is the key, but here are a few extra tips and considerations to make sure your fried cheese bites are always a smashing success:
- Cheese Choice Matters: While the recipe calls for log-style cheese like goat cheese or cream cheese, you can experiment! Just ensure the cheese is firm enough to hold its shape when cut and very cold. Mozzarella sticks are the classic, but firm cheddar cubes or even slices of halloumi (which doesn’t melt as much) can work with this method, though the melt factor will vary. Avoid soft cheeses that don’t firm up when cold.
- Keep Everything Cold: I cannot stress this enough! The colder the cheese pieces are going into the fryer, the more time the breading has to crisp up before the cheese threatens to leak. Freeze them solid, keep them chilled while you bread, and refrigerate them again before frying.
- Don’t Skip the Double Breading: That second pass through the egg and panko is your insurance policy against leaks. It creates a thicker, more robust crust that’s also incredibly delicious and crispy.
- Monitor Your Oil Temperature: Too cool oil results in greasy, soggy bites. Too hot oil will burn the outside before the inside is warm. Aim for that 350°F (175°C) sweet spot. If you don’t have a thermometer, the panko crumb test is a good indicator, but a thermometer is worth the investment for consistent frying results.
- Fry in Small Batches: Overcrowding is the enemy of crispy fried food. It drops the oil temperature and makes everything cook unevenly. Give those bites some space!
- Serving Suggestions Go Beyond Jam: While sweet jam is traditional, get creative! Try them with sweet chili sauce, fig preserves, hot honey, or even a balsamic glaze. For a savory twist, they can be surprisingly good with pesto or a tangy marinara, although the sweet contrast is usually preferred.
- Make Ahead: You can prep the breaded cheese bites and keep them refrigerated for several hours before frying. Just make sure they are thoroughly chilled.
What to Serve With Crispy Fried Cheese Bites
These glorious bites are fantastic on their own, but they truly shine when paired with the right accompaniments. The classic pairing is definitely something sweet to balance the richness of the cheese and the crispy coating. Think small bowls of vibrant raspberry jam, fig jam, or even a homemade hot honey. For a fun spread, alongside your cranberry brie bites or cheesy garlic bombs, they make a wonderful appetizer platter.
If you’re feeling adventurous, consider other dipping sauces. A tangy balsamic glaze offers a sophisticated touch. A warm, slightly spicy pepper jelly provides a sweet heat. You could even experiment with fruit compotes like cherry or apricot. The key is usually a bit of sweetness or acidity to cut through the richness of the fried cheese. They’re perfect for parties, game nights, or just a decadent snack!
Your Crispy Fried Cheese Bites Questions Answered (FAQ)
Have a few questions buzzing in your head about making these? Don’t worry, I’ve got you covered! Here are some of the most common inquiries about whipping up the best crispy fried cheese bites.
Can I use different types of cheese?
Yes, but with caution! The recipe specifically calls for log-style cheeses like goat cheese or cream cheese because they hold their shape well when frozen. Firm block cheeses like cheddar or provolone can also be used if cut into thick cubes, but avoid softer cheeses like brie or camembert (unless you’re making specific baked brie bites using a different method) as they are more prone to leaking even with the freezing trick. Halloumi is a great option if you prefer a cheese that holds its shape more when heated.
Can I bake these instead of frying?
While you can bake breaded cheese, it won’t achieve the same level of intense crispiness or rapid melting as frying. Baking tends to heat the cheese more slowly, increasing the chances of it spreading before the coating is fully crisp. The freezing trick still helps, but for that authentic “crispy fried” texture, frying is recommended. If you must bake, place them on a wire rack over a baking sheet and bake at a high temperature (around 400°F or 200°C) for 8-12 minutes, watching very closely.
How do I store leftovers?
Fried cheese bites are definitely best enjoyed immediately. The coating will soften as they cool. If you do have leftovers, store them in an airtight container in the refrigerator. Reheating can be tricky.
What’s the best way to reheat them?
To regain some crispiness, avoid the microwave! The best way to reheat crispy fried cheese bites is in an air fryer or oven. Pop them in an air fryer at 350°F (175°C) for 3-5 minutes, or in a preheated oven on a baking sheet at 375°F (190°C) for 5-10 minutes, until heated through and the coating crisps up again. Watch them closely to prevent burning.
Can I freeze the breaded cheese bites before frying?
Absolutely! This is a great way to prep ahead. After you’ve done the double breading and the initial refrigeration step, you can transfer the baking sheet to the freezer and freeze them solid. Once frozen, transfer the individual bites to a freezer-safe bag or container. When ready to fry, take them directly from the freezer and fry as directed, adding an extra minute or two to the frying time as needed, watching for that perfect golden color.
Enjoy Your Homemade Crispy Fried Cheese Bites!
See? Making perfectly crispy, melty fried cheese bites without the dreaded leakage isn’t a culinary mystery – it’s just about knowing the right technique, and the freezing step is your superhero! This recipe delivers on the promise of golden, crunchy goodness giving way to warm, yielding cheese every time. They are the ideal appetizer, snack, or decadent treat that always impresses.
Give this recipe a try, and you’ll never look at fried cheese the same way again. Get ready for happy faces and satisfied cravings! If you make them, let me know how they turned out in the comments below. Happy frying!
Crispy Fried Cheese Bites

Ingredients
- 8 ounces log-style cheese (like goat cheese or cream cheese), cold
- 1/2 cup all-purpose flour
- 2 large eggs, beaten
- 1 cup panko breadcrumbs
- Vegetable oil, for frying
- Sweet sauce or jam, for serving
Directions
- Cut the cold cheese log into approximately 1-inch thick rounds or squares.
- Place the cut cheese pieces on a small baking sheet lined with parchment paper and freeze them solid for at least 1 hour. This is the crucial step to prevent leaking.
- Set up a breading station. Place the flour in one shallow dish, the beaten eggs in a second shallow dish, and the panko breadcrumbs in a third shallow dish.
- Working quickly while the cheese is still frozen, dredge each piece first in the flour, shaking off excess. Then dip in the egg wash, letting excess drip off. Finally, generously coat in the panko breadcrumbs, pressing gently to adhere.
- For extra crispy coating and added security against leaks, carefully dip each breaded piece back into the egg wash and coat again thoroughly with panko breadcrumbs.
- Return the breaded cheese bites to the parchment-lined baking sheet and refrigerate for at least 30 minutes to help the coating set.
- Pour vegetable oil into a medium heavy-bottomed pot or Dutch oven to a depth of about 2 inches. Heat the oil over medium-high heat until it reaches about 350 degrees Fahrenheit (175 degrees Celsius). If you don’t have a thermometer, test by dropping a few panko crumbs in the oil; they should sizzle vigorously and turn golden brown in seconds.
- Carefully add the chilled breaded cheese bites to the hot oil in batches, being careful not to overcrowd the pot.
- Fry for 1 to 2 minutes per side, or until the coating is deeply golden brown and crispy. Keep a close eye on them as they fry quickly. The short frying time on the frozen cheese ensures the outside is crispy before the inside fully melts and potentially leaks.
- Use a slotted spoon to remove the fried cheese bites from the oil and transfer them to a plate lined with paper towels to drain excess oil.
- Serve immediately while hot and crispy, drizzled with your favorite sweet sauce or jam.