Have you ever made a glaze, excitedly anticipating that glossy, perfect coating for your cake, muffins, or even savory dishes, only to have it turn out either watery and thin or thick and lumpy? It’s one of those frustrating kitchen moments we’ve all faced. But what if I told you there’s a simple, foolproof way to achieve the perfect easy orange glaze consistency, every single time?
This recipe isn’t just about mixing ingredients; it’s about understanding a simple technique that guarantees a smooth, pourable glaze that clings beautifully to whatever you drizzle it over. It brings a bright, sweet citrusy finish that elevates everything it touches. Get ready to say goodbye to glaze guesswork and hello to glossy perfection!
Why You’ll Absolutely Love This Orange Glaze
This easy orange glaze recipe is about more than just flavor (though it has plenty!). It’s designed for success in your kitchen.
- Foolproof Consistency: The key is a controlled simmer time, making it easy to get just the right thickness.
- Bright, Fresh Flavor: Made with real orange juice and zest, it delivers a vibrant citrus punch.
- Incredibly Versatile: Fantastic on baked goods, a delightful finish for roasted chicken or ham, and even drizzled over breakfast items.
- Simple Ingredients: You likely have most of what you need in your pantry and fridge right now.
- Quick to Make: From saucepan to perfection in under 30 minutes.
Gathering Your Ingredients for the Perfect Orange Glaze
Creating this luscious glaze starts with a few simple components, each playing a vital role in achieving that desired flavor and texture. Quality ingredients make a difference here, especially when it comes to the citrus!
Here’s what you’ll need to gather from your pantry and refrigerator:
- Packed Brown Sugar: This is our primary sweetener and thickener. Using brown sugar, as opposed to white, adds a subtle caramel note and helps create a richer, slightly deeper color and flavor. Packing it ensures you get the right amount for the intended sweetness and body of the glaze.
- Water: Our liquid base, working with the sugar and citrus to create the syrupy consistency as it reduces during simmering.
- Fresh Orange Juice: For that essential citrus flavor and acidity. Using fresh juice provides the brightest, most authentic taste compared to concentrate.
- Orange Zest: Where a significant portion of the orange’s essential oils and intense flavor resides! One tablespoon of finely grated zest adds a concentrated burst of aroma and taste that the juice alone cannot replicate. Make sure to zest only the colored part, avoiding the bitter white pith underneath.
- Unsalted Butter: Stirred in at the end, the butter adds richness, a smooth mouthfeel, and that lovely glossy sheen that makes a glaze look so appealing. Using unsalted butter allows you to control the overall saltiness, though this glaze doesn’t call for added salt.
- Vanilla Extract: A touch of vanilla extract rounds out the flavors beautifully, adding warmth and complexity that complements the bright orange. Use pure vanilla extract for the best results.
Crafting Your Orange Glaze: Step-by-Step for Perfect Consistency
The magic of this easy orange glaze lies in the process, particularly the simmering time. Follow these steps closely, and you’ll achieve that beautiful, pourable thickness every time.
Begin by combining the initial ingredients in a medium saucepan. You’ll add the packed brown sugar, water, fresh orange juice, and that flavorful orange zest. Giving it a quick stir now helps start the process of dissolving the sugar before heat is applied. Using a medium-sized saucepan gives you enough room to stir and prevents it from boiling over later.
Place the saucepan over medium heat. Stir the mixture constantly at this stage. The goal is to fully dissolve the brown sugar crystals into the liquids. You’ll see it transform from a grainy mixture into a smooth, uniform liquid. Constant stirring prevents the sugar from scorching on the bottom of the pan.
Once the sugar is completely dissolved, bring the mixture to a gentle boil. As soon as it reaches this bubbling point, immediately reduce the heat significantly to low. We want a gentle simmer, not a rolling boil, which would evaporate the liquid too quickly and could lead to scorching.
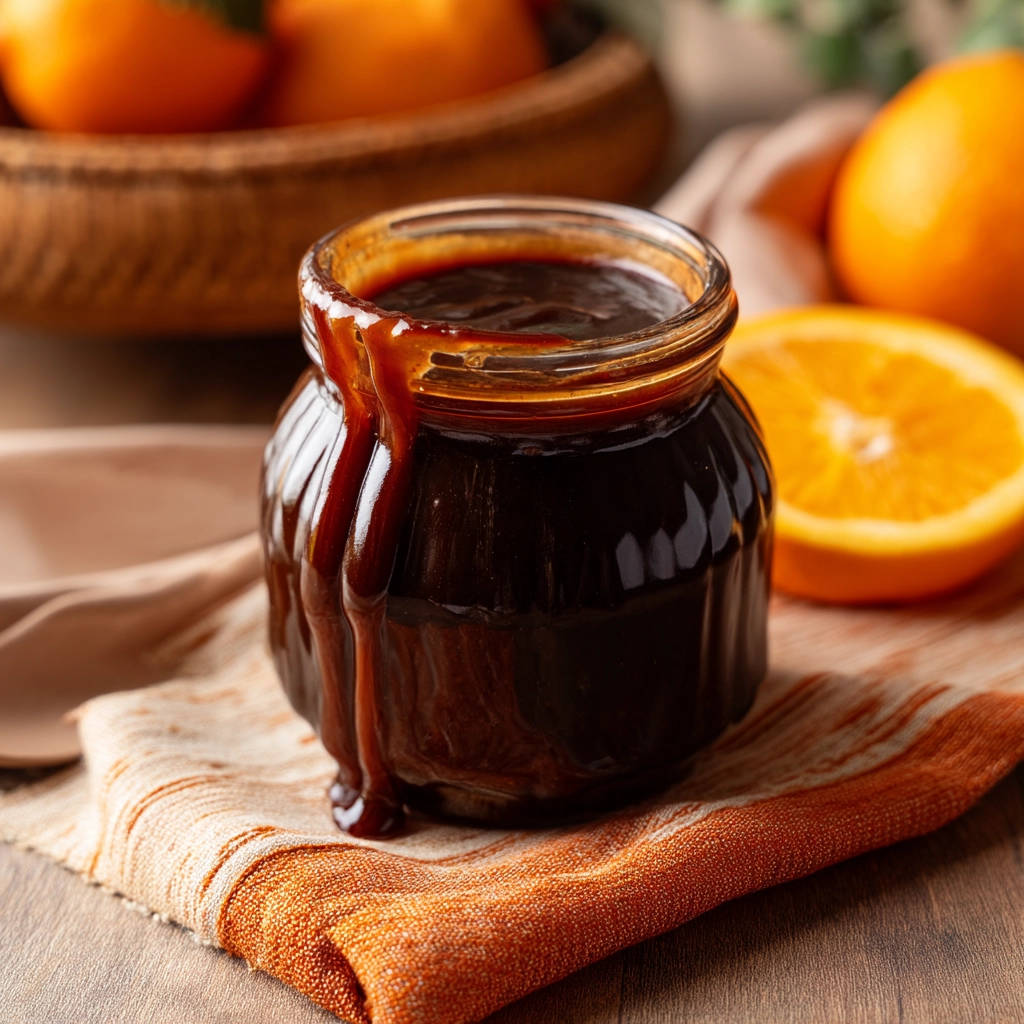
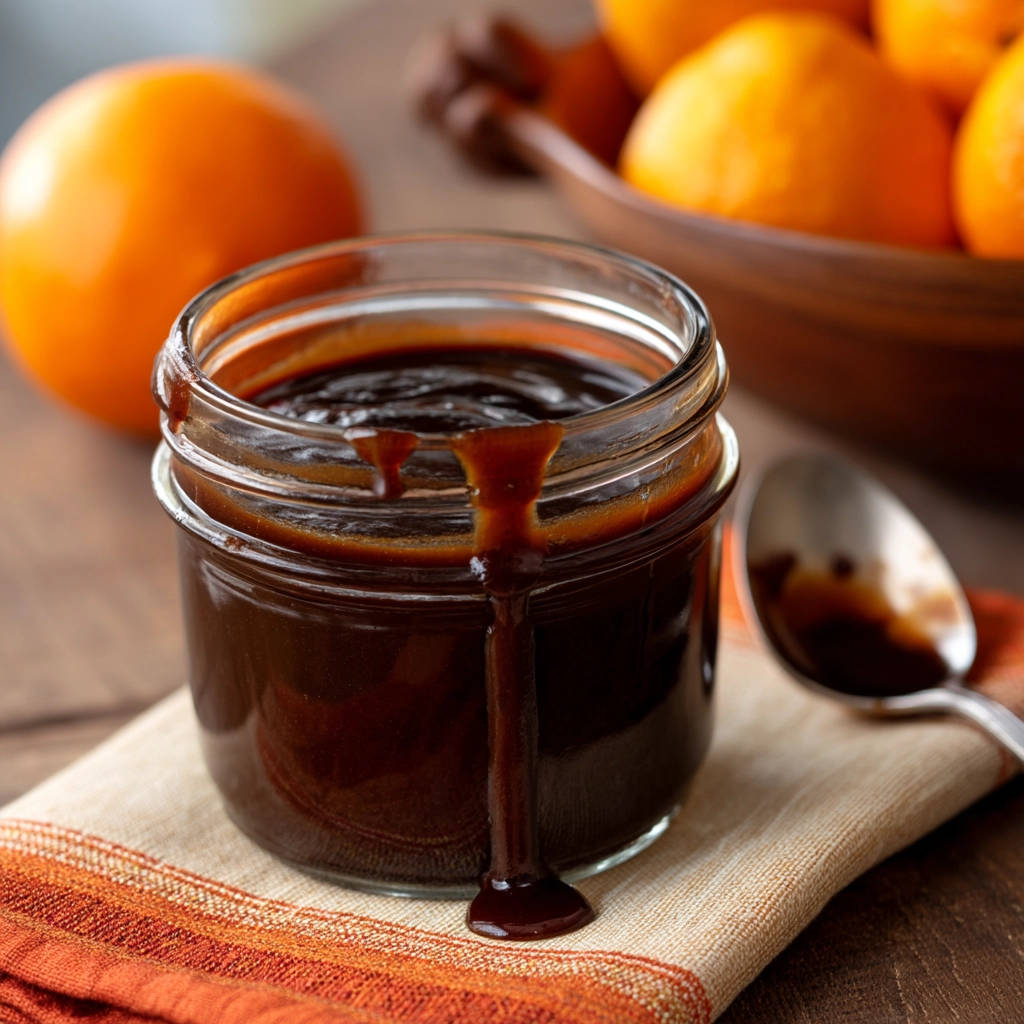
Now comes the crucial step for achieving perfect thickness! Let the glaze simmer gently on low heat for 10 to 15 minutes. This simmering time allows the water to evaporate, concentrating the sugar and orange flavors and thickening the glaze. Stir occasionally to prevent sticking and ensure even heating. To check if it’s ready, the classic test is to dip the back of a spoon into the glaze. When you pull it out, the glaze should lightly coat the back of the spoon without running off immediately. Remember that the glaze will thicken more as it cools, so don’t expect it to be super thick right off the heat.
If, after 10-15 minutes and testing, the glaze still seems too thin for your liking, continue to simmer it for a few more minutes, testing every minute or two. Be patient! If you happen to overshoot and it becomes too thick as it cools, don’t worry. You can easily adjust the consistency by stirring in a tablespoon or two of hot water until it reaches your desired pourable state.
Once you are happy with the consistency – it coats the back of a spoon nicely and has simmered for the recommended time – carefully remove the saucepan from the heat. This stops the cooking process and prevents further reduction.
With the saucepan off the heat, add the unsalted butter and vanilla extract. Stir gently until the butter is completely melted and fully incorporated into the glaze. The butter will add a lovely richness and give the glaze a beautiful, glossy finish.
Carefully pour the finished easy orange glaze into a jar or other heatproof container for storage or cooling. As mentioned, it will continue to thicken slightly as it cools. For optimal drizzling consistency, allow it to cool at room temperature for about 15-20 minutes before you use it. This cooling time is key to achieving that perfect pourable texture that coats your baked goods or meats beautifully.
Tips for Perfect Orange Glaze Every Time
Here are a few extra pointers to ensure your orange glaze is consistently perfect:
- Zest First: Always zest your orange before you juice it. It’s much easier to get the zest from a firm, whole orange.
- Avoid the Pith: When zesting, be careful to only remove the brightly colored outer layer of the peel. The white pith underneath is bitter and will give your glaze an unpleasant taste.
- Fresh is Best: While bottled orange juice can be used in a pinch, fresh orange juice provides a far superior, brighter flavor for your glaze.
- Watch Your Simmer: The 10-15 minute simmer time is a guideline. Pay attention to the visual cue (lightly coating the spoon) and adjust the time based on how your glaze looks and feels. Factors like your saucepan size and stove heat can affect reduction time.
- Adjusting Thickness Later: Remember the hot water trick if it’s too thick, and a quick gentle reheat with a tiny bit more water can loosen it up if it sets too much.
- Flavor Boost: Want to punch up the flavor even more? Consider adding a tiny pinch of ground ginger or a dash of orange extract (use sparingly!) along with the vanilla.
What to Serve With This Easy Orange Glaze
The versatility of this easy orange glaze is one of its best features! While it’s divine on just about any sweet treat, don’t limit yourself. Here are some delicious ideas:
For a different kind of sweetness, explore this fluffy vanilla buttercream.
Drizzle it generously over warm classic fluffy waffles or pancakes for a breakfast revelation. It’s also incredible on freshly baked muffins or scones. Have you tried making cranberry orange scones? A touch of this glaze takes them to a whole new level!
For desserts, think beyond the cake. This glaze is fantastic over classic banana bread, pound cake, or even spooned over ice cream. It would be a beautiful addition to many of our baking recipes, like our easy carrot cake.
But it’s not just for sweets! A light brush of this glaze towards the end of cooking adds a gorgeous sheen and subtle sweetness to roasted chicken or glazed ham. It creates a lovely caramelized exterior that is truly craveable.
Your Easy Orange Glaze Questions Answered (FAQ)
Got questions about making or using this glaze? Here are some common ones:
Can I make this orange glaze ahead of time?
Absolutely! This glaze is perfect for making in advance. Prepare it according to the instructions, let it cool completely, then store it in an airtight container in the refrigerator. It will thicken considerably when chilled.
How do I reheat chilled orange glaze?
To use the glaze after refrigeration, you’ll need to gently reheat it. The easiest way is to place the container in a bowl of warm water for a few minutes, stirring occasionally. You can also microwave it in short bursts (15-30 seconds), stirring between each burst, until it’s pourable again. If it’s still too thick, stir in a tiny amount (half a teaspoon at a time) of hot water.
How long does homemade orange glaze last?
Stored properly in an airtight container in the refrigerator, this orange glaze should last for up to 1-2 weeks. Always check for any off smells or mold before using.
Can I double or triple this recipe?
Yes, you can easily scale this recipe up. Use a larger saucepan to accommodate the increased volume and allow for proper simmering. The simmering time might increase slightly, so rely on the spoon test for consistency.
What if I don’t have fresh oranges for zest?
Fresh zest is truly best for intensity, but if you absolutely cannot get fresh oranges, you could potentially omit the zest and perhaps add a drop or two of pure orange extract very carefully at the end along with the vanilla, tasting as you go. The flavor won’t be quite the same without the fresh zest’s aromatic oils, but it will still give you an orange note. Canned or bottled juice is fine for the liquid, but prioritize fresh if possible.
Is this glaze dairy-free or vegan?
As written, no, because it contains unsalted butter. To make it dairy-free or vegan, you would need to substitute the butter with a plant-based butter substitute. The texture might vary slightly, but the core orange flavor will still be there.
Enjoy Your Homemade Easy Orange Glaze!
With this simple recipe and technique, you’re now equipped to make a perfectly thick and wonderfully flavorful easy orange glaze any time you need it. It’s a bright, versatile addition to your recipe repertoire, ready to transform ordinary baked goods or savory dishes into something special.
Give it a try and let me know what you think! What’s your favorite way to use orange glaze? Share your ideas in the comments below!
Orange Glaze
Course: SauceCuisine: AmericanDifficulty: easy12
servings3
minutes15
minutes350
kcal18
MinutesLearn how to make the perfect easy orange glaze every time with this foolproof recipe! Achieve ideal thickness for cakes, meats, and more. Get the secret here!
Ingredients
1 cup packed brown sugar
1/2 cup water
1/4 cup fresh orange juice
1 tablespoon orange zest
2 tablespoons unsalted butter
1/2 teaspoon vanilla extract
Directions
- Combine the brown sugar, water, orange juice, and orange zest in a medium saucepan.
- Heat over medium heat, stirring constantly until the sugar is completely dissolved.
- Bring the mixture to a gentle boil, then reduce the heat to low and simmer.
- This is the key step for perfect thickness: Let the glaze simmer for 10 to 15 minutes, stirring occasionally. To test if it’s ready, dip a spoon into the glaze. It should lightly coat the back of the spoon. As it cools slightly, it will thicken further. If it seems too thin, simmer for a few more minutes, testing again. If it gets too thick, you can stir in a tablespoon or two of hot water to reach the desired consistency.
- Once the glaze reaches your desired thickness and coats the back of a spoon, remove the saucepan from the heat.
- Stir in the butter and vanilla extract until the butter is completely melted and incorporated.
- Pour the glaze into a jar or heatproof container. It will thicken slightly as it cools. Allow it to cool for about 15-20 minutes before using.
Notes
- For a smoother glaze, strain out the orange zest after simmering if you prefer a less textured finish. If your glaze seems too thick after cooling slightly, a tiny splash of warm water can help loosen it up.