Oh, homemade granola bars. They promise so much – a healthy-ish, portable snack, completely customizable, and a fun kitchen project. But let’s be honest, if you’ve ever tried making them from scratch, you’ve likely experienced the ultimate granola bar heartbreak: the crumble. You lift one from the pan, and poof – you’re left with a pile of chocolatey, oaty granola bar dust instead of a perfect bar. It’s beyond frustrating!
I know this struggle intimately. I spent years experimenting, tweaking, and sighing over crumbly batches. But after countless tests, I finally cracked the code to create homemade chocolate chip granola bars that hold together beautifully, are perfectly chewy, and satisfy that sweet snack craving. The secret isn’t complicated; it comes down to understanding the simple science of binding and pressing. And I can’t wait to share it with you!
Why You’ll Fall in Love with This Granola Bar Recipe
Forget those expensive, often overly sweet store-bought bars. Making your own offers so many advantages, and this recipe takes it to the next level:
- No More Crumbling: This is the big one! You’ll get sturdy, transportable bars every single time.
- Perfectly Chewy Texture: Not too hard, not too soft – just the right amount of chewiness.
- Easy to Make: Seriously, the process is straightforward and doesn’t require any fancy equipment.
- Wholesome Ingredients: You control exactly what goes in, making them a great snack option.
- Delicious Chocolate Chip Flavor: Because who doesn’t love a little chocolate in their snack?
- Great for Meal Prep: Whip up a batch at the start of the week for easy grab-and-go breakfasts or snacks.
Gathering Your Ingredients for Sturdy Granola Bars
One of the best things about this recipe is how simple the ingredient list is. You likely have most of these pantry staples on hand right now! Each component plays a crucial role in achieving that perfect balance of flavor, texture, and most importantly, structure.
Our base is, of course, oats. We use rolled oats (sometimes called old-fashioned oats) because they retain their shape and provide that classic chewy granola bar texture. Quick oats can work in a pinch, but they absorb liquid differently and can result in a softer, sometimes gummier bar, so rolled oats are highly recommended for the best results.
The magic binder that holds everything together comes from a simple syrup mixture. This is where the honey or maple syrup, butter or coconut oil, and brown sugar work in harmony. The syrup (either honey for a classic taste or maple syrup for a vegan option and distinct flavor) provides sweetness and stickiness. Combining it with melted butter or coconut oil adds richness and helps distribute the binding power throughout the oats. Brown sugar not only contributes sweetness but its molasses content adds a lovely depth of flavor and helps create that desirable chewiness. A touch of vanilla extract enhances all the other flavors, and a pinch of salt balances the sweetness.

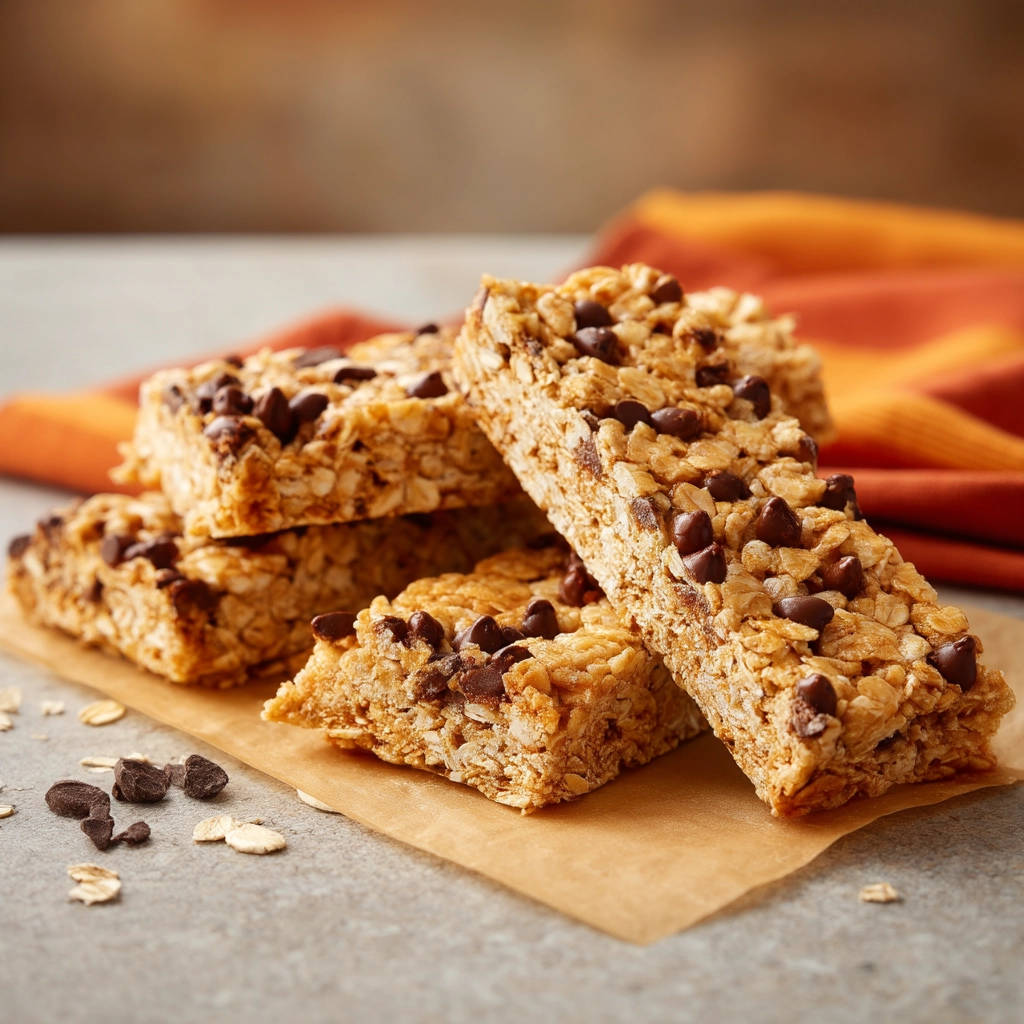
And then, there are the stars that make these bars kid-approved (and let’s be honest, adult-approved too!): mini chocolate chips! Using mini chips ensures you get a bit of chocolatey goodness in almost every bite without overwhelming the bar.
Here’s a quick list of what you’ll need:
- 3 cups rolled oats
- 1/2 cup mini chocolate chips
- 1/2 cup honey or maple syrup
- 1/4 cup unsalted butter or coconut oil
- 2 tablespoons brown sugar
- 1 teaspoon vanilla extract
- 1/4 teaspoon salt
Crafting Your Granola Bars That Won’t Fall Apart: Step-by-Step
Making these sturdy chocolate chip granola bars is a breeze once you understand the key techniques. Don’t skip the crucial steps – they are what prevent the dreaded crumble!
Prepare Your Pan: First things first, get your pan ready. Grab an 8×8 inch baking pan. Lining it with parchment paper is essential because it makes removing the finished block of bars incredibly easy. Make sure to leave a generous overhang of parchment on all sides – this acts as handles later on. This simple step prevents sticking and broken bars when you try to take them out.
Combine Dry Ingredients: In a large mixing bowl, measure out your rolled oats and pour in the mini chocolate chips. Give them a quick stir just to distribute the chocolate chips somewhat evenly among the oats. This is the dry foundation for our bars.
Cook the Magical Binder: This is arguably the most crucial step for ensuring your bars stay together! In a small saucepan, combine the honey (or maple syrup), melted butter (or coconut oil), brown sugar, salt, and vanilla extract. Place this saucepan over medium heat. Cook this mixture, stirring frequently, until the butter is completely melted and you see small bubbles forming and simmering around the edges of the pan. This usually takes about 2-3 minutes once it’s heated through. Cooking this syrup mixture slightly concentrates the sugars and activates their binding properties. This brief heating period is key to creating a sticky, solidifying binder.
Combine Wet and Dry: Immediately pour the hot syrup mixture from the saucepan over the oat and chocolate chip mixture in your large bowl. Work quickly now! Use a sturdy spoon or spatula to stir everything together right away. Continue stirring until every single oat flake is coated in the warm, sticky syrup. You’ll see the dry ingredients transform as they get glossy and fully integrated with the binder.
Press, Press, PRESS!: Now for the technique that guarantees no crumbling. Pour the coated oat mixture into the parchment-lined 8×8 inch baking pan. This is where you need to exert some serious, even pressure. Use the back of a spoon, a flat-bottomed glass, or even another smaller pan to press the mixture down very firmly and evenly into the pan. Don’t be shy here! Pack it down as tightly as you possibly can, ensuring there are no loose spots or air pockets. The tighter you pack it, the more cohesive the final bars will be.
Chill Out: Once the mixture is firmly pressed into the pan, place the entire pan into the refrigerator. It needs time to cool completely and for the butter/coconut oil and the cooked syrup binder to solidify and set. Chill for at least 2 hours, or until the block of granola is completely firm to the touch. Patience during this chilling phase is rewarded with bars that are easy to cut and hold their shape.
Lift and Slice: Once fully chilled and firm, use the parchment paper overhang as handles to carefully lift the entire block of granola bars out of the baking pan and transfer it to a cutting board. This is where you’ll really appreciate that overhang!
Cut and Store: Use a sharp knife to cut the large block into individual bars. A sharp knife makes for clean cuts and minimizes crumbling. You can cut them into traditional rectangles or squares, depending on your preference. Store your finished homemade chocolate chip granola bars in an airtight container. They can be kept at room temperature for a few days, or in the refrigerator for a longer shelf life (they’ll also be even firmer when chilled!).
Tips for Perfect Homemade Granola Bars Every Time
Even with a foolproof recipe, a few extra tips can help ensure your success and open up possibilities for variations:
- Measure Accurately: Especially for the liquid binder ingredients. Too much dry or too little binder will affect the structure.
- Don’t Skimp on Pressing: I know I mentioned it in the steps, but it bears repeating! Pressing firmly is the single most important factor in preventing crumbling. Put some muscle into it!
- Use the Right Oats: Rolled oats (old-fashioned) are best. Instant oats will make the texture mushy, and steel-cut oats won’t bind correctly.
- Cool Completely: Trying to cut the bars before they are fully chilled will lead to a crumbly mess. Be patient!
- Mix-In Ideas: While this is a classic chocolate chip recipe, feel free to get creative. You could swap chocolate chips for other additions. Consider dried cranberries (perhaps after making some candied cranberries?), chopped nuts, seeds (like chia or flax), shredded coconut, or other types of chips (peanut butter, white chocolate). Just keep the total amount of mix-ins roughly the same as the chocolate chips (around 1/2 cup) so you don’t throw off the oat-to-binder ratio.
- Make it Gluten-Free: Ensure you are using certified gluten-free rolled oats and a gluten-free sweetener like maple syrup.
- Make it Vegan: Use maple syrup instead of honey and coconut oil instead of butter. Ensure your chocolate chips are dairy-free.
Serving Suggestions for Your Granola Bars
These homemade chocolate chip granola bars are fantastic on their own as a quick snack or part of a packed lunch. But they can also be enjoyed in other ways:
Enjoy one with your morning coffee or tea for a simple, energizing start to your day. They make a great addition to a packed breakfast alongside some fruit or yogurt, perhaps after you’ve mastered the ultimate breakfast sandwich for heartier mornings.
Pair a bar with a glass of milk or a smoothie for an afternoon pick-me-up. You could even crumble a bar over yogurt or ice cream for a quick dessert topping, similar to how you might use a crumble from recipes like classic peach crumble, just for a different texture.
Your Homemade Granola Bar Questions Answered (FAQ)
Got questions? I’ve got answers! Here are some common things people ask when making granola bars from scratch:
Why do my homemade granola bars keep falling apart?
The most common reasons are not cooking the binder mixture long enough (or at all!) and not pressing the mixture firmly enough into the pan. The brief cooking step helps the sugars in the syrup and brown sugar become stickier and harden upon cooling. Aggressive pressing removes air pockets and creates a dense, solid block that holds together once chilled.
How long do homemade granola bars last?
When stored in an airtight container, these granola bars will last for about 3-4 days at room temperature or up to a week in the refrigerator. Keeping them chilled can help them maintain their firmness, especially in warmer climates.
Can I substitute other ingredients for the chocolate chips?
Absolutely! Feel free to swap the mini chocolate chips for an equal amount (around 1/2 cup total) of other add-ins like chopped nuts, seeds, dried fruit (like raisins or chopped apricots), or even a mix of several things. Just be mindful that using larger or heavier additions might make them slightly more prone to breaking, but the core binding technique should still work well.
Can I use instant oats instead of rolled oats?
I highly recommend using rolled oats (old-fashioned oats) for the best texture and structure. Instant oats are cut finer and cook faster, absorbing the liquid binder differently. While they might technically work, the resulting bar can be softer and sometimes have a gummy texture, and may be more likely to crumble compared to using rolled oats.
Can I freeze these granola bars?
Yes, you can! Once the bars are cut, wrap each individual bar tightly in plastic wrap, then place the wrapped bars in a freezer-safe bag or container. They can be frozen for up to 3 months. Thaw them at room temperature for an hour or two before enjoying.
Is this recipe considered no-bake?
Yes, this is essentially a no-bake recipe in terms of the final product being set without oven baking. The binder mixture is cooked on the stovetop, but the main oat and chocolate chip mixture is not baked in the oven.
Enjoy Your Homemade Chocolate Chip Granola Bars!
I hope this recipe brings an end to your granola bar crumbling woes! These chewy, chocolatey, and perfectly sturdy bars are a game-changer for easy snacking and breakfast on the go. Give them a try, master the pressing technique, and enjoy the satisfaction of making your own delicious treats.
What are your favorite granola bar mix-ins? Do you have any other tips for perfect bars? Let me know in the comments below! And if you make these, be sure to share a picture – I love seeing your creations!
Homemade Chocolate Chip Granola Bars

Ingredients
- 3 cups rolled oats
- 1/2 cup mini chocolate chips
- 1/2 cup honey or maple syrup
- 1/4 cup unsalted butter or coconut oil
- 2 tablespoons brown sugar
- 1 teaspoon vanilla extract
- 1/4 teaspoon salt
Directions
- Line an 8×8 inch baking pan with parchment paper, leaving some overhang on the sides.
- In a large bowl, combine the rolled oats and mini chocolate chips.
- In a small saucepan over medium heat, combine the honey or maple syrup, butter or coconut oil, brown sugar, salt, and vanilla extract. Cook and stir until the butter is melted and the mixture is bubbly around the edges, about 2-3 minutes. This cooking step is crucial for binding.
- Pour the hot syrup mixture over the oat and chocolate chip mixture in the large bowl. Stir everything together quickly until the oats are completely coated.
- Pour the mixture into the prepared baking pan. This is the key step to prevent crumbling: Press the mixture down very firmly and evenly into the pan using the back of a spoon or a flat-bottomed glass. Really pack it in tightly.
- Place the pan in the refrigerator and chill for at least 2 hours, or until completely firm.
- Use the parchment paper overhang to lift the block of granola bars out of the pan. Place it on a cutting board.
- Cut the block into bars using a sharp knife. Store bars in an airtight container at room temperature or in the refrigerator.