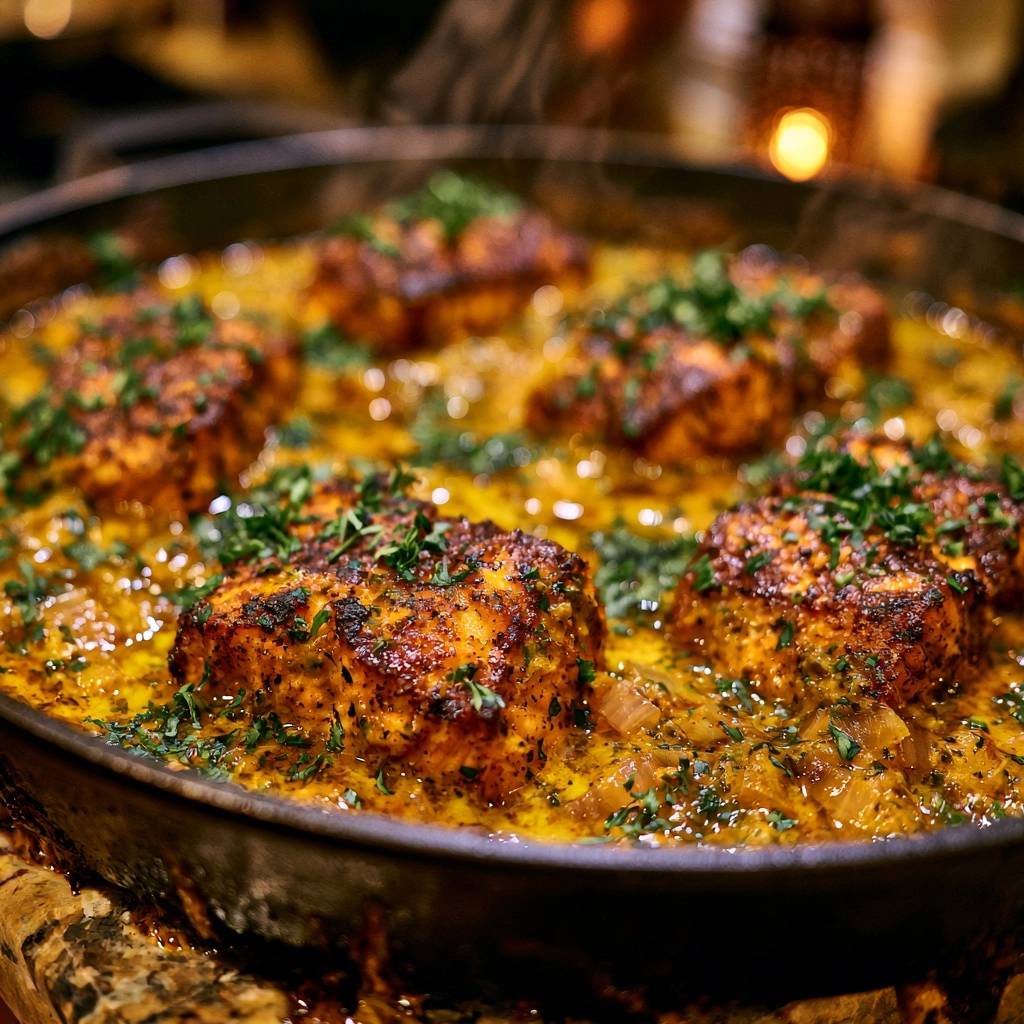
Forget those sad, rubbery salmon fillets with pale skin that slides right off the fork. Most home cooks struggle with salmon because they add liquid too early or crowd the pan, which essentially steams the fish instead of searing it. If you’ve ever felt disappointed by a soggy crust, you’re in the right place to fix that forever.
This Blackened Creamy Garlic Butter Salmon is all about the contrast between an aggressive, charred spice crust and a delicate, velvety cream sauce. We use a specific high-heat dry-sear method to ensure the fish stays firm and flavorful. By the time you’re done, you’ll have a restaurant-quality meal that looks as good as it tastes.
The secret to this recipe’s success is the timing of the sauce. We sear the salmon to perfection first, then set it aside while building the garlic butter emulsion. This prevents the spices from washing away and keeps that skin incredibly crisp. Trust me, once you hear that first crunch against the creamy sauce, you’ll never go back to basic pan-frying.
The Mechanics of a Perfect Blackened Crust
Blackening is a culinary technique that often gets confused with simply burning food, but there’s a massive difference. A true blackened crust is the result of a complex Maillard reaction where the proteins in the fish and the sugars in the spices caramelize under intense heat. It creates a savory, deeply flavored barrier that protects the tender meat inside.
In this recipe, we use a heavy hand with smoked paprika and dried herbs. These ingredients don’t just add flavor; they create a physical crust that insulates the delicate fish oils. When the spices hit the hot oil, they toast instantly, releasing an earthy aroma that permeates the top layer of the salmon without overcooking the center.
The goal is a dark, mahogany-colored finish that feels firm to the touch. This crust provides the structural integrity needed to sit in a rich sauce without turning into mush. It’s the ultimate balance of texture, providing a smoky, spicy bite that cuts right through the decadence of the heavy cream and butter.
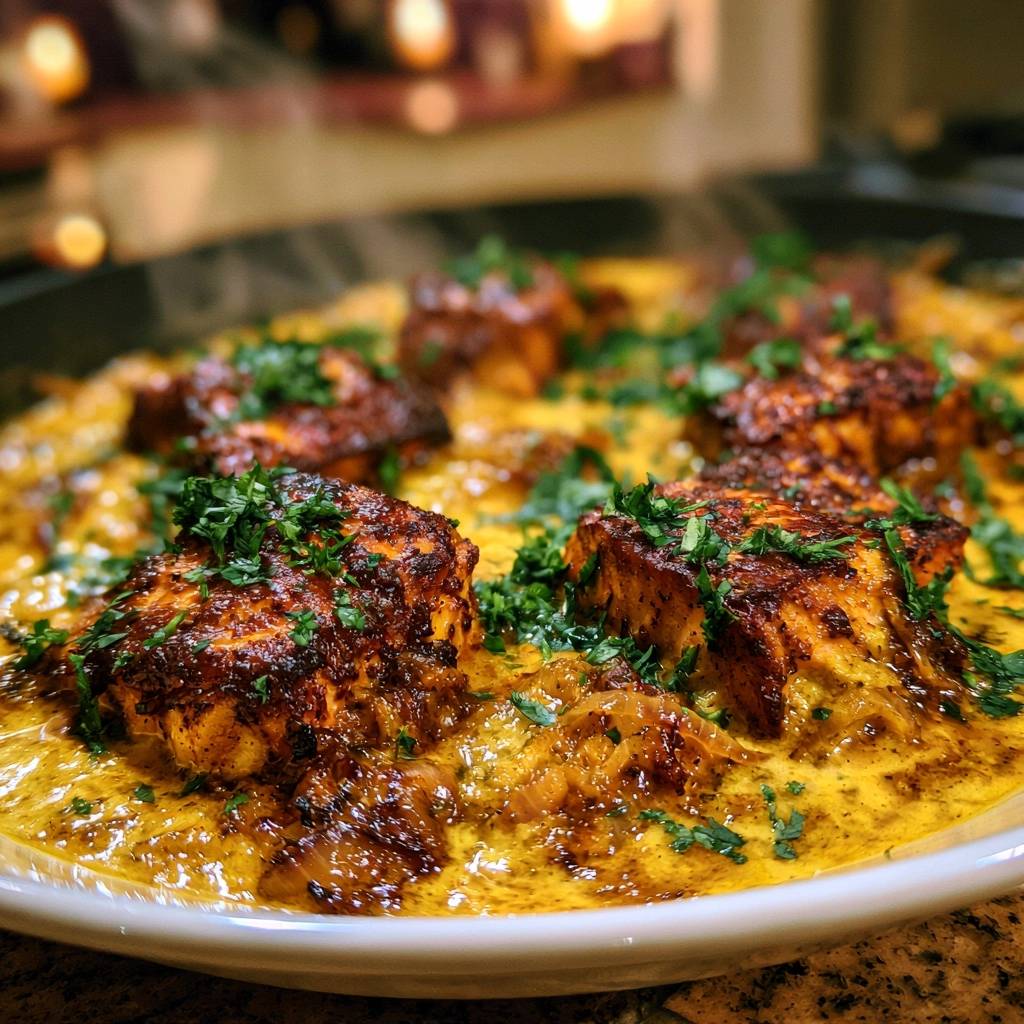
Why Moisture is the Enemy of Crisp Salmon
If there’s one rule you must follow, it’s this: moisture is the absolute enemy of a good sear. When you put a damp piece of fish into a hot pan, the surface water immediately turns into steam. That steam creates a pocket between the fish and the pan, preventing the direct contact needed for browning.
You must pat the salmon fillets extremely dry with paper towels on all sides before you even think about adding the spices. I’m talking bone-dry. If the skin is wet, it will turn out rubbery and tough rather than snapping like a cracker. Taking thirty seconds to dry the fish is the difference between a mediocre dinner and a masterpiece.
Essential Components for Blackened Creamy Garlic Butter Salmon
Quality ingredients are the backbone of this dish, especially since we’re using high heat. I always recommend using skin-on fillets because the skin acts as a natural heat shield. It protects the flesh from drying out while providing that essential fatty crunch that makes the dish so satisfying.
When it comes to the fat, we use a combination of olive oil for the high-heat sear and unsalted butter for the sauce. Using unsalted butter is a pro move here. Since the blackening rub already contains a fair amount of salt, using unsalted butter allows you to control the final seasoning perfectly without the dish becoming a salt bomb.
Fresh garlic and shallots are non-negotiable for the base of the sauce. While powder works for the rub, the sauce needs the aromatic punch of freshly minced cloves. The heavy cream provides the body, while a splash of chicken broth adds a savory depth that water just can’t replicate.
Selecting the Right Cut: Wild vs. Farmed
Choosing your salmon is the first step toward success. King salmon is the “wagyu” of the sea with a high fat content that stands up beautifully to blackening. Sockeye is leaner and has a more intense, “fishy” flavor that some people love, but it can overcook quickly if you aren’t careful.
Atlantic salmon, which is usually farmed, is a great all-around choice for this recipe because its higher fat content makes it very forgiving. Look for fillets that are vibrant in color and firm to the touch. If you press the flesh and it doesn’t spring back, or if it smells overly “oceanic,” keep looking for a fresher batch.
The Spice Profile: Balancing Heat and Earthiness
The rub is a carefully calibrated mix of smoked paprika, garlic powder, onion powder, and dried oregano. We use onion powder in the rub instead of fresh onions because fresh bits would burn and turn bitter at the temperatures required for blackening. The powder provides that savory sweetness without the risk of scorching.
If you like a bit of a kick, the cayenne pepper is your best friend. You can easily scale it up or down depending on your spice tolerance. The goal is to create a balanced profile where the heat doesn’t mask the natural sweetness of the salmon but rather enhances the richness of the garlic butter sauce.
Step-by-Step: Achieving the High-Heat Sear
To get that iconic sear, you need to heat your oil until it’s shimmering and just starting to show tiny wisps of smoke. This is the “shimmer point.” If the oil isn’t hot enough, the fish will stick to the pan, and you’ll lose that beautiful crust when you try to flip it.
Once you lay the salmon in the pan—skin-side down first—use a flexible spatula to press down firmly for about ten seconds. This prevents the skin from curling as the proteins contract from the heat. It ensures the entire surface of the skin makes contact with the pan for an even, golden-brown finish.
Don’t move the fish! Let it sit undisturbed for at least four minutes. You’ll see the color of the meat start to change from the bottom up. This patience is what builds the crust. If you try to flip it too early and it feels stuck, give it another thirty seconds; the fish will naturally “release” from the pan once the sear is complete.
Managing the Cast Iron Skillet
A heavy-bottomed pan, specifically cast iron, is the gold standard for this recipe. Cast iron holds heat better than stainless steel or non-stick, meaning the temperature won’t drop the moment the cold fish hits the surface. This consistent heat is vital for a fast, effective sear.
Keep an eye on the smoke. If the pan starts billowing acrid, dark smoke, it’s too hot and your spices will taste burnt. If there’s no sizzle at all, it’s too cool. You want a steady, vigorous sizzle that tells you the moisture is evaporating and the crust is forming.
The Flip: Timing the Internal Temperature
When you flip the salmon, you’re looking for the “opaque creep.” This is when the cooked, lighter-colored meat has moved about halfway up the side of the fillet. The second side only needs a couple of minutes because the spices will darken very quickly.
For the best texture, aim for an internal temperature of 125°F to 130°F. This is medium-rare, which is ideal because the fish will continue to cook slightly once you nestle it back into the warm sauce. Overcooked salmon becomes chalky, but this temperature ensures it stays buttery and moist.
Building the Velvety Garlic Butter Emulsion
After removing the salmon, the pan will be full of “fond”—those delicious browned bits of spice and fish protein. Don’t wash the pan! We use chicken broth to deglaze, which means the liquid lifts those bits off the bottom and incorporates them directly into the sauce for a massive flavor boost.
As you stir in the heavy cream and the remaining butter, the sauce will begin to emulsify. This is where the magic happens. The fat from the cream and butter binds with the liquid to create a thick, glossy coating that feels incredibly luxurious on the tongue.
Keep the heat at a gentle simmer. If you boil the sauce too hard, the cream might break, leading to a greasy mess. A slow bubble is all you need to reduce the liquid and concentrate the flavors into a velvety consistency that’s ready to hug your salmon fillets.
Aromatics: The Shallot and Garlic Foundation
We sauté the shallots first because they take a little longer to soften than garlic. You want them translucent and sweet, not browned. Once the shallots are soft, add the minced garlic. Garlic burns in seconds, so only give it about a minute until it smells amazing.
The heavy cream acts as a thermal buffer. As soon as you pour it in, it drops the temperature of the pan, stopping the garlic from cooking further. This ensures you get the sweet, mellow flavor of cooked garlic without any of the bitterness that comes from over-browning.
Achieving the Ideal Sauce Consistency
You’ll know the sauce is ready when it reaches the “nappe” stage. This is a fancy French term that just means the sauce is thick enough to coat the back of a spoon. If you run your finger through the sauce on the spoon, the line should stay clean and not fill back in.
Always add your lemon juice at the very end, after you’ve turned off the heat or lowered it significantly. The acid in the lemon juice can cause the proteins in the cream to curdle if it’s boiled too vigorously. Adding it last provides a bright, fresh finish that cuts through the richness perfectly.
Avoiding Common Salmon Cooking Mistakes
One of the most common mistakes is pouring the sauce directly over the top of the finished salmon. Don’t do it! This will immediately soften the blackened crust you worked so hard to create. Instead, nestle the fillets into the sauce so the skin stays submerged but the crusty top remains dry and crispy.
If your sauce feels too thick, simply whisk in a tablespoon of broth or water to loosen it up. If it’s too thin, let it simmer for another minute or two. Remember, the sauce will continue to thicken as it cools slightly on the plate, so pull it off the heat just before it looks “perfect.”
Optimal Pairings for Rich Seafood Dishes
Because this dish is so rich and buttery, you want side dishes that offer a bit of acidity or crunch. Roasted asparagus with a heavy squeeze of lemon is a classic choice. The bitterness of the asparagus balances the cream sauce beautifully.
A light quinoa pilaf or a simple bed of garlicky sautéed spinach also works wonders. These sides soak up the extra garlic butter sauce without making the meal feel too heavy. If you want something more substantial, a small portion of pasta tossed in olive oil and parsley is a great vessel for that extra cream.
Troubleshooting and Expert Preparation Tips
Can I use frozen salmon fillets for this recipe?
Yes, you can use frozen salmon, but you must thaw it completely in the refrigerator overnight. Once thawed, it will likely have more surface moisture than fresh fish. You’ll need to be extra diligent about patting it dry with paper towels to ensure you still get a proper sear and a crispy crust.
How do I prevent the spices from smoking out my kitchen?
Blackening naturally creates some smoke because of the high heat and the spices. To manage this, use an oil with a high smoke point like avocado oil or refined olive oil. Make sure your kitchen is well-ventilated by turning on the exhaust fan or opening a window before you start the searing process.
What is the best way to reheat leftovers without overcooking the fish?
Reheating salmon is tricky because it dries out easily. The best method is to place the salmon and sauce in a pan over low heat, cover it with a lid, and warm it slowly. This creates a gentle steam environment that heats the fish through without blasting it with high heat again. Avoid the microwave if possible!
Can I substitute heavy cream with a lighter alternative?
You can use half-and-half, but the sauce won’t be as thick or stable. Heavy cream has a higher fat content which prevents it from curdling when mixed with the lemon juice and broth. If you use a lighter milk, you may need to whisk in a teaspoon of cornstarch mixed with water to help it thicken properly.
How do I keep the skin crispy if I’m making this for a dinner party?
The “nestling” technique is key. Prepare the sauce and the fish separately. Only place the fish back into the pan right before you are ready to walk the dish to the table. This minimizes the time the crispy skin spends in contact with the liquid, ensuring every guest gets that perfect crunch.
Storage and Quality Maintenance
This dish is best enjoyed immediately while the textures are at their peak. However, if you have leftovers, store them in an airtight container in the refrigerator for up to two days. The sauce may thicken significantly when cold, so you might need a splash of water when reheating.
I do not recommend freezing this dish. The cream-based sauce is an emulsion that will likely break and become grainy once frozen and thawed. Additionally, the salmon’s texture will lose its firmness. For the best experience, stick to the two-day refrigeration window and enjoy it for a quick, delicious lunch.
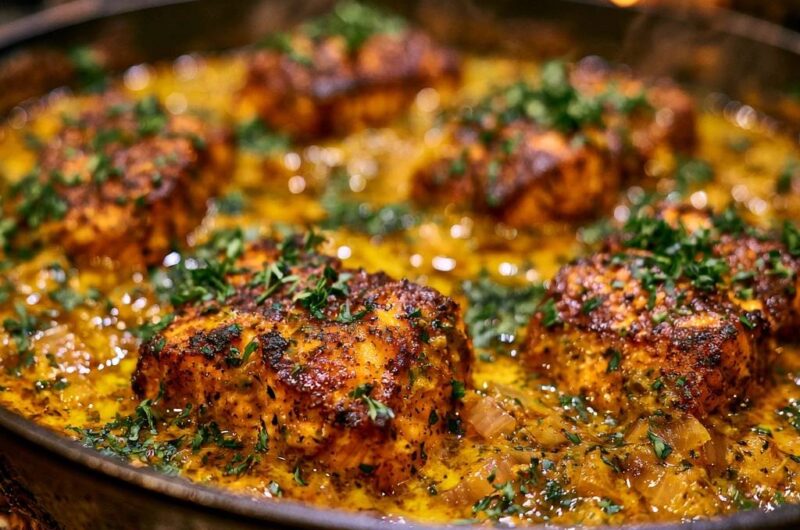
Blackened Creamy Garlic Butter Salmon
Course: Main CourseCuisine: AmericanDifficulty: easy4
servings10
minutes15
minutes25
Minutes480
kcalAmerican
Ingredients
4 salmon fillets (6 oz each), skin-on
2 tablespoons olive oil
1 tablespoon smoked paprika
1 teaspoon garlic powder
1 teaspoon onion powder
1/2 teaspoon dried oregano
1/2 teaspoon cayenne pepper (optional for heat)
1 teaspoon kosher salt
1/2 teaspoon cracked black pepper
4 tablespoons unsalted butter, divided
4 cloves garlic, minced
1 small shallot, finely diced
1/2 cup heavy cream
1/4 cup chicken broth
1/2 cup fresh parsley, finely chopped
1 tablespoon lemon juice
Directions
- Pat the salmon fillets extremely dry with paper towels on all sides. This is the most critical step for a crispy, non-mushy result.
- In a small bowl, mix the paprika, garlic powder, onion powder, oregano, cayenne, salt, and pepper. Generously coat the flesh side and the sides of the salmon with the spice rub, pressing it in so it adheres.
- Heat olive oil in a large cast-iron or heavy-bottomed skillet over medium-high heat until the oil is shimmering and just starting to wisps of smoke.
- Place salmon in the pan, skin-side down first. Press down firmly with a spatula for 10 seconds to prevent curling. Cook undisturbed for 4-5 minutes until the skin is deeply browned and crispy.
- Flip the fillets. Cook for 2-3 minutes on the flesh side until the spices form a dark, blackened crust. Remove the salmon from the pan and set aside on a plate.
- Reduce heat to medium. Wipe out any excess burnt spice bits if necessary, then add 2 tablespoons of butter. Once melted, sauté the shallots and garlic for 1-2 minutes until translucent and fragrant.
- Pour in the chicken broth to deglaze the pan, scraping up the flavorful browned bits. Stir in the heavy cream and the remaining 2 tablespoons of butter. Simmer for 3-4 minutes until the sauce reduces and thickens to a velvety consistency.
- Stir in the lemon juice and half of the parsley.
- Carefully place the salmon back into the pan, nestling it into the sauce. To keep the skin and crust crispy, do not pour the sauce over the top of the fish.
- Garnish heavily with the remaining fresh parsley and serve immediately directly from the skillet.
Notes
- Patting the salmon extremely dry is the most critical step for crispy skin. To maintain the texture, do not pour the sauce over the top of the blackened crust when serving.