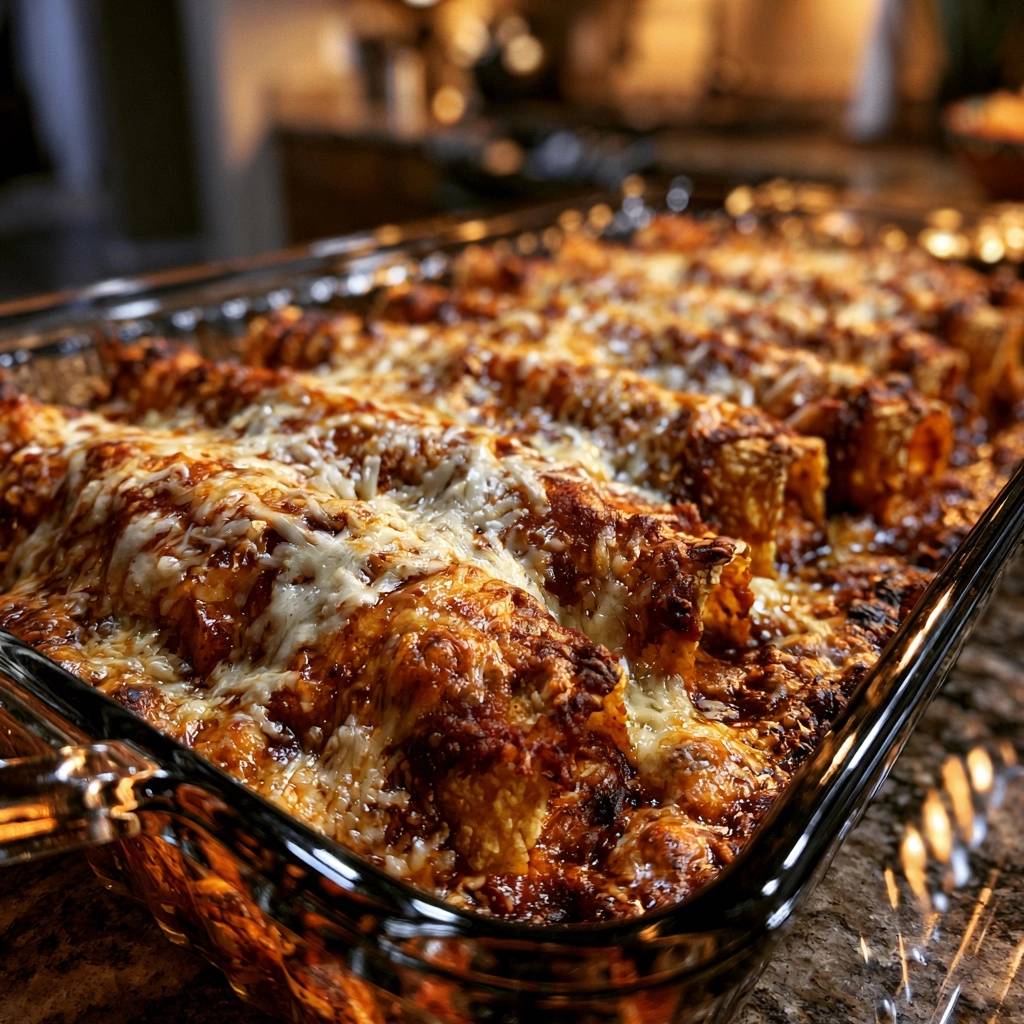
Nothing ruins a long-awaited Mexican dinner faster than a plate of mushy, falling-apart tortillas. You know the feeling when you lift an enchilada out of the pan, and it disintegrates into a soggy masa porridge? It’s a common heartbreak in home kitchens, but it doesn’t have to be your reality.
The secret to a restaurant-quality experience lies in the structural integrity of the tortilla. We’re aiming for a specific textural contrast: a tender, sauce-soaked center paired with slightly crisp, toasted edges and a molten cheese topping. By balancing the hearty protein of lean ground beef with the earthy fiber of black beans, we create a filling that stands up to the bold red sauce.
The real game-changer here is what I call the Anti-Soggy Hack. Most recipes fail because they skip a crucial step that protects the corn fiber from moisture. If you’ve ever wondered why professional chefs have such firm enchiladas, the secret is a quick flash-fry in hot oil to create a hydrophobic barrier before the sauce even touches the tortilla.
The Science of the Anti-Soggy Tortilla Hack
To understand why enchiladas get soggy, we have to look at the chemistry of a corn tortilla. Corn tortillas are made of masa harina, which is essentially dehydrated corn starch and fiber. When these starch molecules come into contact with a water-based liquid like enchilada sauce, they immediately begin to absorb it, swelling and losing their structural bond.
If you simply dip a raw tortilla in sauce and bake it, the starch becomes oversaturated. However, when you pass a tortilla through hot oil for a few seconds, you’re performing a “flash-fry.” This process does two things: it gelatinizes the surface starches and coats the fibers in a thin layer of lipids (fat).
This lipid layer acts as a waterproof shield. While the sauce will still flavor the tortilla and soften it slightly, the oil prevents the liquid from fully penetrating and dissolving the masa. This is why the “dip and roll” method used in many quick recipes often results in a casserole-like mush, whereas the flash-fry method preserves the individual identity of every single roll.
Essential Components for Cheesy Beef and Bean Enchiladas
Quality ingredients are the foundation of this dish. I always recommend using a 90/10 lean ground beef. While fat adds flavor, too much grease in an enchilada filling will pool at the bottom of your baking dish, contributing to that dreaded sogginess we’re trying to avoid.
Black beans serve as a fantastic texture stabilizer in this recipe. They provide a creamy interior contrast to the crumbly beef and help soak up the small amount of sauce we add to the filling. Make sure you rinse them thoroughly to remove the metallic-tasting canning liquid.
Selecting the Right Corn Tortillas
Look for standard yellow or white corn tortillas rather than the “extra thin” varieties. You need a bit of thickness to withstand the frying and rolling process. Avoid flour tortillas for this specific recipe, as they behave differently and tend to become gummy when baked in sauce.
The Three-Cheese Mexican Blend Ratio
For the ultimate melt, a blend of Monterey Jack, Cheddar, and Asadero is king. Monterey Jack provides the gooey stretch, Cheddar brings the sharp tang, and Asadero offers a buttery smoothness that ties it all together. If you can’t find Asadero, a mild Muenster is a great substitute.
Homemade vs. Store-Bought Red Sauce
While store-bought sauce is a great time-saver, look for brands that list chili purée as the first ingredient rather than tomato paste. If the sauce tastes too acidic or “tinny” straight from the can, whisk in a pinch of sugar or a dash of cumin to mellow it out before assembling your dish.
Preparing the Savory Beef and Bean Filling
Start by browning your beef in a large skillet over medium-high heat. As the meat cooks, use your spatula to break it into very small crumbles. You want a uniform texture so that every bite of the enchilada has an even distribution of beef and beans.
Don’t rush the onion step. Once the beef is mostly browned, add your diced onions and cook until they are translucent and soft. You’re looking for that sweet aroma that indicates the natural sugars have released, which provides a flavor base for the dry spices.
Toasting Dry Spices for Maximum Aroma
Instead of just dumping the cumin and chili powder on top of the liquid, stir them into the hot meat and onions for about 30 seconds first. This “blooms” the spices in the residual beef fat, intensifying their oils and creating a much deeper flavor profile in the finished filling.
Binding the Filling with Enchilada Sauce
A common mistake is leaving the filling too dry, which makes the enchiladas feel crumbly. By stirring 1/4 cup of sauce directly into the beef and bean mixture, you create a cohesive filling that stays put inside the tortilla during the rolling process.
The Flash-Fry Technique: Step-by-Step Execution
This is the most critical part of the process. Heat your vegetable oil in a small skillet until it is shimmering. If the oil isn’t hot enough, the tortilla will just soak up the grease and become heavy. If it’s too hot, it will turn into a crispy taco shell instantly.
Using tongs, slide a tortilla into the oil. You should hear a gentle sizzle immediately. Count to five, then flip. You are looking for the tortilla to become very pliable and develop tiny little blisters on the surface. It should feel soft, not crunchy.
Immediately move the tortilla to a plate lined with paper towels. Pat away the excess surface oil. You’ll notice the tortilla is now much stronger and won’t tear when you start stuffing it with the heavy beef and bean mixture.
Assembling Your Cheesy Beef and Bean Enchiladas
Architecture matters when you’re building a tray of enchiladas. You want to create a stable environment where the heat can circulate evenly around each roll. This starts with the very first drop of sauce you put in the pan.
The Thin Base Layer of Sauce
Spread about 1/4 cup of sauce across the bottom of your 9×13 glass dish. This isn’t meant to submerge the enchiladas; it’s just enough to prevent the bottom of the tortillas from sticking to the glass. Too much sauce on the bottom is a one-way ticket to Soggy Town.
The Dip, Fill, and Roll Sequence
Take your flash-fried tortilla and give it a very quick dunk in your bowl of sauce. Lay it flat, add about two tablespoons of filling and a pinch of cheese across the center. Don’t overfill them, or they will burst during the baking process.
Seam-Side Down: Why Placement Matters
Always place the enchilada into the dish with the seam facing down. The weight of the filling will keep the tortilla closed, eliminating the need for toothpicks. Pack them in tightly so they support each other’s shape as the cheese melts and the sauce bubbles.
Strategic Sauce Application and Topping
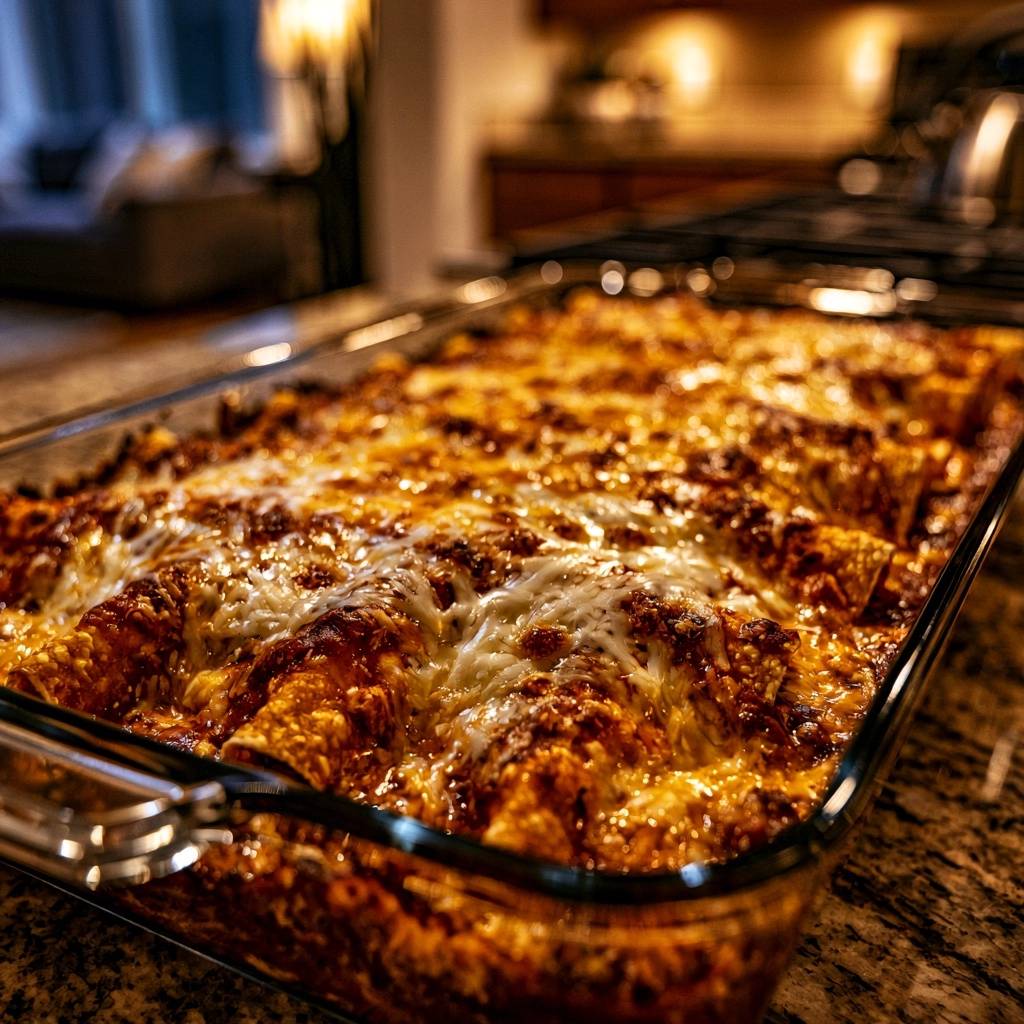
Instead of drowning the entire dish in sauce, try the “thick stripe” method. Pour the remaining sauce in a wide band down the center of the row of enchiladas. This leaves the ends of the tortillas exposed to the dry heat of the oven.
Those exposed tips will crisp up beautifully, providing a crunchy texture that contrasts with the tender, saucy middle. It also makes for a much more professional, “chef-style” presentation when you pull the dish out of the oven.
When you add the cheese, focus the bulk of it over the sauced areas. This creates a protective blanket that keeps the sauce from evaporating too quickly, while the cheese itself becomes a molten, bubbly topping that everyone fights over.
Baking and the Broiler Finish
Set your oven to 375°F. This temperature is high enough to get the sauce bubbling and the cheese melting quickly without drying out the beef filling. As it bakes, the flavors of the cumin and chili powder will marry with the beans and meat.
You’ll know it’s getting close when the sauce starts to thicken and the cheese is completely melted. The kitchen should smell incredible—earthy, spicy, and savory. But we aren’t done quite yet; the final touch happens in the last two minutes.
Achieving the Golden-Brown Toasted Cheese Spots
Switch your oven to the broiler setting for the final 120 seconds. Watch it like a hawk! You want the cheese to develop those deep golden-brown toasted spots. This adds a nutty, caramelized flavor to the cheese that a standard bake simply can’t achieve.
The Critical 5-Minute Rest Period
I know it’s tempting to dig in immediately, but you must wait five minutes. This rest period allows the internal starches to settle and the cheese to firm up slightly. If you cut into them too soon, the filling will spill out and the tortillas will lose their shape.
Troubleshooting Common Enchilada Failures
If your tortillas are cracking while you roll them, your oil likely wasn’t hot enough during the flash-fry, or you didn’t fry them long enough. The heat is what makes the corn fibers flexible. Give the next one an extra two seconds in the pan.
If you find a pool of liquid at the bottom of your dish after baking, it usually means the beef wasn’t drained well enough or the beans weren’t rinsed. Next time, let the beef sit in a colander for a minute before mixing in the spices.
Greasy cheese is another common complaint. This often happens with pre-shredded cheese because of the anti-caking agents used in the packaging. For the best results, buy blocks of cheese and grate them yourself; it melts much more smoothly and tastes significantly better.
Flavor Variations and Ingredient Swaps
This recipe is a fantastic canvas for customization. While the beef and bean combo is a classic, you can easily swap the protein to suit your pantry. The structural rules remain the same regardless of what’s inside the tortilla.
Substituting Ground Turkey or Shredded Chicken
If you want a lighter option, ground turkey works perfectly. Just be sure to add a teaspoon of olive oil when browning since turkey is much leaner than beef. For shredded chicken, toss the cooked meat in a little extra sauce before rolling to keep it moist.
Adding Heat with Roasted Poblanos or Jalapeños
If you like a kick, dice up a roasted poblano pepper and mix it into the beef filling. For even more heat, leave the seeds in some fresh jalapeños. The earthy heat of the peppers complements the black beans beautifully.
Vegetarian Adjustments Using Extra Beans and Corn
To make this vegetarian, replace the beef with a second can of beans (pinto works well) and a cup of frozen corn. The corn adds a nice “pop” of texture and sweetness that balances the savory red sauce.
Make-Ahead Strategies and Freezing Instructions
Enchiladas are the ultimate meal-prep food. You can prepare the beef and bean filling up to two days in advance and keep it in the fridge. When you’re ready to eat, just do the flash-fry, assemble, and bake. This makes weeknight dinners a breeze.
If you want to freeze them, I recommend assembling the rolls and placing them in a freezer-safe dish *without* the final topping of sauce and cheese. Wrap the dish tightly in plastic wrap and then foil. Freezing them “dry” prevents the tortillas from absorbing too much liquid as they thaw.
When you’re ready to bake, let them thaw in the fridge overnight. Add the fresh sauce and cheese right before putting them in the oven. If baking from frozen, cover with foil and bake at 350°F for 45 minutes, then add sauce/cheese and bake uncovered for another 20 minutes.
Side Dishes to Complement Your Enchiladas
Since these enchiladas are quite rich and cheesy, you want side dishes that offer acidity and crunch to cleanse the palate. A heavy dish needs a bright partner to make the meal feel balanced.
Lime-Cilantro Rice for Acidity
A simple white rice tossed with fresh lime juice and chopped cilantro is the perfect base. The citrus cuts right through the fat of the beef and cheese, making every bite of enchilada taste as fresh as the first.
Shaved Cabbage Slaw for Crunch
Instead of a standard lettuce salad, try a quick cabbage slaw. Thinly sliced green cabbage with a dressing of apple cider vinegar and a pinch of salt provides a necessary textural contrast to the soft enchiladas.
Cooling Elements: Crema and Avocado
Always serve these with a dollop of sour cream or Mexican crema. The coolness helps temper the spices. Freshly sliced avocado or a quick guacamole adds a healthy fat that rounds out the earthy flavors of the red chili sauce.
Expert Tips for Professional Results
Use a glass or ceramic baking dish if possible. Metal pans heat up very quickly and can cause the bottom sauce to scorch before the center of the enchiladas is hot. Glass provides a more even, gentle heat distribution.
Always rinse your canned beans. The liquid in the can is full of excess sodium and starches that can make your filling gummy. A quick rinse under cold water ensures the beans stay distinct and firm inside the roll.
Check your spices! If your chili powder has been in the pantry for three years, it has likely lost its punch. Fresh spices should have a strong, pleasant aroma. If you can’t smell it, you won’t be able to taste it in the final dish.
If you’re worried about the beef being cooked through, use an instant-read thermometer. The filling should reach 160°F before you start rolling. Since the baking time is mostly for melting cheese and heating the sauce, having a hot filling ensures the centers aren’t cold when you serve.
How do I store and reheat leftover enchiladas?
Store leftovers in an airtight container in the refrigerator for up to three days. To reheat, place them in the oven at 350°F covered with foil until warmed through. Using a microwave is faster, but it will soften the tortillas significantly, losing those crispy edges we worked so hard to create.
Why did my tortillas fall apart when I tried to roll them?
This usually happens for two reasons: the tortillas weren’t heated enough or they were too dry. The flash-fry step is essential because the heat and oil make the corn fibers flexible. If you skip the oil, try steaming the tortillas in a damp paper towel for 30 seconds, though they won’t be as resistant to sogginess.
Can I use flour tortillas instead of corn?
You can, but the texture will be very different. Flour tortillas absorb sauce much faster and tend to become “doughy” or gummy when baked. If you use flour, do not flash-fry them; just fill and roll them dry, and use slightly less sauce on top to maintain some structure.
What can I use if I don’t have red enchilada sauce?
You can make a quick “emergency” sauce by whisking a tablespoon of flour into a tablespoon of melted butter to make a roux, then slowly adding a cup of beef broth and two tablespoons of chili powder. Simmer until thickened. It won’t be as complex as a slow-simmered sauce, but it works in a pinch.
Is there a way to make this dish less spicy?
The heat mostly comes from the enchilada sauce and the chili powder. Look for a “mild” labeled sauce at the store. You can also stir a little bit of sour cream directly into the red sauce before pouring it over the enchiladas to create a “suiza” style sauce that is much creamier and tamer.
Can I add other vegetables to the filling?
Absolutely. Finely diced bell peppers, zucchini, or even spinach work well. Just make sure to sauté them with the onions first to cook out their moisture. If you add raw, watery vegetables directly to the filling, they will release steam during baking and make the tortillas soggy from the inside out.
Cheesy Beef and Bean Enchiladas
Course: Main CourseCuisine: Mexican-AmericanDifficulty: easy6
servings20
minutes25
minutes45
Minutes485
kcalMexican-American
Ingredients
12 corn tortillas
1 pound lean ground beef
1 can (15 oz) black beans, drained and rinsed
2 cups red enchilada sauce
3 cups shredded Mexican blend cheese (Monterey Jack, Cheddar, and Asadero)
1 small onion, finely diced
1/2 cup vegetable oil (for frying)
1 teaspoon cumin
1 teaspoon chili powder
1/2 teaspoon garlic powder
Salt and pepper to taste
Directions
- Preheat your oven to 375 degrees F.
- In a large skillet over medium heat, brown the ground beef with the diced onions. Drain any excess fat. Stir in the black beans, cumin, chili powder, garlic powder, salt, and pepper. Add 1/4 cup of the enchilada sauce to the meat mixture to bind it. Remove from heat.
- The Anti-Soggy Hack: Heat 1/2 cup of vegetable oil in a small skillet over medium-high heat until shimmering. Using tongs, pass each tortilla through the hot oil for 5-8 seconds per side. They should be pliable and slightly blistered, but not crisp like a chip. Drain briefly on paper towels. This oil barrier prevents the sauce from penetrating the corn fiber.
- Pour a very thin layer of sauce (about 1/4 cup) into the bottom of a 9×13 inch glass baking dish.
- To assemble: Dip a flash-fried tortilla into the remaining sauce to coat both sides. Lay it flat, fill with 2-3 tablespoons of the beef mixture and a sprinkle of cheese, then roll tightly. Place seam-side down in the dish. Repeat for all tortillas, packing them tightly together.
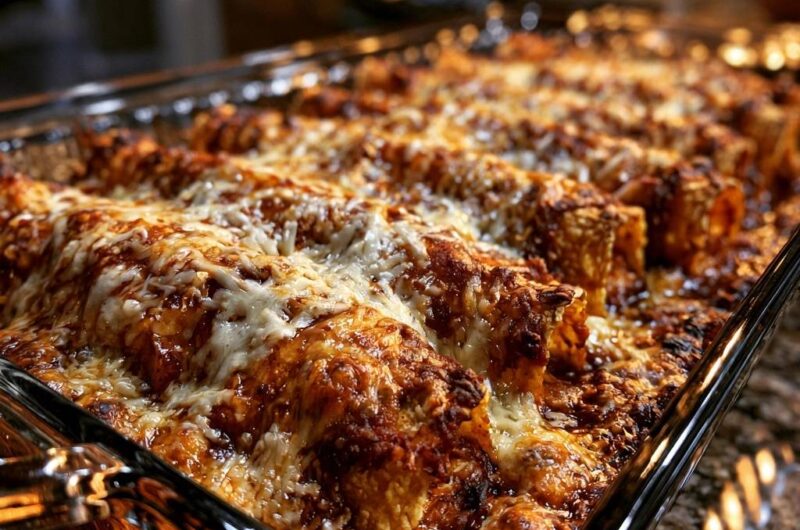
- Pour the remaining sauce over the center of the enchiladas in a thick stripe, leaving the very edges of the tortillas exposed. This allows the tips to crisp up in the oven as seen in the image.
- Top generously with the remaining shredded cheese, focusing on the sauced areas.
- Bake for 20 to 25 minutes. For the visual result in the image, turn on the broiler for the last 2 minutes until the cheese is bubbly and develops deep golden-brown toasted spots.
- Let rest for 5 minutes before serving to allow the internal structure to set.
Notes
- The secret to preventing sogginess is passing the tortillas through hot oil for 5 to 8 seconds per side. This creates a moisture barrier. For a professional finish, broil for the last 2 minutes to get golden-brown toasted spots on the cheese.