Nothing ruins a holiday meal faster than a mushy, flavorless stuffing that turns into a paste on your plate. We’ve all been there, staring at a side dish that looks more like savory bread pudding than the crisp, textured delight it should be. The “Anti-Soggy” philosophy is about respecting the bread and controlling the moisture with surgical precision.
Sourdough is the undisputed champion for this mission because its unique cellular structure stands up to liquid better than any other loaf. While white bread collapses into a sponge, sourdough maintains its dignity. This recipe focuses on a specific double-toast method to ensure every cube stays crisp on the outside while soaking up just enough savory broth to stay tender in the middle.
The secret to success isn’t just the ingredients; it’s the dehydration process. Most people think “stale” bread is enough, but stale bread still contains internal moisture that leads to a gummy texture. By oven-drying the cubes first, you create a thirsty, rigid structure that can absorb flavor without losing its shape. It’s the difference between a soggy mess and a side dish that guests will actually ask for seconds of.
The Structural Integrity of Sourdough Bread
Sourdough isn’t just a flavor choice; it’s a structural necessity for high-quality stuffing. The long fermentation process used to make sourdough creates a sturdy gluten network and large, irregular air pockets. These “alveoli” act as tiny reservoirs for your broth and butter, holding the liquid in place rather than letting it dissolve the bread’s walls.
When you compare sourdough to standard “grocery store” sandwich loaves, the difference is night and day. Commercial white bread is designed for softness, meaning it has very little structural protein to fight back against the broth. Sourdough’s natural acidity also provides a bright counterpoint to the heavy, fatty flavors of a traditional holiday spread, cutting through the richness of gravy and butter.
Because sourdough is denser and more resilient, it can handle the weight of add-ins like plump cranberries and sautéed celery. It provides a “chew” that makes the stuffing feel like a substantial part of the meal rather than a soft garnish. If you want a stuffing that holds its own next to a heavy slice of roast, sourdough is your only real option.
Essential Components for Cranberry Sage Sourdough Stuffing
Quality ingredients are the foundation of this dish, and it starts with the fat. I always recommend using a high-fat, European-style unsalted butter. These butters have less water content than standard sticks, which means you’re adding pure flavor and richness rather than extra steam to your bread cubes.
The broth is your primary seasoning vehicle, so choosing a low-sodium chicken or vegetable broth is mandatory. This gives you total control over the salt levels. If you use a full-sodium broth, the salt concentrates as the liquid evaporates in the oven, often resulting in a dish that’s too salty to eat. You can always add salt, but you can’t take it away once it’s baked into the bread.
Dried cranberries provide the necessary tartness to balance the earthy sage and savory onion. Look for cranberries that are still slightly pliable rather than rock-hard. They will plump up beautifully as they hit the warm butter in the skillet, releasing just enough sweetness to bridge the gap between the tangy sourdough and the savory herbs.
Selecting the Right Sourdough Loaf
When shopping, look for a rustic boule or batard with a thick, dark crust. That crust is pure flavor and provides a wonderful textural contrast in the finished dish. Avoid pre-sliced sourdough “sandwich” bread, which is often too thin and lacks the hearty crumb needed for a chunky stuffing.
While many old-school recipes call for “day-old” bread, fresh bread is actually better if you dehydrate it yourself. Day-old bread is just dry on the surface, but fresh bread that has been cubed and oven-toasted is dry all the way through. This ensures the center of the cube doesn’t stay soft and turn into mush when the broth hits it.
Fresh Sage vs. Dried Herbs
Fresh sage is non-negotiable here because it contains volatile oils that provide a fuzzy, warm, and peppery aroma that dried sage simply cannot match. However, these oils need heat to wake up. Sautéing the chopped sage in butter for a few minutes releases those flavors, infusing the fat that will eventually coat every single bread cube.
For the thyme, a dried version works perfectly well because it offers a concentrated, earthy punch that lingers through the long bake. The combination of fresh, bright sage and deep, dried thyme creates a layered herbal profile. It makes the stuffing smell like a classic kitchen even before it hits the oven.
The Double-Toast Technique for Maximum Crispness
The physics of a perfect stuffing rely on moisture migration. If you put wet bread into a hot oven, the outside browns while the inside stays damp. The double-toast technique solves this by splitting the cooking into two distinct phases: dehydration and the Maillard reaction.
The first bake at 350°F is all about dehydration. You are pulling the moisture out of the center of the sourdough cubes until they feel like croutons. This creates a “dry sponge” effect. When you finally add the broth, the liquid travels deep into the bread but the structure remains rigid enough to keep the cube intact.
The second bake happens after the stuffing is assembled. This is where the Maillard reaction takes over, browning the tops of the cubes and creating those coveted crunchy edges. By removing the foil halfway through the final bake, you allow surface moisture to evaporate, leaving behind a golden, crispy crust that shatters when you bite into it.
Preparing the Aromatic Vegetable Base
The onion and celery mixture is the “sofrito” of your stuffing, providing the aromatic backbone for the entire dish. You don’t want to rush this step. A slow sauté of 8 to 10 minutes is necessary to properly break down the cellulose in the celery and the sugars in the onion.
You aren’t looking for heavy browning here; you want the vegetables to become soft, translucent, and sweet. If the vegetables are undercooked, they will remain crunchy and feel like an interruption in the stuffing. When they are properly softened, they meld into the bread, providing flavor in every bite without a distracting texture.
As the vegetables soften, they also release their own juices into the butter. This creates a flavorful emulsion that coats the bread cubes more effectively than plain melted butter would. Once the cranberries and herbs are added to this mix, the aroma in your kitchen will be absolutely incredible.
Step-by-Step: Building the Stuffing Foundation
Once your bread is toasted and your aromatics are soft, it’s time to combine them in a very large mixing bowl. Use a bowl bigger than you think you need. This gives you plenty of room to toss the ingredients without crushing the bread cubes into smaller fragments.
Use a gentle folding motion, like you’re mixing a cake batter. You want every cube to be glistening with the herb-infused butter. If you stir too vigorously, you’ll create bread crumbs, which will lead to a denser, heavier texture. Keep those cubes whole and distinct for the best mouthfeel.
Hydration Control: Adding Broth and Egg
The egg acts as a protein binder, creating a light “web” that holds the stuffing together so it doesn’t just fall apart on the plate. Whisking it into the broth ensures it is evenly distributed. If you pour the egg in separately, you’ll end up with bits of scrambled egg in your stuffing.
Drizzle the broth mixture slowly. The bread should look moistened and slightly duller in color, but there should be no pool of liquid at the bottom of the bowl. If the bread still feels bone-dry and brittle, add that extra half-cup of broth. It’s a balancing act: you want hydration, not saturation.
The Importance of Loose Packing
When you transfer the mixture to your baking dish, resist the urge to press it down with your spoon. Tamping it down squeezes out the air pockets and prevents heat from circulating between the cubes. This is a major cause of the “mushy middle” that we are trying to avoid.
Keep the mixture loose and craggy. Those little peaks and valleys of bread sticking up are exactly what will turn into the crispy, golden bits everyone fights over at the table. Air circulation allows steam to escape, which is the key to maintaining that “Anti-Soggy” structural integrity.
Baking Phases: From Steam to Crunch
The two-stage baking process is the final secret to success. The first 20 minutes under foil are about heat penetration. The foil traps just enough steam to set the egg binder and ensure the center of the stuffing is hot and tender. Without the foil, the top would burn before the middle was cooked through.
The second phase is the “uncovered bake.” Once the foil comes off, the surface moisture evaporates rapidly. This is when the magic happens. The butter on the surface of the bread begins to fry the edges of the cubes, turning them a deep mahogany brown. Watch it closely during the last 5 minutes to ensure it reaches your preferred level of crunch.
If you notice the edges are browning too fast while the center still looks pale, you can loosely tent just the edges with strips of foil. However, in a standard 9×13 dish, the heat usually distributes evenly enough to give you a consistent, golden crust across the entire top surface.
Troubleshooting Common Stuffing Failures
If you pull your stuffing out and the middle feels mushy, it usually means too much broth was added or the bread wasn’t toasted long enough. You can often fix this by baking it uncovered for an extra 10 minutes at a slightly lower temperature, like 325°F, to help more moisture evaporate without burning the top.
On the flip side, if the stuffing looks bone-dry and the bread feels like rocks, don’t panic. Warm up a 1/4 cup of broth and drizzle it evenly over the top, then cover it with foil for 5 minutes. The steam will soften the bread just enough to make it palatable again without losing all the texture.
Another common issue is “greasy” stuffing, which happens if the butter separates from the broth. This usually occurs if the broth is added too quickly or if it’s ice-cold. Always try to use room-temperature broth to keep the fats emulsified. If it does look greasy, a quick toss before the final uncovered bake can help the bread re-absorb those fats.
Make-Ahead Strategies and Storage Logistics
Stuffing is the ultimate make-ahead dish if you handle the steps correctly. You can toast the sourdough cubes up to 3 days in advance; just keep them in a sealed bag or container at room temperature. The vegetable and cranberry base can be sautéed 24 hours ahead and stored in the fridge.
I don’t recommend fully assembling and hydrating the stuffing until you are ready to bake. If the bread sits in the broth overnight in the fridge, it will inevitably break down and become mushy. For the best results, mix the dry bread and the wet ingredients right before the dish goes into the oven.
Leftovers should be stored in an airtight container in the fridge for up to 3 days. To reheat, avoid the microwave, which makes the bread rubbery. Instead, place the stuffing in a small oven-safe dish, add a tiny splash of broth, and bake at 350°F until the edges crisp up again. It almost tastes better the second day!
Pairing Your Cranberry Sage Sourdough Stuffing
While this is a natural partner for turkey, its robust flavor profile makes it excellent with roasted chicken or even a thick-cut beef roast. The acidity of the sourdough and the tartness of the cranberries act as a “palate cleanser” against rich, fatty meats and heavy cream-based sides.
For a different take with similar festive flavors, explore these cranberry thyme stuffing balls.
For a vegetarian feast, this stuffing serves as a fantastic main course when paired with a hearty mushroom gravy or roasted root vegetables. The sourdough provides enough substance to feel like a complete meal. The earthy sage notes also pair beautifully with roasted squash or sweet potatoes, creating a cohesive autumn flavor palette.
If you’re serving a very rich gravy, you might find you don’t need as much on this stuffing as you would on a traditional version. The sourdough itself carries so much flavor that a light drizzle is usually plenty. It’s a dish that stands on its own rather than relying on other components to provide taste.
Expert Tips for Customizing the Flavor
Once you master the base recipe, you can start playing with textures. Adding a half-cup of toasted pecans or walnuts provides a wonderful tannic crunch that complements the sourdough. If you want a different fruit profile, try swapping the cranberries for chopped dried apricots or even dried cherries for a deeper sweetness.
For a more savory, umami-forward version, you can add sautéed mushrooms to the onion and celery mix. Shiitake or cremini mushrooms work particularly well with sage. Just make sure to sauté the mushrooms until all their moisture has evaporated, or you’ll risk introducing too much liquid to the bread.
Another sophisticated twist is to use brown butter instead of regular melted butter. By cooking the butter until the milk solids turn golden and smell nutty, you add a layer of complexity that makes the stuffing taste like it came from a high-end bistro. It’s a small change that makes a massive impact on the final aroma.
Expert Troubleshooting and Technical FAQ
Can I use gluten-free sourdough for this recipe?
Yes, you can use gluten-free sourdough, but be aware that gluten-free bread often dehydrates faster and can become more brittle. I recommend checking the bread during the first toast at the 12-minute mark. You may also need slightly less broth, as gluten-free starches can sometimes turn gummy if over-hydrated. Add the liquid in smaller increments to be safe.
Why did my butter separate and pool at the bottom?
This usually happens if there is a large temperature difference between the sautéed vegetables and the broth. If you pour ice-cold broth into a pan with hot butter, the fat will solidify into clumps. To prevent this, let your vegetable mixture cool slightly and ensure your broth is at least room temperature before mixing them together. A quick, gentle toss before baking can also help the bread re-absorb any stray fat.
How do I scale this recipe for a crowd of 20?
To scale for 20 people, you will need to triple the recipe. Do not try to bake it all in one massive deep dish, as the middle will never crisp up. Instead, use three separate 9×13 baking pans. This maintains the surface-area-to-depth ratio, ensuring everyone gets those crispy top bits. You may need to rotate the pans in your oven halfway through the bake to ensure even browning.
Can I bake this inside the turkey?
I strongly advise against baking this specific “Anti-Soggy” stuffing inside the bird. Cooking stuffing inside a turkey subjects it to a constant stream of poultry juices and steam, which completely defeats the purpose of the double-toast method. It will inevitably become wet and dense. For the best texture, bake it in a separate dish where the surface can actually crisp up and the moisture can evaporate.
What is the best way to revive leftovers that have gone soft?
The best way to revive leftovers is in a hot skillet or the oven. In a skillet, melt a tiny bit of butter and press the stuffing down slightly to create a “stuffing pancake.” Fry it until the bottom is crispy. In the oven, spread the leftovers on a baking sheet and bake at 375°F for 10 minutes. This removes the moisture absorbed in the fridge and restores that essential sourdough crunch.
Sourdough Stuffing
Course: Side DishCuisine: AmericanDifficulty: medium8
servings20
minutes45
minutes285
kcal65
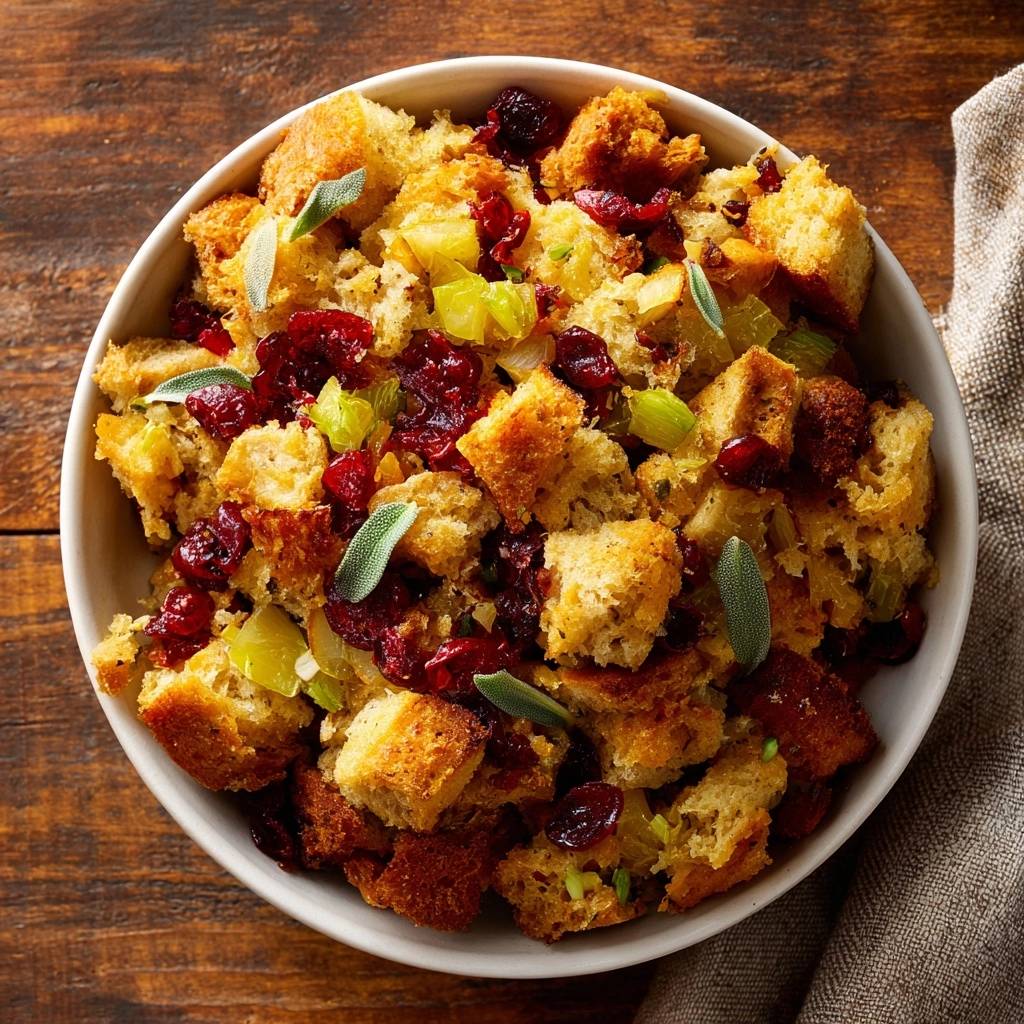
MinutesThis recipe eliminates soggy stuffing by using dehydrated sourdough cubes and a specific moisture ratio. Combined with fresh sage, butter, and dried cranberries, it provides a perfect balance of savory and sweet for holiday meals.
Ingredients
1 pound sourdough bread, torn or cut into 1-inch rustic cubes
1/2 cup unsalted butter
1 large yellow onion, chopped
3 stalks celery, sliced
1 cup dried cranberries
2 tablespoons fresh sage leaves, chopped (plus whole leaves for garnish)
1 teaspoon dried thyme
1/2 teaspoon salt
1/2 teaspoon black pepper
1 1/2 to 2 cups low-sodium chicken or vegetable broth
1 large egg, beaten
Directions
- Preheat your oven to 350°F. Spread the sourdough cubes on a large baking sheet in a single layer. Bake for 15 to 20 minutes, tossing halfway through, until they are completely dry and lightly golden. This dehydration step is essential to prevent sogginess.
- In a large skillet, melt the butter over medium heat. Add the onion and celery. Saute for 8 to 10 minutes until the vegetables are soft and translucent.
- Stir in the dried cranberries, chopped sage, thyme, salt, and pepper. Cook for 2 minutes until the herbs are fragrant and the cranberries begin to plump slightly from the butter.
- Place the toasted bread cubes in a very large mixing bowl. Pour the butter and vegetable mixture over the bread and toss gently to coat every cube.
- In a small bowl, whisk the beaten egg into 1 1/2 cups of the broth. Slowly drizzle this mixture over the bread while tossing. The bread should be moistened but not saturated. If the bread still feels very brittle and dry, add the remaining 1/2 cup of broth.
- Transfer the mixture to a greased 9×13 inch baking dish. Do not pack it down; keep it loose to allow air circulation for crispier edges.
- Cover with foil and bake for 20 minutes to set the center.
- Remove the foil and bake for an additional 20 to 25 minutes. This final uncovered bake is the key to achieving those coveted deep golden brown, crunchy tops seen in the image.
- Garnish with fresh whole sage leaves before serving.
Notes
- The double-toast method is essential to prevent sogginess. Do not pack the mixture down in the baking dish to allow for maximum air circulation and crispier edges.