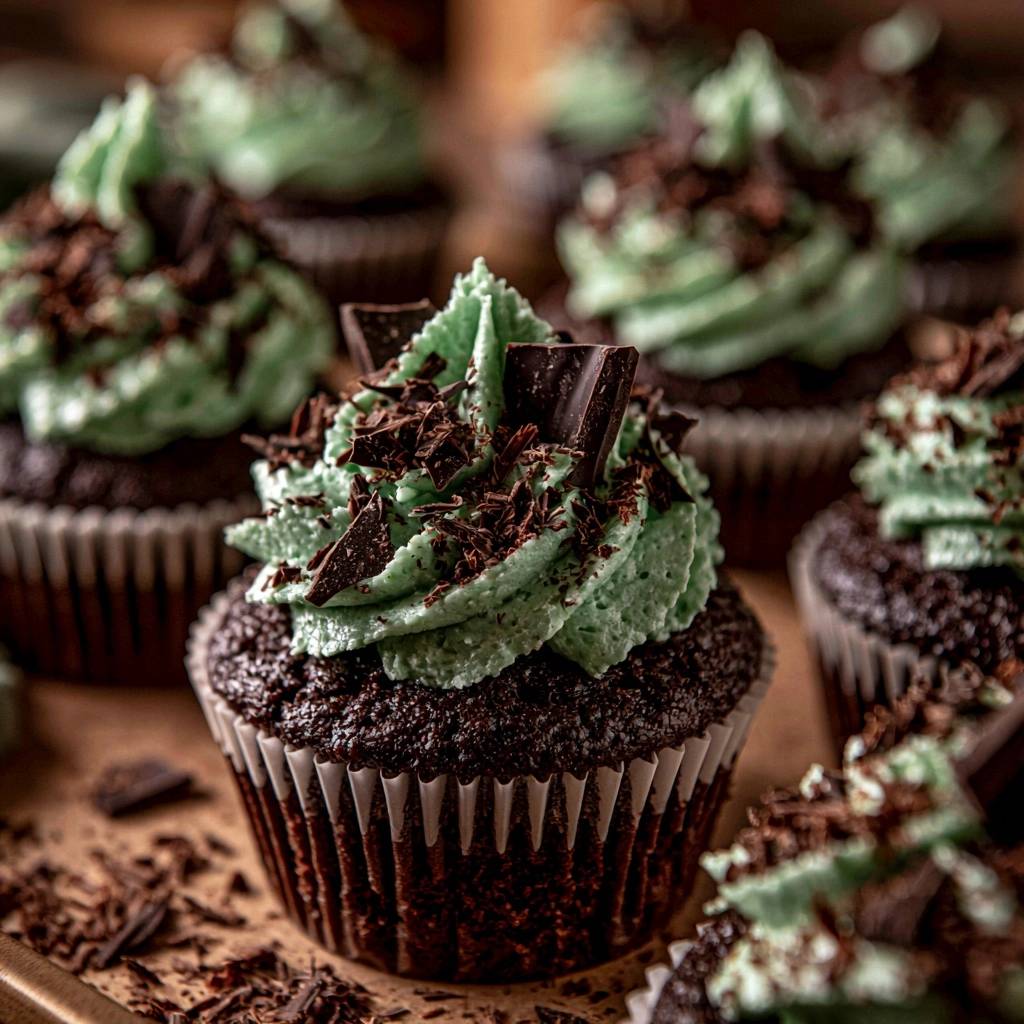
Imagine biting into a cupcake where the crumb is so dark and velvety it almost melts, immediately followed by the cooling sensation of a cloud-like peppermint frosting. The contrast between the deep, earthy cocoa and the sharp, refreshing mint is a classic for a reason. However, achieving that perfect balance often feels like a gamble when you’re staring at a tray of sunken centers.
We’ve all been there: you follow a recipe to the letter, only to have your beautiful domes collapse into sad craters the moment they hit the cooling rack. It’s heartbreaking to waste good ingredients on a bake that looks more like a pothole than a professional dessert. This guide changes that by focusing on the structural engineering of the batter to ensure your cupcakes stay tall and proud.
The secret to a stable, non-sinking cupcake lies in the precise distribution of leavening agents and the temperature of your liquids. By sifting your dry ingredients and using boiling water to “bloom” the cocoa, you create a sturdy internal framework that sets before the air bubbles have a chance to pop. I’ve found that this specific method creates a crumb that is both incredibly moist and structurally sound enough to hold a mountain of buttercream.
The Science of Structural Integrity in Baking
Cupcakes usually collapse because the internal air cell structure isn’t strong enough to support its own weight as it cools. When the baking soda reacts with the acidic cocoa and vinegar, it produces carbon dioxide gas. These bubbles expand in the heat of the oven, pushing the batter upward to create that coveted dome.
However, if the protein network formed by the flour and egg isn’t set by the time the gas pressure drops, the whole thing implodes. This is why the ratio of leavening to flour is so critical. Too much baking soda creates bubbles that are too large and fragile, leading to a “Swiss cheese” effect where the walls of the cake simply give way.
Furthermore, the interaction between the vinegar and the baking soda provides an immediate chemical lift. This rapid reaction needs to be balanced by the heat of the oven to “lock” the crumb in place. If the oven temperature is too low or the door is opened too early, the steam inside the cake condenses, the pressure drops, and you’re left with a sunken mess.
Essential Components for Dark Chocolate Mint Cupcakes
Quality ingredients are the foundation of any bake, but for these cupcakes, the type of cocoa you choose is non-negotiable. You must use Dutch-process cocoa powder. Unlike natural cocoa, Dutch-process is treated with an alkalizing agent, giving it a darker color and a smoother, less acidic flavor that pairs perfectly with mint.
Your egg must be at room temperature to ensure proper emulsification. A cold egg can seize the fats in the oil and milk, leading to an uneven batter that won’t rise consistently. When the fats and liquids are properly bonded, they trap air more efficiently, contributing to a finer, more stable crumb.
Distilled white vinegar might seem like an odd addition to a dessert, but it’s the secret weapon for a high rise. It reacts instantly with the baking soda to provide a secondary boost of lift. Don’t worry about the taste; the acidity completely evaporates during the baking process, leaving behind only a light, fluffy texture.
Why Boiling Water Changes the Crumb
Adding boiling water to your cocoa powder is a technique known as “blooming.” The intense heat dissolves the cocoa solids, releasing trapped flavor compounds and intensifying the chocolate profile. Beyond flavor, the hot liquid begins to hydrate the flour’s starches immediately, which helps the batter set faster once it enters the oven.
Selecting the Right Peppermint Extract
There is a big difference between “mint” extract and “pure peppermint” extract. Mint extract often contains spearmint, which can give your frosting a flavor reminiscent of toothpaste. For that clean, crisp holiday flavor, always reach for pure peppermint extract and balance it with a splash of vanilla to round out the sharp edges.
Step-by-Step: Engineering the Perfect Rise
Start by sifting your flour, sugar, cocoa, and leavening agents together. Sifting isn’t just about removing lumps; it aerates the flour and ensures the baking soda is perfectly distributed. If a clump of baking soda ends up in one spot, you’ll get an uneven rise and a metallic aftertaste in that bite.
When mixing your wet and dry ingredients, use a gentle hand. Overmixing develops too much gluten, which makes the cake tough and elastic. A tough batter will rise aggressively and then snap back and shrink as it cools. Mix just until the streaks of flour disappear to keep the texture tender.
The “2/3 full” rule is perhaps the most important step for preventing sinks. If you overfill the liners, the batter climbs over the edge of the tin. Without the metal walls of the pan to support the weight of the rising cake, the center will inevitably fall. Give your cupcakes the room they need to grow upward, not outward.
The Critical First 18 Minutes
The first 18 minutes of baking are when the “magic” happens. During this window, the batter transitions from a liquid to a solid. If you open the oven door to peek, the sudden influx of cool air causes a temperature drop that can shock the delicate air cells. This causes the steam to condense prematurely, leading to an instant collapse that no amount of extra baking can fix.
The Five-Minute Pan Rest Rule
Once the cupcakes are out of the oven, leave them in the hot tin for exactly five minutes. This residual heat allows the internal structure to finish setting completely. However, don’t leave them any longer than that. If they stay in the pan too long, steam will build up at the bottom, causing the liners to peel away and the cakes to become soggy.
Creating High-Definition Mint Buttercream
A great frosting needs to be stable enough to hold its shape but light enough to feel like silk. The key is to beat your softened butter alone for at least three full minutes before adding any sugar. This incorporates air and creates a pale, voluminous base that can support the weight of the powdered sugar and heavy cream.
Once you add the sugar and cream, beat it again on high. You are looking for “stiff peaks” that hold their shape when you lift the whisk. This structural integrity is vital if you plan on piling the frosting high or topping it with heavy chocolate shards. If the frosting is too soft, it will simply slump under the weight of the garnishes.
Achieving the Signature Mint Hue
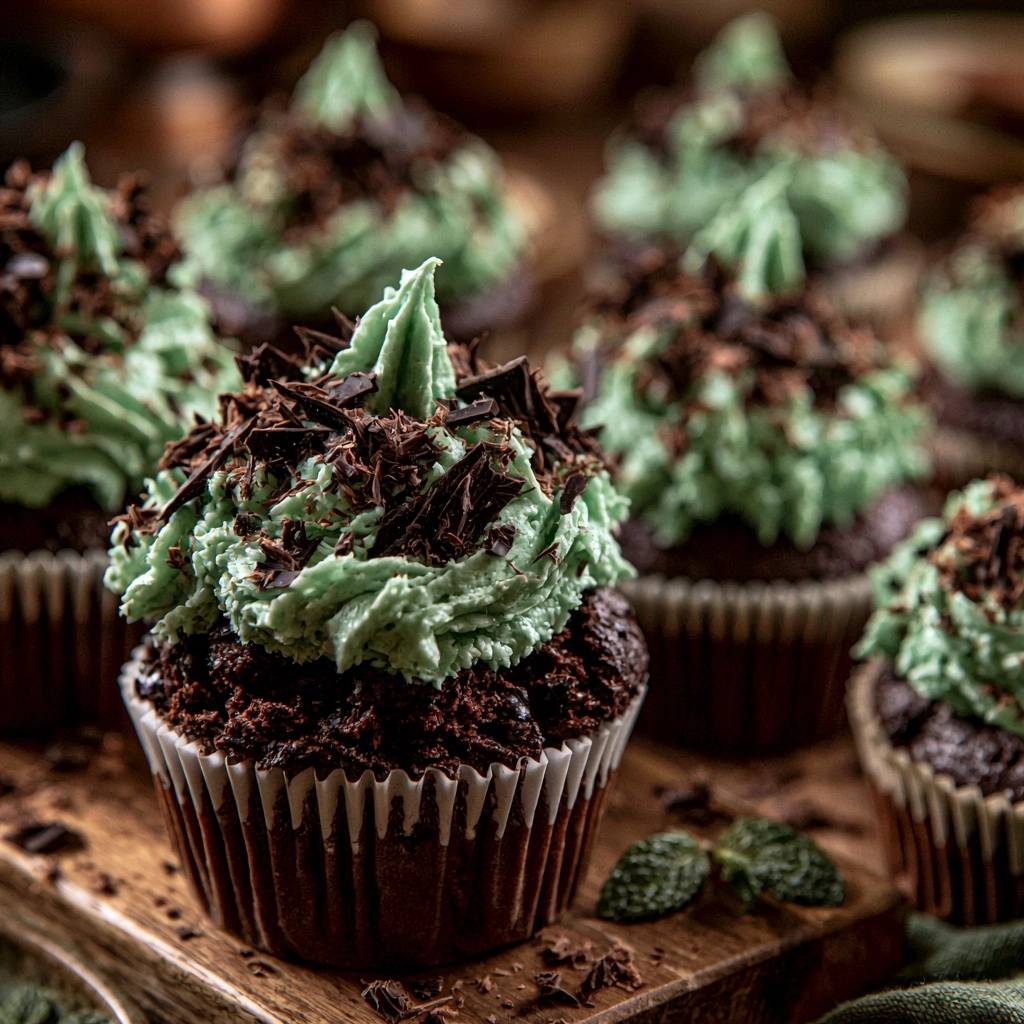
For a professional look, use gel food coloring rather than liquid drops. Gel is more concentrated and won’t thin out your frosting. Start with a tiny amount on a toothpick to achieve a sophisticated seafoam green. It’s much easier to add more color than it is to fix a neon-green frosting that looks like a science experiment.
Hand-Chopped Shards vs. Chocolate Chips
While chocolate chips are convenient, hand-chopped dark chocolate shards offer a much better eating experience. The irregular shapes provide a mix of fine chocolate “dust” that melts instantly and larger chunks that offer a satisfying crunch. Use a sharp chef’s knife to create a variety of textures that make each bite interesting.
Troubleshooting Common Cupcake Failures
If your liners are greasy and peeling away, it’s usually due to excess moisture or leaving the cupcakes in the pan too long. Ensure you move them to a wire rack promptly. If the crumb feels tough or bready, you likely overmixed the batter after adding the flour. Remember, a light touch is essential for a tender cake.
Grainy frosting is another common headache. This happens when the powdered sugar isn’t fully incorporated or if the butter was too cold. Always sift your powdered sugar if it looks lumpy, and make sure your butter is soft enough that your finger leaves an easy indentation. If it’s still grainy, a tablespoon of heavy cream and an extra minute of high-speed beating usually smooths it out.
Make-Ahead Strategies and Storage Logistics
These cupcakes can be made a day in advance, but storage is key. Store them in an airtight container at room temperature if you plan to eat them within 24 hours. If you need to keep them longer, put them in the fridge, but remember that butter-based frosting gets very hard when cold. Take them out at least an hour before serving so the buttercream can soften back to its creamy state.
You can also freeze the unfrosted bases for up to three months. Wrap them individually in plastic wrap and place them in a freezer bag. When you’re ready for a treat, thaw them at room temperature and frost them fresh. I don’t recommend freezing fully decorated cupcakes, as the mint frosting can sometimes absorb “freezer smells” and lose its delicate flavor.
Expert Tips for Professional Presentation
To get that “bakery-style” look, use a large open star tip (like a 1M or 2D). Start in the center of the cupcake, spiral outward to the edge, and then spiral back up toward the middle to create height. A tall frosting swirl looks much more impressive than a flat spread. For the final touch, use a microplane to grate a little extra chocolate over the top for a fine, snowy finish.
How do I store leftover cupcakes?
Store your cupcakes in an airtight container at room temperature for up to 2 days. If your kitchen is very warm, you can keep them in the refrigerator for up to 4 days, but make sure to bring them to room temperature before eating. The butter in the frosting and the oil in the cake both firm up when cold, so they won’t taste as soft if eaten straight from the fridge.
Why did my cupcakes sink in the middle?
The most common reason for sinking is opening the oven door too early, which causes a sudden drop in temperature. Other culprits include overbeating the batter, which incorporates too much air that then escapes, or using expired baking soda. Ensure your baking soda is fresh by dropping a pinch into vinegar; if it doesn’t fizz violently, it’s time to replace it.
Can I use a different type of oil?
Yes, any neutral-flavored oil will work perfectly in this recipe. Grapeseed, canola, or vegetable oil are all great choices. Avoid using olive oil or coconut oil unless you want their specific flavors to come through in the chocolate base. Oil is preferred over butter in this specific recipe because it keeps the cake moist even when refrigerated.
What can I use if I don’t have Dutch-process cocoa?
If you only have natural cocoa powder, you can use it, but the cupcakes will be lighter in color and slightly more acidic. Because this recipe uses baking soda and vinegar, it has enough leavening power to handle natural cocoa. However, for that specific “dark chocolate” look and mellow flavor, Dutch-process is the gold standard.
How do I fix frosting that is too runny?
If your mint buttercream is too soft to hold a peak, try adding more powdered sugar, one-quarter cup at a time. If the room is very warm, your butter might be melting; in this case, pop the mixing bowl into the fridge for 10 to 15 minutes, then beat it again. Adding a little extra butter can also help stabilize a frosting that has too much liquid from the cream or food coloring.
Can I make these gluten-free?
You can substitute the all-purpose flour with a high-quality 1:1 gluten-free flour blend. Look for a blend that already contains xanthan gum, as this provides the structural “glue” that gluten usually provides. Be aware that gluten-free batters sometimes need an extra minute or two of baking time to set properly in the center.
Dark Chocolate Mint Cupcakes
Course: DessertCuisine: AmericanDifficulty: easy12
cupcakes20
minutes22
minutes42
Minutes380
kcalAmerican
Ingredients
1 and 1/2 cups all-purpose flour
1 cup granulated sugar
1/2 cup Dutch-process cocoa powder (for the dark color shown)
1 teaspoon baking soda
1/2 teaspoon salt
1 large egg, room temperature (essential for structure)
1/2 cup whole milk
1/3 cup vegetable oil
1 teaspoon vanilla extract
1/2 cup boiling water
1 teaspoon distilled white vinegar
1 cup unsalted butter, softened
3 cups powdered sugar
1-2 tablespoons heavy cream
1/2 teaspoon peppermint extract
3 drops green food coloring
1/2 cup dark chocolate, roughly chopped into shards and shavings
Directions
- Preheat your oven to 350°F (175°C) and line a muffin tin with paper liners.
- In a large bowl, sift together the flour, sugar, cocoa powder, baking soda, and salt. Sifting is the secret to preventing sinking; it ensures the leavening agent is perfectly distributed to create a stable air cell structure.
- In a separate bowl, whisk the egg, milk, oil, and vanilla. Pour into the dry ingredients and mix until just combined.
- Carefully stir in the boiling water and vinegar. The batter will be thin; this high heat “blooms” the cocoa and creates a rapid rise that sets quickly. Do not overmix, as overworking the gluten causes cakes to rise too fast and then collapse.
- Fill the cupcake liners only 2/3 full. Overfilling causes the batter to spill over the edges, losing the structural support of the tin and leading to a sunken center.
- Bake for 18 to 22 minutes. To ensure they do not sink, do not open the oven door before the 18-minute mark. Sudden temperature drops cause the steam inside the cake to condense before the crumb has set.
- Remove from the oven and let them sit in the hot pan for exactly 5 minutes before moving to a wire rack. This allows the residual heat to finish setting the internal structure.
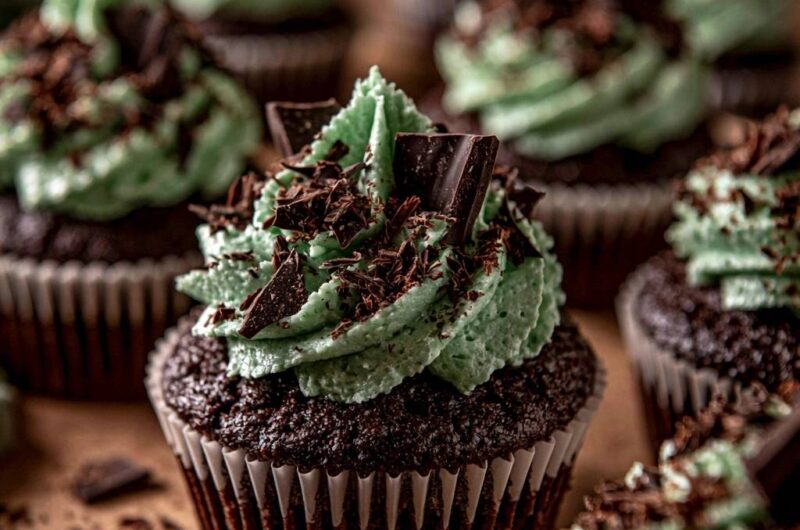
- For the frosting, beat the softened butter until very pale and creamy (about 3 minutes). Gradually add powdered sugar, peppermint extract, food coloring, and heavy cream. Beat on high for an additional 3 minutes to incorporate enough air for the stiff, textured peaks seen in the image.
- Using a star tip, pipe the mint frosting in a high swirl onto the completely cooled cupcakes. Top generously with the hand-chopped dark chocolate shards and fine shavings.
Notes
- Sifting is essential to prevent sinking. Do not open the oven door before 18 minutes to avoid temperature drops that cause centers to collapse.