We’ve all been there: you’re craving that perfect, restaurant-style roasted broccoli, but you end up with a pile of limp, gray, and mushy florets. It’s a common kitchen heartbreak that usually leads to soggy vegetables being pushed around the plate. The secret to achieving that elusive contrast between tender stalks and crispy, charred edges isn’t just luck; it’s a specific methodology involving moisture control and thermal physics.
This Garlic Parmesan Roasted Broccoli recipe focuses on the “Anti-Soggy Secret” to ensure every bite has a satisfying crunch. By mastering the way heat interacts with the vegetable’s surface, you can transform a humble side dish into the star of the meal. You’re looking for a deep, golden-brown crust that shatters slightly when you bite into it, followed by a perfectly cooked interior.
The real trick to this recipe is the preheated sheet pan. Most people toss their veggies on a cold tray and slide them into the oven, but that’s a recipe for steaming rather than roasting. When you drop dry broccoli onto a screaming-hot pan, the searing process begins the very second the florets touch the metal. This immediate heat transfer locks in the structure and prevents the dreaded “boiled” texture.
The Physics of Crisp: Why Most Broccoli Fails
Roasting is essentially a battle against water. Broccoli is packed with moisture, and as it heats up, that water wants to escape. If that moisture turns into a cloud of steam around the vegetable, you’ll never get a crisp exterior. Therefore, the goal is to evaporate surface moisture as quickly as possible to allow the Maillard reaction to occur.
The Maillard reaction is the chemical process that creates those delicious, savory, browned flavors we love. However, this reaction cannot happen in the presence of excess water because steam caps the temperature at 212 degrees Fahrenheit. To get that deep char, the surface of the broccoli needs to exceed that temperature, which is why a dry environment is your best friend in the kitchen.
The Role of Surface Moisture in Texture
Washing your broccoli right before it goes into the oven is the most common mistake home cooks make. Even if you think you’ve shaken it dry, those tiny green beads on the florets act like little sponges for water. If you don’t dry them thoroughly, that water creates a steam barrier that prevents the olive oil from actually searing the vegetable.
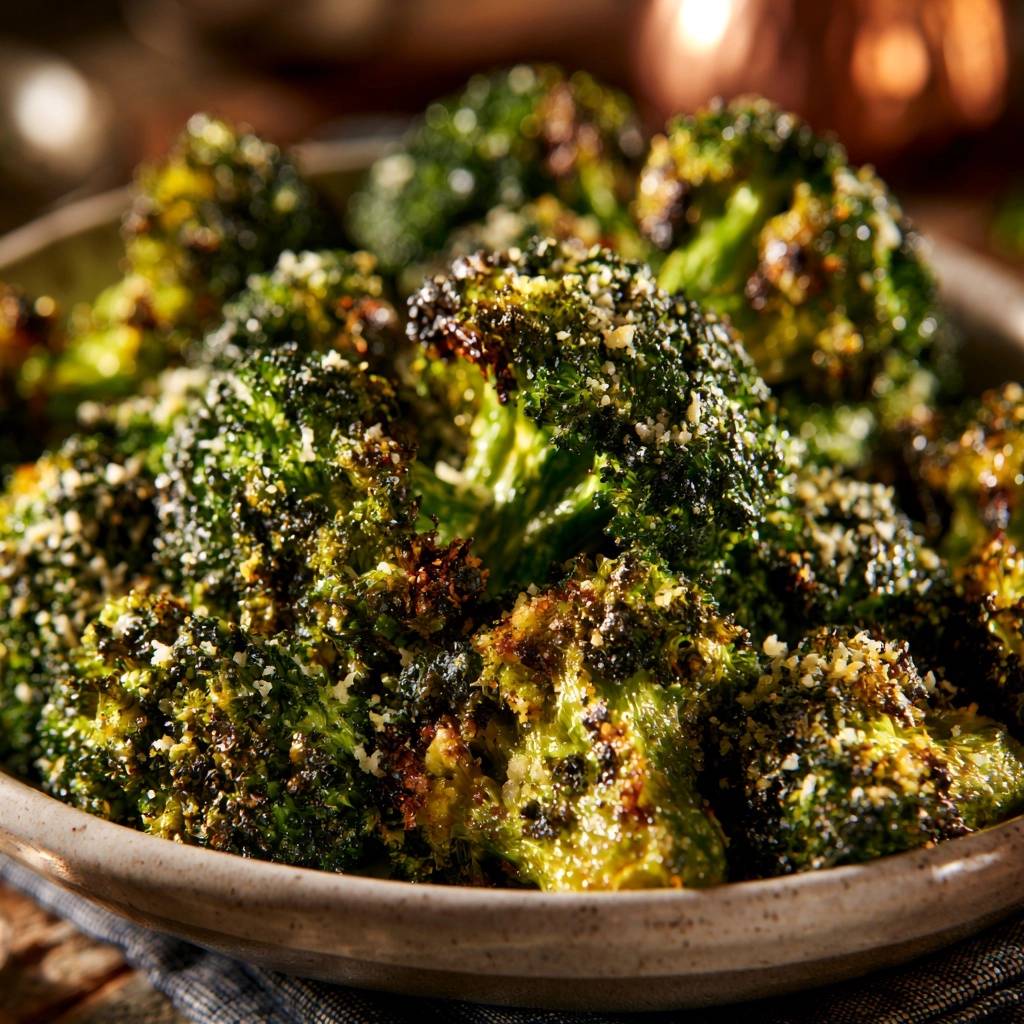
I always recommend using a salad spinner or pressing the florets between two thick kitchen towels. You want the broccoli to feel bone-dry to the touch before you even think about adding the oil. If the surface is wet, the oil will just slide off and sit at the bottom of the pan, leading to a greasy, soft mess instead of a crisp crust.
Thermal Mass and the Preheated Sheet Pan
Think of your baking sheet as a stovetop skillet. You wouldn’t put a steak into a cold pan, right? The same logic applies here. By placing your rimmed baking sheet in the oven while it preheats to 425 degrees, you are building up thermal mass. This stored energy provides immediate conductive heat the moment the broccoli hits the surface.
You should actually hear a distinct sizzle when you spread the florets onto the hot tray. This initial sear jumpstarts the browning process on the bottom of the broccoli while the hot air of the oven works on the tops. This two-pronged heat attack is the most effective way to ensure the stalks cook through before the florets become overly mushy.
Essential Components for Garlic Parmesan Roasted Broccoli
Quality ingredients make a massive difference when you’re working with such a simple flavor profile. Since we are roasting at high heat, every element needs to be able to stand up to the temperature without burning or losing its character. Using kosher salt is vital here because the larger grains provide a better “pop” of flavor than fine table salt.
The choice of fat is also critical. Extra virgin olive oil provides a rich, peppery base that complements the earthy broccoli. However, you must ensure every crevice of the floret is lightly coated. If you leave dry spots, the broccoli will dehydrate and turn tough rather than roasting into a tender, crispy treat.
Selecting and Prepping Fresh Broccoli Heads
Start with the freshest broccoli you can find. Look for heads with tight, dark green beads and firm stalks. If the beads are starting to turn yellow or feel loose, the broccoli is already losing its moisture and will likely turn bitter in the oven. Freshness is the foundation of that sweet, nutty roasted flavor.
When cutting your florets, aim for uniform, bite-sized pieces. If you have some massive chunks and some tiny slivers, they won’t cook at the same rate. I like to keep a bit of the stem attached to each floret because the stem provides a wonderful structural crunch that balances the softer top beads.
The Texture Trio: Parmesan, Panko, and Garlic
To get that specific “crust” look, the consistency of your cheese matters. Use a finely grated Parmesan that looks almost like a powder. This allows the cheese to fall into the nooks and crannies of the florets, creating a cohesive coating. Pre-shredded cheese often has anti-clumping agents that prevent it from melting and sticking properly.
Panko breadcrumbs are the secret weapon for visual and textural appeal. Unlike traditional breadcrumbs, which can turn sandy, Panko stays light and airy. When mixed with the Parmesan and garlic, it creates a jagged, golden-brown shell that catches the light and provides a major crunch factor. Freshly minced garlic is also a must; the jarred stuff is too wet and lacks the aromatic punch needed to stand up to the cheese.
Fat and Acid: Olive Oil and Lemon Juice
While olive oil handles the cooking, lemon juice handles the finishing. Adding acid is a professional chef’s trick to “wake up” a dish. However, never add the lemon juice before roasting. The acid will break down the chlorophyll in the broccoli, turning it a dull, unappetizing gray during the cook time.
Instead, wait until the pan is whistling hot and fresh out of the oven. A quick squeeze of fresh lemon juice provides a bright, citrusy lift that cuts through the richness of the Parmesan. It also helps the salt and pepper flavors bloom on your palate, making the whole dish taste more vibrant.
Step-by-Step: Achieving the Perfect Char
Achieving the perfect roast is all about timing and heat management. You can’t just throw everything in at once and hope for the best. Garlic and cheese burn much faster than broccoli cooks, so we have to use a phased approach to ensure everything peaks at the exact same moment.
The total cook time is about 20 minutes, but those minutes are divided to protect the delicate aromatics. You’ll start with high-heat roasting to establish the base texture, then finish with the toppings to create that golden-brown “halo” effect. This method ensures the garlic stays sweet and fragrant rather than turning bitter and black.
Phase 1: The High-Heat Initial Sear
Once your oven and pan are at 425 degrees, toss your dry broccoli with the olive oil, salt, and pepper. Carefully pull the hot pan out and spread the broccoli in a single layer. You must hear that sizzle! If the pan is crowded, the broccoli will release moisture and steam itself, so use two pans if you’re doubling the recipe.
Roast for the first 12 to 15 minutes without disturbing them too much. You want the side touching the pan to develop a deep, dark brown color. This is where the flavor lives. During this phase, the broccoli will soften slightly and the edges of the florets will start to look a bit toasted.
Phase 2: Integrating the Crust and Aromatics
While the broccoli is having its first roast, mix your minced garlic, Parmesan, and Panko in a small bowl. After the initial 15 minutes, pull the pan out. Sprinkle this mixture evenly over the florets. I like to use tongs to give them a quick toss so the cheese and crumbs stick to the oily surfaces of the broccoli.
This is the most fragrant part of the process. The garlic will hit the hot oil and immediately start to smell incredible. By adding the garlic now, you’re giving it just enough time to mellow out and lose its raw bite without risking the burnt, acrid flavor that comes from 20 minutes in a hot oven.
Phase 3: The Final Crisp and Finishing Touches
Slide the pan back in for the final 5 minutes. Keep a close eye on it! You’re looking for the Panko to turn a beautiful toasted gold and the Parmesan to melt into crispy little lacy bits. The very tips of the broccoli should be deeply charred, almost black in some spots, which provides a smoky sweetness.
As soon as you pull the pan out, hit it with that fresh lemon juice. The residual heat will help the juice penetrate the florets. Serve it immediately while the crust is at its peak crispness. If it sits too long, the steam from the interior of the broccoli will eventually soften the Panko, so timing is everything.
Troubleshooting Common Roasting Obstacles
Even with the best intentions, things can go sideways in a hot oven. The most common issue is a lack of browning. If your broccoli looks pale after 15 minutes, your oven might be running cool. Don’t be afraid to crank the heat up or move the rack to a lower position where it’s closer to the heating element.
Another issue is uneven cooking. If the stalks are still tough but the florets are burning, your pieces are likely too large. Next time, try cutting the stalks thinner or even peeling the tough outer skin of the broccoli stems. This allows the heat to penetrate the dense center of the stalk much faster.
Why is my broccoli still limp?
If your broccoli comes out limp, it’s almost always due to overcrowding or moisture. When florets are packed too tightly on a pan, the air can’t circulate. This traps the escaping steam, which effectively “boils” the broccoli from the outside in. Always leave at least an inch of space between the pieces.
If you catch this happening mid-roast, you can try to salvage it by splitting the broccoli onto two pans and increasing the heat by 25 degrees. However, the best fix is prevention: dry the broccoli like your life depends on it and use a large enough pan to give every floret its own “personal space.”
Preventing Burnt Garlic and Bitter Cheese
Garlic is incredibly delicate. If you mince it too finely, it can vanish and burn into tiny bitter specks. Try a medium mince so the pieces have enough body to toast without incinerating. If you find the cheese is burning before the breadcrumbs get golden, you might be using a cheese with a very high fat content.
To fix this, ensure you are using a hard, aged Parmesan (like Parmigiano-Reggiano). These cheeses have less moisture and a higher melting point, which allows them to crisp up beautifully. Also, make sure the cheese is distributed on the broccoli itself rather than sitting on the bare metal of the pan, where it will burn instantly.
Flavor Variations and Dietary Adaptations
Once you’ve mastered the basic technique, you can start playing with the flavor profile. The “Anti-Soggy” method works for almost any seasoning blend. You can swap the lemon for a splash of balsamic glaze at the end, or add a teaspoon of lemon zest to the Panko mixture for an even more intense citrus aroma.
The beauty of this dish is its versatility. It can lean Mediterranean with some dried oregano, or take on a more savory, umami-forward profile with a sprinkle of nutritional yeast. As long as you keep the moisture low and the heat high, the results will be fantastic.
Adding Heat with Red Pepper and Spices
The red pepper flakes in this recipe provide a subtle, back-of-the-throat warmth that cuts through the salty cheese. If you want more kick, you can increase the flakes or add a pinch of cayenne pepper to the oil toss. Smoked paprika is another great addition that adds a “grilled” flavor without needing a barbecue.
Just be careful with fresh chilies. Like the broccoli itself, fresh peppers contain water. If you want to use fresh jalapeños or serranos, slice them very thinly and toss them in with the broccoli at the very beginning so their moisture has time to evaporate during the roasting process.
Dairy-Free and Vegan Alternatives
You can absolutely make this dish vegan without losing the crunch. Nutritional yeast is a fantastic substitute for Parmesan because it has a naturally nutty, cheesy flavor and a dry, powdery texture. It toasts beautifully in the oven and provides that savory “umami” hit you’d normally get from the cheese.
For the breadcrumbs, most Panko is naturally vegan, but always check the label. You can also use crushed toasted walnuts or almonds in place of the Panko for a grain-free, keto-friendly version. The nuts provide a similar crunch and a rich flavor that pairs perfectly with the charred broccoli.
Pairing Suggestions for a Balanced Meal
This broccoli is so flavorful it can almost be a snack on its own, but it really shines as a side dish. The acidity and crunch make it a perfect partner for rich proteins. Try serving it alongside a pan-seared salmon fillet or a juicy roasted chicken breast. The lemon in the broccoli will complement the fats in the meat beautifully.
It also works wonders in a vegetarian grain bowl. Toss the roasted broccoli with some cooked quinoa, chickpeas, and a dollop of tahini dressing. The charred edges of the broccoli provide a smoky depth that makes the whole bowl feel much more substantial and satisfying.
Expert Tips for Storage and Reheating
Roasted broccoli is best served immediately, but if you have leftovers, don’t lose hope. Store them in an airtight container in the refrigerator for up to three days. Whatever you do, stay away from the microwave! The microwave will turn those once-crispy florets into a rubbery, soggy mess in seconds.
To reheat and regain that crunch, use an air fryer or your oven. Put the broccoli back on a baking sheet at 400 degrees for about 5 to 7 minutes until it’s heated through and the edges start to sizzle again. An air fryer is even faster, taking only 3 to 4 minutes to bring that “just-roasted” texture back to life.
Expert Troubleshooting
Can I use frozen broccoli for this recipe?
You can, but it is much harder to get it truly crispy. Frozen broccoli has been blanched, which means its cellular structure is already softened, and it carries a lot of internal ice. If you must use frozen, do not thaw it first. Toss the frozen florets in oil and put them directly onto the preheated pan. You will likely need to increase the cook time by 5 to 10 minutes to allow the extra moisture to evaporate.
What if I don’t have a rimmed baking sheet?
A rimmed baking sheet is ideal because it prevents oil from dripping into your oven, but a flat cookie sheet will work in a pinch. The most important factor is the material. Heavy-duty aluminum or stainless steel pans hold heat better than thin, cheap pans. Avoid using glass baking dishes or ceramic pans, as they don’t conduct heat quickly enough to sear the vegetables, which will lead to sogginess.
Can I use bottled lemon juice instead of fresh?
In a pinch, yes, but fresh is significantly better. Bottled lemon juice often has a muted, slightly metallic taste and lacks the bright essential oils found in the zest and fresh juice. Since the lemon is added at the very end to brighten the dish, the quality of that juice is very noticeable. If you don’t have a lemon, a splash of white balsamic or apple cider vinegar is a better substitute than bottled juice.
How do I scale this for a dinner party without losing the crunch?
The biggest danger when scaling up is overcrowding the pan. If you are cooking for a large group, use two or even three baking sheets. Rotate the pans between the top and bottom racks halfway through the cooking time to ensure even browning. Never try to cram four heads of broccoli onto one tray, or you will end up with a giant pile of steamed vegetables instead of the crispy treat you’re aiming for.
Why did my garlic turn blue or green?
Don’t panic! This is a natural chemical reaction between the sulfur compounds in the garlic and the acid in the lemon juice (or even the minerals in the water). It usually happens if the garlic is very fresh or if it sits in an acidic environment for too long. It is perfectly safe to eat and doesn’t change the flavor, though it looks a bit strange. Adding the garlic later in the roasting process, as this recipe suggests, usually prevents this from happening.
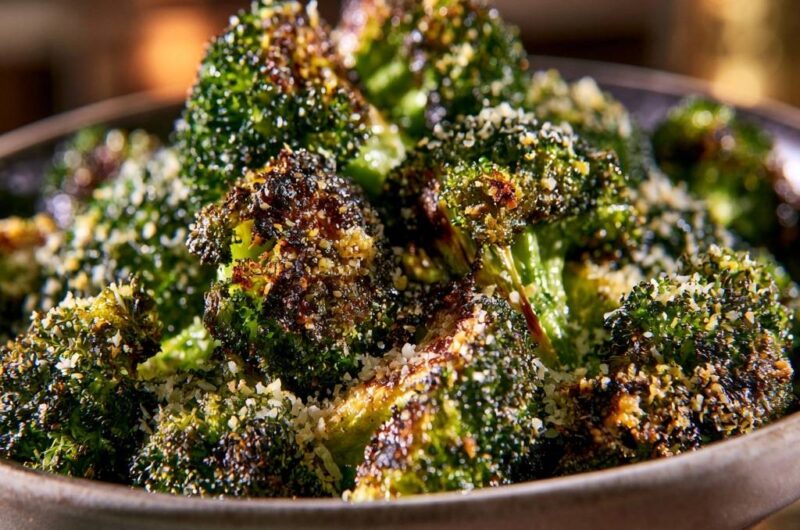
Garlic Parmesan Roasted Broccoli
Course: Side DishCuisine: AmericanDifficulty: easy4
servings10
minutes20
minutes30
Minutes165
kcalAmerican
Ingredients
2 large heads of broccoli, cut into bite-sized florets
3 tablespoons extra virgin olive oil
4 cloves garlic, minced
1/2 cup finely grated Parmesan cheese (powder-like consistency)
1/4 cup Panko breadcrumbs (for the visual “crust” texture)
1/2 teaspoon kosher salt
1/4 teaspoon cracked black pepper
1/2 teaspoon red pepper flakes (optional)
1 tablespoon fresh lemon juice
Directions
- Place a large, rimmed baking sheet inside your oven and preheat to 425 degrees F. Heating the pan first is the critical step to prevent sogginess; the broccoli starts searing the moment it hits the metal.
- Wash your broccoli florets and dry them thoroughly using a salad spinner or clean kitchen towels. Any remaining water will create steam in the oven, which leads to a mushy texture.
- In a large bowl, toss the dry broccoli florets with olive oil, salt, pepper, and red pepper flakes until every crevice is lightly coated.
- Carefully remove the hot baking sheet from the oven. Spread the broccoli in a single layer, ensuring the florets are not crowded. If they touch too much, they will steam instead of roast.
- Roast for 12-15 minutes. While the broccoli roasts, mix the minced garlic, Parmesan cheese, and Panko breadcrumbs in a small bowl.
- Remove the pan from the oven. Sprinkle the garlic-cheese-breadcrumb mixture evenly over the florets. Use tongs to toss lightly so the cheese adheres to the charred edges.
- Return to the oven for another 5 minutes until the cheese and breadcrumbs are golden-brown and the edges of the broccoli are deeply charred as seen in the image.
- Remove from the oven and immediately drizzle with lemon juice to brighten the flavors. Serve hot for the ultimate crunch.
Notes
- The critical step to prevent sogginess is preheating the baking sheet and ensuring the broccoli is completely dry before adding oil. Use a salad spinner for best results.