Nothing ruins a plate of loaded fries faster than a pile of limp, grease-soaked potatoes. Most recipes fail because they dump heavy toppings directly onto hot fries, creating steam that destroys the crunch. You’ve likely experienced that disappointment where the first bite is okay, but the rest of the plate turns into a mushy, starch-heavy mess.
This recipe fixes that frustration by focusing on the “Anti-Soggy Bottom” philosophy. We aren’t just throwing things on a tray; we’re using a double-blast heat technique and a strategic sauce layering process. The goal is a plate of Loaded BBQ Chicken Fries where every single fry stays shatteringly crisp, even under a mountain of molten cheese and smoky chicken.
The secret to this success is creating a moisture barrier. By using a preheated baking sheet and layering the cheese before the wet ingredients, you protect the potato’s structural integrity. I’ve found that this specific sequence prevents the sauce from soaking into the fry, ensuring that restaurant-quality crunch lasts until the very last bite.
The Physics of the Perfect Loaded Fry
Achieving the perfect fry is actually a battle against physics. When you place hot, moist toppings like BBQ chicken onto a bed of fries, the heat creates steam. If that steam has nowhere to go, it gets trapped between the potato and the topping, leading to rapid starch degradation. This is why your fries often turn into a sad, soft pile within minutes.
To combat this, we use the concept of a “Moisture Barrier.” By strategically placing the cheese first, we create a hydrophobic layer that shields the potato from the liquid in the BBQ sauce. This keeps the exterior of the fry firm while the interior remains fluffy and light.
Why Preheating the Baking Sheet is Mandatory
You shouldn’t start with a cold pan if you want maximum crunch. When you place frozen fries on a room-temperature tray, they spend the first few minutes in the oven thawing and releasing moisture, which leads to oil absorption. This makes them heavy and greasy rather than crisp.
By sliding a rimmed baking sheet into the oven while it preheats to 425°F, you create a searing surface. The moment those fries hit the hot metal, the exterior sears and locks in the structure. This immediate contact heat is the most effective way to ensure the fries don’t just bake, but actually roast to a firm, golden brown.
The Role of Smoked Paprika and Oil Coating
Tossing your fries in a tablespoon of vegetable oil before baking might seem redundant since they’re already fried, but it’s a crucial step. This thin, fresh layer of oil acts as an additional hydrophobic barrier against the toppings. It also helps the seasonings stick evenly across every surface.
The smoked paprika provides more than just a hint of wood-fired flavor. The sugars and compounds in the spice aid in the Maillard reaction. This chemical process helps the fries develop a deeper golden color and a more complex, savory crust that stands up better to the heavy toppings later on.
Essential Components for Loaded BBQ Chicken Fries
Quality ingredients are the foundation of this dish. While you might be tempted to hand-cut your own potatoes, “Extra Crispy” frozen fries are actually the superior choice here. They are often double-fried or coated in a light starch dust at the factory, which gives them the structural strength needed to support heavy BBQ chicken and cheese.
For the chicken, use breast meat diced into small, uniform cubes. This ensures you get a bit of protein in every bite without the pieces being so large that they fall off the fry. If you’re using leftovers, make sure the chicken is cold when you toss it with the sauce so it doesn’t release excess moisture too early.
Selecting the Right BBQ Sauce Profile
Not all BBQ sauces are created equal for this application. You want a sauce that is thick and high in sugar for the final drizzle, as this creates those beautiful, glossy ribbons that stay put. A thinner, vinegar-based sauce is better for tossing the chicken because it coats the meat thinly without adding too much weight.
Look for a smoky profile to complement the paprika. Since we aren’t using any smoked meats like bacon from beef, the smokiness of the sauce and the paprika provides that essential “backyard grill” flavor that makes the dish feel authentic and hearty.
Cheese Selection: Meltability vs. Sharpness
Sharp cheddar is the gold standard for these fries because its bold flavor cuts through the sweetness of the BBQ sauce. However, you should avoid the pre-shredded bags if possible. Those products are coated in potato starch or cellulose to prevent clumping, which can result in a grainy, broken texture when melted.
Grating your own cheese from a block takes two minutes but makes a massive difference. Freshly grated cheddar melts into a smooth, cohesive blanket. This is vital for creating that “waterproof seal” that protects your fries from the moisture of the chicken and sauce.
Step-by-Step: Achieving the Ultimate Crunch
Precision during the cooking process is what separates a soggy snack from a masterpiece. You need to watch for specific visual cues rather than just relying on the timer. The transformation from frozen potato to a golden vessel for cheese is a three-phase process.
Phase 1: The High-Heat Initial Roast
Spread your oiled and seasoned fries in a single layer on that screaming-hot preheated tray. If you overcrowd the pan, the fries will release steam and boil in their own moisture rather than roasting. You want to hear a sizzle the moment they touch the metal.
Bake them for about 20 to 22 minutes, and don’t skip the halfway flip. You’re looking for a “deeply golden” color and a firm texture. If the fries feel limp when you try to flip them, give them another three minutes before touching them again. They must be extra firm before the toppings go on.
Phase 2: The Strategic Layering Sequence
Once the fries are crisp, move them into a tight pile in the center of the tray. This minimizes the surface area exposed to the toppings and keeps the heat concentrated in the middle. It also leaves the ends of the fries exposed so they stay crunchy even if the center softens slightly.
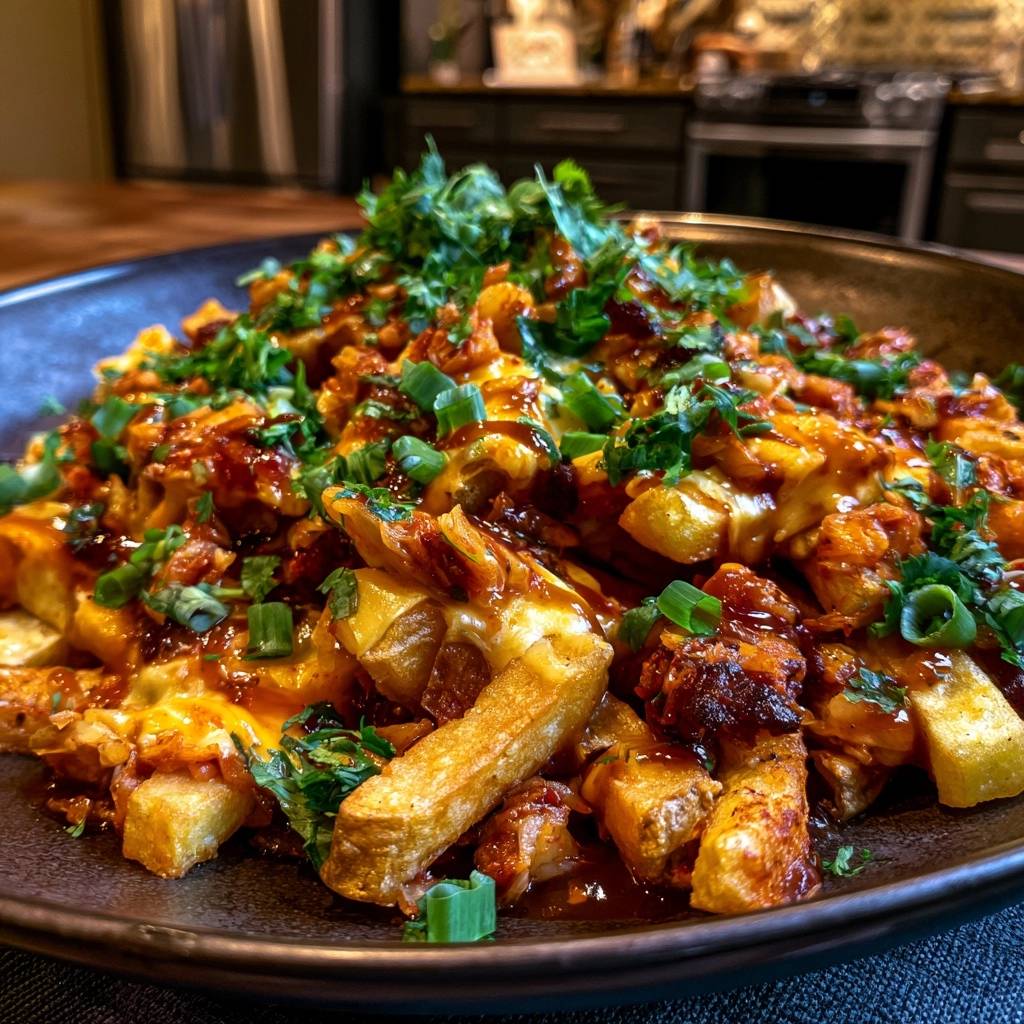
Apply the shredded cheese first. This is the most important step. The cheese needs to melt directly onto the fries to create that protective barrier. Only after the cheese is down should you add the BBQ-tossed chicken and the crispy beef or turkey bacon bits. This keeps the “wet” chicken away from the “dry” potato.
Phase 3: The Final Melt and Garnish
Return the tray to the oven for a quick 3 to 5 minute blast. You aren’t trying to cook the toppings further; you just want the cheese bubbling and the chicken warmed through. Watch it closely so the cheese doesn’t burn or separate into oil.
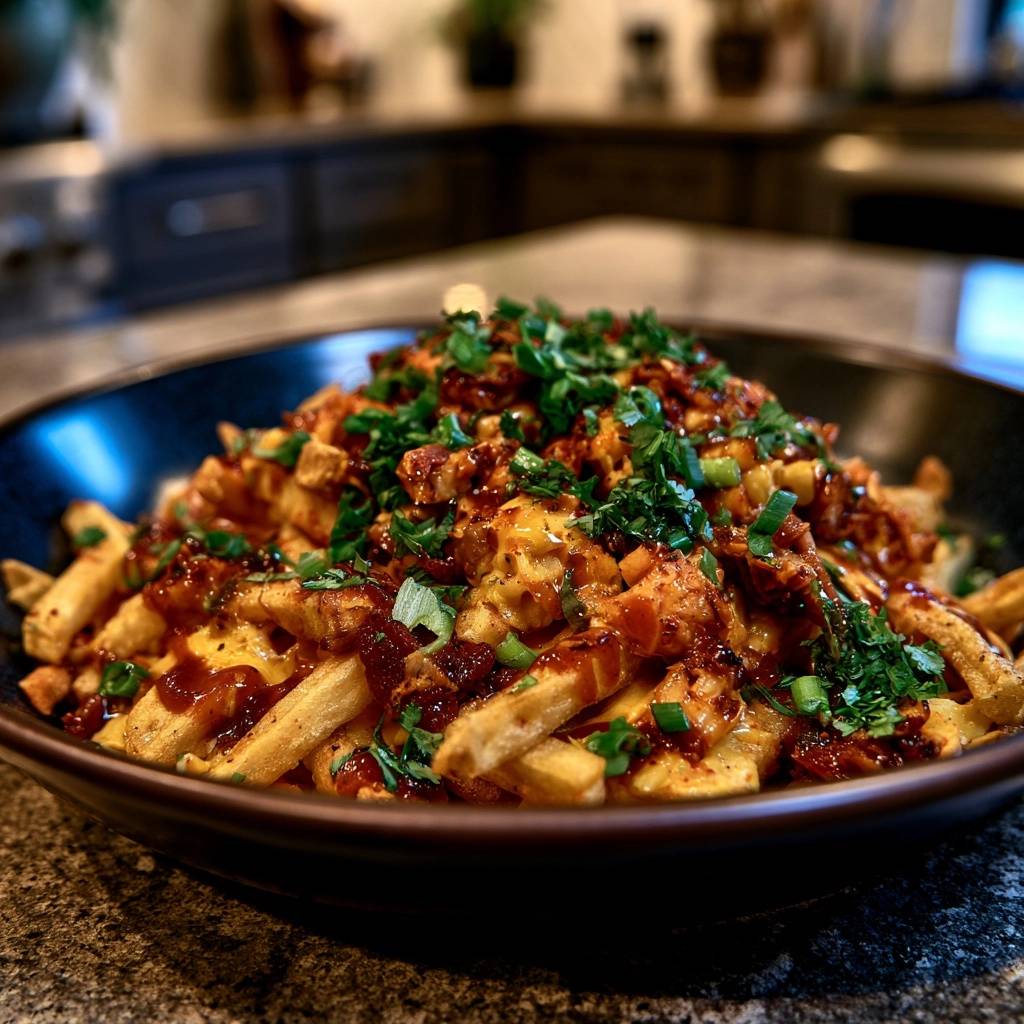
After removing the tray, transfer the pile to a serving bowl and add your final drizzle of BBQ sauce. Immediately top with a heavy layer of fresh cilantro and sliced green onions. These fresh elements provide the necessary acid and brightness to cut through the rich, savory fats of the cheese and chicken.
Avoiding Common Mistakes with Loaded Fries
The biggest mistake people make is over-saucing the chicken. You only need about two tablespoons of sauce for two cups of chicken. The meat should look glazed, not swimming in liquid. Any excess sauce will inevitably run down and turn your fries into mush.
If you’re using leftover rotisserie chicken, it can sometimes be a bit dry. Instead of adding more sauce, try adding a teaspoon of oil to the chicken toss. This adds moisture and mouthfeel without the water content that ruins the potato’s crunch.
Managing Moisture in Protein Toppings
Before you toss your chicken in the BBQ sauce, pat it dry with a paper towel. This is especially important if you’ve just defrosted it or if it was stored in juices. Removing that surface moisture allows the sauce to cling better and prevents “sauce creep” on the baking sheet.
The same goes for your bacon bits. Whether you use beef bacon or turkey bacon, ensure it is fully rendered and crispy before it hits the fries. Soft, undercooked bacon will release fat and moisture during the final melt, which is a one-way ticket to a soggy bottom.
The “Serve Immediately” Mandate
Loaded fries have a peak texture window of about 5 to 8 minutes. After that, the laws of thermodynamics take over and the steam will eventually win. To extend this window, serve the fries in a pre-warmed ceramic bowl which helps maintain the cheese’s molten state without continuing to cook the fries.
If you’re serving a crowd, don’t load the entire batch at once. It’s better to do two smaller trays than one giant one that sits out and gets cold. Freshness is the most important ingredient in this recipe, so timing your garnishes for the exact moment of serving is key.
Flavor Variations and Protein Swaps
Once you master the technique, you can swap the flavors while keeping the structural rules the same. For a “Spicy Buffalo” version, toss the chicken in buffalo sauce and swap the cheddar for a mix of Monterey Jack and blue cheese crumbles. Just remember to keep the sauce-to-protein ratio low.
A “Smoky Brisket” version is also fantastic. Use shredded beef brisket that has been warmed and drained of excess fat. Since brisket is naturally richer than chicken, you might want to increase the amount of green onions or add some pickled jalapeños to provide extra acidity.
Vegetarian Alternatives with Structural Integrity
If you want to skip the meat, roasted cauliflower florets make an excellent substitute. Toss small cauliflower pieces in BBQ sauce and roast them separately until they are charred and dry before adding them to the fries. This prevents the vegetable’s natural water from leaking into the potatoes.
Smoked chickpeas are another great option. They provide a nice textural contrast and a nutty flavor that pairs perfectly with smoky BBQ sauce. Just like the cauliflower, ensure they are roasted until firm before they join the fry pile to maintain that all-important crunch.
What to Serve with Loaded BBQ Chicken Fries
Because this dish is very rich and savory, you want to pair it with something bright and acidic. A crisp vinegar-based coleslaw is the perfect side. The crunch of the cabbage and the tang of the vinegar cleanse the palate between bites of cheesy, saucy fries.
Pickled vegetables, like quick-pickled red onions or cucumbers, also work wonders. You could even serve a simple green salad with a citrus-based vinaigrette. Avoid heavy sides like mac and cheese or potato salad, as you already have plenty of starch and dairy on the main plate.
Make Ahead Strategies and Storage
I’ll be honest: loaded fries do not store well once they are assembled. The microwave is the enemy of the fried potato, turning it into a rubbery, sad version of its former self. If you know you’ll have leftovers, it’s best to store the components separately.
Keep your cooked chicken, shredded cheese, and fries in different containers. When you’re ready for round two, you can crisp the fries back up in the oven or air fryer before adding the fresh toppings. This is the only way to replicate the original experience.
How to Reheat Without Losing the Crunch
If you must reheat already-loaded fries, use an air fryer at 375°F for about 3 to 5 minutes. The circulating hot air is your best chance at reviving the potato’s exterior. It won’t be exactly like the first time, but it’s significantly better than the oven.
In a standard oven, use a high heat of 400°F on a wire rack. The rack allows heat to reach the bottom of the fries, helping to evaporate some of the moisture that settled during storage. Avoid the microwave at all costs unless you actually enjoy soggy potatoes!
Expert Troubleshooting
Can I use an air fryer for the entire process?
Yes, you absolutely can. Air fry the fries first until they are very crisp. Then, pile them up in the basket, add your cheese and chicken, and air fry for another 2 minutes at 350°F. Just be careful not to overfill the basket, or the air won’t circulate enough to keep the bottom layer crunchy.
My cheese didn’t melt into a “seal,” what happened?
This usually happens if the cheese is too cold or if you used pre-shredded cheese with too much anti-caking powder. Make sure your cheese is at room temperature before topping, and try a finer shred. A finer shred melts faster and more evenly, creating that solid layer you need to block the moisture.
How do I scale this recipe for a large party?
To scale this up, use multiple baking sheets rather than one giant one. Overcrowding is the number one cause of failure. Roast the fries on two or three trays, then combine them into smaller “piles” for the topping phase. This ensures every guest gets crispy fries rather than just the people eating from the edges.
What are the best potato alternatives (waffle fries, tater tots)?
Waffle fries are excellent because they have a lot of surface area for crunch, but they can be fragile. Tater tots are actually the sturdiest alternative and hold up incredibly well under heavy toppings. If you use tots, increase the initial bake time by 5 minutes to ensure the centers are fully cooked and firm.
Why did my fries turn out dark but not crispy?
This is usually a sign that the oven temperature was too high or the fries had too much sugar/seasoning on them, causing them to brown before the moisture evaporated. Stick to 425°F and ensure you aren’t using a BBQ rub with high sugar content during the initial roast. Save the sweet stuff for the final drizzle.
Loaded BBQ Chicken Fries
Course: Main CourseCuisine: AmericanDifficulty: easy4
servings15
minutes25
minutes40
Minutes610
kcalAmerican
Ingredients
1 bag (28 oz) extra crispy frozen french fries
2 cups cooked chicken breast, diced into small cubes
1/2 cup smoky BBQ sauce, divided
1 1/2 cups shredded sharp cheddar cheese
1/2 cup cooked bacon bits
1/4 cup fresh cilantro, finely chopped
3 green onions, thinly sliced
1 tablespoon vegetable oil
1/2 teaspoon smoked paprika
Directions
- Preheat your oven to 425°F (220°C). Place a large rimmed baking sheet inside the oven while it preheats. This hot surface is the first step to preventing sogginess.
- In a large bowl, toss the frozen fries with one tablespoon of oil and the smoked paprika. This light coating acts as a moisture barrier and adds color. Spread the fries in a single layer on the preheated tray and bake for 20-22 minutes, flipping halfway through, until they are deeply golden and extra firm.
- While fries bake, toss the diced chicken with 2 tablespoons of the BBQ sauce in a small bowl. Do not oversaturate the chicken, as excess liquid is the enemy of a crisp fry.
- Remove the tray from the oven. Move the fries into a tight pile in the center of the tray. This minimizes the surface area exposed to the toppings and keeps the heat concentrated.
- Layer the shredded cheese first. The melted cheese creates a “waterproof seal” over the fries. Top the cheese with the BBQ chicken and bacon bits.
- Return the tray to the oven for 3 to 5 minutes until the cheese is fully melted and bubbling.
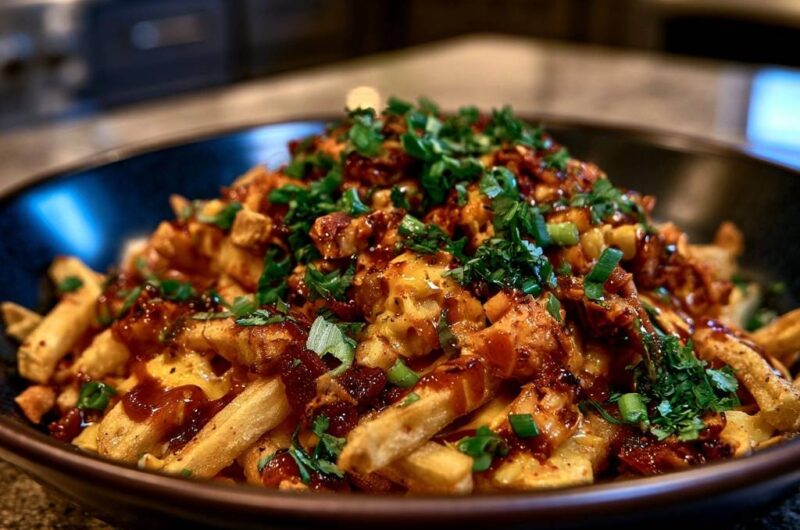
- Transfer the loaded fries to a serving bowl. Immediately drizzle with the remaining BBQ sauce in a zig-zag pattern. Finish with a heavy, dense layer of fresh cilantro and green onions as shown in the image. Serve immediately to enjoy the perfect contrast of molten toppings and crunchy fries.
Notes
- The secret to preventing sogginess is layering the cheese first to create a waterproof seal and using a preheated baking sheet for a double-blast of heat.