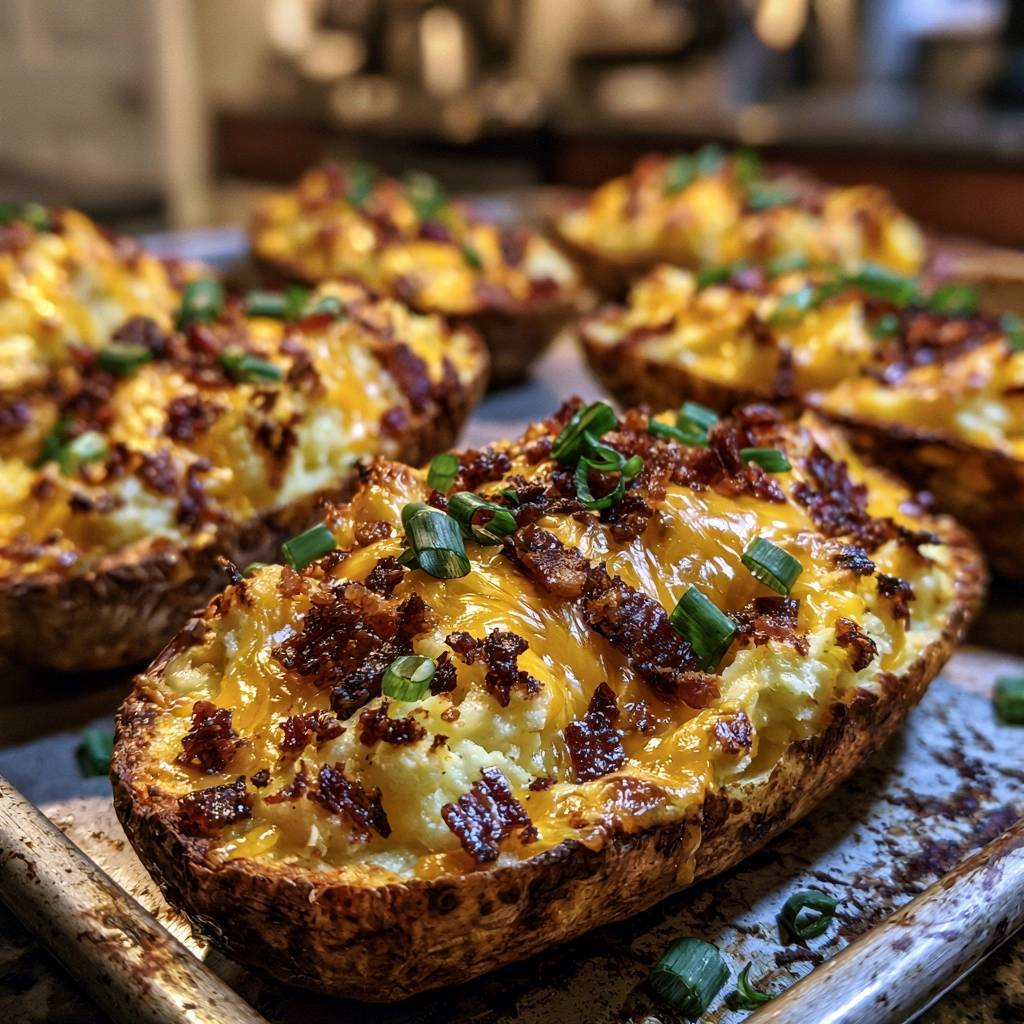
Most home cooks struggle with twice-baked potatoes that have a limp, leathery skin or a gummy, glue-like filling. You know the ones I’m talking about—they come out of the oven looking sad and tasting like a wet sponge. The secret to the ultimate restaurant-style potato is all about moisture management.
By skipping the foil wrap and using a high-heat salt rub, we draw out excess moisture to ensure the skin stays shatter-crisp while the inside remains light and fluffy. It’s that incredible sensory contrast between the salty, crunchy exterior and the cloud-like interior that makes this dish a total showstopper. You’re not just making a side dish; you’re engineering the perfect bite.
The real trick to success lies in how you handle the starch. If you treat the potato flesh too roughly, you’ll end up with a paste. I’ve found that hand-mashing while the potato is still warm, but not piping hot, allows the steam to escape without activating the starches into a sticky mess. Let’s get into the science of why this works.
The Science of Moisture and Potato Starch
When you’re making Loaded Twice-Baked Potatoes, the Russet potato is your only real choice. These potatoes are high in starch and low in moisture, which is exactly what you need for a fluffy result. The starch granules in a Russet are large and swell when cooked, creating that beautiful, mealy texture we love. However, these granules are fragile.
If you over-work the potato using a high-speed electric mixer, you rupture those starch cells. This releases amylose, which turns your filling into a gummy, gluey disaster. This process is often worsened by “retrogradation,” where the starch molecules realign into a tough structure as they cool. By mashing by hand, you keep those cells intact for a light, airy mouthfeel.
The salt rub serves a dual purpose beyond just seasoning. Through osmosis, the salt draws surface moisture out of the skin during the first bake. This allows the skin to dehydrate and crisp up rather than steaming inside a foil jacket. You’ll notice the skin becomes almost cracker-like, providing the perfect structural support for the rich filling.
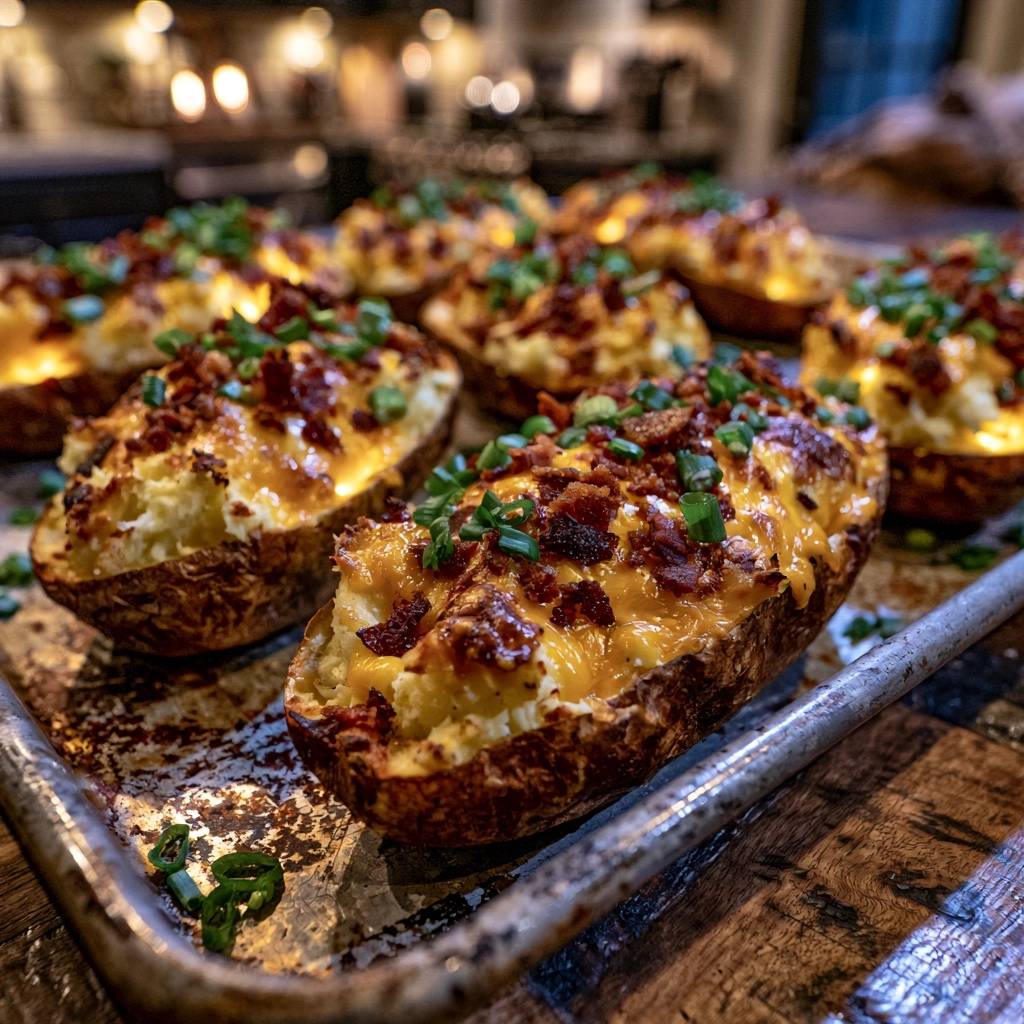
Essential Components for the Ultimate Loaded Filling
Quality ingredients make a massive difference when you have such a simple base. I always reach for unsalted butter because it gives you total control over the seasoning. Different brands of salted butter have varying salt levels, and since we’re already using a salt rub on the skins, you don’t want to accidentally create a salt bomb.
Full-fat sour cream is another non-negotiable. The acidity in the sour cream is vital because it cuts through the heavy richness of the butter and cheese. If you use a low-fat version, the filling often becomes runny and lacks that signature tang. It’s the balance of fat and acid that makes the flavor pop.
For the cheese, go with a sharp cheddar. Mild cheddars tend to disappear into the potato, but a sharp, aged variety holds its own. It provides a punchier flavor profile that stands up to the smoky bacon and fresh green onions. Always grate your cheese from a block if you can, as it melts much smoother than the pre-shredded stuff coated in cellulose.
Selecting the Right Russet Potatoes
When you’re at the market, look for potatoes that are roughly the same size. This ensures they all finish cooking at the same time, so you aren’t waiting on one giant potato while the others get cold. Avoid any with green spots, as that indicates solanine, which can taste bitter and be harmful in large amounts.
Firmness is key. If a potato feels soft or has sprouts, it’s already losing its internal moisture and won’t give you that fluffy interior. You want a potato that feels heavy for its size and has a clean, unblemished skin that will crisp up beautifully in the oven.
The Role of High-Heat Fats and Salts
Olive oil is the best vehicle for the initial rub because it handles the 400-degree heat well and helps the salt adhere to the skin. The oil fries the surface of the skin slightly as it bakes. When combined with a generous coating of kosher salt, it creates a protective crust that prevents the skin from becoming leathery.
Phase One: Achieving the Perfect Foundation Bake
Preheat your oven to 400 degrees F and throw away the foil. Wrapping potatoes in foil traps steam, which results in a boiled, soggy skin. Instead, prick the potatoes with a fork to let steam escape from the center, rub them with oil and salt, and place them directly on the oven rack.
Placing them on the rack allows for 360-degree airflow. This prevents the bottom of the potato from sitting in its own moisture and getting soft. Put a baking sheet on the lower rack to catch any oil drips. After about 60 minutes, the skins will be deeply browned and the centers will be perfectly tender.
Phase Two: Carving the Structural Potato Shell
Once the potatoes have cooled for about 5 to 10 minutes, slice them in half. You need to be careful here. Use a small spoon to scoop out the flesh, but leave a 1/4 inch thick shell of potato attached to the skin. This is your “vessel,” and it needs to be strong.
If you scoop too close to the skin, the potato will collapse under the weight of the filling. If you leave too much flesh, the potato tastes dense and you won’t have enough room for all that cheesy goodness. That 1/4 inch sweet spot provides the structural integrity needed to hold the mounded filling without sagging.
Phase Three: Hand-Mashing for a Fluffy Interior
This is the most critical step for texture. Put down the electric mixer! Use a hand masher or even a large fork to break up the potato flesh while it’s still warm. You want to see small, fluffy crumbles before you add any liquids. This ensures the butter and sour cream incorporate evenly without over-mixing.
Add your softened butter, sour cream, and milk, then mix until just combined. You’re looking for a texture that is creamy but still has a bit of body. If it starts looking like shiny paste, stop immediately. Fold in your cheese and onions gently. The goal is a filling that feels like a light mash, not a heavy puree.
Phase Four: The Double-Bake and Broil Technique
Spoon the mixture back into the shells. Don’t smooth the tops down; instead, leave them craggy with little peaks and valleys. This creates more surface area for the cheese to melt into and for the oven heat to create crispy, toasted edges. Top them with the remaining cheese and bacon.
Return them to the oven for 10 to 15 minutes. This second bake sets the filling and ensures the skin stays crunchy after being handled. For that professional, toasted look, flip the broiler on for the last 2 minutes. Watch them closely! You want the cheese bubbling and the potato peaks to turn a golden brown.
Troubleshooting Common Twice-Baked Potato Failures
If your skins turned out chewy, it’s almost always because steam was trapped. This happens if you used foil or if the oven temperature was too low. High heat and airflow are your best friends for a crunch that lasts. Always bake directly on the rack for the first round.
Runny filling usually comes from adding too much milk or using low-fat dairy. If your filling seems too soft, add a little more shredded cheese to help bind it together. Remember, the potato will absorb some moisture as it sits, but you want the initial mix to hold its shape on a spoon.
If your potato shells split, you might have scooped them while they were too hot, or you didn’t leave enough of a wall. Let them cool just enough to handle. If a shell does tear, you can usually “glue” it back together with a bit of the potato filling before the second bake.
Lack of browning on the cheese is often due to a flat surface. If you smooth the top of the potato like a landing strip, the heat just slides over it. Keep the top rough and craggy so the broiler can catch those edges and create that beautiful toasted color.
Make-Ahead Strategies and Storage Logistics
You can absolutely prep these 24 hours in advance. Follow the steps all the way through stuffing the potatoes, but stop before the second bake. Cover them loosely and keep them in the fridge. When you’re ready to eat, let them sit at room temperature for 20 minutes before baking so the centers heat through evenly.
Store leftovers in an airtight container in the fridge for up to 3 days. I don’t recommend freezing them, as the potatoes can become grainy and the sour cream may separate upon thawing. The texture is never quite the same after a trip to the freezer.
To reheat, avoid the microwave if you want to keep the skin crisp. The microwave will turn the skin soft and rubbery. Instead, pop them back into a 350-degree oven for about 15 to 20 minutes. This revives the crunch and ensures the cheese is perfectly melted again.
Pairing Suggestions for a Complete Meal
For a classic steakhouse vibe, serve these potatoes alongside a seared ribeye and a crisp wedge salad with blue cheese dressing. The richness of the potato complements a high-quality protein perfectly. It’s a heavy meal, so the fresh crunch of the salad helps balance the plate.
If you want a vegetarian feast, these potatoes are hearty enough to be the star. Pair them with a big tray of roasted root vegetables like carrots and parsnips tossed in balsamic glaze. The sweetness of the roasted veggies plays well against the salty, savory potato skin.
They also make a fantastic companion to a big bowl of chili or a hearty vegetable stew. Instead of bread, use the potato to soak up the flavors of the soup. It’s the ultimate comfort food combination for a cold evening, providing plenty of warmth and texture.
Expert Tips for Customizing Your Filling
Once you master the base, you can get creative. Try folding in some roasted garlic for a mellow, sweet depth of flavor. You can also swap the green onions for fresh chives or even a bit of chopped parsley for a brighter, herb-forward finish. Just keep your ratios steady.
If you want to add more texture, caramelized onions are a game-changer. Sauté them low and slow until they are jammy and sweet, then fold them into the mash. The sweetness of the onions against the sharp cheddar is a match made in heaven.
Vegetarian Protein Alternatives
If you aren’t using bacon, you can still get that smoky hit. Try adding a teaspoon of smoked paprika to the potato mash. Another great trick is to use finely chopped sun-dried tomatoes. They provide a savory, umami punch and a chewy texture that mimics the experience of bacon bits without the meat.
Adjusting for High-Altitude Baking
If you’re cooking at a high altitude, potatoes can take a bit longer to soften. You might need to add 10 to 15 minutes to the initial bake time. Ensure the internal temperature reaches about 210 degrees F to guarantee the starches have fully broken down and are ready for mashing.
How do I store leftovers?
Place the cooled potatoes in an airtight container and keep them in the refrigerator for up to 3 days. To maintain the crispy skin, reheat them in the oven at 350°F for 15-20 minutes rather than using a microwave. Freezing is not recommended as the texture of the potato and sour cream can become grainy and watery once thawed.
Why is my potato filling gummy or sticky?
Gummy filling is usually caused by over-processing the potato. When you use an electric mixer or food processor, the blades break the starch granules, releasing amylose which creates a glue-like consistency. Always mash by hand with a potato masher or fork and mix in your dairy until just combined to keep the texture light and fluffy.
Can I use a different type of potato?
Russet potatoes are the best choice because of their high starch content and thick skin. Yukon Gold potatoes are delicious but have a waxier texture and thinner skin, which makes them prone to collapsing when scooped. If you must use Yukons, leave a slightly thicker shell (about 1/2 inch) to ensure they hold their shape during the second bake.
What can I use instead of sour cream?
If you don’t have sour cream, plain Greek yogurt is an excellent substitute. It offers a similar tang and creamy texture. You could also use a splash more milk and a teaspoon of lemon juice to provide the necessary acidity, though the filling may be slightly less rich. Avoid using heavy cream alone, as you need the acid to balance the fats.
How do I prevent the potatoes from tipping over in the oven?
If your potatoes are rolling around on the baking sheet, slice a tiny sliver off the bottom of the potato skin to create a flat base. Be careful not to cut all the way through to the flesh. This “anchor” will keep them upright so your mounded filling and cheese stay perfectly in place during the final bake.
Can I make these ahead of time?
Yes, you can prepare the potatoes through the stuffing step up to 24 hours in advance. Store them covered in the fridge. When you are ready to serve, add the cheese and bacon toppings and bake at 400°F. You may need to add 5 extra minutes to the bake time since the potatoes will be starting from a cold temperature.
Loaded Twice-Baked Potatoes
Course: Side DishCuisine: AmericanDifficulty: easy8
servings15
minutes1
hour60
Minutes310
kcalAmerican
Ingredients
4 large Russet potatoes, scrubbed and dried
2 tablespoons olive oil
1 tablespoon kosher salt
1/2 cup unsalted butter, softened
1/2 cup sour cream
1/4 cup whole milk
2 cups shredded sharp cheddar cheese, divided
8 slices thick-cut bacon, cooked until very crispy and finely crumbled
3 green onions, thinly sliced
Salt and black pepper to taste
Directions
- Preheat your oven to 400 degrees F. To solve the soggy skin problem, do not wrap potatoes in foil. Instead, prick them with a fork, rub the skins thoroughly with olive oil, and coat generously with kosher salt. Place them directly on the oven rack (with a baking sheet on the lower rack to catch drips) and bake for 60 minutes until the skins are deeply browned and crisp.
- Remove potatoes and let them cool for 5-10 minutes. Slice each potato in half lengthwise.
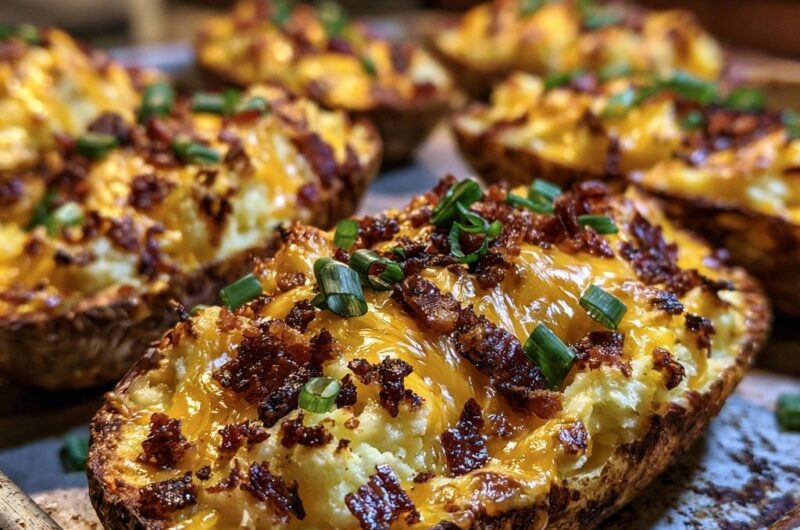
- Carefully scoop out the flesh into a large bowl, leaving a 1/4 inch thick shell. This shell thickness is vital to provide the structural integrity seen in the image and prevent the potato from collapsing.
- To avoid a gummy texture, mash the potato flesh by hand with a potato masher or fork before adding liquids. Add the softened butter, sour cream, and milk. Mix until just combined. Do not over-mix or use a high-speed electric mixer, as this releases too much starch and creates a gluey consistency.
- Fold in 1 cup of cheddar cheese and half of the green onions. (Note: To match the visual, keep the bacon for the topping). Season with salt and pepper.
- Spoon the mixture back into the potato shells, mounding it up and leaving the texture slightly craggy on top rather than smooth.
- Top each potato generously with the remaining 1 cup of cheese and the crumbled bacon.
- Place the potatoes on a baking sheet and return to the oven for 10-15 minutes. This second bake at high heat locks in the crispness of the skin while melting the cheese into the filling. For the specific toasted look in the image, you may broil on high for the final 2 minutes.
- Garnish with the remaining fresh green onions and serve immediately while the skins are at their maximum crunch.
Notes
- Do not use an electric mixer for the filling as it creates a gluey consistency. Leaving a 1/4 inch shell prevents the potato from collapsing.