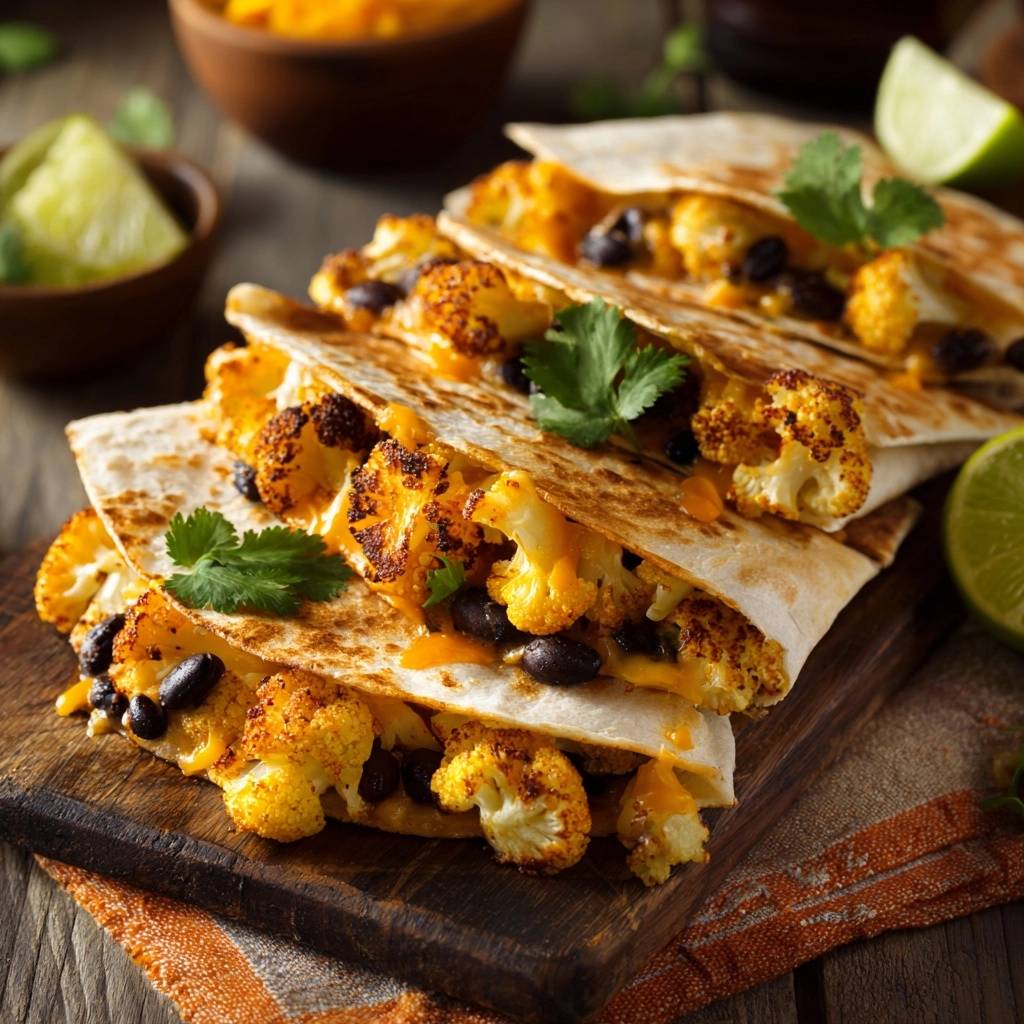
Imagine biting into a quesadilla where the tortilla actually shatters like a thin cracker, revealing a smoky, tender center of caramelized cauliflower and earthy beans. Most vegetarian quesadillas are a letdown because they turn into a soggy, limp mess the moment the vegetables hit the heat. This recipe changes that by focusing on moisture control and high-heat roasting to ensure every bite is packed with texture.
The secret to this “Anti-Soggy Bottom” method lies in how we treat the vegetables before they ever touch the tortilla. By roasting the cauliflower at a high temperature, we evaporate the water that usually leaks out and ruins your lunch. You’re left with concentrated flavor and a crunch that holds up against the melted cheese.
I’ve found that the real trick to a professional-grade quesadilla is the dry-pan sear. While it’s tempting to swirl butter or oil in the skillet, that fat actually soaks into the flour and creates a greasy, soft exterior. Using a completely dry, hot pan allows the starch in the tortilla to toast and harden, giving you that coveted golden-brown crust that stays crispy until the very last bite.
The Science of Preventing Soggy Tortillas
Vegetables like cauliflower are roughly 90% water, which is the natural enemy of a crispy tortilla. When you sauté vegetables in a pan, they release steam that gets trapped between the tortilla layers, effectively poaching the bread from the inside out. Roasting the cauliflower at 425°F first ensures that this moisture is gone before assembly begins.
Black beans also carry significant surface moisture from their canning liquid. If you don’t dry them thoroughly, that liquid creates a muddy texture once the cheese melts. Patting them with a paper towel until they are bone-dry is a small step that makes a massive difference in the final structural integrity of the dish.
Preventing moisture is key, so consider how you prepare your beans for crispy beef quesadillas.
The “Dry Pan” method is equally vital for the physics of the crunch. Flour tortillas contain enough fat and moisture on their own to brown beautifully under direct heat. Adding extra oil in the pan lowers the surface temperature of the tortilla and prevents it from reaching that “shatteringly crisp” state. A dry pan creates a toasted, toasted-nut aroma and a rigid texture that supports the heavy filling.
Essential Components for Roasted Cauliflower and Black Bean Quesadillas
Success starts with how you prep your cauliflower. You want to cut the head into very small, bite-sized florets rather than large chunks. Smaller pieces provide more surface area for caramelization and ensure that every single bite of the quesadilla has an even distribution of vegetable and cheese.
The black beans act as the protein-rich anchor for the dish. However, they must be rinsed and patted very dry. If they are even slightly damp, they will steam inside the folded tortilla, which softens the crust. Using a high-quality canned bean is perfectly fine, provided you take the time to remove that excess starch and water.
Freshness matters for the finishing touches. While the filling is hot and savory, the garnish of fresh cilantro and a sharp squeeze of lime provides the necessary acid to cut through the richness of the roasted oil and melted cheese. Don’t skip the lime; it brightens the earthy notes of the cumin and beans.
Choosing the Right Tortilla and Cheese
For this specific roasting and searing application, flour tortillas are the superior choice over corn. Flour tortillas are more pliable, allowing them to fold without cracking, and they develop a much crispier, flaky texture when dry-seared. Look for “burrito” or “fajita” sized tortillas that feel soft in the package.
When it comes to cheese, sharp cheddar is the gold standard here. It has a lower moisture content than mild cheddar or mozzarella, which helps keep the quesadilla dry. More importantly, it provides a punchy flavor that stands up to the smoky spices. Always grate your cheese from a block; pre-shredded bags are coated in potato starch to prevent clumping, which interferes with a smooth, gooey melt.
The Spice Profile: Beyond Basic Taco Seasoning
While you can use a store-bought mix, a custom blend of chili powder, cumin, garlic powder, and smoked paprika is much better. The smoked paprika is the “secret weapon” in this lineup. It mimics the flavor of a charcoal grill and perfectly complements the charred, caramelized edges of the roasted cauliflower.
Cumin provides an earthy warmth that ties the black beans to the cauliflower. Garlic powder is preferred over fresh garlic here because fresh garlic would likely burn at the high roasting temperatures required for the vegetables. This dry spice rub creates a flavorful crust on the florets that seasons the entire quesadilla from the inside.
Phase One: Achieving the Perfect Cauliflower Roast
Preheating your oven to 425°F is non-negotiable. You need that intense initial blast of heat to sear the outside of the cauliflower before the inside becomes mushy. If your oven isn’t hot enough, the cauliflower will simply bake and soften without ever developing those dark, flavorful edges.
The “Single Layer” rule is the most important part of this phase. If you crowd the sheet pan, the moisture escaping from the cauliflower will create a cloud of steam. This results in gray, limp vegetables. Use two pans if you have to, ensuring every floret has plenty of “breathing room” to roast and brown properly.
Watch for the Maillard reaction, which is the chemical process that creates those deeply browned, savory spots. You aren’t just looking for “tender” cauliflower; you want to see dark brown or even slightly blackened edges. That char is where the deep, nutty flavor lives, providing a beautiful contrast to the creamy melted cheese later on.
Phase Two: Assembly and the Dry-Heat Sear
Once your cauliflower is roasted, it’s time for the skillet. Heat your large non-stick pan over medium heat. Place the tortilla down and immediately sprinkle a thin layer of cheese over the entire surface. This acts as a waterproof barrier, protecting the tortilla from any residual moisture in the vegetables.
Add your roasted cauliflower and dry black beans to just one half of the tortilla. By the time you’ve finished adding the filling, the cheese on the bottom should be starting to glisten. Fold the empty half over the filling and use a heavy spatula to press down firmly. This pressure is what seals the edges and ensures the heat transfers evenly into the center.
Cook the quesadilla for about 2 to 3 minutes per side. You are looking for dark golden-brown spots and a tortilla that feels rigid when you try to lift it. If it feels floppy, it needs more time. The dry heat will eventually pull the last bit of moisture out of the tortilla, leaving it incredibly crunchy.
Why the Wire Rack Rest is Mandatory
If you take a hot quesadilla and put it directly onto a flat plate or cutting board, you will ruin all your hard work. The heat from the quesadilla will create condensation on the bottom of the plate, which the tortilla will immediately soak up. This is how you get a “soggy bottom” in less than sixty seconds.
Instead, slide the finished quesadilla onto a wire cooling rack for just one minute. This allows air to circulate 360 degrees around the tortilla, letting the steam escape into the room rather than back into the crust. This short rest also allows the cheese to set slightly so it doesn’t all slide out when you cut it.
After sixty seconds, move it to a cutting board and use a sharp knife or a pizza cutter to slice it into wedges. You should hear a distinct “crunch” as the blade goes through. Serve it immediately while the interior is still molten and the exterior is at its peak crispness.
Troubleshooting Common Quesadilla Failures
If your tortilla is burning before the cheese inside has melted, your heat is too high. Every stove is different, so if you see the bread turning black quickly, turn the burner down to medium-low. A slower toast gives the internal ingredients time to reach the proper temperature without ruining the crust.
If your filling is falling out every time you flip, you are likely overstuffing or using too little cheese. The cheese is the “glue” of the operation. Make sure you have a layer of cheese both under and over the vegetables to lock them in place. Also, keep the filling about half an inch away from the edges to prevent overflow.
A lack of flavor usually stems from under-seasoning the beans. While the cauliflower is heavily spiced, the beans can be bland. If you find the dish needs more “oomph,” toss the beans in a little extra lime juice and a pinch of salt before adding them to the tortilla. This adds a layer of seasoning that balances the rich cheddar.
Finally, if the exterior feels greasy, check your pan. Even a small amount of leftover oil from a previous dish can ruin the dry-sear. Wipe the pan out completely with a paper towel between batches to ensure a clean, dry surface for every single tortilla.
Flavor Variations and Ingredient Swaps
This method works beautifully with other hearty vegetables if you want to switch things up. Sweet potatoes are a fantastic substitute for cauliflower; just peel and dice them into half-inch cubes before roasting. They provide a natural sweetness that pairs perfectly with the smoky paprika and black beans.
For another hearty option, explore these sweet potato kale black bean quesadillas.
If you aren’t a fan of black beans, pinto beans or even chickpeas work well. Just remember the golden rule: they must be rinsed and dried thoroughly. For those who want a bit of heat, adding pickled jalapeños or a few dashes of hot sauce inside the quesadilla before folding adds a great acidic kick.
You can also experiment with the cheese blend. While sharp cheddar is great for flavor, adding a bit of Monterey Jack can result in a superior “cheese pull” because of its excellent melting properties. Just ensure the majority of your blend is a drier, aged cheese to maintain that moisture control we’ve worked so hard for.
Round Out Your Meal
To complement your Roasted Cauliflower and Black Bean Quesadillas, consider these other flavorful dishes.
- For a fresh contrast, try the Crunchy Taco Slaw Salad for bright, crisp Mexican layers.
- If you’re in the mood for something creamy and satisfying, the Southwestern Macaroni Salad offers a rich, never-dry texture.
Optimal Pairings for Roasted Vegetable Quesadillas
Since these quesadillas are rich and savory, you want side dishes that offer a bright, acidic contrast. A simple lime-heavy cabbage slaw is the perfect companion. The crunch of the raw cabbage and the zing of the lime juice refresh the palate between bites of cheesy goodness.
Fresh pico de gallo is another excellent choice. The raw onions, tomatoes, and jalapeños provide a watery crispness that balances the dense, roasted filling of the quesadilla. Avoid heavy sides like refried beans or rice, which can make the meal feel overly weighted and starchy.
For a dipping sauce, try a lime crema made with Greek yogurt instead of sour cream. It provides a tangy, high-protein alternative that feels lighter. Whisk together yogurt, lime zest, lime juice, and a pinch of salt for a dip that highlights the smoky cauliflower without adding too much extra fat.
Make-Ahead Strategies and Storage Tips
You can easily prep the filling for these quesadillas in bulk. Roast a double batch of cauliflower and dry out two cans of beans on a Sunday. Store them together in an airtight container in the refrigerator for up to four days. When you’re ready for a quick meal, you just have to assemble and sear.
If you have leftover assembled quesadillas, do not put them in the microwave. The microwave will turn the tortilla into a rubbery, soggy mess. Instead, use an air fryer at 350°F for about 3 to 4 minutes. This will reactivate the crispness of the tortilla and melt the cheese perfectly without drying out the filling.
A toaster oven is another great reheating option. Place the wedges directly on the rack at 375°F for a few minutes until the cheese starts to bubble at the edges. While these are best served fresh, these dry-heat reheating methods will get you about 90% of the way back to that original “shatteringly crisp” texture.
Expert Preparation FAQ
Can I use frozen cauliflower for this recipe?
You can use frozen cauliflower, but you must be extra careful with the roasting process. Frozen vegetables release significantly more water than fresh ones. Thaw the cauliflower completely and pat it dry with towels before tossing it in oil. You may need to roast it for an extra 5 to 10 minutes to ensure all that extra moisture evaporates and the edges actually brown.
How do I make these quesadillas vegan?
To make this vegan, substitute the cheddar with a high-quality plant-based melting cheese. Be aware that many vegan cheeses have different melting points and can sometimes become oily. Use a slightly lower heat in the skillet to give the vegan cheese more time to soften without burning the tortilla. Adding a little mashed avocado inside can also help provide that creamy “glue” that cheese usually provides.
What is the best pan for searing quesadillas?
A heavy-bottomed non-stick skillet is the easiest tool for the job because it ensures the cheese won’t stick if any leaks out. However, a well-seasoned cast-iron skillet is the professional’s choice. Cast iron holds heat incredibly well and provides a very even, deep brown toast to the flour tortilla. Just make sure the cast iron is preheated thoroughly before you start.
Can I roast the black beans on the sheet pan with the cauliflower?
Yes, you can roast the beans, but only for the last 10 minutes of the cauliflower’s cook time. Roasting black beans for too long can make them tough or “popped.” Adding them toward the end allows them to warm through and dry out even further, which actually enhances the overall texture of the quesadilla filling. Just ensure they are tossed in a little of the seasoned oil from the pan.
Why is my tortilla sticking to the pan if I’m not using oil?
If the tortilla is sticking, it usually means the cheese has leaked out and caramelized against the metal, or your pan isn’t truly non-stick. If you aren’t using a non-stick pan, you can use a very light coating of cooking spray, but wipe most of it away with a paper towel before adding the tortilla. The goal is a nearly dry surface to achieve that specific toasted crunch.
Roasted Cauliflower and Black Bean Quesadillas
Course: Main CourseCuisine: Mexican-AmericanDifficulty: easy4
servings15
minutes25
minutes385
kcal40
MinutesA flavorful vegetarian quesadilla that avoids sogginess by roasting cauliflower at high heat and using a dry-pan searing method for a shatteringly crisp tortilla.
Ingredients
1 large head cauliflower, cut into small bite-sized florets
1 can (15 oz) black beans, rinsed and patted very dry
2 tablespoons olive oil
1 tablespoon taco seasoning (chili powder, cumin, garlic powder, smoked paprika)
2 cups shredded sharp cheddar cheese
8 medium flour tortillas
Fresh cilantro for garnish
Lime wedges for serving
Directions
- Preheat your oven to 425°F (220°C). This high temperature is the first step to preventing sogginess by evaporating moisture quickly and creating the charred edges seen in the image.
- Toss the cauliflower florets with olive oil and taco seasoning on a large sheet pan. Spread them out in a single layer. If the pan is crowded, they will steam instead of roast.
- Roast for 20-25 minutes, tossing halfway through, until the cauliflower is tender and the edges are deeply browned and caramelized.
- To solve the soggy bottom issue, heat a large non-stick skillet or griddle over medium heat without any oil or butter. Adding fat to the pan often soaks into the flour tortilla, making it greasy rather than crunchy.
- Place one tortilla in the dry pan. Sprinkle a thin layer of cheese over the whole surface. Add a generous layer of the roasted cauliflower and the dry black beans to one half.
- Once the cheese begins to melt, fold the tortilla in half. Press down firmly with a spatula. This pressure creates a seal and helps the dry heat crisp the exterior.
- Cook for 2-3 minutes per side until dark golden-brown toasted spots appear and the tortilla feels rigid and “shatteringly” crisp.
- Remove from heat and let sit for 1 minute on a wire rack or cutting board before slicing. This resting period allows steam to escape so the crust stays firm. Serve immediately with fresh cilantro and a squeeze of lime to cut through the richness of the roasted vegetables.
Notes
- To ensure maximum crunch, do not add oil or butter to the pan when searing the tortillas, and let the finished quesadillas rest for one minute before slicing to allow steam to escape.