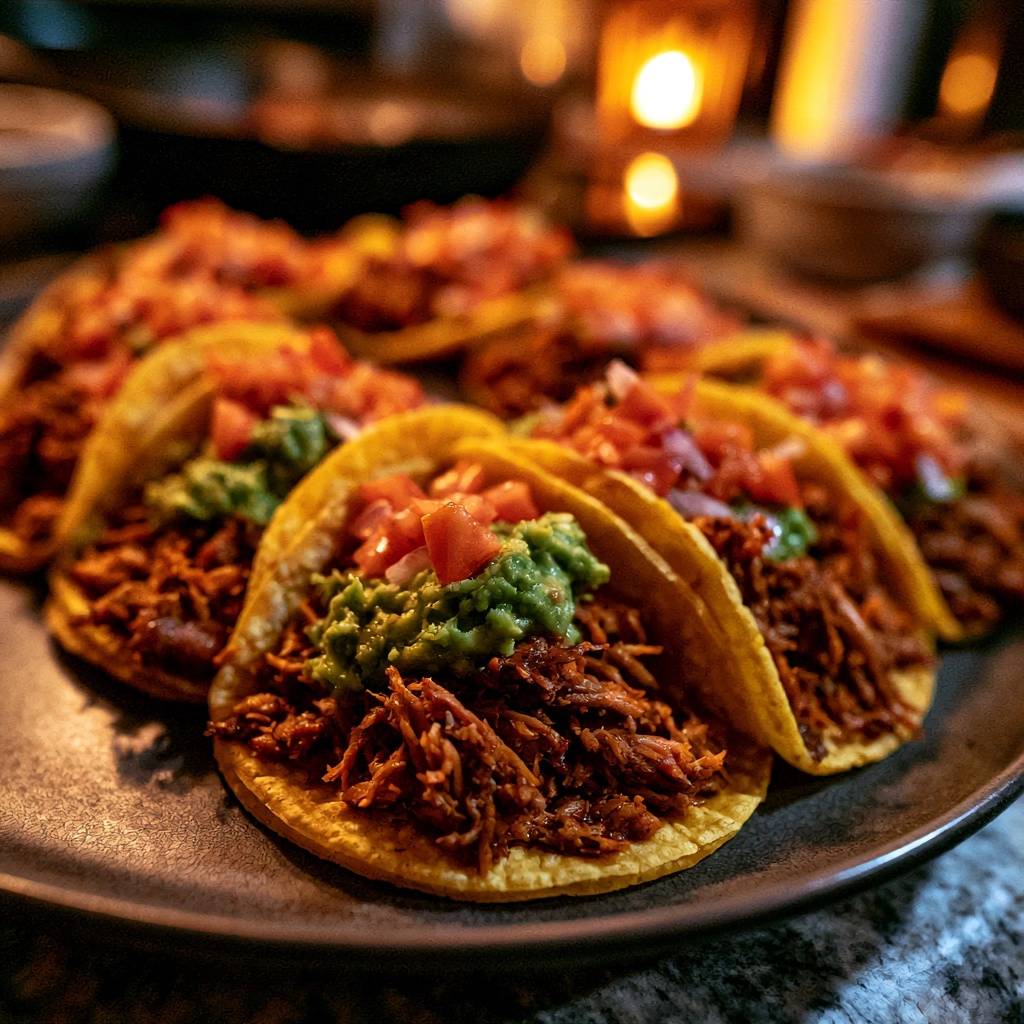
You’ve likely experienced the heartbreak of a perfect-looking taco falling apart the moment you pick it up. That dreaded structural failure happens when the corn tortilla absorbs too much moisture, turning your dinner into a soggy mess. It’s a common frustration that plagues even the most seasoned home cooks, but it doesn’t have to be your reality.
This recipe introduces a professional “Triple-Barrier” philosophy designed to keep your tacos structurally sound and incredibly flavorful. We aren’t just throwing meat into a pot; we’re engineering a meal that maintains its integrity from the first bite to the last. By controlling moisture at every stage, you’ll achieve that elusive balance of a juicy interior and a crisp, sturdy shell.
The secret to this success lies in the reduction phase, where we transform thin braising liquid into a thick, syrupy glaze. This step is non-negotiable because it coats the beef fibers and locks in flavor while removing the “free water” that usually migrates into the tortilla. When you master this technique, you’ll never settle for a limp, falling-apart taco again.
The Science of Braising Beef Chuck Roast
Beef chuck roast is the undisputed king of slow cooking for a very specific scientific reason. This cut is packed with connective tissue and collagen, which are tough and chewy when raw. However, when you subject these tissues to low, steady heat over eight hours, a beautiful transformation occurs. The collagen slowly melts into gelatin, providing a rich, silky mouthfeel that leaner cuts simply can’t replicate.
This gelatin is what gives the beef its “melt-in-the-mouth” quality while helping the shredded fibers hold onto the savory glaze. Unlike a lean round roast, which can become stringy and dry, the fat marbling in chuck roast acts as an internal basting system. It keeps the meat succulent throughout the long cooking cycle without making the final dish feel greasy or watery.
Selecting the Right Cut for Shredding
When you’re at the butcher counter, look for a chuck roast with heavy white flecks of intramuscular fat, known as marbling. Avoid brisket or round for this specific application; brisket can be too fibrous, and round is often too lean to shred properly. A well-marbled chuck roast ensures that every strand of beef is infused with flavor and stays moist even after the liquid reduction phase.
Essential Components for the Beef Spice Rub
A great taco starts with a complex flavor profile that can stand up to hours of simmering. We use a blend of chili powder, smoked paprika, and cumin to create a warm, earthy base with a hint of woodsy depth. These spices don’t just add heat; they provide the aromatic backbone that defines the character of the beef. The smoked paprika is particularly important here, as it mimics the flavor of an outdoor pit without the need for a smoker.
Garlic and onion powders are essential additions because they dissolve into the meat’s surface, creating a consistent savory foundation. While fresh aromatics are great for finishing, they can sometimes lose their punch or become bitter during an eight-hour braise. Salt plays the most critical role here, as it penetrates the protein, breaking down the structure to ensure the meat is seasoned all the way to the center.
Why Dry Spices Excel in Slow Cookers
Dried spices are actually preferred over fresh herbs for long-duration cooking. The sustained heat of the slow cooker helps release the volatile oils trapped within the dried spices, blooming their flavors over several hours. Fresh herbs would simply wilt and lose their vibrancy, whereas dried cumin and chili powder become more mellow and integrated as the clock ticks down.
Step-by-Step: Achieving the Perfect Maillard Sear
Before the beef ever touches the slow cooker, you must achieve a proper sear. This is where the Maillard reaction happens—a chemical dance between amino acids and reducing sugars that creates hundreds of flavor compounds. To get this right, you must pat the beef chunks completely dry with paper towels. Any surface moisture will turn to steam, preventing the meat from browning and leaving you with a gray, boiled appearance.
Once the meat is dry and rubbed with spices, sear it in a hot skillet until a dark, mahogany crust forms. This crust isn’t just for looks; it provides a deep, caramelized flavor that permeates the entire pot during the braise. You’ll notice a rich, savory aroma filling your kitchen, which is a clear sign that you’ve successfully unlocked the meat’s full potential.
Managing Skillet Temperature and Batch Cooking
Patience is your best friend during the searing phase. If you crowd the pan with too many beef chunks at once, the temperature of the oil will drop, and the meat will start to release its juices and boil. Work in small batches, allowing the skillet to return to a high heat between each set. This ensures a consistent, crispy exterior on every single piece of beef.
The Braising Process and Liquid Ratios
In this recipe, we use a surprisingly small amount of liquid—just one cup of beef broth mixed with tomato paste. It’s a common mistake to submerge the meat entirely, but that leads to boiling rather than braising. By using less liquid, the beef partially steams in its own juices, which intensifies the flavor and prevents the meat from becoming waterlogged.
The tomato paste acts as a natural thickener and adds a necessary acidic note to balance the richness of the beef fat. As the hours pass, you’ll see the meat transition from tough chunks to tender pieces that fall apart at the slightest touch of a fork. This slow breakdown is what creates the perfect texture for a taco filling.
Anti-Soggy Technique: The Glaze Reduction Phase
This is the most critical step in the entire process. Most slow cooker recipes tell you to serve the meat straight from the pot, but that’s a recipe for a soggy tortilla. Instead, you’ll remove the shredded beef and pour the remaining liquid into a wide skillet. By boiling this liquid over high heat, you evaporate the excess water, leaving behind a concentrated, syrupy glaze.
When you toss the shredded beef back into this reduction, the glaze coats every fiber. This creates a protective layer that keeps the meat juicy while ensuring there is no “free water” left to soak into your taco shell. It’s the difference between a messy, dripping taco and a professional-grade meal that stays together until the last bite.
Engineering the Hydrophobic Tortilla Barrier
To further protect the integrity of your taco, we use a “flash-fry” method for the tortillas. By dipping each corn tortilla into hot oil for just a few seconds, you create a hydrophobic, or water-resistant, barrier on the surface of the grain. This doesn’t make the tortilla hard like a pre-formed shell; rather, it makes it pliable yet sturdy enough to resist moisture.
Dry-toasted tortillas often have tiny cracks that allow juices to seep through, leading to immediate disintegration. The oil-treated version acts like a shield. You’ll notice the difference immediately as the tortilla holds its shape even when loaded with heavy, glazed beef and fresh toppings.
Choosing Between Yellow and White Corn
While white corn tortillas are delicate and sweet, yellow corn tortillas are the superior choice for shredded beef. Yellow corn has a slightly denser grain and a sturdier structural backbone, which is necessary to support the weight of the meat. They also stand up better to the flash-frying process, developing a beautiful golden hue and a nutty toasted flavor.
The Avocado Gasket: A Final Waterproof Seal
The final layer of protection in our anti-soggy mission is the avocado gasket. By spreading a layer of mashed avocado directly onto the warm tortilla before adding the meat, you’re creating a physical fat barrier. Since oil and water don’t mix, the high fat content in the avocado prevents any residual moisture from the beef from reaching the tortilla grain.
Beyond the structural benefits, the cool, creamy avocado provides a perfect textural contrast to the warm, savory beef. It acts as a glue that holds the meat in place, ensuring that your toppings don’t slide out the back of the taco as you take a bite. It’s a functional and delicious addition that elevates the entire experience.
Assembling for Maximum Structural Integrity
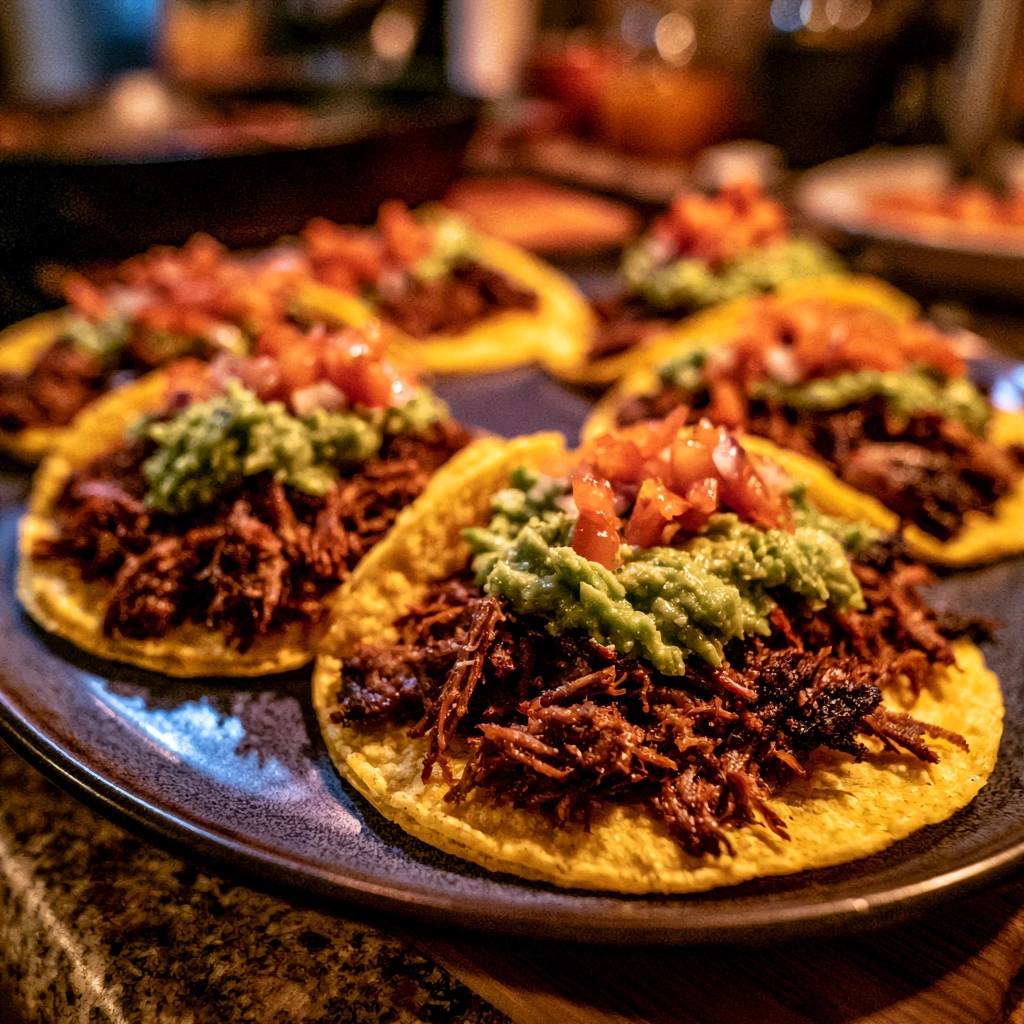
The order in which you build your taco matters immensely. Start with the oil-treated tortilla, followed by the avocado seal. Next, add a generous heap of the glazed shredded beef. Finally, place your fresh aromatics like diced tomatoes and red onion on the very top. This specific order is designed to keep the wettest ingredients as far away from the tortilla as possible.
By placing the tomatoes on top of the meat, any juice they release will be absorbed by the beef or the glaze rather than soaking directly into the shell. This simple change in assembly logic preserves the crunch and ensures the taco remains easy to handle. It’s a small detail that makes a massive difference in the final presentation.
Expert Troubleshooting for Shredded Beef
If your beef is still tough after eight hours, don’t panic; it simply needs more time. Every slow cooker runs at a slightly different temperature, and some cuts of meat have more stubborn connective tissue than others. Just cover the pot and keep cooking on low until the meat yields easily to a fork. It’s almost impossible to overcook chuck roast in a slow cooker, so err on the side of more time.
If your sauce isn’t thickening during the reduction phase, you might need to turn up the heat or use a wider skillet to increase the surface area for evaporation. Avoid using a cornstarch slurry if possible, as it can dull the flavors; a natural reduction provides a much cleaner, more intense taste. Also, be mindful of salt levels. As the liquid reduces, the saltiness concentrates, so always taste the glaze before adding any extra seasoning at the end.
When serving a crowd, you can keep the oil-treated tortillas warm in a low oven, stacked between slightly damp paper towels inside a foil pouch. This keeps them pliable without making them greasy. However, for the absolute best texture, flash-fry them just before you’re ready to assemble and serve.
Optimizing Texture with Fresh Garnishes
Fresh garnishes are the final touch that brings the whole dish to life. The rich, fatty nature of the slow-cooked beef needs a sharp “acid hit” to cut through the weight. A squeeze of fresh lime juice and a sprinkle of raw red onion provide that necessary brightness and crunch. These elements wake up the palate and make each bite feel balanced.
When preparing your tomatoes, make sure to seed them thoroughly before dicing. The watery interior of a tomato is a hidden enemy of the crispy taco shell. By using only the firm outer flesh, you get the fresh flavor and color without adding unnecessary liquid to the assembly. It’s these small, thoughtful steps that separate a good taco from a truly great one.
Make-Ahead Strategies and Storage Logistics
This shredded beef is a fantastic candidate for make-ahead meals. In fact, the flavors often deepen and improve after a night in the refrigerator. If you’re cooking in advance, store the shredded beef directly in its concentrated glaze. This keeps the meat from drying out and ensures it stays flavorful during the reheating process.
When you’re ready to eat, skip the microwave. Reheating the beef in a skillet over medium heat allows the glaze to re-caramelize and keeps the texture of the meat intact. If the mixture seems too thick, add a tiny splash of beef broth to loosen it up. For long-term storage, this beef freezes beautifully for up to three months. Just thaw it in the fridge overnight before reheating in a pan for the best results.
How should I store leftovers?
Store the shredded beef in an airtight container in the refrigerator for up to four days. Keep the beef in its glaze to prevent it from drying out. Do not store assembled tacos, as the shells will inevitably become soft; instead, store the components separately and assemble them fresh when you are ready to eat.
Why is my beef still tough after the full cooking time?
Toughness in a slow cooker usually means the collagen hasn’t had enough time to break down into gelatin. Simply put the lid back on and continue cooking on the LOW setting for another hour. Check it every 30 minutes until it shreds easily with two forks. The age and thickness of the specific cut of beef can affect the exact timing.
Can I use flour tortillas instead of corn?
You can use flour tortillas, but they are much more prone to becoming soggy because they are more porous than corn. If you choose flour, you should still lightly toast them in a dry pan or with a tiny bit of oil to create a surface sear. The avocado “gasket” step becomes even more important when using flour tortillas to prevent them from turning gummy.
What can I use if I don’t have a slow cooker?
You can achieve the same results in a heavy Dutch oven. Follow the searing and liquid steps as written, then cover the pot tightly and place it in a 300°F oven for about 3 to 4 hours. Check the meat periodically to ensure the liquid hasn’t completely evaporated, adding a splash more broth if necessary until the beef is tender.
How do I fix a sauce that is too salty after reduction?
Because reducing a liquid concentrates the salt, it can sometimes become overpowering. If this happens, add a small splash of water or unsalted beef broth to dilute the saltiness, then balance it with a teaspoon of honey or brown sugar. The sweetness will help counteract the salt without thinning the glaze too much.
Can I freeze the shredded beef?
Yes, the glazed shredded beef freezes exceptionally well. Place the cooled meat and glaze into a freezer-safe bag, squeeze out as much air as possible, and freeze for up to three months. To serve, thaw in the refrigerator overnight and reheat in a skillet. Avoid freezing the tortillas or fresh toppings like avocado and tomatoes.
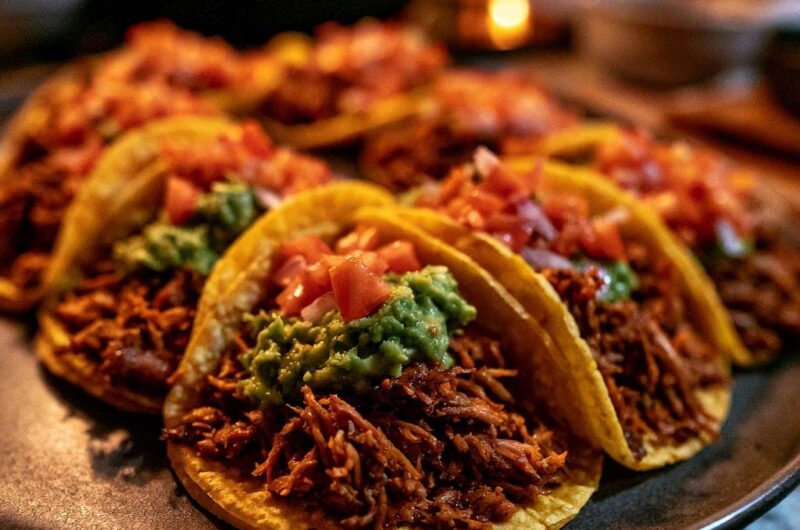
Slow Cooked Shredded Beef Tacos
Course: Main CourseCuisine: Mexican-AmericanDifficulty: easy6
servings20
minutes8
hours480
Minutes410
kcalMexican-American
Ingredients
3 pounds beef chuck roast, trimmed and cut into large chunks
2 tablespoons vegetable oil (for searing)
1/4 cup vegetable oil (for tortilla frying)
2 tablespoons chili powder
1 tablespoon smoked paprika
1 teaspoon ground cumin
1 teaspoon garlic powder
1/2 teaspoon onion powder
1 cup beef broth
2 tablespoons tomato paste
12 small yellow corn tortillas
2 ripe avocados, mashed with a pinch of salt and lime juice
1 cup Roma tomatoes, seeded and finely diced
1/2 cup red onion, finely minced
Fresh cilantro for garnish
Directions
- The Flavor Base: Pat the beef chunks completely dry. In a small bowl, combine chili powder, paprika, cumin, garlic powder, onion powder, salt, and pepper. Rub the spice blend thoroughly into all sides of the beef.
- The First Sear: Heat 2 tablespoons of oil in a heavy skillet over medium-high heat. Sear the beef chunks in batches until a dark, caramelized crust forms on all sides. Transfer the beef to a slow cooker.
- The Braise: Whisk the tomato paste into the beef broth and pour it into the slow cooker. Cover and cook on LOW for 8 hours or HIGH for 4-5 hours until the beef is fork-tender.
- The Reduction (Anti-Soggy Step 1): Remove the beef from the slow cooker and shred it with two forks. Pour the remaining cooking liquid into a wide skillet and boil over high heat for 8-10 minutes until it reduces into a thick, syrupy glaze. Toss the shredded beef back into this glaze and sauté for 3-5 minutes. This coats the fibers and evaporates excess water that would otherwise soak the shell.
- The Shell Barrier (Anti-Soggy Step 2): Heat 1/4 cup oil in a clean skillet over medium heat. Using tongs, dip each corn tortilla into the oil for 10-15 seconds per side until they are pliable but starting to crisp and hold their shape. Drain on paper towels. This creates a fried “hydrophobic” barrier on the grain of the tortilla.
- The Fat Seal (Anti-Soggy Step 3): To assemble, spread a generous, even layer of mashed avocado directly onto the center of the warm tortilla. The oils in the avocado act as a final waterproof gasket between the meat and the shell.
- Assembly: Place a heap of the glazed shredded beef over the avocado. Top with the diced tomatoes, red onion, and cilantro as shown in the image. Serve immediately for a taco that stays crunchy from the first bite to the last.
Notes
- The triple-barrier technique involves reducing the braising liquid, frying the shells, and using avocado as a gasket to prevent the meat from making the tortilla soggy.