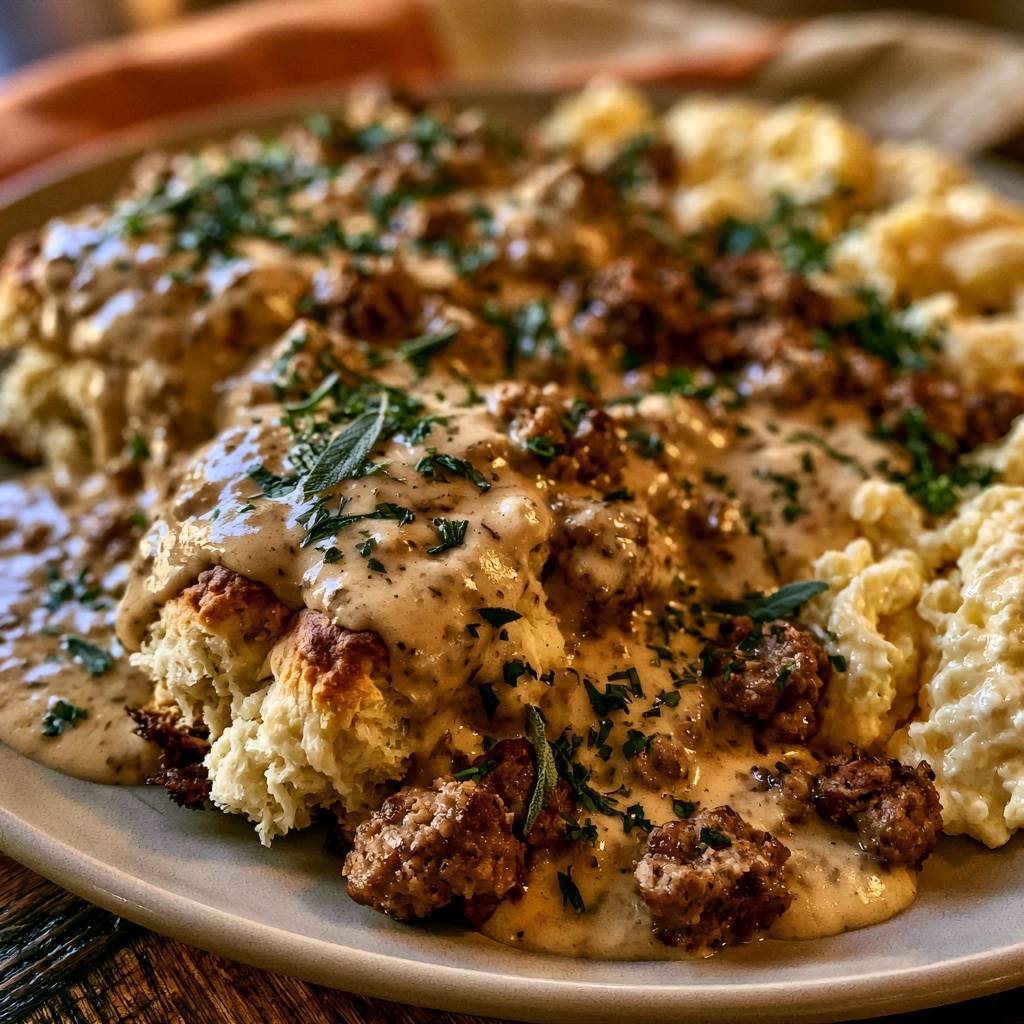
Southern biscuits and sausage gravy represents the pinnacle of comfort food, a dish that defines Sunday mornings and slow-paced family gatherings. It’s a humble masterpiece, yet so many home cooks struggle with the dreaded “watery plate” syndrome. You know the one: you ladle a beautiful-looking sauce over your biscuits, only to watch it separate into a thin, translucent liquid that turns your flaky pastry into a soggy mess within minutes.
Achieving “Skyscraper” quality means creating a gravy so thick and velvety that it clings to the crags of a biscuit like a warm blanket. This isn’t just about adding more flour; it’s about understanding the chemistry of a stable emulsion. When you master the specific fat-to-flour ratio and temperature control, you transform basic pantry staples into a rich, ivory-colored sauce that holds its shape from the first bite to the last.
The secret to this success lies in the thermal transition of your ingredients. Most people pull milk straight from the fridge, which shocks the hot roux and causes the fats to seize or separate. By using room temperature dairy and a touch of heavy cream, you ensure the starch bonds remain strong. This creates a luxurious, stable texture that won’t weep or break, even when it hits the steam of a fresh-baked biscuit.
The Anatomy of a Perfect Sausage Gravy
A truly great gravy relies on a delicate balance of heavy fats and sharp, aromatic spices. The savory, salt-forward profile of the sausage provides the base, but the freshly cracked black pepper is what gives the dish its iconic “bite.” You want enough pepper to see the dark flecks throughout the cream, providing a heat that cuts through the richness of the dairy.
Herbaceous notes of sage are non-negotiable for that authentic Southern flavor profile. The sage bridges the gap between the heavy cream and the earthy meat, adding a layer of complexity that prevents the dish from feeling one-dimensional. Without this herbal lift, the gravy can taste overly heavy or bland.
The foundation of the entire dish is the roux, which requires a precise 1:1 ratio of fat to flour by volume. If you have too much fat, the gravy will feel greasy on the tongue. If you have too much flour, it becomes a pasty, flavorless glue. We’re looking for that sweet spot where the flour disappears into the fat, creating a smooth paste that acts as the thickening engine for your milk.
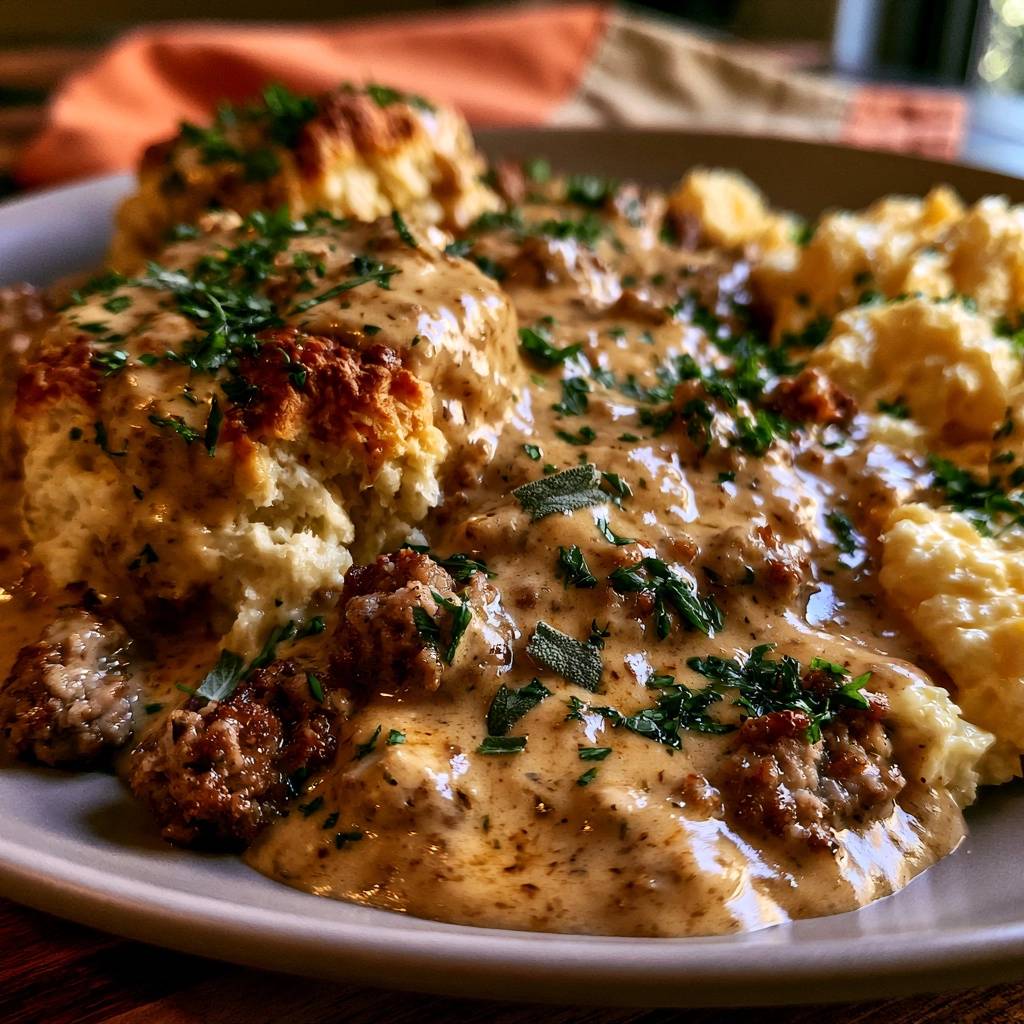
Selecting the Right Breakfast Sausage
High-quality ground sausage is the undisputed star of this show, so don’t settle for the leanest option on the shelf. You need a sausage with at least 20-30% fat content because that rendered fat is what flavors your roux. If the meat is too lean, you’ll lose that deep, pork-infused essence that characterizes a traditional country gravy.
Look for a “breakfast” or “country-style” spice profile when shopping. These blends usually feature a heavy hand of sage, rosemary, and black pepper, which saves you from having to over-season the sauce later. The goal is to have the meat provide the primary seasoning, while your pantry spices simply enhance those existing notes.
The Role of Room Temperature Dairy
Thermal shock is the number one enemy of a smooth sauce. When you pour ice-cold milk into a hot skillet, the flour particles can clump together instantly, creating a lumpy texture that’s nearly impossible to whisk out. By letting your milk sit on the counter for 20 minutes, you ensure a much smoother integration.
Whole milk is the standard for a reason, as the fat content provides a creamy mouthfeel that lower-fat milks simply can’t replicate. However, adding a splash of heavy cream is the real pro move. The extra milk fat acts as a stabilizer, preventing the sauce from “weeping” or turning watery once it’s plated and begins to cool slightly.
Essential Pantry Staples and Fresh Aromatics
All-purpose flour is the best choice for this recipe because its protein content is perfectly suited for thickening without making the sauce gummy. Avoid using bread flour or cake flour, as they can alter the viscosity in unpredictable ways. You want a clean, neutral thickener that lets the sausage and pepper shine.
Freshly cracked black pepper is vastly superior to the pre-ground stuff found in tins. Pre-ground pepper loses its volatile oils quickly, leaving you with a dusty heat rather than a floral, spicy punch. Use a coarse grind to ensure those beautiful black specks are visible in every spoonful of your gravy.
If you enjoy a bit of “Nashville-style” heat, a pinch of crushed red pepper flakes adds a wonderful back-end glow. It doesn’t make the dish “spicy” in a traditional sense, but it provides a subtle warmth that balances the cool creaminess of the milk. Fresh parsley and sage at the end add a pop of color and a hit of freshness that wakes up the palate.
The Science of the “Never Watery” Roux
A roux is a chemical reaction between fat and starch. As you cook the flour in the rendered sausage fat, the starch granules swell and begin to brown. This process is vital because it toasts the flour, removing that “pasty” raw taste that can ruin an otherwise perfect breakfast.
You are aiming for a “Dark Blond” stage, which takes about 2 to 3 minutes of constant stirring. At this point, the roux will smell slightly nutty, like toasted bread. This stage provides the maximum thickening power while still contributing a deep, savory flavor to the final sauce.
If your sausage didn’t render enough fat, don’t be afraid to add a tablespoon or two of unsalted butter. You want the flour and fat mixture to look like wet sand. If it looks dry or crumbly, the gravy will likely be lumpy; if it’s swimming in oil, the final product will be greasy. Balance is everything here.
Step-by-Step: Building the Southern Biscuits and Sausage Gravy
Phase 1: Rendering and Browning the Sausage
Start by placing your sausage in a heavy-bottomed skillet over medium-high heat. Don’t rush this part! You want a “hard sear” on the meat to develop deep flavor. Use a wooden spoon to break the meat into large, rustic crumbles rather than a fine grind. Those bigger chunks provide a much better texture against the soft biscuits.
As the meat cooks, you’ll notice brown bits forming on the bottom of the pan. This is called the fond, and it’s pure flavor gold. Don’t scrape it away; as you add the liquid later, these bits will dissolve into the gravy, giving it a beautiful tan hue and a concentrated savory taste that you can’t get from salt alone.
Phase 2: Incorporating the Flour and Fat
Once the sausage is deeply browned and crispy on the edges, assess the fat. You need about 1/3 cup of liquid fat in the pan. If it looks a little dry, toss in that extra butter and let it foam up. Sprinkle the flour evenly over the meat and stir vigorously to coat every piece of sausage.
Keep stirring for at least two minutes. You’ll see the flour transform from a white powder into a golden-brown paste that clings to the meat. This step is crucial for ensuring the flour is fully cooked. If you skip this, your gravy will taste like raw dough, no matter how much pepper you add.
Phase 3: The Slow-Whisk Emulsion
Now comes the most important part: the pour. Slowly stream in your room temperature milk and cream while whisking constantly with your other hand. You’ll see the mixture turn into a thick paste almost immediately, but keep adding the liquid slowly and whisking until it smooths out into a heavy cream consistency.
Turn the heat down to medium-low. You want a gentle simmer, not a violent boil. High heat can break the starch bonds you just worked so hard to build, leading to that watery separation we’re trying to avoid. The slow simmer allows the proteins in the milk to bond with the starches in the flour gently.
Phase 4: The Final Simmer and Seasoning
Let the gravy simmer for 5 to 8 minutes, stirring frequently to prevent the bottom from scorching. Use the “back of the spoon” test: dip a metal spoon into the gravy and run your finger through the coating. If the line stays clean and the gravy doesn’t run back into the gap, it’s ready.
Remember that gravy continues to thicken as it cools. You want to pull it off the heat when it’s just slightly thinner than your ideal final result. Stir in your salt, pepper, and dried sage at the very end to keep the flavors bright and punchy. Taste it one last time—it should be bold and highly seasoned.
Troubleshooting Common Gravy Failures
If you end up with lumpy gravy, don’t panic. Usually, this happens because the milk was added too fast. You can often fix this by whisking vigorously over low heat, or in extreme cases, giving it a very quick pulse with an immersion blender (just be careful not to pulverize all your sausage chunks).
If the gravy becomes too thick—almost like a paste—simply whisk in a tablespoon of milk at a time until you reach the desired consistency. Do this over low heat so you don’t break the emulsion. If the flavor feels flat, it usually needs more salt or a tiny pinch more of dried sage to wake up the savory notes.
A lack of depth is often caused by under-browning the meat. If your gravy looks very white and tastes mostly like milk, you didn’t let the sausage get crispy enough or didn’t cook the roux long enough. You can bridge this gap by adding a tiny drop of Worcestershire sauce, though it’s not traditional.
Why Heavy Cream is the Secret Stability Agent
Heavy cream has a much higher fat-to-protein ratio than whole milk. This extra fat acts as a buffer, surrounding the starch molecules and preventing them from leaking water. It’s essentially an insurance policy against a broken sauce, ensuring that even if the gravy sits on the table for ten minutes, it stays creamy.
Furthermore, the cream adds a luxurious mouthfeel that milk alone cannot achieve. It coats the palate and carries the flavor of the black pepper and sage more effectively. While you only use a half-cup, that small amount makes the difference between a “good” home-cooked breakfast and a “restaurant-quality” feast.
The Art of the Craggy Buttermilk Biscuit
While the gravy is the star, the biscuit is the essential vessel. You want a buttermilk biscuit that is golden brown on the outside with flaky, distinct layers on the inside. A “craggy” top is ideal because all those little peaks and valleys catch the gravy, ensuring you get a bit of sauce in every single bite.
Pro tip: don’t use a knife to slice your biscuits open. Instead, gently pull them apart with your hands. This creates an uneven, textured surface that is much better at “grabbing” the thick sausage gravy than a smooth, knife-cut surface. It also preserves the airy structure of the biscuit’s interior.
Flavor Variations and Herbaceous Swaps
If you want to experiment, try adding a tiny pinch of freshly grated nutmeg. It’s a classic French technique for white sauces that adds a mysterious depth without making the dish taste like dessert. It enhances the creaminess of the milk and pairs beautifully with the pork sausage.
For a more traditional “poultry” vibe, you can increase the dried sage or add a bit of fresh thyme. If you prefer a smoky element, a half-teaspoon of smoked paprika can change the profile entirely, giving it a rustic, campfire feel. Just be careful not to add too many competing flavors; the beauty of this dish is its simplicity.
What to Serve with Southern Biscuits and Sausage Gravy
To complete the “Skyscraper” breakfast aesthetic, serve this alongside creamy scrambled eggs. The soft texture of the eggs complements the richness of the gravy perfectly. If you want to be extra indulgent, place the eggs right on top of the gravy-soaked biscuits so the yolks can mingle with the sauce.
Because this dish is incredibly rich and fatty, it benefits from something bright or acidic on the side. A few slices of salted heirloom tomatoes or a bowl of fresh berries can cut through the heavy dairy and refresh your palate between bites. A glass of cold orange juice or a strong cup of black coffee also provides a necessary contrast.
Make Ahead, Storage, and Reheating Instructions
You can absolutely make the gravy ahead of time, but keep in mind that it will thicken significantly as it chills in the refrigerator. Store it in an airtight container for up to three days. I don’t recommend freezing this gravy, as the dairy can become grainy and the sausage texture changes once thawed.
When reheating, do not use the microwave if you can avoid it, as it tends to heat unevenly and can cause the fat to separate. Instead, place the gravy in a small saucepan over low heat. Add a tablespoon or two of milk and whisk gently as it warms up to restore that original velvet-smooth texture.
Expert Tips for a Picture-Perfect Plate
Garnish is not just for show; it adds essential flavor. The bright green of finely chopped parsley and the silver-green of chiffonade sage provide a visual contrast to the beige gravy, making the plate look vibrant and appetizing. It signals to your guests that the dish is fresh and thoughtfully prepared.
Always serve this dish immediately. The longer the gravy sits on the biscuits, the more the biscuits will absorb the moisture. For the best experience, you want that contrast between the slightly crisp biscuit exterior and the hot, flowing gravy. Ladle the sauce generously, making sure those big chunks of sausage are front and center.
How do I store leftover biscuits and gravy?
It is best to store the biscuits and the gravy in separate airtight containers. The gravy will stay fresh in the refrigerator for up to 3 days. The biscuits can be kept at room temperature for 2 days or refrigerated. Never store them together, or the biscuits will turn into a soggy paste that cannot be salvaged.
Why is my sausage gravy lumpy?
Lumps usually form when the milk is added too quickly to the hot roux or if the milk is ice-cold. To fix this, keep the pan on low heat and whisk vigorously. If the lumps persist, you can use an immersion blender for a few seconds, but be careful not to over-process the sausage crumbles. In the future, always add the milk in a slow, steady stream while whisking.
Can I make this recipe gluten-free?
Yes, you can substitute the all-purpose flour with a high-quality 1:1 gluten-free flour blend. However, gluten-free flours can sometimes thicken more aggressively or create a slightly grittier texture. You may need to add an extra splash of milk during the simmering process to maintain the desired velvet consistency.
What is the best way to reheat the gravy without it separating?
The best method is to reheat it slowly on the stove over low heat. As the gravy warms, it will be very thick, so whisk in a tablespoon of milk or cream at a time until it returns to its original consistency. Avoid high heat, which can cause the fat to break away from the flour and milk solids, resulting in a greasy mess.
Can I use a different meat besides pork sausage?
While pork is traditional, you can use turkey sausage or even beef crumbles. However, these meats are often much leaner than pork. If you use a leaner meat, you must add the full 1/4 cup of butter to the pan to ensure you have enough fat to create a proper roux. Without that fat, the flour won’t cook correctly and the gravy won’t thicken.
Why does my gravy taste like flour?
If your gravy has a pasty, raw taste, it means the roux didn’t cook long enough before the milk was added. You must cook the flour and fat mixture for at least 2-3 minutes until it reaches a dark blond color and smells nutty. Once the milk is added, you cannot “cook out” that raw flour taste, so the browning stage is your only chance to develop the flavor.

Southern Biscuits and Sausage Gravy
Course: BreakfastCuisine: AmericanDifficulty: easy4
servings15
minutes25
minutes40
Minutes720
kcalAmerican
Ingredients
1 pound high-quality ground pork breakfast sausage
1/4 cup unsalted butter (if sausage is lean)
1/3 cup all-purpose flour
2 1/2 cups whole milk, room temperature
1/2 cup heavy cream
1 teaspoon freshly cracked black pepper
1/2 teaspoon kosher salt (plus more to taste)
1/2 teaspoon dried sage
1/4 teaspoon crushed red pepper flakes (optional)
8 large buttermilk biscuits, baked until golden brown
2 tablespoons fresh parsley, finely chopped
1 tablespoon fresh sage, chiffonade (for garnish)
4 large eggs, scrambled (optional, as seen in photo)
Directions
- Place the ground sausage in a large, heavy-bottomed skillet over medium-high heat. Brown the meat thoroughly, breaking it into large, rustic crumbles with a wooden spoon. Cook until deeply browned and slightly crispy on the edges to match the visual texture in the photo.
- Assess the fat in the pan. You need approximately 1/3 cup of fat. If the sausage was lean, add the butter now and let it melt. Sprinkle the flour evenly over the cooked sausage and fat. Stir constantly for 2-3 minutes. This creates a dark blond roux that binds the sauce and eliminates the raw flour taste.
- To prevent a watery result, ensure your milk and cream are not ice-cold. Slowly pour in the milk and heavy cream while whisking vigorously. The addition of heavy cream ensures the high-fat stability seen in the image.
- Reduce the heat to medium-low. Simmer the gravy for 5 to 8 minutes. The “Never Watery” secret: keep the gravy at a gentle simmer, not a rolling boil, which can break the starch bonds. Stir frequently until the sauce is thick enough to heavily coat the back of a spoon.
- Stir in the black pepper, salt, dried sage, and red pepper flakes. The gravy should be pepper-forward as shown in the visual. Taste and adjust seasoning.
- Split the warm, craggy biscuits in half and place them on plates. Generously ladle the thick sausage gravy over the biscuits, ensuring large chunks of sausage are visible on top. Garnish heavily with fresh parsley and fresh sage. Serve immediately alongside creamy scrambled eggs to complete the dish as pictured.
Notes
- To ensure the gravy never becomes watery, use room temperature milk and cream, and maintain a gentle simmer rather than a rolling boil to protect the starch bonds.