
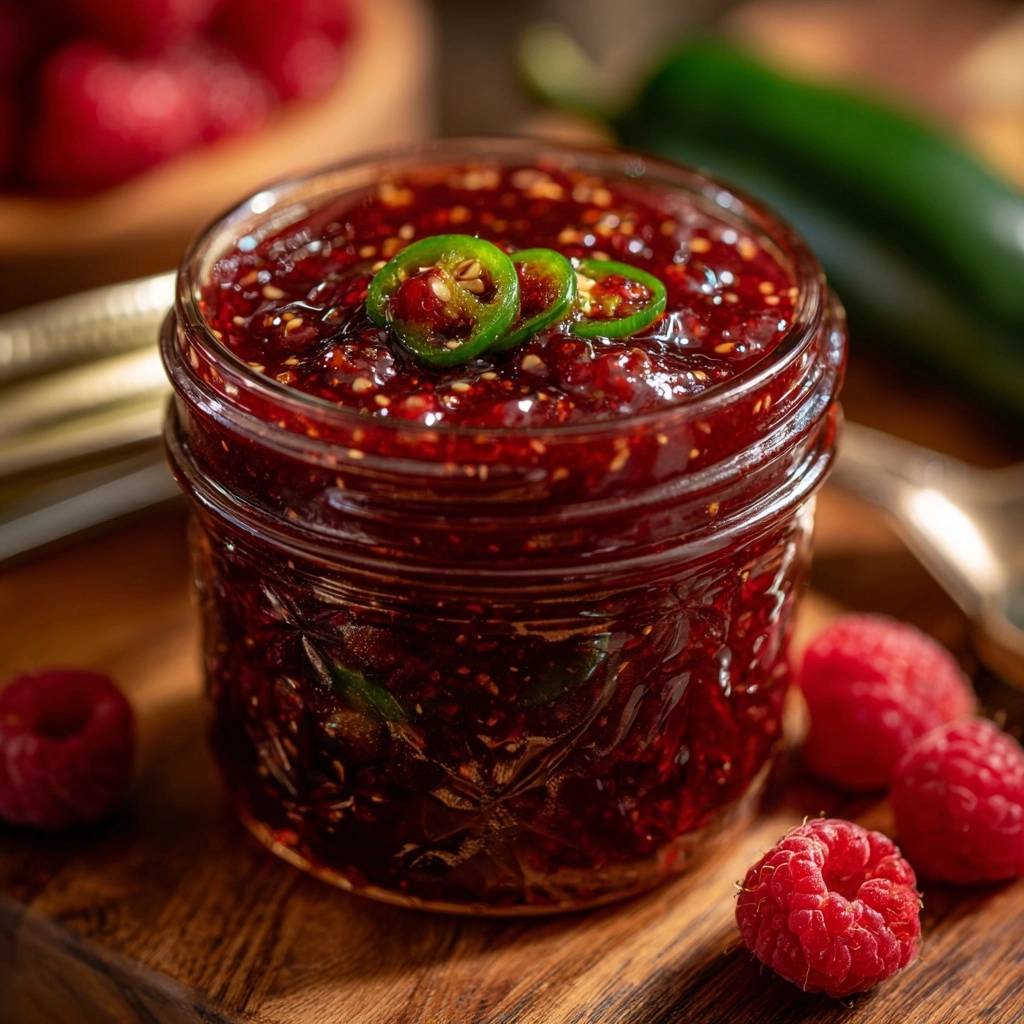
Imagine a spread that hits your palate with the bright, floral sweetness of sun-ripened raspberries before a gentle, creeping heat from fresh jalapenos wakes up your taste buds. This isn’t your average grocery store jelly that sits in a translucent, jiggly blob on your toast. We are talking about a rich, jewel-toned preserve that clings to a cracker and boasts visible, vibrant green pepper rounds for a truly artisanal look.
Many home cooks shy away from making jam because they fear the “runny” result—that dreaded fruit syrup that soaks through bread and ruins a cheese board. The frustration of spending time over a hot stove only to end up with a watery mess is real. However, achieving a professional, thick consistency is actually a matter of simple science rather than luck. By mastering the balance of sugar, acid, and evaporation, you can create a spread that rivals any high-end boutique brand.
The secret to this recipe’s success lies in the “hard boil” and the timing of your additions. While most recipes tell you to throw everything in at once, we wait to add the sliced jalapeno rounds until the very end. This specific technique ensures the peppers stay crisp and bright green instead of turning into brown, mushy bits. It’s these small, intentional steps that transform a basic condiment into a centerpiece for your next gathering.
The Chemistry of a Perfect Set
Creating jam is essentially a lesson in chemistry where three main players—pectin, acid, and sugar—work together to create a gel structure. Pectin is a natural fiber found in the cell walls of fruits that acts as a thickening agent. Raspberries are unique because they contain a medium amount of pectin, meaning they need a little help from their friends to reach that perfect, spreadable state.
Lemon juice is the essential catalyst in this equation. The acid in the juice lowers the pH of the jam mixture, which neutralizes the electrical charge on the pectin molecules. This allows them to join together into a mesh-like web that traps the fruit juices and sugar. Without enough acid, your jam will remain a liquid no matter how long you boil it.
Sugar does more than just provide sweetness; it acts as a preservative and a structural component. As the mixture boils, the sugar bonds with the water molecules, leaving the pectin free to form its gel. To reach the “magic number” for a set, the mixture generally needs to hit 220°F (104°C). At this temperature, the sugar concentration is high enough to ensure the fruit remains suspended in a thick, glossy matrix.
Why Your Previous Jams Were Watery
The most common reason for a watery jam is under-boiling. If you don’t let the mixture reach a full rolling boil for a sustained period, the excess water trapped in the fruit doesn’t evaporate. You are looking for the “heavy bubble” stage, where the bubbles become larger, slower, and make a distinct “thumping” sound as they pop.
Another frequent mistake is doubling the recipe. While it’s tempting to make a massive batch, a larger volume of fruit takes much longer to heat up and evaporate. This extended cooking time can actually break down the pectin and darken the fruit, resulting in a dull color and a runny set. Stick to small batches for the best texture and flavor.
Essential Components for Spicy Raspberry Jalapeno Jam
Quality ingredients are the foundation of any great preserve. For the best results, use fresh, plump raspberries that are deep red in color. While frozen berries work in a pinch, they often release more water, which means you’ll need to boil the mixture slightly longer to achieve the desired thickness.
Jalapenos provide the “kick” that balances the sugar. When selecting your peppers, look for ones with firm, glossy skins and no soft spots. If you see small white “stretch marks” on the skin, that’s often a sign of a spicier pepper. We use a mix of finely diced peppers for heat distribution and thin rounds for a beautiful visual contrast against the red berries.
Selecting the Right Raspberries and Peppers
Ripeness plays a huge role in the pectin content of your fruit. Overripe raspberries are incredibly sweet but have lower pectin levels, while slightly underripe berries are tart and pectin-rich. A mix of both is actually ideal for a jam that sets well and tastes complex. Ensure your berries are washed and thoroughly dried before you start.
For the jalapenos, the visual appeal is just as important as the flavor. By choosing peppers with a deep green hue, you create a stunning “Christmas” color palette in the jar. The rounds should be sliced thinly and evenly so they suspend beautifully in the jam without being overwhelming to bite into.
For a quick sauce that’s always a favorite, check out Grandma’s best cranberry sauce.
The Role of Lemon Juice and Zest
In this recipe, we use both lemon juice and fresh zest. The juice provides the necessary acidity for the pectin to bond, while the zest adds a layer of aromatic complexity. The oils in the zest cut through the heavy sweetness of the sugar, giving the jam a bright, citrusy finish that lingers on the tongue.
While some people use bottled lemon juice for its consistent pH, fresh lemon juice works perfectly for this refrigerator-style jam. The zest should be added at the very end of the cooking process. This prevents the delicate citrus oils from evaporating, keeping the flavor fresh and punchy.
Required Tools for Small-Batch Preserving
You don’t need a lot of fancy equipment, but a heavy-bottomed saucepan is non-negotiable. Thin pots have “hot spots” that can cause the sugar to burn or scorch before the jam reaches the setting point. A wide, shallow pan is even better, as it provides more surface area for evaporation.
A potato masher is your best friend for texture. Unlike a blender, which can turn the fruit into a smooth puree, a masher allows you to control the consistency. You can leave some berries whole for “jammy” pockets while crushing others to release their natural juices. Finally, keep a small ceramic plate in your freezer for the most reliable way to test the set.
Phase One: Preparing the Fruit Base
Start by combining your raspberries, diced jalapenos, sugar, lemon juice, and a pinch of salt in your saucepan. The salt might seem odd, but it acts as a flavor enhancer that makes the raspberry taste even more intense. At this stage, you can also add a tiny bit of butter to help prevent excess foaming during the boil.
Heat the mixture over medium-low, stirring constantly. It is vital that the sugar dissolves completely before you turn up the heat. If you bring it to a boil while the sugar crystals are still solid, you risk a grainy texture in your finished jam. Once the liquid is smooth and the sugar is gone, you’re ready for the heat.
Phase Two: Achieving the Rolling Boil
Turn the heat up to medium-high and bring the mixture to a full rolling boil. This is a boil that doesn’t stop or “calm down” even when you stir it vigorously. This is where the transformation happens. You’ll notice the scent change from fresh, raw fruit to a deep, caramelized aroma as the sugars concentrate.
Watch the bubbles closely. Initially, they will be small, frothy, and fast. As the water evaporates, the bubbles will become larger and more “glassy” in appearance. They will start to pop with a heavier sound, indicating that the mixture is thickening and approaching the setting point.
Mashing for Texture and Pectin Release
As the jam boils, use your potato masher to lightly crush the berries. You want to pulverize about half of the fruit to release the natural pectin found in the seeds and skins. This ensures a natural thickness without needing to add commercial pectin packets.
Leaving some berries partially intact provides a wonderful mouthfeel. These whole pieces of fruit become infused with the spicy jalapeno syrup, creating little bursts of flavor in every spoonful. Keep stirring frequently during this stage to ensure nothing sticks to the bottom of the pan.
Phase Three: Incorporating Heat and Visual Texture
Timing is everything when it comes to the jalapeno rounds. If you add them at the beginning, the high heat will destroy their vibrant green color and turn them a dull olive brown. To keep them looking fresh and “snappy,” stir them in during the last five minutes of the boiling process.
For a different fruit-forward tartness, see this guide to homemade cranberry sauce.
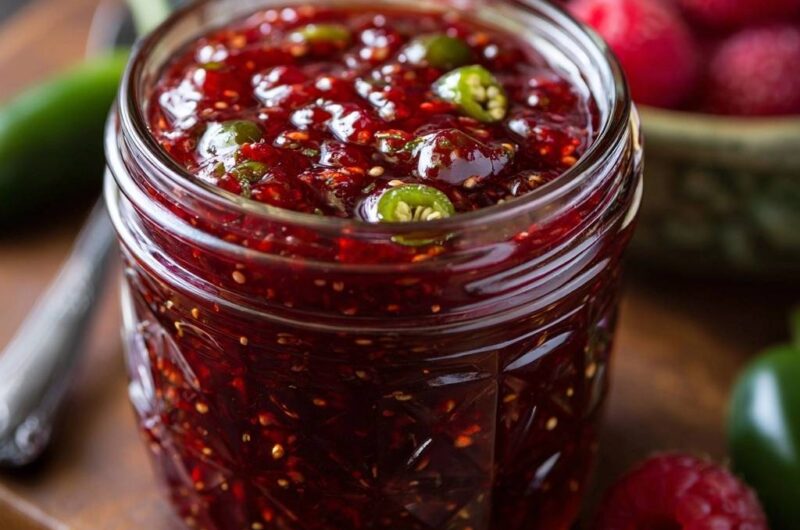
This short window is just enough time to soften the peppers slightly and allow them to absorb the sugar, but not long enough to break them down. The result is a jam that looks like it came from a high-end farmers market, with beautiful green circles suspended in a deep red sea of berries.
The Cold Plate Test: Ensuring a Firm Set
The most reliable way to tell if your jam is done is the “wrinkle test.” Take that frozen plate out of the freezer and drop a small spoonful of hot jam onto it. Let it sit for about 30 seconds to cool down. This mimics how the jam will behave once it is fully chilled in the refrigerator.
Gently push the edge of the jam with your finger. If the surface wrinkles and the whole dollop moves as one unit, it’s ready. If your finger just slides through it and the jam runs back into the empty space, it needs more time. Boil for another two minutes and repeat the test until you get that perfect wrinkle.
Phase Four: The Cooling and Jarring Process
Once you’ve reached the setting point, remove the pan from the heat. Here is a pro tip: let the jam sit in the pan for about 5 to 8 minutes before putting it in jars. If you pour it in while it’s piping hot, the jalapeno pieces will all float to the top of the jar because the liquid is too thin to hold them.
By letting it cool slightly, the jam becomes more viscous. Stirring it occasionally during this resting period ensures the peppers are evenly distributed from top to bottom. After the rest, transfer the jam to clean glass jars. Leave them on the counter until they reach room temperature before sealing and moving them to the fridge.
Troubleshooting Common Jam Obstacles
If you wake up the next morning and find your jam is still too soft, don’t panic. You can pour it back into a pan, add a teaspoon of lemon juice, and boil it for another few minutes. On the flip side, if it’s too hard (meaning you overcooked it), you can gently reheat it with a tablespoon of water to loosen the set.
If the jam is too spicy for your liking, you can balance it out by serving it with something creamy, like goat cheese or cream cheese. Next time, be sure to remove all the seeds and white membranes from the jalapenos, as that is where the majority of the capsaicin (heat) lives.
Creative Pairings for Spicy Fruit Preserves
This jam is incredibly versatile and goes far beyond breakfast. It is a classic companion for a cheese board, pairing beautifully with sharp aged cheddar, creamy brie, or salty manchego. The sweetness of the raspberries cuts through the richness of the cheese, while the jalapeno adds a sophisticated finish.
You can also use it as a glaze for roasted vegetables like carrots or sweet potatoes. Simply brush a little jam on during the last 10 minutes of roasting for a spicy-sweet char. For a quick snack, swirl a spoonful into thick Greek yogurt or spread it over a piece of toasted sourdough topped with ricotta cheese.
Storage and Longevity Guidelines
Because this is a “refrigerator jam” and hasn’t been processed in a traditional water bath canner, it must be stored in the fridge. It will stay fresh and delicious for up to three weeks. Always use a clean spoon when scooping it out to prevent cross-contamination, which can cause the jam to spoil faster.
If you want to keep it longer, this jam actually freezes quite well. Store it in a freezer-safe container (leaving a little room at the top for expansion) for up to six months. When you’re ready to use it, thaw it in the refrigerator overnight. The texture may be slightly softer after freezing, but the flavor will remain vibrant.
Sweet Ways to Enjoy Raspberry
If you’re enjoying the raspberry flavors in the jam, consider these other sweet raspberry treats.
- For a delightful baked good that also features raspberries, try these Raspberry Thumbprint Cookies, using a method designed to prevent spreading.
- Continue your raspberry indulgence with this Raspberry Vanilla Layer Cake, a beautiful dessert for any occasion.
Customizing the Heat: Variations and Swaps
You can easily adjust the heat level of this recipe to suit your preference. For a very mild version, swap the jalapenos for finely diced green bell peppers. If you are a true heat seeker, you can replace one of the jalapenos with a habanero pepper, which offers a fruity, intense burn that complements the raspberries perfectly.
The “Seed Factor” is your primary tool for control. Leaving the seeds in the diced portion of the peppers will significantly increase the spice level. For a cleaner look and a more moderate heat, remove all seeds and ribs before dicing. This allows the vegetal flavor of the pepper to shine without overwhelming the fruit.
Substituting Other Berries
This recipe template works wonderfully with other berries as well. Blackberries or marionberries are excellent substitutes for raspberries. Keep in mind that blackberries often have larger, tougher seeds, so you might want to strain a portion of the mashed fruit if you prefer a smoother jam.
Blueberries can also be used, but they have much higher natural pectin levels and less water than raspberries. If you switch to blueberries, you may find the jam reaches the setting point much faster. Always rely on the cold plate test rather than the clock when experimenting with different fruit bases.
How do I store this jam and how long does it last?
This is a refrigerator jam, meaning it is not shelf-stable. You must store it in a clean, airtight glass jar in the fridge. It will stay fresh for up to 3 weeks. For longer storage, you can freeze the jam in freezer-safe containers for up to 6 months. Just be sure to leave about half an inch of headspace at the top of the jar to allow for expansion as it freezes.
Why is my jam still runny after cooling?
If your jam is runny, it likely didn’t reach the proper setting temperature of 220°F or wasn’t boiled long enough to evaporate the excess moisture. You can fix this by returning the jam to a pot, adding a splash of lemon juice, and boiling it again for 3-5 minutes. Always use the frozen plate test to confirm it wrinkles before taking it off the heat the second time.
Can I use a sugar substitute like stevia or honey?
Sugar is essential for the chemical bond that creates the gel structure in traditional jam. Using a sugar substitute like stevia will result in a sauce rather than a thick jam because it doesn’t bond with pectin the same way. Honey can be used, but it changes the flavor profile significantly and requires a much longer boiling time to reach a set. For this specific recipe, granulated sugar is highly recommended for the best texture.
How can I make the jam less spicy or more spicy?
To reduce the heat, remove all the seeds and the white internal membranes (ribs) from the jalapenos before dicing them. You can also soak the diced peppers in cold water for 10 minutes before adding them to the pot. To increase the heat, leave the seeds in or swap one jalapeno for a hotter pepper like a serrano or habanero. Remember that the heat will intensify slightly as the jam sits in the fridge.
Can I use frozen raspberries instead of fresh?
Yes, you can use frozen raspberries. However, frozen fruit often releases more liquid as it thaws. You may need to increase the boiling time by 5-10 minutes to evaporate that extra moisture. Do not thaw the berries before adding them to the pot; just toss them in frozen with the sugar and lemon juice and proceed with the recipe as directed.
Why did my jalapenos float to the top of the jar?
This happens when the jam is jarred while it is still too hot and thin. As the jam cools in the pan for 5-8 minutes, it becomes thicker and more viscous. This increased thickness is what allows the pepper pieces to stay suspended throughout the mixture. If you notice them floating, simply give the jam a good stir before it fully sets in the jar to redistribute the pieces.
Spicy Raspberry Jalapeno Jam
Course: CondimentCuisine: AmericanDifficulty: medium24
servings15
minutes25
minutes55
kcal40
MinutesA thick and jewel-toned jam that balances the sweetness of fresh raspberries with the heat of jalapenos. This recipe uses a cold-plate test to ensure a perfect, spreadable consistency every time.
Ingredients
12 ounces fresh raspberries
3 large jalapenos (2 finely diced, 1 sliced into thin rounds for visual texture)
1.5 cups granulated sugar
2 tablespoons lemon juice
1/2 teaspoon lemon zest
1/4 teaspoon butter (optional, to reduce foaming)
1 pinch salt
Directions
- Place a small ceramic plate in the freezer before you start. This is your secret weapon for checking the set.
- In a heavy-bottomed saucepan, combine the raspberries, diced jalapenos, sugar, lemon juice, and salt. If you want to prevent excess foam, add the 1/4 teaspoon of butter now.
- Heat over medium-low, stirring constantly until the sugar is completely dissolved. This prevents a grainy texture and ensures the sugar doesn’t burn before the fruit releases its juices.
- Increase the heat to medium-high and bring the mixture to a full rolling boil (a boil that doesn’t stop when stirred). Use a potato masher to lightly crush the berries to release their natural juices and pectin.
- Maintain a steady boil for 15 to 20 minutes, stirring frequently. As the water evaporates, the bubbles will become larger, slower, and “heavier” in sound.
- Five minutes before finishing, stir in the reserved jalapeno rounds. This ensures they remain bright green and intact, as seen in the image, rather than breaking down completely.
- To solve the watery jam problem, perform the cold-plate test: Drop a small spoonful of jam onto the frozen plate. Let it sit for 30 seconds, then push it with your finger. If it wrinkles and holds its shape rather than running back into a puddle, it has reached the setting point (approx. 220°F/104°C). If it is still runny, boil for 2 more minutes and repeat.
- Stir in the lemon zest during the last minute of cooking for a bright, citrusy finish.
- Remove from heat and let the jam sit in the pan for 5-8 minutes. Stirring occasionally during this cooling phase prevents the jalapeno pieces from floating to the top, ensuring an even distribution throughout the jar.
- Transfer to a clean glass jar. Allow to cool to room temperature before sealing. The jam will continue to firm up significantly as it chills. Store in the refrigerator for up to 3 weeks.
Notes
- To prevent jalapeno pieces from floating to the top, let the jam sit for 5 to 8 minutes after cooking before transferring to jars. Use the cold-plate test to ensure the jam reaches the setting point of approximately 220 degrees Fahrenheit.