Most home cooks face a frustrating trade-off when making glazed chicken: you either get a flavorful, sticky sauce or a crispy skin, but rarely both. Usually, the moment that sweet liquid hits the pan, the skin turns into a rubbery, soggy mess. This recipe changes the game by using a specific two-stage searing and reduction method that locks in a serious crunch before the glaze even touches the pan.
The secret lies in the “Anti-Soggy” philosophy, where we treat the skin and the sauce as two separate entities that only meet at the very last second. You’ll achieve a deep mahogany color and a tacky, finger-licking coating while maintaining the structural integrity of the rendered skin. When you bite through that glossy exterior into the juicy dark meat, the contrast is absolutely addictive.
To pull this off like a pro, you have to master the art of surface dehydration. I’ve found that even a tiny bit of moisture on the chicken skin will create steam, which is the ultimate enemy of crispiness. By patting the meat bone-dry and using a cold-start technique, we ensure the fat renders out completely, leaving behind a paper-thin, golden crust that can stand up to the heaviest glaze.
The Physics of Rendering Fat for Maximum Crunch
Starting with a cold pan might feel counterintuitive if you’re used to searing steaks, but for skin-on chicken thighs, it’s a total game-changer. When you drop cold chicken into a screaming hot skillet, the skin seizes up instantly, trapping a thick layer of rubbery fat underneath. This creates a greasy mouthfeel that no amount of sauce can fix.
By placing the thighs skin-side down in a cold non-stick skillet and then turning on the heat, you allow the subcutaneous fat to melt gradually. As the pan warms up, the fat liquefies and fries the skin in its own juices. This slow process ensures the skin becomes incredibly thin and brittle, which is exactly what you want for a professional-grade result.
High-heat searing often browns the surface too quickly while leaving the connective tissue tough. Therefore, the medium-heat, cold-start method is superior because it provides the time necessary for the collagen to break down. You’ll hear the sizzle slowly build from a whisper to a roar, signaling that the moisture is leaving and the crunch is arriving.
Why Moisture is the Enemy of the Glaze
If there is water on the surface of your chicken, the pan’s energy goes into boiling that water rather than browning the meat. This creates a “steaming” effect that prevents the Maillard reaction—the chemical process responsible for that savory, browned flavor. You must use paper towels to press firmly into the skin until it feels tacky to the touch.
Surface dehydration is the only way to ensure the honey-soy reduction clings to the chicken rather than sliding off. In addition, salt should only be applied to the meat side initially. Salting the skin too early can draw out internal moisture, creating a wet surface that ruins your chances of achieving that perfect, crackling texture.
Essential Components for the Sticky Sesame Glaze
A great glaze is a balancing act between four distinct pillars: Umami, Sweet, Acid, and Aromatics. The soy sauce provides the salty backbone, while the honey and brown sugar create the “stick” factor. Without the rice vinegar and a final squeeze of lemon, the sauce would be cloyingly sweet and heavy on the palate.
The ginger and garlic aren’t just there for scent; they provide a sharp bite that cuts through the richness of the chicken fat. When these ingredients reduce together, they form a complex syrup that coats the meat in a reflective, mahogany sheen. It’s a concentrated flavor bomb that transforms simple poultry into something spectacular.
Selecting the Right Soy Sauce and Honey
For this recipe, a standard all-purpose soy sauce works best. However, if you want a deeper color, you can swap one tablespoon of it for dark soy sauce, which is thicker and less salty. The honey you choose also matters; a clover honey is neutral, but a wildflower honey adds a subtle floral note that pairs beautifully with the toasted sesame oil.
Don’t skip the brown sugar in favor of using only honey. While honey provides the shine, the molasses in brown sugar helps achieve that specific “tacky” texture. This combination ensures the glaze stays thick and doesn’t run off the chicken and pool at the bottom of your plate.
The Role of Aromatics: Fresh Ginger vs. Powder
I strongly recommend using fresh ginger and garlic over the powdered versions. Fresh ginger contains natural oils and enzymes that emulsify with the rendered chicken fat, creating a much smoother and more vibrant sauce. The heat from fresh ginger is also more “alive” and lingers pleasantly on the tongue.
When you grate the ginger and mince the garlic finely, they melt into the glaze during the reduction phase. This prevents you from biting into a large, raw chunk of garlic while still ensuring every square inch of the chicken is infused with aromatic flavor. The difference in the final aroma is night and day.
Step-by-Step: Achieving the Mahogany Finish
Achieving the perfect finish requires discipline and timing. You can’t rush the rendering, and you can’t glaze too early. We break this down into three distinct phases: The Render, The Rest, and The Glaze. This separation is what keeps the chicken juicy and the skin crisp.
During the first phase, your only job is to watch the fat. You’ll see it pooling in the pan—this is liquid gold. Once the chicken is cooked through, we remove it to a wire rack. This is a crucial “Pro Tip” because resting the chicken on a flat plate would trap steam underneath, softening the skin you just spent 15 minutes crisping up.
Phase 1: The Cold-Start Sear
Place your dry thighs skin-side down in the cold pan and turn the heat to medium. For the first 5 minutes, it might seem like nothing is happening, but stay patient. Soon, you’ll see clear fat bubbling around the edges. Do not move the chicken! If you try to flip it and it sticks, it’s not ready to be moved.
Around the 12-minute mark, the skin should be a deep, even golden brown. Use tongs to peek underneath; it should look like a well-fried potato chip. Once you flip it, the meat side only needs about 5 to 7 minutes. You’re looking for an internal temperature of 165°F, though thighs are very forgiving if they go slightly over.
Phase 2: The Slurry and Reduction Technique
After removing the chicken, pour off the excess fat but leave about a tablespoon for flavor. Pour in your whisked sauce mixture. It will bubble violently at first—this is the vinegar and water evaporating. Once it starts to simmer, whisk in your cornstarch slurry. This is the secret to that “restaurant-style” thickness.
Watch for the “nappe” consistency. This is a fancy chef term that simply means the sauce is thick enough to coat the back of a spoon. If you run your finger through the sauce on the spoon, the line should stay clean. This thickness is what allows the glaze to sit on top of the chicken skin without soaking in and making it soggy.
Phase 3: The Final Assembly and Coating
Now for the most important rule: return the chicken to the pan skin-side UP. Never submerge the crispy skin into the liquid sauce. Instead, use a large spoon to drape the thick, glossy glaze over the top of each thigh. The heat from the pan will cause the glaze to set almost instantly into a reflective coating.
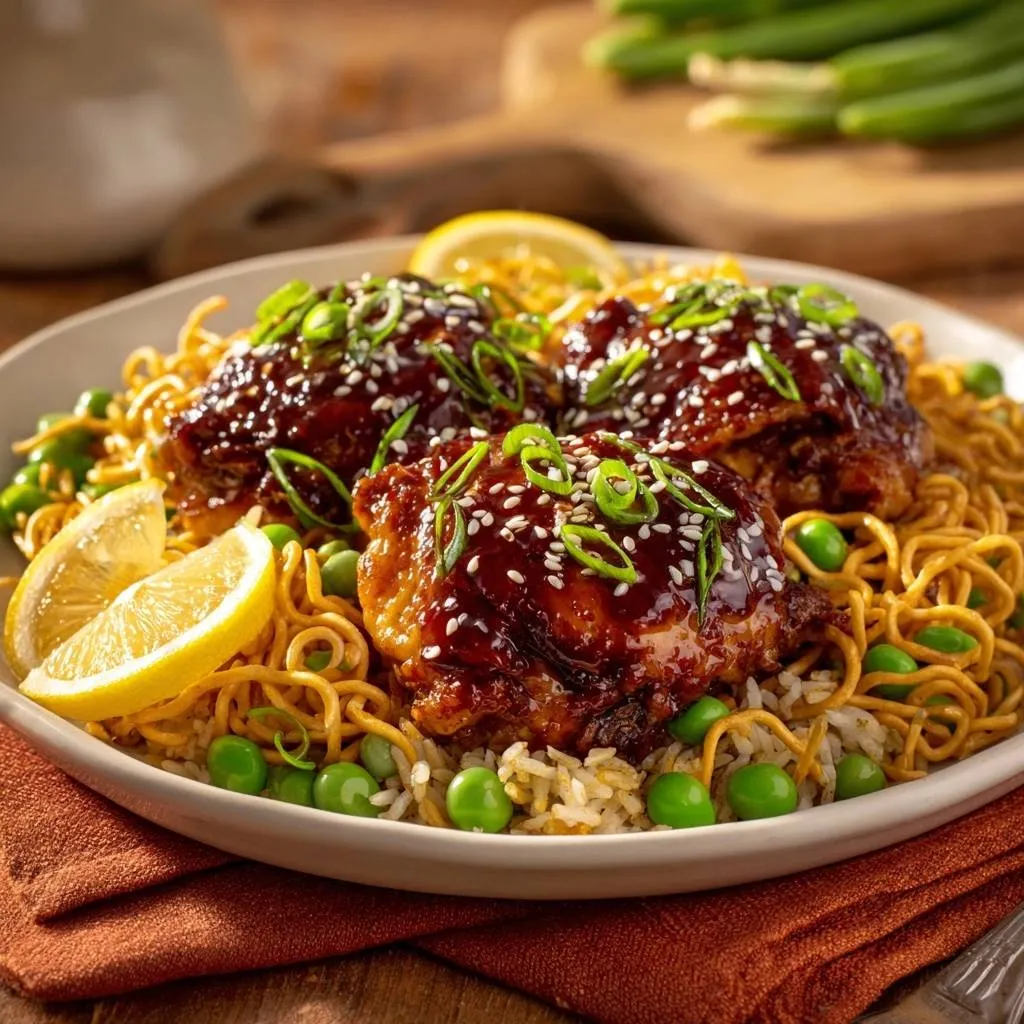
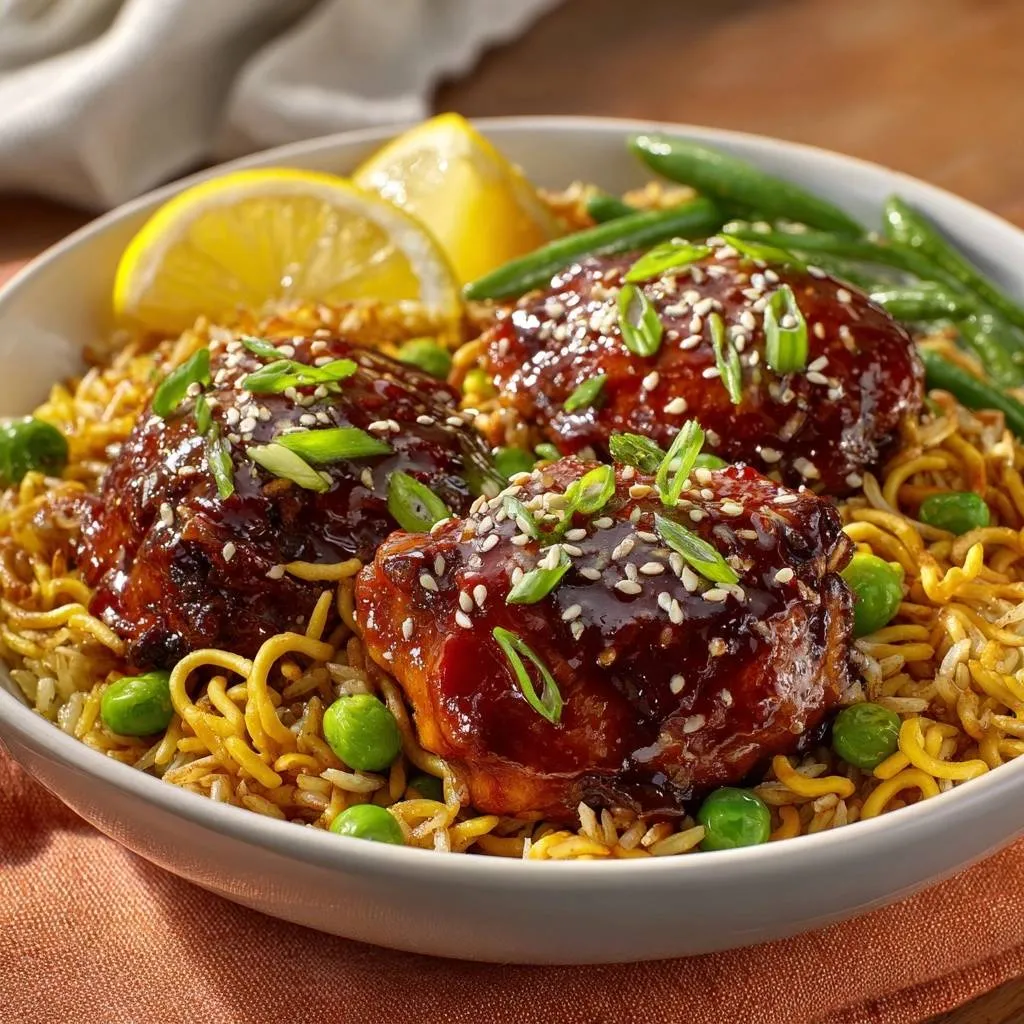
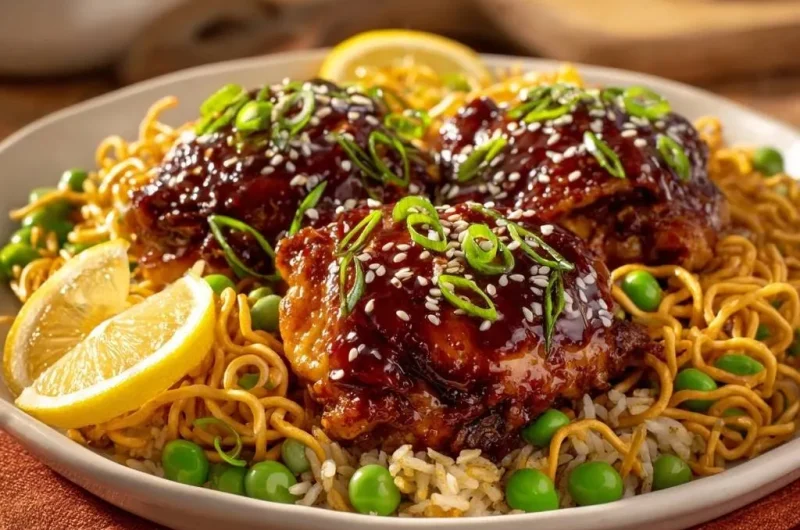
This method protects the crunch of the skin while ensuring the meat is fully seasoned. The high sugar content in the glaze will begin to caramelize further as it hits the hot chicken, creating that iconic mahogany color. It looks like it came out of a high-end rotisserie, but you did it all in one skillet.
Building the Texture: Rice, Peas, and Chow Mein Noodles
Plating this dish is about more than just looks; it’s about architectural logic. We start with a base of fluffy white rice mixed with sweet green peas. On top of that, we add a generous layer of crispy chow mein noodles. These noodles act as a secondary crunch element and a barrier between the rice and the chicken.
When you place the heavy, glazed chicken on top of the noodles, they absorb any stray drops of the sesame glaze without losing their snap. Every forkful gives you a mix of soft rice, popping peas, crunchy noodles, and succulent chicken. It’s a texture party that keeps the meal from feeling one-dimensional.
Troubleshooting Common Glazing Obstacles
If your sauce feels too thin even after the slurry, let it simmer for another minute. The cornstarch needs heat to activate its thickening power. Conversely, if the sauce becomes too thick or “gloopy,” simply whisk in a teaspoon of water or lemon juice to loosen it back up to a pourable consistency.
If you notice the garlic or ginger starting to smell bitter or look black, your heat is too high. Sugar burns quickly, so don’t be afraid to lift the pan off the burner for a few seconds to regulate the temperature. If the chicken skin sticks to the pan initially, just give it more time; it will naturally release once the fat has fully rendered.
Managing Heat Levels to Prevent Burning Sugar
Honey and brown sugar are notorious for burning if left unattended. Once you add the sauce to the pan, you must stay active with your whisk. You want a gentle bubble, not a rolling boil. If the sauce starts to smoke, turn the heat down immediately. Caramelization is a slow dance, not a sprint.
Flavor Variations and Ingredient Swaps
If you don’t have honey on hand, maple syrup is an excellent substitute that adds a woody depth to the glaze. If you’re out of rice vinegar, a splash of apple cider vinegar or even lime juice provides the necessary acidity. The goal is to keep that balance of sweet and sour intact.
For those who like a bit of heat, feel free to whisk in a teaspoon of chili garlic sauce or a pinch of red pepper flakes into the glaze. This won’t change the “sticky” nature of the dish but will add a nice back-of-the-throat warmth that complements the ginger beautifully.
What to Serve with Sticky Sesame Poultry
Since the chicken is quite rich and sweet, you want side dishes that offer a fresh, crisp contrast. Charred bok choy is a fantastic option because its slight bitterness balances the honey glaze. Alternatively, a simple steamed broccoli tossed in garlic and a little lemon juice works wonders.
A bright, smashed cucumber salad with a splash of vinegar and sesame oil is another winner. The cool, watery crunch of the cucumbers cleanses the palate between bites of the savory chicken. Avoid overly heavy or creamy sides, as they can compete with the intensity of the sesame glaze.
Make Ahead Strategies and Storage
This dish is undoubtedly best served immediately while the skin is at its peak crispiness. However, if you have leftovers, store them in an airtight container in the refrigerator for up to 3 days. I do not recommend freezing this dish, as the skin will become very soft and the rice can get grainy when thawed.
When reheating, avoid the microwave at all costs! It will turn the chicken rubbery and the glaze into a watery mess. Instead, place the chicken in an air fryer at 350°F for about 5 minutes, or in a toaster oven. This will help revive the glaze and bring back some of that essential skin texture.
Expert Tips for Professional Results
The final garnish is not just for decoration. The fresh green onions provide a necessary oniony bite, and the toasted sesame seeds add a nutty aroma that reinforces the oil in the sauce. Most importantly, do not skip the lemon wedges. A fresh squeeze of lemon right before eating “wakes up” all the heavy flavors.
If you want an even deeper flavor, try toasting your sesame seeds in a dry pan for 2 minutes before sprinkling them on. The difference in aroma is massive. Also, ensure your peas are fully thawed and patted dry before mixing them into the rice so they don’t release excess water into your base.
The Importance of Internal Temperature
While 165°F is the standard safety mark for poultry, chicken thighs are incredibly resilient due to their higher fat content. In fact, taking them to 170°F or 175°F often results in a more tender, “fall-off-the-bone” texture. Unlike chicken breasts, which dry out instantly, thighs stay juicy even at higher temperatures.
Choosing the Right Skillet: Non-Stick vs. Cast Iron
For beginners, a heavy-bottomed non-stick skillet is the safest bet. It ensures the skin won’t tear when you try to flip it, which is vital for the presentation. However, if you are experienced with cast iron, it provides excellent heat retention that can lead to an even more impressive crust. Just make sure your cast iron is well-seasoned to prevent sticking.
How do I keep the chicken skin from getting soggy once the sauce is added?
The secret is the “Skin-Side Up” rule. Never toss the chicken in the sauce like you would with wings. Instead, keep the crispy skin facing upward and spoon the thickened glaze over the top. This allows the meat to absorb the flavor while the skin stays dry and crunchy on the bottom and tacky on the top.
Why is my glaze not thickening into a syrup?
This usually happens if the cornstarch slurry wasn’t mixed properly or if the sauce hasn’t reached a high enough temperature. Cornstarch needs to hit a simmer to “bloom” and thicken the liquid. If it’s still too thin, simmer it for another 60 seconds. If that fails, whisk another half-teaspoon of cornstarch with a tiny bit of water and add it in.
Can I use chicken breasts instead of thighs?
You can, but you have to be very careful. Breasts cook much faster and lack the fat content that makes this rendering method work so well. If using breasts, I recommend pounding them to an even thickness and reducing the cook time significantly to avoid drying them out. However, for the best “sticky” experience, bone-in thighs are superior.
What is the best way to store and reheat leftovers?
Store leftovers in an airtight container for up to 3 days. To reheat, use an air fryer or oven at 350°F until warmed through. This helps the glaze caramelize again and prevents the skin from becoming mushy. Avoid the microwave, as it will steam the chicken and ruin the texture of both the skin and the chow mein noodles.
My sauce tastes too salty, how can I fix it?
If the sauce is too salty, it’s likely because it reduced too much or the soy sauce was particularly strong. You can balance this by adding a tablespoon of water and an extra teaspoon of honey or brown sugar. A fresh squeeze of lemon juice also helps mask excessive saltiness by introducing bright acidity.
Sticky Glazed Sesame Chicken Thighs
Course: Main CourseCuisine: Asian FusionDifficulty: easy4
servings15
minutes25
minutes40
Minutes510
kcalAsian Fusion
Ingredients
4 bone-in, skin-on chicken thighs
1/2 cup soy sauce
1/4 cup honey
1 tablespoon brown sugar
1 tablespoon grated fresh ginger
2 cloves garlic, minced
1 tablespoon rice vinegar
1 teaspoon sesame oil
1 teaspoon cornstarch (whisked with 1 tablespoon water)
2 cups cooked white rice
1 cup crispy chow mein noodles
1 cup frozen peas, thawed
2 green onions, sliced
1 tablespoon sesame seeds
1 lemon, sliced into wedges
Directions
- Pat the chicken thighs extremely dry with paper towels. This is the most important step to prevent steaming. Season only the meat side with salt.
- Place chicken skin-side down in a cold non-stick skillet. Turn the heat to medium. This slow start renders the fat out gradually, ensuring the skin becomes paper-thin and crispy rather than rubbery.
- Cook undisturbed for 12 to 15 minutes until the skin is deep golden brown and very crisp. Flip and cook for another 5 to 7 minutes until the internal temperature reaches 165°F.
- While chicken cooks, whisk soy sauce, honey, brown sugar, ginger, garlic, rice vinegar, and sesame oil in a small bowl.
- Remove the chicken from the pan and set aside on a wire rack. Pour off all but one tablespoon of the rendered fat.
- Pour the sauce mixture into the hot pan. Bring to a simmer, then whisk in the cornstarch slurry. Let it bubble and reduce for 2 to 3 minutes until it becomes a thick, glossy glaze that coats the back of a spoon.
- Return the chicken to the pan skin-side UP. Use a spoon to generously coat the top of the chicken with the thick glaze. The high sugar content and cornstarch will create the thick, reflective mahogany coating seen in the image without softening the rendered skin.
- Toss the cooked rice and peas together and place on a serving platter. Top with a layer of crispy chow mein noodles.
- Arrange the glazed chicken over the noodles. Garnish with sesame seeds, sliced green onions, and lemon wedges for a bright acidic finish.
Notes
- The secret to the texture is starting the chicken in a cold skillet to render the fat slowly and keeping the skin-side up once the glaze is added to maintain crunch.