There is nothing quite like the sensation of biting into a piece of chicken that is so shatteringly crisp it makes an audible crunch, only to be followed by the cool, refreshing snap of vibrant greens. This isn’t just a salad; it’s a study in high-contrast textures. Most people struggle with the “soggy salad syndrome,” where the heat from the chicken wilts the lettuce and the dressing turns the breading into a mushy disappointment within minutes.
The secret to avoiding this culinary tragedy lies in how you handle the moisture. By controlling the steam and using a specific double-dredge technique, you can create a barrier that stays crunchy even after it’s tossed with a zesty ginger dressing. I’ve found that the temperature of your ingredients and the way you cool the meat are just as important as the frying itself.
If you want that professional, restaurant-quality crust, you must pat your chicken chunks completely dry with paper towels before they ever touch the flour. Any surface moisture on the meat will create a layer of steam between the chicken and the coating, causing the breading to slide right off in the pan. Start with dry meat, and you’re already halfway to a perfect crunch.
The Science of the Anti-Soggy Coating
Achieving a long-lasting crunch requires a bit of kitchen chemistry. While many recipes rely solely on flour, this version uses a strategic blend of cornstarch and all-purpose flour. Cornstarch is a pure starch that, when fried, creates a brittle, glass-like texture that resists moisture much better than wheat flour alone.
However, cornstarch by itself can be a bit too delicate and pale. Therefore, adding all-purpose flour provides the necessary protein structure to hold those craggy, golden ridges together. This combination ensures that the coating doesn’t just shatter; it stays attached to the chicken and maintains its integrity against the dampness of the vegetables.
Why Cornstarch Outperforms Standard Breading
Traditional breadcrumbs or Panko are wonderful for many dishes, but they act like tiny sponges in a salad environment. They soak up dressing and vegetable juices almost instantly. Starch granules, on the other hand, swell and fuse together during the frying process to create a more continuous moisture barrier.
This barrier is what protects the juicy interior of the chicken while providing that signature “snap” when you bite down. Because the starch doesn’t contain the same gluten levels as a heavy breading, the result feels lighter on the palate, making it the ideal companion for a fresh bed of cabbage and romaine.
Essential Components for the Perfect Crunch
Quality ingredients are the foundation of this dish, but their preparation is what determines the final outcome. You’ll want to choose hardy greens that can stand up to the weight and warmth of the fried chicken. While delicate butter lettuce might look nice, it will collapse the moment the dressing hits it.
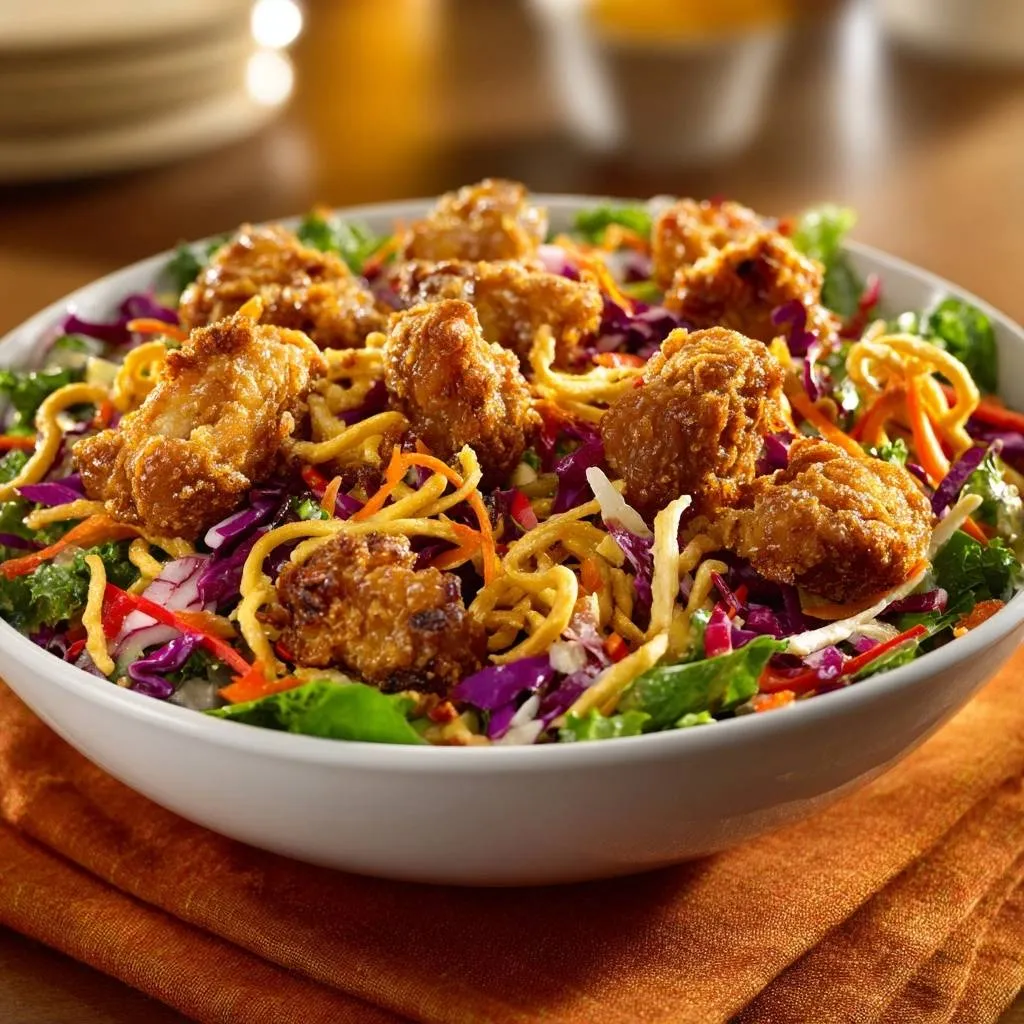
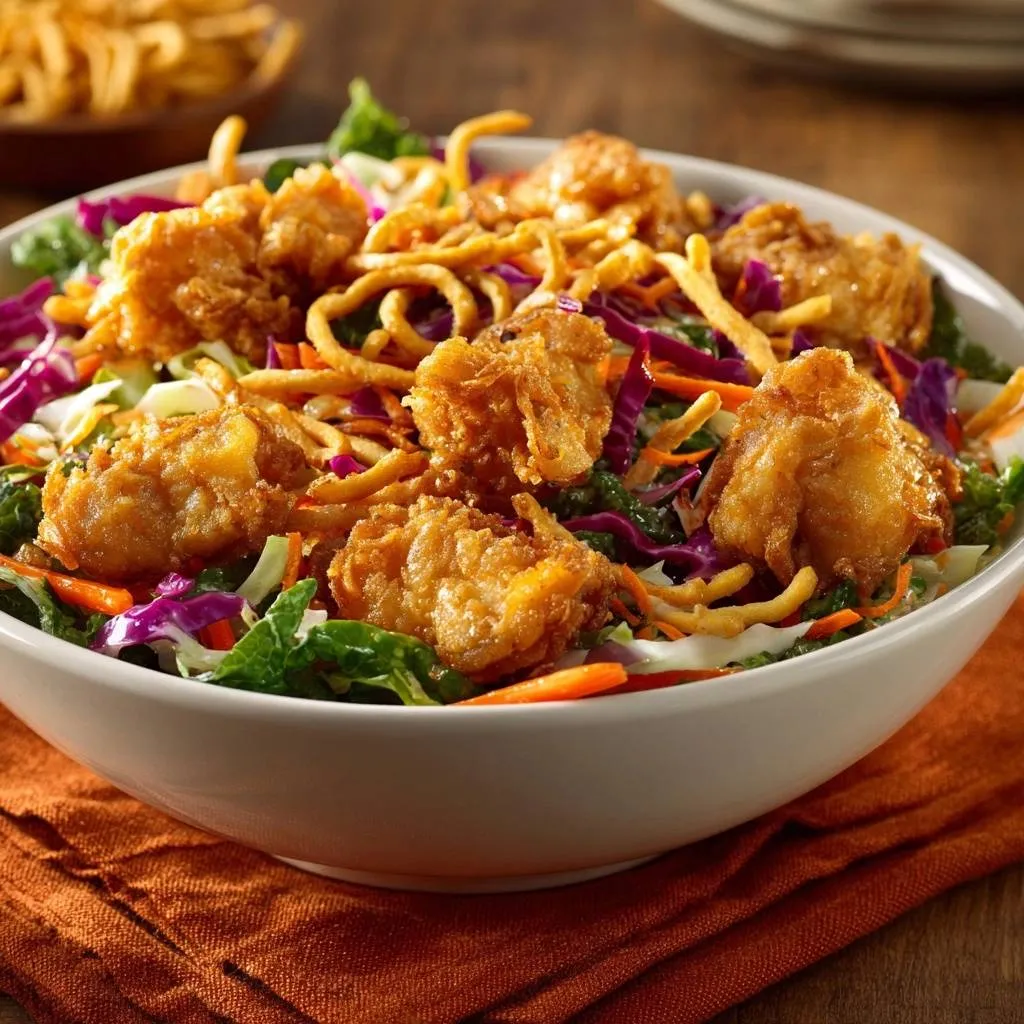
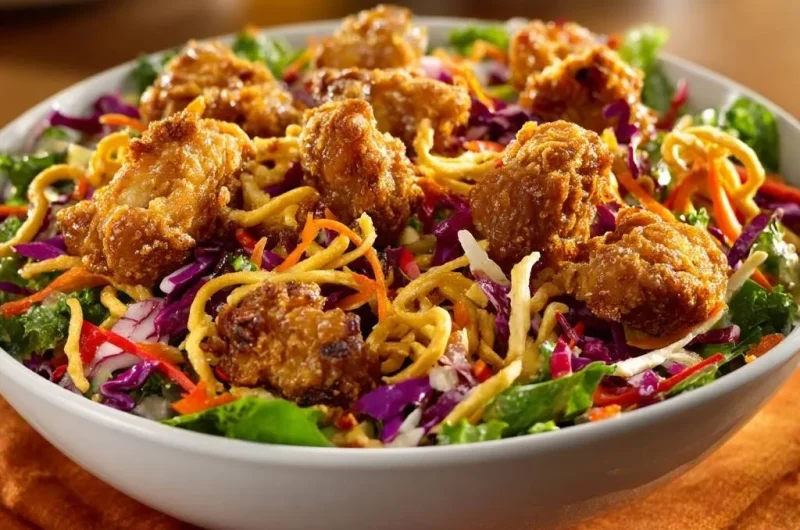
I always recommend using a mix of red cabbage and kale or romaine. These vegetables have a sturdy cellular structure that provides a secondary crunch. In addition, the vibrant purple of the cabbage and the bright orange of shredded carrots make the plate look as good as it tastes.
Selecting and Prepping Your Poultry
For the best results, use boneless, skinless chicken breasts cut into uniform 1-inch chunks. Consistency is king here; if your pieces vary in size, the small ones will dry out before the large ones are safely cooked through. Smaller chunks also mean more surface area, which translates to more of that delicious crispy coating in every forkful.
Before you start the dredging process, ensure the chicken is at room temperature for about ten minutes. Cold meat can drop the oil temperature too quickly, leading to greasy results. Once cut, give them one final pat with a paper towel to ensure they are bone-dry.
The Vibrant Base: Cabbage, Carrots, and Peppers
The vegetable base should be more than just a garnish. I like to julienne the red bell peppers and carrots into very thin strips. This “matchstick” cut ensures that you get a little bit of every vegetable in every bite, rather than chasing large chunks around the bowl.
Red cabbage is particularly important because its natural peppery bite balances the richness of the fried coating. If you find raw cabbage a bit too tough, you can toss the shredded cabbage with a tiny pinch of salt five minutes before assembling. This softens the fibers just enough to make it tender while keeping the snap.
Step-by-Step: Achieving the Double-Dredge Texture
The double-dredge is the technical heart of this recipe. It involves coating the chicken in starch, dipping it in egg, and then coating it in starch again. This creates multiple layers of texture and those coveted “craggy” bits that catch the dressing perfectly.
When you do the second dredge, don’t just toss the chicken lightly. Use your hands to firmly press the flour mixture into the meat. This pressure helps the coating adhere and creates an uneven surface that fries up into a beautiful, golden crust with plenty of nooks and crannies.
The Egg Wash and Soy Infusion
Instead of just using plain beaten eggs, I whisk in a tablespoon of soy sauce. This serves two purposes: it seasons the chicken from the inside out and adds a boost of umami that complements the ginger dressing. The proteins in the egg act as a powerful glue, ensuring the secondary layer of starch stays put during the vigorous bubbling of the frying process.
Make sure your eggs are well-beaten until no streaks of white remain. A smooth egg wash ensures an even coating. If the egg wash is too thick, the coating might become “cakey” rather than crispy, so keep it fluid and well-mixed.
Executing the Secondary Coating
To keep your kitchen from becoming a sticky mess, use the “dry hand/wet hand” method. Use one hand for moving chicken into the egg wash and the other for tossing it in the dry flour mixture. This prevents your fingers from becoming breaded along with the chicken.
Before the chicken goes into the oil, it should look dusty and heavily textured. If it looks pasty or wet, toss it in the flour mixture one more time. That dusty exterior is exactly what transforms into a shatteringly crisp shell once it hits the hot oil.
Precision Frying and Temperature Control
Frying is all about heat management. You want your oil at a steady 350°F. If the oil is too cool, the chicken will absorb the fat and become greasy. If it’s too hot, the outside will burn before the inside is cooked. A clip-on kitchen thermometer is your best friend here.
Always fry in batches. It is tempting to throw all the chicken in at once to save time, but this will cause the oil temperature to plummet. When the temperature drops, the “sear” doesn’t happen instantly, and you lose that crispness you worked so hard to build during the dredging phase.
Choosing the Right Oil for High-Heat Frying
You need an oil with a high smoke point for this recipe. Vegetable oil, canola oil, or peanut oil are all excellent choices. These oils can handle the 350°F heat without breaking down or smoking, which would impart a bitter flavor to your delicate chicken.
Avoid using extra virgin olive oil or unrefined nut oils for the frying portion. They have low smoke points and will burn quickly. Save the flavorful oils for the dressing where their nuances can actually be appreciated without being destroyed by the heat.
The Wire Rack Method vs. Paper Towels
This is the most critical “anti-soggy” secret in the entire process. Most home cooks instinctively reach for paper towels to drain fried food. However, as the hot chicken sits on a flat paper towel, steam is trapped underneath it. That steam has nowhere to go but back into the crust, turning it soft and mushy in seconds.
Instead, use a wire cooling rack set over a baking sheet. This allows air to circulate around the entire piece of chicken, including the bottom. The steam escapes into the air rather than into the breading, keeping the chicken “shatteringly” crisp while the excess oil drips away cleanly.
Resting the Chicken for Maximum Retention
Give the chicken at least three minutes to rest on that wire rack. This short window allows the internal juices to redistribute so they don’t leak out and soggy up the crust the moment you take a bite. It also gives the crust a chance to “set” and harden into its final, crunchy form.
While the chicken rests, you can do the final toss of your salad greens. This timing ensures that the chicken is still warm when it hits the plate, but not so hot that it immediately wilts the lettuce. It is the sweet spot for temperature and texture harmony.
Flavor Variations and Ingredient Swaps
While this recipe is fantastic as written, you can easily customize it to your pantry. If you want a bit of heat, add a teaspoon of red chili flakes to the flour mixture. For a touch of sweetness, some people love adding mandarin orange segments or sliced mango to the salad base.
If you don’t have chow mein noodles, toasted almond slivers or even crushed wonton wrappers provide a great alternative crunch. The goal is to have multiple layers of different textures—the snap of the cabbage, the crunch of the chicken, and the brittle crisp of the noodles.
Protein Alternatives: Shrimp or Tofu
You can use this exact double-dredge method for shrimp or extra-firm tofu. For tofu, make sure to press it under a heavy weight for 20 minutes first to remove as much water as possible. Tofu will need about 3-4 minutes of frying per side to get that golden exterior.
Shrimp cooks much faster than chicken, usually requiring only 2-3 minutes total. Because shrimp are smaller, the ratio of crispy coating to protein is even higher, making for an incredibly decadent salad topper. Just be careful not to overcook them, or they will become rubbery.
Assembling the Crispy Asian Chicken Salad
Assembly should happen at the very last second. I like to place the greens and heavy vegetables in the bowl first and toss them with about half of the dressing. This ensures every leaf is coated without drowning the salad in liquid.
Place the warm chicken and the crispy noodles on top of the dressed greens. Drizzle the remaining dressing specifically over the chicken right before you serve. This “just-in-time” method is the final insurance policy against sogginess, ensuring the first bite is just as crunchy as the last.
The Role of Aromatics: Green Onions and Ginger
Never skip the green onions! Their sharp, fresh bite provides a necessary contrast to the savory, fried chicken. Similarly, if you are making a homemade dressing, use freshly grated ginger rather than the powdered stuff. The warmth of fresh ginger cuts through the richness of the oil and brightens the entire dish.
I also find that a sprinkle of toasted sesame seeds at the very end adds a subtle nuttiness that ties the Asian-inspired flavors together. It’s a small detail, but it’s those layers of flavor that make a simple salad feel like a gourmet meal.
Troubleshooting Common Texture Issues
If you find that your coating is falling off, it usually means the chicken was too wet or the oil wasn’t hot enough. Ensure you are pressing the flour firmly into the egg-washed meat. If the oil temperature drops too low, the “glue” of the egg wash doesn’t set fast enough, and the coating can drift away.
On the other hand, if your chicken is dark brown on the outside but raw in the middle, your oil is too hot. Turn the heat down slightly and let the oil temperature stabilize before starting the next batch. If this happens, you can finish the undercooked pieces in a 350°F oven for 5 minutes to save them.
Maintaining Oil Temperature Between Batches
After you remove a batch of chicken, wait about 60 seconds before adding the next one. This “recovery time” allows the oil to climb back up to the target 350°F. If you rush it, each subsequent batch will be greasier and less crispy than the one before it.
Keep a slotted spoon or a small mesh strainer handy to scoop out any stray bits of breading left in the oil between batches. If these bits stay in the oil, they will burn and give your chicken a bitter, charred taste. Keeping the oil clean is a hallmark of a pro fry-cook.
Expert Tips for Meal Prep and Storage
While the fried chicken is best eaten immediately, you can definitely meal prep the components. Shred the cabbage, carrots, and peppers and store them in an airtight container with a damp paper towel on top to keep them crisp. Store the dressing in a separate jar.
If you have leftover chicken, do not use the microwave! A microwave will turn that beautiful crust into a rubbery mess. Instead, use an air fryer at 375°F for 3-4 minutes or a toaster oven. This will re-crisp the coating and keep the chicken juicy inside.
The Best Containers for Keeping Greens Crisp
For the longest shelf life, store your hardy greens like cabbage and kale in glass containers. Glass stays colder than plastic and doesn’t retain odors. Keep the crispy chow mein noodles in their original bag or a sealed zip-top bag at room temperature; putting them in the fridge will make them lose their snap.
By keeping the “wet” ingredients (dressing), “moist” ingredients (vegetables), and “dry” ingredients (chicken and noodles) separate until the moment of consumption, you can enjoy a high-quality salad even on a busy Wednesday at the office.
Pairing Suggestions and Serving Ideas
This salad is a complete meal on its own, but it pairs beautifully with a light, sparkling beverage. A sparkling apple cider or a cold ginger ale complements the ginger in the dressing perfectly. The carbonation helps cleanse the palate between bites of the rich, fried chicken.
If you are serving this for a dinner party, consider serving it in a large, shallow wooden bowl. The wide surface area allows you to spread the chicken out so it doesn’t pile up and create steam pockets. It also makes for a stunning presentation that highlights the rainbow of colors in the vegetables.
Frequently Asked Questions
Can I bake this chicken instead of frying?
You can bake it at 400°F on a parchment-lined sheet, but the texture will be significantly different. To get a similar crunch, you would need to spray the chicken heavily with oil before baking. However, it will never achieve the same “shatter-crisp” ridges that the deep-frying method provides.
What is the best substitute for chow mein noodles?
Wonton strips are the most common substitute and offer a very similar texture. If you want something healthier, toasted sliced almonds or sunflower seeds provide a great crunch, though they lack the light, airy snap of the noodles.
How do I keep the cabbage from bleeding color onto the other vegetables?
Red cabbage contains water-soluble pigments that can turn your carrots or chicken purple. To prevent this, rinse the shredded cabbage in cold water until the water runs clear, then pat it very dry before mixing it with the other vegetables. This removes the excess surface pigment.
Can I use chicken thighs instead of breasts?
Absolutely. Chicken thighs are more forgiving because they have a higher fat content, meaning they stay juicy even if you overcook them slightly. However, they may take an extra minute or two in the fryer compared to breast meat. Ensure they reach an internal temperature of 165°F.
Is there a gluten-free alternative for the all-purpose flour?
Yes! You can replace the all-purpose flour with a 1:1 gluten-free flour blend or simply use 100% cornstarch. Using all cornstarch will actually result in an even crispier, though slightly thinner, coating. Just ensure your soy sauce is replaced with tamari to keep the entire dish gluten-free.
Crispy Asian Chicken Salad
Course: Main CourseCuisine: Asian FusionDifficulty: easy4
servings20
minutes15
minutes35
Minutes510
kcalAsian Fusion
Ingredients
1.5 lbs chicken breast, cut into 1-inch chunks
2 cups shredded red cabbage
2 cups chopped romaine lettuce or kale
1 cup shredded carrots
1/2 cup sliced red bell pepper (thin strips)
1 cup crispy chow mein noodles
1/2 cup sliced green onions
1 cup cornstarch
1/2 cup all-purpose flour
2 eggs, beaten
1 tablespoon soy sauce
1 teaspoon garlic powder
1 teaspoon ginger powder
1/2 teaspoon white pepper
Vegetable oil for frying
Sesame ginger dressing (store-bought or homemade)
Directions
- Pat the chicken chunks completely dry with paper towels. This is the first step to preventing a soggy coating. In a small bowl, whisk the eggs with 1 tablespoon of soy sauce.
- In a separate shallow bowl, whisk together the cornstarch, flour, garlic powder, ginger powder, white pepper, and a pinch of salt. The addition of flour to the cornstarch provides the structural integrity seen in the golden, craggy crust in the image.
- THE DOUBLE-DREDGE: Toss the chicken chunks in the cornstarch mixture to coat lightly. Dip into the egg wash, then return to the cornstarch mixture, pressing the coating firmly onto the chicken to create those signature crispy ridges.
- Heat 1 inch of oil in a heavy skillet or Dutch oven to 350°F (175°C).
- Fry the chicken in small batches to avoid crowding the pan. Fry for 5 to 6 minutes, turning occasionally, until the exterior is deep golden brown and the internal temperature reaches 165°F.
- THE CRITICAL STEP: Do not drain the chicken on paper towels. Placing hot fried food on paper towels traps steam underneath, which softens the crust. Instead, place the fried chicken on a wire cooling rack set over a baking sheet. This allows air to circulate around the entire piece, keeping it perfectly crispy.
- While the chicken rests for 3 minutes on the rack, combine the cabbage, lettuce, carrots, red bell pepper, and green onions in a large bowl.
- Add the crispy chow mein noodles to the salad for extra texture.
- Top the greens with the warm chicken and drizzle with sesame ginger dressing just before serving to maintain the ultimate “anti-soggy” crunch.
Notes
- The critical step to avoid sogginess is draining the fried chicken on a wire cooling rack instead of paper towels to prevent steam from softening the crust.