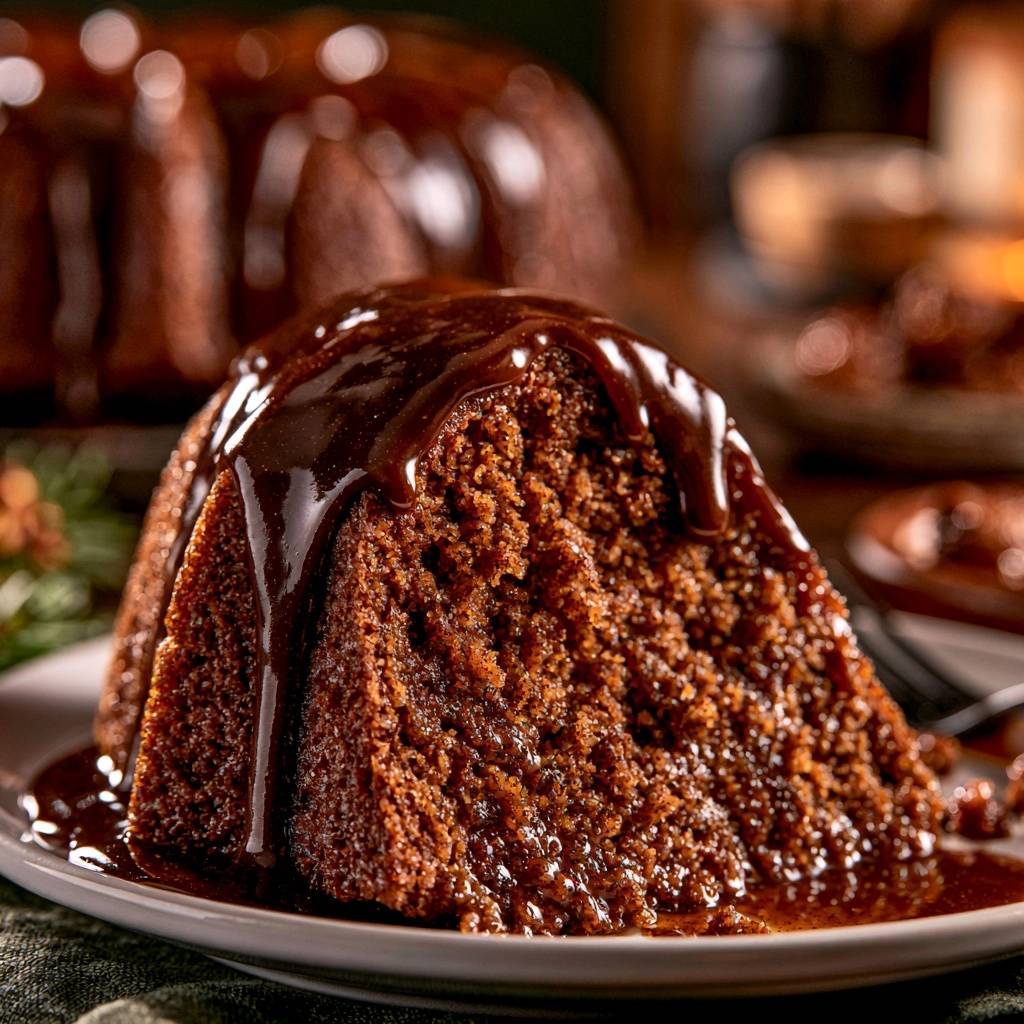
There is something undeniably majestic about a Bundt cake sitting on a pedestal. The deep ridges, the symmetrical curves, and that glossy river of chocolate cascading down the sides make it the undisputed crown jewel of any dessert table. However, for many home bakers, that beauty comes with a side of anxiety. We have all been there, holding our breath as we flip the pan, praying the cake doesn’t leave its top half behind.
The fear of the “Bundt fail” is real, but it shouldn’t stop you from creating a masterpiece. This recipe tackles that psychological hurdle head-on by combining a high-intensity chocolate crumb with a specialized release technique. You won’t just be making a cake; you’ll be mastering the physics of the flip so every single ridge comes out sharp and intact.
The secret lies in a specific cocoa-butter paste that acts as a lubricant between the batter and the metal. When you pair that with a batter designed for maximum moisture, you get a dessert that looks like it came from a high-end bakery but feels like a cozy, homemade hug. Let’s dive into why this method works and how you can achieve that perfect, mirror-like finish every time.
The Chemistry of a Moist Chocolate Crumb
Creating a cake that is both sturdy enough to hold its shape and tender enough to melt in your mouth requires a bit of kitchen science. We use all-purpose flour here because it provides the necessary protein structure to support the weight of the heavy ganache. While cake flour might seem tempting for a lighter crumb, it often lacks the strength to handle the intricate designs of a Bundt pan.
The leavening process is equally important. We use a combination of baking soda and baking powder to ensure a consistent rise. The baking soda reacts immediately with the acidic buttermilk, creating tiny carbon dioxide bubbles that lift the heavy batter. Meanwhile, the baking powder provides a second boost of lift once the cake hits the heat of the oven, ensuring it doesn’t collapse under its own richness.
Why Hot Coffee is Non-Negotiable
If you see coffee in a chocolate recipe, don’t worry about it tasting like a latte. The hot brewed coffee serves a very specific purpose called “blooming.” When you pour hot liquid over cocoa powder, it dissolves the cocoa solids and releases trapped flavor compounds that cold liquids simply can’t reach.
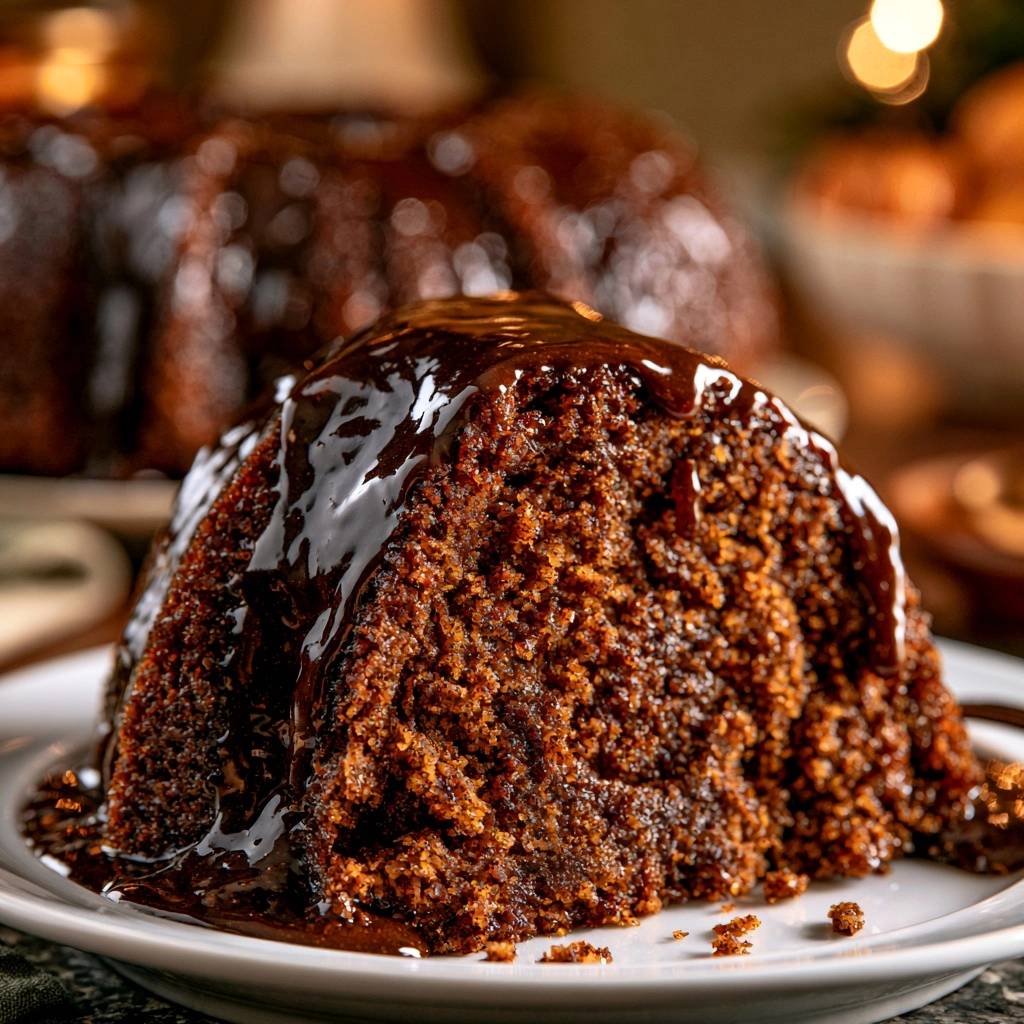
This process results in a much darker, more sophisticated chocolate profile. The heat also helps break down any stubborn lumps in the cocoa powder, ensuring the batter is silky smooth. By the time the cake finishes baking, the coffee flavor has vanished, leaving behind only an intensified, deep chocolate essence that tastes incredibly professional.
The Role of Buttermilk and Oil
Many traditional cakes rely on creamed butter for flavor, but for a Bundt cake, vegetable oil is the superior choice. Oil remains liquid at room temperature, which means your cake will stay moist and soft for days. Butter-based cakes tend to firm up and can feel dry if they aren’t eaten immediately or if they are stored in the fridge.
Buttermilk is the other half of this moisture duo. It contains natural acids that work to tenderize the gluten strands in the flour. This prevents the cake from becoming tough or bread-like. If you don’t have buttermilk on hand, you can easily make a quick substitute by adding a tablespoon of lemon juice or white vinegar to a cup of regular milk and letting it sit for five minutes.
Essential Components for the Glazed Chocolate Bundt Cake
Quality ingredients are the foundation of a great Glazed Chocolate Bundt Cake. Since chocolate is the star of the show, I always recommend using a high-quality unsweetened cocoa powder. Natural cocoa powder works best here because its acidity reacts perfectly with the baking soda to create that signature fluffy texture.
Temperature management is another key to success. You want your eggs and buttermilk to be at room temperature before you start mixing. Cold ingredients don’t emulsify well with oil and sugar, which can lead to an uneven bake or a greasy crumb. Simply set them out on the counter about 30 to 60 minutes before you plan to bake.
When measuring your flour, avoid scooping it directly with the measuring cup. This packs the flour down and results in a dry, heavy cake. Instead, fluff the flour with a spoon, sprinkle it into the cup, and level it off with a flat edge. This small change ensures your ratios stay exactly as intended for a perfect crumb.
Selecting the Right Semi-Sweet Chocolate
For the ganache glaze, the quality of your chocolate makes all the difference. I strongly advise against using standard chocolate chips. Chips are formulated with stabilizers and waxes designed to help them keep their shape under heat, which can result in a grainy or dull glaze.
Instead, grab a high-quality semi-sweet chocolate bar and chop it finely with a serrated knife. Chopped bar chocolate has a higher cocoa butter content, which allows it to melt into a perfectly smooth, velvety liquid. This is how you get that professional-grade finish that stays glossy even after it sets on the cake.
The Secret to a Foolproof Pan Release
The biggest challenge with Bundt cakes is the intricate design of the pan. All those nooks and crannies provide more surface area for the cake to grip onto. Traditional methods like spraying with oil or dusting with flour often fail because the flour can leave a white, chalky residue on your beautiful dark chocolate cake.
The cocoa paste method is a total game-changer. By mixing melted butter with cocoa powder, you create a dark, slippery barrier that matches the color of your cake. It fills in every tiny detail of the pan, ensuring that the sugar in the batter doesn’t bond to the metal during the long baking process.
Creating the Cocoa-Butter Barrier
To make the paste, simply whisk together equal parts melted butter and cocoa powder until it looks like liquid chocolate. Use a pastry brush to paint this mixture onto the inside of the pan. Be diligent! Make sure you coat the center tube and every single ridge of the design.
This paste is hydrophobic, meaning it repels the moisture in the batter. As the cake bakes, the paste creates a thin, flavorful “skin” on the outside of the cake. This not only helps it slide out effortlessly but also adds an extra layer of chocolate flavor to the exterior. It is the ultimate insurance policy for your hard work.
Step-by-Step: Mixing and Aerating the Batter
Start by whisking your dry ingredients together in a large bowl. This isn’t just about mixing; it’s about aerating the flour and ensuring the leavening agents are evenly distributed. You don’t want to bite into a pocket of salt or baking soda later on.
Once you add the wet ingredients, mix on medium speed for about two minutes. You are looking for the batter to become pale and smooth. This step builds just enough structure to hold the air bubbles without overworking the gluten. You’ll notice the batter looks thick and creamy at this stage, which is exactly what you want before the final addition.
Managing a Thin Batter Consistency
When you pour in the hot coffee, the batter will suddenly become very thin and watery. Don’t panic! This is exactly how it should look. A thin batter allows the heat to penetrate evenly, which is crucial for a deep pan like a Bundt.
Pour the coffee in slowly while mixing on low speed to avoid splashing yourself with hot liquid. The batter will look dark and shiny. This high liquid content is what creates that signature fudgy, almost brownie-like interior that makes this cake so addictive. Just be careful when moving the filled pan to the oven so it doesn’t slosh over the sides.
Precision Baking and the Ten-Minute Rule
Bake your cake on the middle rack of the oven to ensure even heat distribution. If the pan is too high, the top might scorch; too low, and the bottom might overcook before the center is set. Use a long wooden skewer to test for doneness. It should come out clean or with just a few moist crumbs attached.
Remember that the cake continues to cook for a few minutes after you pull it out of the oven. This is called carry-over cooking. The residual heat from the heavy metal pan is intense, so taking the cake out just as it finishes will prevent it from drying out during the cooling phase.
The Critical Window for Inverting the Cake
Timing is everything when it comes to the flip. You must let the cake cool in the pan for exactly 10 minutes. During this window, the cake’s structure firms up enough to support its own weight, but the sugars are still warm and fluid.
If you wait too long, the sugars will cool and act like glue, sticking the cake to the pan forever. If you flip too soon, the cake is too fragile and will likely break apart. After 10 minutes, give the pan a gentle side-to-side shake. If you feel the cake “thump” or move, you are ready to invert it onto your wire rack.
Crafting the High-Gloss Chocolate Ganache
A great ganache is an emulsion, much like a salad dressing. When you pour the hot cream over the chopped chocolate, let it sit undisturbed for five minutes. This allows the chocolate to melt evenly without being agitated, which prevents the fat from separating and making the glaze look greasy.
The addition of a little light corn syrup is a professional secret. It acts as a glucose agent that keeps the glaze flexible and provides a mirror-like shine. Without it, the ganache can become dull and matte as it cools. With it, your cake will look like it belongs in a magazine spread.
Temperature Control for the Perfect Pour
Viscosity is the key to a beautiful pour. If the glaze is too hot, it will run right off the cake and leave a thin, translucent coating. If it’s too cold, it will be lumpy and won’t flow into the ridges. You want it to be roughly the consistency of warm honey.
I like to use a small pitcher or a ladle for the pour. Start at the center of the ring and move in a slow circle, letting the glaze naturally find the path of least resistance down the sides. If you have any bare spots, you can use a spoon to gently nudge the glaze over the edge. Let it set for at least 20 minutes so the glaze firms up into a fudgy coating.
Troubleshooting Common Bundt Disasters
If the unthinkable happens and a piece of the cake sticks to the pan, don’t lose heart. You can carefully “patch” the piece back onto the cake while it’s still warm. Once the thick chocolate ganache goes over the top, no one will ever know there was a mishap. The glaze is very forgiving!
If your ganache looks broken or curdled, it usually means the cream was too hot or you whisked too vigorously. You can often fix this by adding a teaspoon of room-temperature milk and whisking very gently until it comes back together. If the cake is underbaked in the center, you can cover the top with foil and pop it back in the oven for 5-10 minutes, though the “skewer test” usually prevents this.
Storage and Make-Ahead Strategies
This cake actually tastes better the second day as the flavors have more time to meld. You can store the glazed cake under a cake dome at room temperature for up to three days. If your kitchen is very warm, you might want to keep it in the fridge, but let it sit out for 30 minutes before serving to soften the crumb.
For long-term storage, you can freeze the unglazed cake. Wrap it tightly in plastic wrap and then a layer of foil; it will stay fresh for up to two months. When you’re ready to serve, thaw it at room temperature overnight and then apply a fresh batch of warm ganache. I don’t recommend freezing the glazed cake, as the ganache can lose its shine and become tacky when thawed.
Expert Tips for Professional Results
To take your baking to the next level, consider these professional touches. First, always sift your cocoa powder. Cocoa is notorious for clumping, and those little white or brown spots in your finished cake are usually just unmixed cocoa or flour. Sifting ensures a perfectly uniform color and texture.
Second, use the “tap” method. Once you pour the batter into the pan, firmly tap it on the counter three or four times. This forces large air bubbles to the surface so you don’t end up with unsightly holes in the design of your cake. It also helps the batter settle into the fine details of the pan.
Finally, if you want a truly perfect ganache, use a kitchen thermometer. The ideal temperature for pouring ganache is between 85°F and 90°F. At this temperature, it has the perfect balance of flow and thickness to create those beautiful, heavy drips that stay put on the cake.
Recommended Equipment for Success
The pan you use matters. Heavy-cast aluminum pans are the gold standard for Bundt baking because they conduct heat evenly and have superior non-stick coatings. Thin tin or silicone pans often result in uneven browning or structural collapse because they don’t provide enough support for the heavy batter.
A long-handled pastry brush is also a must-have. It allows you to get the cocoa-butter paste into the very bottom of deep, intricate designs without making a mess. A sturdy wire cooling rack is also essential to allow air to circulate around the cake as it cools, preventing the bottom from becoming soggy.
Flavor Variations and Enhancements
While this cake is incredible as written, you can easily customize the flavor profile. Try rubbing the zest of one orange into the sugar before mixing to create a bright, citrusy chocolate experience. The oils in the zest will permeate the entire cake during the bake.
For an even deeper flavor, add a teaspoon of espresso powder to your dry ingredients. It won’t make the cake taste like coffee, but it acts as a flavor enhancer for the chocolate. You can also swap the vanilla extract in the glaze for almond extract or even a splash of peppermint extract for a holiday twist.
Frequently Asked Questions
How do I store leftovers to keep them moist?
The best way to store this cake is under a cake dome or in a large airtight container at room temperature. Because this is an oil-based cake, it stays moist much longer than butter-based cakes. It will remain fresh and delicious for about 3 to 4 days. If you must refrigerate it, make sure it is tightly wrapped so it doesn’t absorb any fridge odors, and always bring it back to room temperature before eating for the best texture.
Why did my cake stick to the pan even though I greased it?
Sticking usually happens for one of two reasons: the timing of the flip or the type of grease used. If you flip the cake immediately, it hasn’t had time to set its structure. If you wait longer than 10 minutes, the sugar begins to cool and act like a glue. Additionally, using the cocoa-butter paste described in the recipe is much more effective than standard cooking sprays, which can sometimes bake into a sticky film rather than a lubricant.
Can I use a different type of chocolate for the glaze?
Yes, you can use milk chocolate or even white chocolate for the glaze, but you will need to adjust the cream ratio. White chocolate and milk chocolate have more sugar and milk solids, so they require less cream to set up. For white chocolate, reduce the heavy cream to 1/3 cup. However, for the most classic and balanced flavor, semi-sweet chocolate (around 60% cacao) is the gold standard.
What if I don’t have a Bundt pan?
If you don’t have a Bundt pan, you can bake this batter in two 9-inch round cake pans or a 9×13 inch rectangular pan. Keep in mind that the baking time will be shorter, likely around 30 to 35 minutes. You won’t get the dramatic ridges of a Bundt, but the cake will still taste amazing. If using a 9×13 pan, you can simply pour the glaze over the top like a sheet cake.
My ganache is too thin and running off the cake. How can I fix it?
If your ganache is too thin, it is likely still too warm. Let it sit on the counter for another 5 to 10 minutes to thicken up. You can test the consistency by dipping a spoon into it; it should coat the back of the spoon thickly. If it’s still too thin after cooling, you can whisk in a small amount of finely chopped chocolate while the mixture is still slightly warm to increase the solids.
Can I make this cake gluten-free?
Yes, this recipe works quite well with a high-quality 1-to-1 gluten-free flour blend. Look for a blend that contains xanthan gum, which helps provide the structure that gluten normally offers. Because this is a very moist, liquid-heavy batter, the gluten-free flour hydrates well and avoids the gritty texture sometimes found in GF baking. Just be sure to still use the cocoa-butter paste for the pan release!
Glazed Chocolate Bundt Cake
Course: DessertCuisine: AmericanDifficulty: easy12
servings20
minutes50
minutes70
Minutes410
kcalAmerican
Ingredients
For the Pan Release Paste:
1 tablespoon melted butter
1 tablespoon unsweetened cocoa powder
For the Cake:
2 cups all-purpose flour
2 cups granulated sugar
3/4 cup unsweetened cocoa powder
2 teaspoons baking soda
1 teaspoon baking powder
1 teaspoon salt
1 cup buttermilk, room temperature
1/2 cup vegetable oil
2 large eggs, room temperature
2 teaspoons vanilla extract
1 cup hot brewed coffee
For the Chocolate Ganache Glaze:
6 ounces semi-sweet chocolate, finely chopped
2/3 cup heavy cream
1 tablespoon light corn syrup (for shine)
1/2 teaspoon vanilla extract
Directions
- Preheat your oven to 350°F (175°C).
- Solve the sticking problem by creating a chocolate paste. Mix 1 tablespoon of melted butter with 1 tablespoon of cocoa powder until smooth. Use a pastry brush to coat every single nook and cranny of your bundt pan with this mixture. Unlike flour, which leaves white streaks, this cocoa paste creates a non-stick barrier that blends into the cake and ensures it slides right out.
- In a large bowl, whisk together the flour, sugar, cocoa powder, baking soda, baking powder, and salt until no lumps remain.
- Add the buttermilk, vegetable oil, eggs, and vanilla extract. Mix on medium speed with a hand mixer or stand mixer for about 2 minutes until well combined and smooth.
- Reduce speed to low and carefully pour in the hot coffee. The batter will be very thin, but the hot liquid “blooms” the cocoa powder for a deeper, more intense chocolate flavor.
- Pour the batter into the prepared bundt pan. Bake for 45 to 55 minutes, or until a toothpick inserted into the center comes out clean or with just a few moist crumbs.
- Crucial Step: Let the cake cool in the pan for exactly 10 minutes. Any longer and the sugar begins to solidify and stick; any shorter and the structure is too weak to hold its weight. After 10 minutes, gently shake the pan to ensure the cake is loose, then invert the pan onto a wire rack. The cake will release perfectly. Allow it to cool completely before glazing.
- For the glaze, place the chopped chocolate in a small heat-proof bowl. In a small saucepan, heat the heavy cream and corn syrup over medium heat until it just begins to simmer.
- Pour the hot cream over the chocolate and let it sit undisturbed for 5 minutes. Add the vanilla extract, then whisk gently starting from the center until the glaze is glossy and completely smooth.
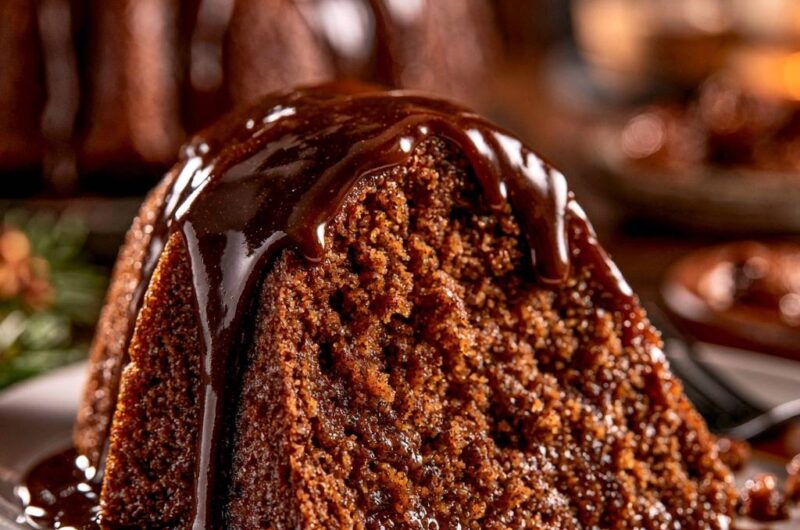
- Place the wire rack with the cake over a piece of parchment paper to catch drips. Pour the warm glaze slowly over the top of the cake, allowing it to thicky coat the ridges and pool slightly at the base as seen in the image. Let the glaze set for at least 20 minutes before slicing.
Notes
- The hot coffee is essential for blooming the cocoa powder. Ensure the cake cools in the pan for exactly 10 minutes before inverting to guarantee a clean release.