Most home cooks struggle with chickpea curry because the sauce ends up thin and separated from the beans. You’ve likely experienced that disappointing bowl where the chickpeas sit in a puddle of watery tomato broth rather than a cohesive sauce. This recipe fixes that common frustration by focusing on a specific reduction and mashing technique that ensures a thick, velvety gravy.
The secret to a restaurant-quality result lies in how you treat the base ingredients before the liquid ever hits the pan. We aren’t just boiling beans in tomato juice; we are building a jammy, concentrated foundation that clings to every single chickpea. This creates a sensory experience where the earthy beans are enveloped in a rich, savory coating that packs a punch in every bite.
I’ve found that the real magic happens when you release the natural starches hidden inside the chickpeas themselves. By crushing just a small portion of the beans directly into the simmering sauce, you create a natural emulsifier. This simple trick binds the fats and liquids together, resulting in a glossy, heavy gravy that never separates on your plate.
The Anatomy of a Thick Tomato Base
Creating a robust curry starts with a process similar to a Mediterranean sofrito but with a deeper focus on caramelization. When you cook finely diced onions in oil, you are laying the structural groundwork for the entire dish. As the water evaporates from the onions, their natural sugars concentrate and brown, providing a sweet counterpoint to the acidic tomatoes.
Adding tomato paste to this mixture is a critical turning point in the flavor profile. You must “fry” the paste in the oil until it shifts from a bright, raw red to a dark brick hue. This chemical transformation, known as the Maillard reaction, removes the metallic tinny taste often found in canned products and replaces it with a deep, umami richness. By keeping water out of the pan during this stage, you allow the oil to carry the heat directly to the tomato solids, intensifying the flavor.
Selecting the Best Chickpeas for Texture
While dried chickpeas offer a slightly firmer bite, canned chickpeas are the ultimate pantry hero for a 30-minute meal. Look for brands that list only chickpeas, water, and salt on the label to avoid unnecessary preservatives. The starch content in the canning liquid, often called aquafaba, is a powerful tool, though we typically rinse it for this specific recipe to maintain total control over the sauce’s saltiness.
If you find your canned chickpeas are particularly firm, you might want to simmer them for an extra five minutes in the sauce. However, most standard canned varieties are perfectly tender and ready to absorb the spices. The goal is a bean that holds its shape but yields easily when pressed against the roof of your mouth.
Essential Spices for Depth and Color
Garam masala, turmeric, and cumin form the aromatic backbone of this dish, each serving a distinct purpose. Turmeric provides that iconic golden undertone and a mild earthy bitterness, while cumin adds a warm, nutty base note. Garam masala is the finishing touch, bringing complex layers of cinnamon, cloves, and peppercorns to the forefront.
To get the most out of these spices, you must “bloom” them in the hot oil for about 30 seconds. This process releases the fat-soluble flavor compounds that would otherwise remain trapped if you simply stirred the powder into a watery sauce. Using a touch of smoked paprika or chili powder won’t just add heat; it provides that vibrant, professional-looking red finish that makes the dish look as good as it tastes.
Step-by-Step: Building the Rich Tomato Chickpea Curry
Building a great curry is all about patience during the first ten minutes. Once the foundation is set, the rest of the process moves quickly, resulting in a meal that tastes like it simmered for hours. Follow these phases to ensure your sauce reaches that perfect, jammy consistency.
Phase 1: Caramelizing Onions for Body
Heat your oil over medium heat and add the onions, stirring frequently for at least 10 to 12 minutes. You aren’t looking for a quick sauté here; you want the onions to become soft, translucent, and eventually a deep golden brown. This long cook time is non-negotiable because these melted onions provide the actual “body” of your sauce.
If the onions start to look dark around the edges too quickly, turn the heat down slightly. You want a slow, even tan rather than a scorched surface. If they stick, add a tiny splash of water to deglaze the pan, which helps the onions soften even further into a paste-like consistency.
Phase 2: Frying the Aromatics and Tomato Paste
Once the onions are golden, stir in the minced garlic and ginger. Cook them for just a minute until the kitchen smells incredible, then clear a small space in the center of the pan for the tomato paste. Press the paste into the hot oil and let it sizzle for 3 to 4 minutes, stirring constantly.
Watch for the color change; the paste will darken significantly as it loses its raw edge. This step is the secret to the “Never Watery” promise because it ensures the tomato base is concentrated and savory. You’ll notice the oil starting to turn a bright orange-red as it absorbs the pigments from the paste.
Phase 3: Blooming Spices and Reducing the Base
Sprinkle in your garam masala, turmeric, cumin, and chili powder. Stir them into the oily onion and tomato mixture for about 30 seconds. You will notice the aroma intensify immediately as the heat wakes up the dried spices. Be careful not to go longer than 30 seconds, as burnt spices can turn the entire dish bitter.
Pour in the crushed tomatoes and stir everything together. Let this mixture simmer for about 5 minutes without adding any extra water yet. You want the tomato juices to reduce and thicken until the sauce looks heavy and starts to bubble lazily. This concentration of flavor is what separates a mediocre curry from a great one.
Phase 4: The Starch-Release Mashing Technique
Add the drained chickpeas to the pan and stir to coat them in the tomato base. Now, take the back of your wooden spoon and firmly crush about a quarter cup of the chickpeas against the side or bottom of the pan. You don’t need to be precise; just mash a few spoonfuls until they turn into a thick paste.
Stir those mashed bits back into the sauce and watch the transformation. The internal starches from the crushed chickpeas act as a natural thickener, binding the oil and tomato juices into a cohesive, velvety gravy. This is the “Skyscraper” technique that ensures your sauce clings to the beans instead of running all over the plate.
Troubleshooting Your Curry Consistency
If your sauce looks a bit too dry or starts sticking to the bottom of the pan, don’t panic and pour in a cup of water. Instead, add water tablespoon by tablespoon, stirring after each addition. This “incremental hydration” allows you to reach the perfect thickness without accidentally thinning out the flavors you worked so hard to build.
On the flip side, if the sauce still feels a bit loose after simmering, simply leave the lid off. Increasing the surface area for evaporation is the fastest way to tighten a sauce. You are looking for the moment when the oil just begins to tiny beads at the edges of the pan, which is a classic sign that the sauce is perfectly reduced and concentrated.
Flavor Variations and Ingredient Swaps
While the tomato base is the star, you can easily tweak this recipe to suit your mood or what’s in your fridge. The core technique remains the same, but the final flavor profile can shift from bright and acidic to rich and creamy with just one or two changes.
For that same satisfying thickness, discover the creamy red lentil dal secrets.
Adding Creaminess Without Dairy
If you want a texture similar to a Tikka Masala or Makhani, stir in a half-cup of full-fat coconut milk or cashew cream during the final five minutes of simmering. This will mellow out the acidity of the tomatoes and add a luxurious mouthfeel. Keep in mind that adding liquid will require a few extra minutes of simmering to maintain that thick, jammy consistency we’re aiming for.
Incorporating Leafy Greens or Roasted Vegetables
You can easily bulk up this meal by adding a few handfuls of fresh spinach or kale at the very end. The residual heat will wilt the greens in about two minutes without releasing too much moisture. If you want to add cauliflower or sweet potatoes, roast them separately first and fold them in at the end; adding raw vegetables directly to the sauce can release water and ruin your perfect reduction.
Optimal Pairings for a Complete Meal
A thick curry needs a vehicle to soak up that incredible sauce. Fluffy Basmati rice is the classic choice, as the long grains stay separate and provide a light texture. For a bit more flavor, try making Jeera rice by sautéing a teaspoon of whole cumin seeds in butter before adding your rice and water.
If you prefer bread, warm garlic naan or simple whole-wheat roti are perfect for scooping up the chickpeas. To balance the deep, savory heat of the curry, a side of cool cucumber salad or a dollop of plain yogurt works wonders. The contrast between the hot, spiced tomato sauce and the cold, crisp cucumber creates a balanced bite every time.
Make-Ahead Strategy and Storage Tips
This is one of those rare dishes that actually tastes better the next day. As the curry sits in the fridge, the spices continue to permeate the chickpeas, and the flavors meld into a more complex, rounded profile. It is a fantastic candidate for Sunday meal prep because it holds up so well throughout the week.
To store it properly, let the curry cool to room temperature before transferring it to an airtight container. It will stay fresh in the refrigerator for up to four days. When you’re ready to eat, you’ll notice the sauce has thickened even more due to the starches; simply add a splash of water when reheating to bring back that glossy texture.
Freezing and Reheating for Best Texture
You can freeze this curry for up to three months in freezer-safe containers. To reheat, it’s best to thaw it in the fridge overnight and then warm it in a small saucepan over medium-low heat. Avoid the microwave if possible, as it can heat the chickpeas unevenly and make the sauce “pop” and splatter.
When reheating on the stovetop, add a tablespoon of water at a time and stir gently. This helps re-emulsify the sauce and prevents the bottom from scorching. Once it’s steaming hot and the sauce looks smooth again, it’s ready to serve. A fresh squeeze of lime juice right before eating can also help wake up the flavors after freezing.
Expert Troubleshooting and Common Questions
Why is my curry bitter?
Bitterness usually comes from two places: burnt garlic or scorched spices. If you cook the garlic for too long or on too high a heat, it turns acrid. Similarly, if the spices bloom for more than 30-45 seconds without liquid, they can burn. To fix a slightly bitter sauce, try adding a pinch of sugar or a squeeze of lemon juice to balance the flavors.
Can I use fresh tomatoes instead of canned?
Yes, you can use about 4-5 large, ripe tomatoes. However, fresh tomatoes contain much more water than canned crushed tomatoes. You will need to simmer the sauce for an additional 15-20 minutes to achieve the same thick, jammy reduction. Make sure to dice them very finely so they break down completely into the gravy.
How do I make it spicier without changing the texture?
If you want more heat, add one or two slit bird’s eye chilies along with the garlic and ginger. This adds a clean, sharp spice without adding extra powder that might make the sauce grainy. Alternatively, a pinch of cayenne pepper during the spice-blooming stage will ramp up the heat significantly while keeping the sauce smooth.
Is this recipe meal-prep friendly?
Absolutely. This curry is incredibly stable and doesn’t get soggy or lose its structure over time. In fact, the chickpeas become more flavorful as they marinate in the sauce. It lasts for 4 days in the fridge, making it a perfect healthy lunch option that you can quickly reheat at work or home.
What if my sauce is still too thin?
If you’ve followed the steps and it still feels watery, mash a few more chickpeas! You can safely crush up to a third of the beans without losing the “chunky” appeal of the dish. Also, ensure you are simmering uncovered; a lid traps steam, which turns back into water and thins out your sauce. Let that steam escape to concentrate the flavors.
Before you serve, don’t skip the fresh cilantro garnish. The bright, citrusy notes of the fresh herbs provide a necessary lift to the deep, earthy flavors of the reduced tomato and spices. It adds a pop of color and a fresh aroma that makes the whole dish feel vibrant and complete.
Chickpea Curry
Course: Main CourseCuisine: Indian InspiredDifficulty: easy4
servings10
minutes30
minutes285
kcal40
MinutesA hearty and flavorful chickpea curry featuring a concentrated tomato base. This recipe focuses on caramelizing onions and frying tomato paste to create a deep, rich gravy that perfectly coats the chickpeas.
Ingredients
2 cans (15 oz each) chickpeas, drained and rinsed
1 large onion, finely diced
3 cloves garlic, minced
1 tablespoon fresh ginger, grated
1 can (15 oz) crushed tomatoes
3 tablespoons tomato paste
2 tablespoons vegetable oil
1 tablespoon garam masala
1 teaspoon ground turmeric
1 teaspoon ground cumin
1/2 teaspoon chili powder (or smoked paprika for color)
1 teaspoon salt
1/4 cup water (only if needed)
Fresh cilantro for garnish
Directions
- Heat the vegetable oil in a large heavy-bottomed pan or karahi over medium heat. Add the onions and cook for 10 to 12 minutes, stirring frequently, until they are deep golden brown and soft. This caramelization provides the base body for the sauce.
- Stir in the garlic and ginger, cooking for 1 minute until fragrant.
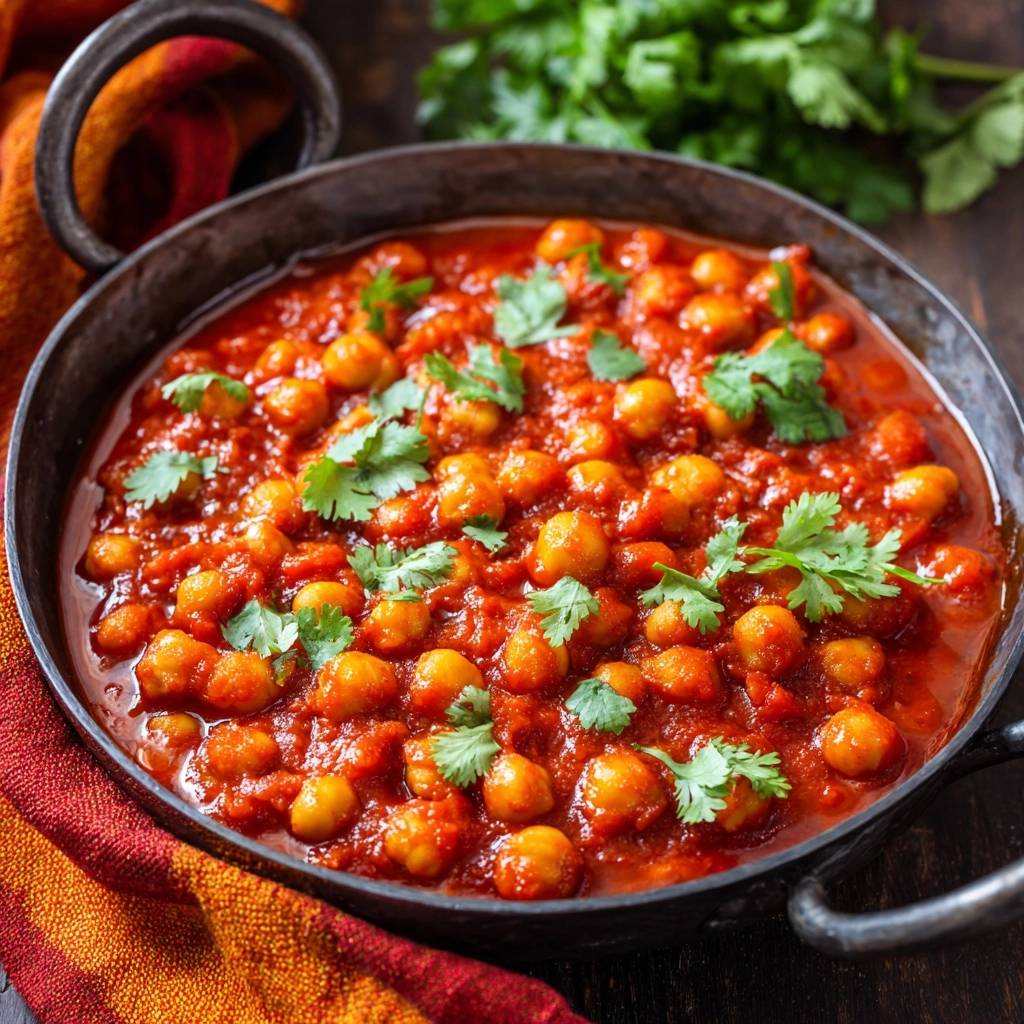
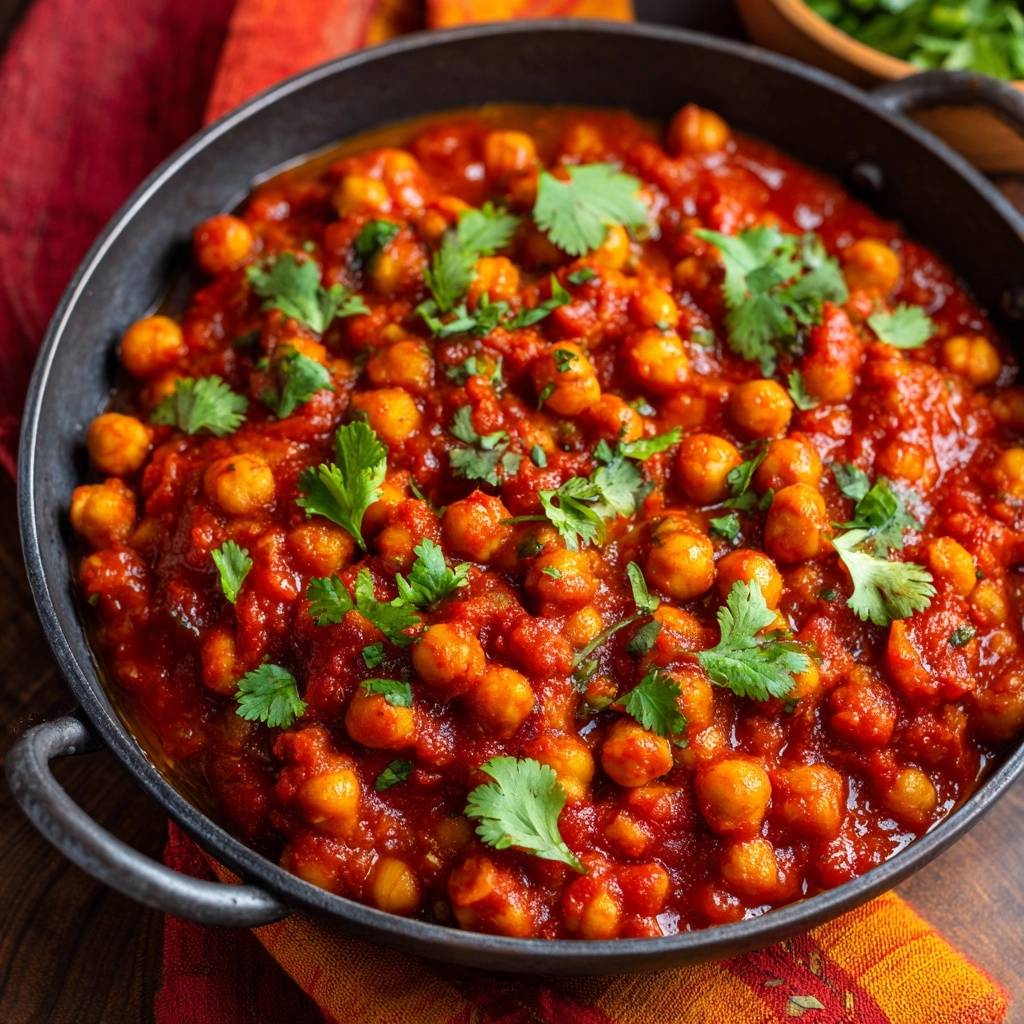
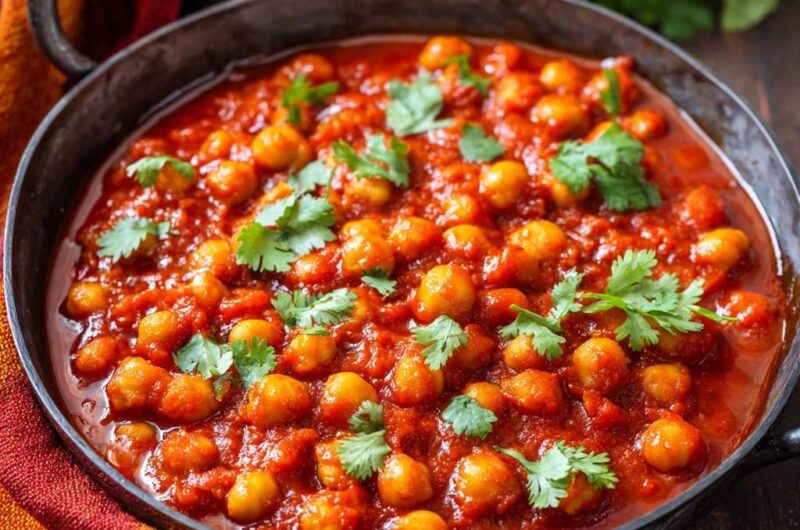
- Add the tomato paste and cook for 3 to 4 minutes, stirring constantly. You want the paste to darken to a deep brick red and begin to “fry” in the oil; this removes the metallic taste and creates the vibrant red color seen in the image.
- Add the garam masala, turmeric, cumin, chili powder, and salt. Toast the spices in the oil for 30 seconds to bloom their aromatics.
- Pour in the crushed tomatoes. Do not add all the water yet. Bring to a steady simmer for 5 minutes to allow the tomato juices to reduce and thicken.
- Add the chickpeas to the pan. To solve the watery sauce problem, use the back of your wooden spoon to crush about 1/4 cup of the chickpeas directly into the sauce. The released starches act as a natural thickener, binding the tomato base into a rich, jammy gravy.
- Reduce heat to low and simmer uncovered for 10-15 minutes. If the sauce becomes too thick or starts to stick, add the water 1 tablespoon at a time. The goal is a concentrated, thick consistency where the oil just begins to separate at the edges.
- Once the sauce is thick and clings heavily to the chickpeas, remove from heat.
- Garnish generously with fresh cilantro leaves and serve warm.
Notes
- To ensure a thick consistency, mash about one quarter cup of the chickpeas into the sauce to release natural starches. Fry the tomato paste until it reaches a brick red color to eliminate metallic flavors.