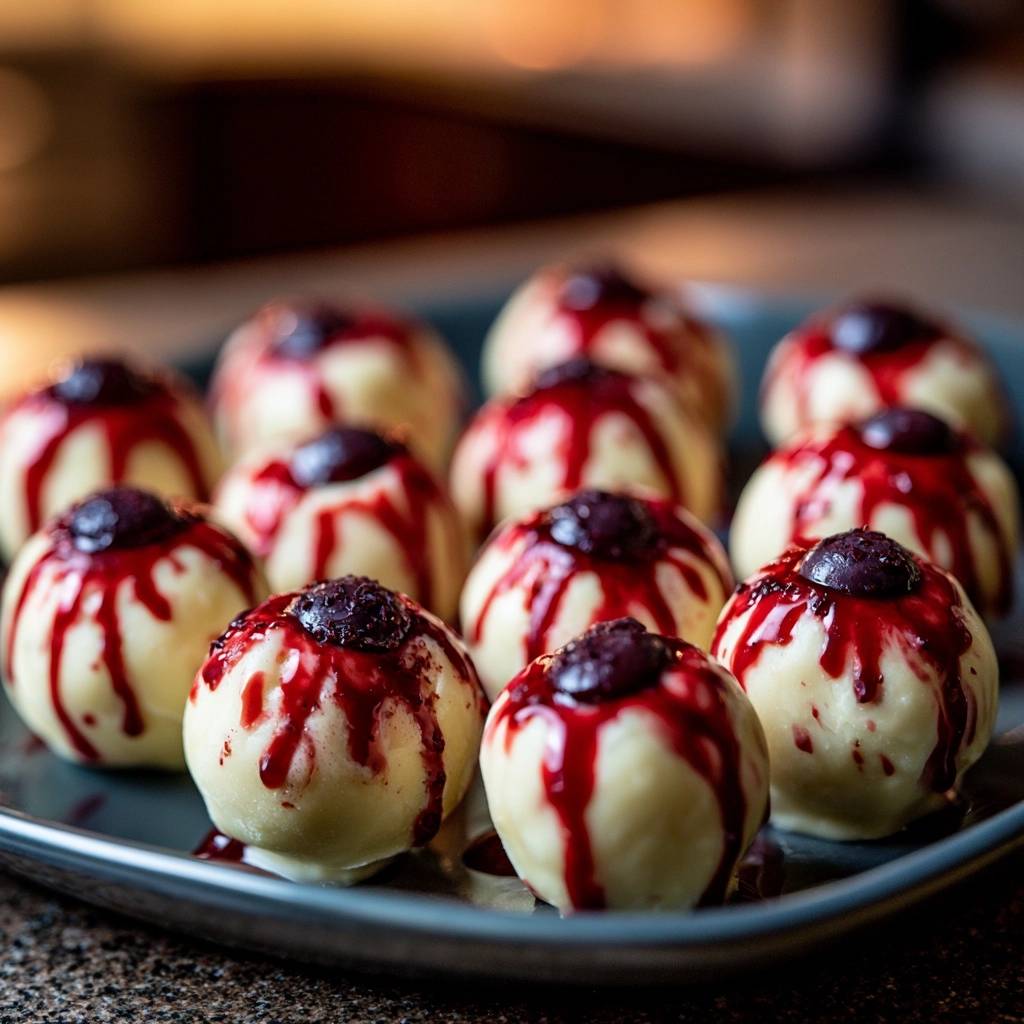
There is something undeniably elegant about the snap of a thin white chocolate shell giving way to a creamy, tart fruit center. These White Chocolate Blueberry Truffles offer a sophisticated balance between the buttery sweetness of the coating and the bright, acidic pop of real berries. While many home cooks find white chocolate intimidating, this recipe bridges the gap between amateur baking and professional confectionery.
You might have experienced the frustration of chocolate that turns into a thick, grainy paste or shells that crack the moment they hit the fridge. We are moving past those common pitfalls by focusing on temperature control and structural integrity. By the time you finish this batch, you will have a dozen jewel-like treats that look like they walked out of a high-end boutique display case.
The secret to a professional finish lies in the moisture management of your filling. Most people skip the structural binders, leading to a truffle that collapses under the weight of its own coating. I have found that incorporating finely ground graham cracker crumbs acts as a safety net, absorbing excess juice from the blueberries while providing a subtle, toasted flavor that mimics a cheesecake crust.
The Chemistry of Stable White Chocolate Ganache
Creating a stable truffle center requires a delicate dance between fats and sugars. The base of this recipe relies on full-fat cream cheese, which provides the necessary lipids to keep the center plush and scoopable even when chilled. When you beat the cream cheese with powdered sugar, the sugar crystals actually help aerate the fat, creating a light, melt-in-your-mouth texture rather than a dense block of cheese.
However, adding fruit introduces water, which is the natural enemy of a stable ganache. This is where the graham cracker crumbs become your best friend. They act as a structural sponge, locking in the blueberry juices so the moisture doesn’t migrate to the surface. If that moisture were to leak out, it would cause the white chocolate shell to “sweat” or slide right off the filling.
Furthermore, the vanilla extract serves as a bridge between the dairy and the fruit. It rounds out the sharp edges of the cream cheese and enhances the floral notes naturally present in blueberries. Because we aren’t using heat to set the center, the ratio of dry ingredients to wet fats must be precise to ensure the balls hold their shape during the dipping process.
Selecting High-Quality White Chocolate Wafers
When you shop for your coating, you will likely see “white chocolate chips” and “melting wafers.” For this specific recipe, I highly recommend high-quality melting wafers. These are often referred to as compound chocolate, which is formulated with specific fats that make them more stable and easier to melt than standard baking chips.
Standard chips often contain stabilizers meant to help them hold their shape in a hot oven, which is exactly what you don’t want when trying to achieve a smooth, liquid dip. Look for wafers that list cocoa butter as a primary ingredient. Even though wafers are more beginner-friendly, the presence of real cocoa butter ensures that signature rich, creamy flavor that defines a true truffle.
Why Frozen Blueberries Outperform Fresh in Fillings
It might seem counterintuitive, but frozen blueberries are actually superior for the truffle filling. The freezing process breaks down the cellular walls of the berry. When you thaw and mash them, they release their juices and color much more readily than fresh berries would.
This cellular breakdown allows the blueberry flavor to permeate the entire cream cheese mixture, resulting in a beautiful, uniform purple hue. Fresh berries tend to stay in distinct chunks, which can create air pockets in your truffle and lead to an uneven surface once coated. Just be sure to drain the thawed berries thoroughly to keep the moisture levels under control.
Essential Components for Blueberry Truffle Success
Success starts with the temperature of your ingredients before you even turn on the mixer. Your cream cheese must be truly softened to room temperature. If it is even slightly cold, you will end up with tiny white lumps that are impossible to smooth out once the sugar and berries are added.
In addition to the cheese, ensure your blueberry preserves are at room temperature before you attempt to strain them. Cold jam is too thick to pass through a fine-mesh sieve, and you need that smooth, liquid consistency for the final decorative drizzle. Having everything prepped and at the right thermal starting point prevents the mixture from breaking or curdling.
The Role of Coconut Oil in Viscosity
White chocolate is naturally thicker than dark or milk chocolate because of its high milk solid and sugar content. If you try to dip a truffle in pure melted white chocolate, the coating will be thick, gloopy, and difficult to manage. This is where a single tablespoon of coconut oil changes the game.
The coconut oil acts as a thinning agent, reducing the surface tension of the melted chocolate. This allows the excess coating to run off the truffle easily, leaving behind a thin, professional-grade shell. As a bonus, coconut oil helps the chocolate set with a slightly softer bite, preventing the shell from shattering aggressively when you take a mouthful.
Step-by-Step: Preparing the Blueberry Cream Base
Start by whipping your softened cream cheese until it looks like smooth silk. You shouldn’t see a single grain or lump before you add the powdered sugar. Once the sugar is incorporated, the mixture will become glossy and slightly stiff. This is the foundation of your truffle, so take your time with this initial step.
When it is time to add the mashed blueberries and graham cracker crumbs, switch from a mixer to a flexible spatula. Use a gentle folding motion, cutting through the center and lifting from the bottom. You want to distribute the color and the crumbs evenly without overworking the cream cheese, which can cause the fats to become too soft and greasy.
Achieving Structural Integrity Through Freezing
You cannot rush the freezing step. The 45-minute chill is the difference between a round, beautiful truffle and a melted mess. When you dip a frozen center into warm chocolate, the cold temperature of the filling helps the chocolate set almost instantly, locking in the spherical shape.
If the centers are room temperature, the heat from the melted chocolate will soften the cream cheese base immediately. This causes the truffle to flatten or “slump” on the parchment paper, creating a large, unsightly pool of chocolate at the bottom. Think of the freezer as the tool that provides the “skeleton” for your dessert.
The Fail-Safe White Chocolate Coating Method
White chocolate is incredibly sensitive to heat and will seize or burn at temperatures that wouldn’t even melt dark chocolate. To avoid this, you must use the 50 percent power setting on your microwave. High power heats the sugar and milk solids too quickly, causing them to clump into a dry, grainy mass that cannot be saved.
Furthermore, you must ensure that every tool you use is bone-dry. A single drop of water from a recently washed bowl or steam from a nearby pot will cause the chocolate to seize instantly. This chemical reaction turns the smooth liquid into a stiff paste because the water hitches to the sugar particles, pulling them out of the fat suspension.
The Residual Heat Stirring Technique
The most common mistake is heating the chocolate until every single lump is gone. By the time the last lump melts in the microwave, the rest of the chocolate is likely scorched. Instead, stop heating when you still see a few small, solid pieces of chocolate floating in the liquid.
Remove the bowl and stir vigorously for a full minute. The residual heat from the melted portion and the warm glass bowl will gently coax those final lumps into a liquid state. This technique keeps the overall temperature of the chocolate lower, which preserves the glossy finish and prevents the cocoa butter from separating.
Dipping and Tapping for a Glossy Finish
When you are ready to dip, work with one truffle at a time, keeping the rest in the freezer. Drop the frozen ball into the chocolate, roll it quickly to coat, and lift it out with a fork. Do not stir the truffle around excessively, or you might leave crumbs in your clean coating.
Hold the fork over the bowl and gently tap your wrist with your other hand. This vibration encourages the excess chocolate to fall back into the bowl. If you see a “tail” of chocolate hanging from the bottom of the fork, scrape it against the edge of the bowl before placing the truffle on the parchment paper. This ensures a clean, round base without a “foot.”
Advanced Decoration: The Strained Preserve Drizzle
To give these truffles a professional look, we use a strained blueberry preserve glaze. Standard jam contains skins and seeds that look messy when drizzled. By heating the preserves and pushing them through a fine-mesh sieve, you create a clear, jewel-toned syrup that catches the light beautifully.
This syrup provides a concentrated burst of blueberry flavor that hits the palate first. It also serves a functional purpose by helping the fresh blueberry garnish stay securely attached to the top of the truffle. The contrast of the deep purple syrup against the stark white shell is what makes this dessert a visual standout.
Creating the Bleeding Streak Effect
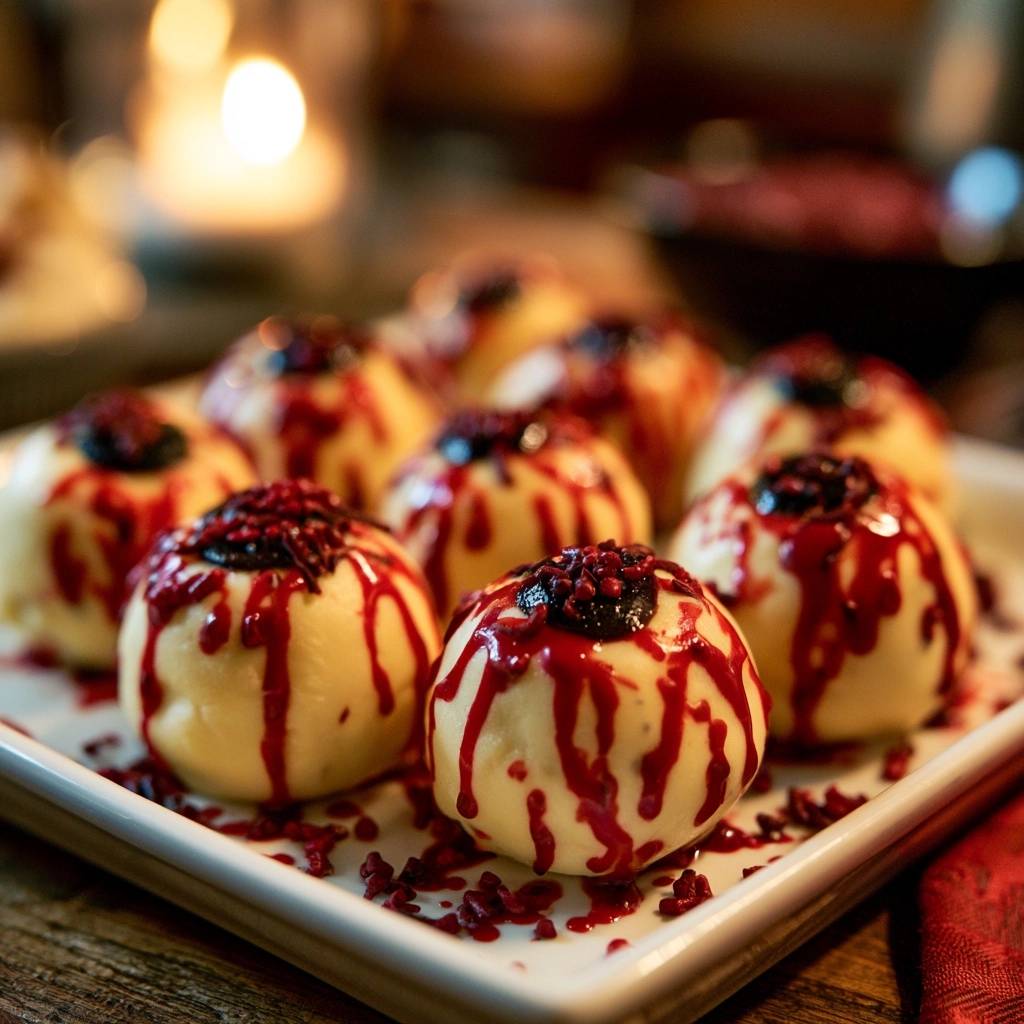
Timing is everything when it comes to the “bleeding” effect. You want to apply the warm syrup while the white chocolate shell has just set but is still slightly cool. Place the fresh blueberry on top first, then use a small spoon to drop a tiny amount of syrup directly onto the berry.
Gravity will do the work for you, pulling the syrup down the curved sides of the truffle. Because the syrup is warm and the shell is cold, the drizzle will slow down as it travels, creating those beautiful, natural streaks. If the syrup is too hot, it will run all the way to the bottom; if it is too cold, it will sit in a thick clump on top.
Troubleshooting Common Truffle Complications
If your chocolate does seize and turn grainy, don’t panic. You can sometimes save it by adding a teaspoon of boiling water and stirring rapidly, though this will change the texture slightly. A better fix is adding another teaspoon of coconut oil and stirring over a very gentle warm water bath until the lumps smooth out.
If you find that your filling is too soft to roll even after freezing, your blueberries might have had too much residual moisture. You can easily fix this by folding in an extra tablespoon or two of graham cracker crumbs. The crumbs will act as an emergency stabilizer, firming up the mixture without significantly altering the flavor profile.
Preventing Shell Cracking in the Fridge
Hairline fractures in the white chocolate shell are usually caused by extreme temperature swings. If you move a truffle from a sub-zero freezer directly into a very warm kitchen, and then immediately into a cold refrigerator, the fats expand and contract too quickly. This stress causes the shell to snap.
To prevent this, let the coated truffles sit at room temperature for about five minutes before putting them in the fridge to fully set. This gradual cooling process allows the shell to stabilize. Also, avoid stacking the truffles, as the weight of the top layer can cause the delicate shells underneath to crack.
Storage Logistics and Serving Temperatures
Because these truffles contain cream cheese and fresh fruit, they must be stored in the refrigerator. They will stay fresh and delicious for up to five days when kept in an airtight container. I recommend lining the container with a piece of paper towel to absorb any condensation that might form, which protects the glossy finish of the chocolate.
For the best tasting experience, take the truffles out of the fridge about ten minutes before serving. This allows the cream cheese center to soften just enough to become velvety, while the white chocolate shell remains crisp. Serving them bone-cold can sometimes mute the delicate flavors of the blueberry and vanilla.
Freezing Finished Truffles for Long-Term Use
If you want to make these well in advance, they freeze surprisingly well. Place the finished, set truffles in a single layer inside a freezer-safe container. Wrap the entire container in a double layer of plastic wrap to prevent freezer burn and to keep odors from the freezer from penetrating the white chocolate.
When you are ready to enjoy them, move the container to the refrigerator and let them thaw slowly overnight. Thawing them at room temperature can cause “sweating,” where beads of moisture form on the shell and ruin the aesthetic. A slow thaw in the fridge keeps the glaze intact and the chocolate shiny.
Expert Tips for Flavor Customization
Once you have mastered the base recipe, you can start experimenting with flavor variations. A popular twist is adding a teaspoon of fresh lemon zest to the cream cheese mixture. The citrus oils cut through the richness of the white chocolate and create a “Blueberry Lemonade” profile that is incredibly refreshing in the summer months.
Another pro tip is to use crushed freeze-dried blueberries instead of graham cracker crumbs for the structural binder. This provides an even more intense punch of color and flavor without adding any extra liquid. If you choose this route, the interior of the truffle will be a vibrant, deep violet that provides a stunning contrast when someone bites into the white shell.
How do I store these truffles and how long do they last?
You must store these truffles in an airtight container in the refrigerator because of the cream cheese and fresh fruit components. They will remain fresh and maintain their texture for up to 5 days. If you need to store them longer, you can freeze them for up to 2 months, but be sure to thaw them slowly in the fridge to prevent the chocolate shell from sweating or cracking.
Why did my white chocolate turn thick and lumpy while melting?
This is known as seizing, and it usually happens for two reasons: overheating or moisture. White chocolate burns at a very low temperature, so if you use high power in the microwave, the sugar scorches and clumps. Additionally, even a single drop of water in your bowl can cause the chocolate to turn into a paste. Always use 50% power and ensure all your equipment is completely dry.
Can I use fresh blueberries in the filling instead of frozen?
While you can use fresh berries, frozen berries are actually better for the filling. Frozen berries have broken cell walls, which allows them to release more juice and color when mashed, resulting in a more uniform flavor and a prettier purple center. If you use fresh berries, the flavor will be less intense and the texture may be chunkier, which can make the truffles harder to roll into smooth balls.
What can I use if I don’t have graham cracker crumbs?
The crumbs are essential for absorbing moisture and providing structure. If you don’t have graham crackers, you can substitute them with crushed vanilla wafers, digestive biscuits, or even a small amount of almond flour. The goal is to use a dry, neutral-flavored ingredient that will prevent the blueberry juice from making the cream cheese mixture too runny to handle.
Why is my blueberry glaze sliding off the truffle?
This usually happens if the glaze is too thin or if the truffle shell is too cold and smooth for the glaze to grip. Make sure you strain the preserves to remove large chunks, but don’t over-heat the syrup until it’s watery. Let the syrup cool for a minute until it reaches a slightly thickened, tacky consistency before drizzling it over the fresh blueberry garnish.
My truffle centers are melting while I try to dip them. What went wrong?
The most likely culprit is skipping or shortening the freezing time. The centers must be frozen firm (at least 45 minutes) before they hit the warm melted chocolate. If they are just “chilled” rather than frozen, the heat from the chocolate will immediately soften the cream cheese, causing the truffle to lose its shape or fall apart on the dipping tool.
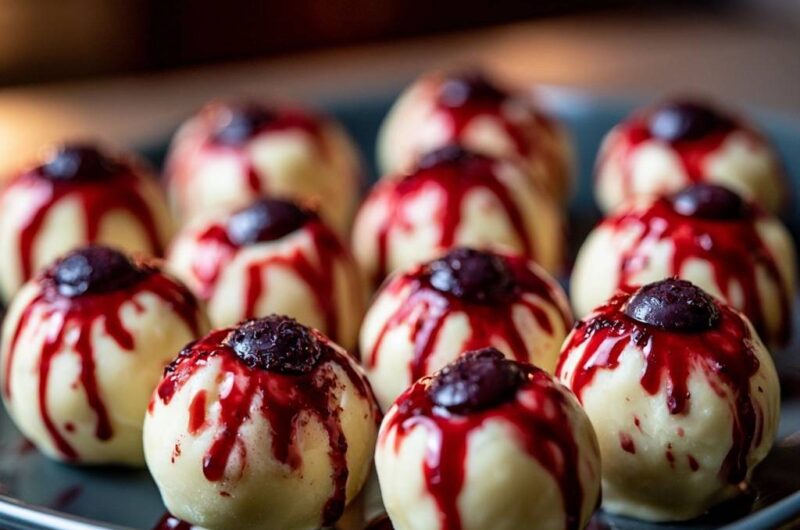
White Chocolate Blueberry Truffles
Course: DessertCuisine: AmericanDifficulty: easy12
truffles30
minutes5
minutes60
Minutes210
kcalAmerican
Ingredients
8 ounces cream cheese, softened
2 cups powdered sugar
1/2 cup graham cracker crumbs (to ensure structural integrity)
1 teaspoon vanilla extract
1/2 cup frozen blueberries, thawed, drained, and mashed
12 ounces high-quality white chocolate melting wafers
1 tablespoon coconut oil
1/2 cup blueberry preserves (strained for a smooth drizzle)
12 fresh blueberries for garnish
Directions
- In a large bowl, beat the softened cream cheese, powdered sugar, and vanilla extract until completely smooth. Fold in the graham cracker crumbs and mashed blueberries. The crumbs are essential to absorb excess moisture from the berries, preventing the centers from becoming too soft to dip.
- Scoop the mixture into one-inch balls and place them on a parchment-lined tray. Freeze for at least 45 minutes. This is crucial; if the centers are not frozen firm, they will melt and deform when they hit the warm chocolate.
- To solve the common clumping issue, combine the white chocolate wafers and coconut oil in a microwave-safe glass bowl. The coconut oil lowers the viscosity of the chocolate, ensuring it flows smoothly over the truffle for that professional, thin shell.
- Microwave in 20-second intervals at 50 percent power, stirring vigorously between each session. Stop heating when a few small lumps remain and stir until the residual heat melts them completely. Never overheat white chocolate, as it burns at a much lower temperature than dark chocolate.
- Using a dipping tool or fork, submerged each frozen truffle into the thinned white chocolate. Tap the tool against the side of the bowl to let the excess drip off. The coconut oil ensures the coating stays thin and even rather than gloopy.
- Place the coated truffles back on the parchment paper. While the chocolate is still wet, press one fresh blueberry firmly into the top center of each truffle.
- Place the blueberry preserves in a small saucepan or microwave-safe dish. Heat until liquid, then strain through a fine-mesh sieve to remove skins. Using a spoon, carefully pour the warm syrup directly over the top blueberry, allowing it to bleed down the sides in the specific “streaked” pattern shown in the image.
- Chill for 20 minutes to set the shell and the glaze before serving.
Notes
- Ensure the centers are frozen for at least 45 minutes before dipping to prevent melting. Use 50 percent power when microwaving white chocolate to avoid burning.