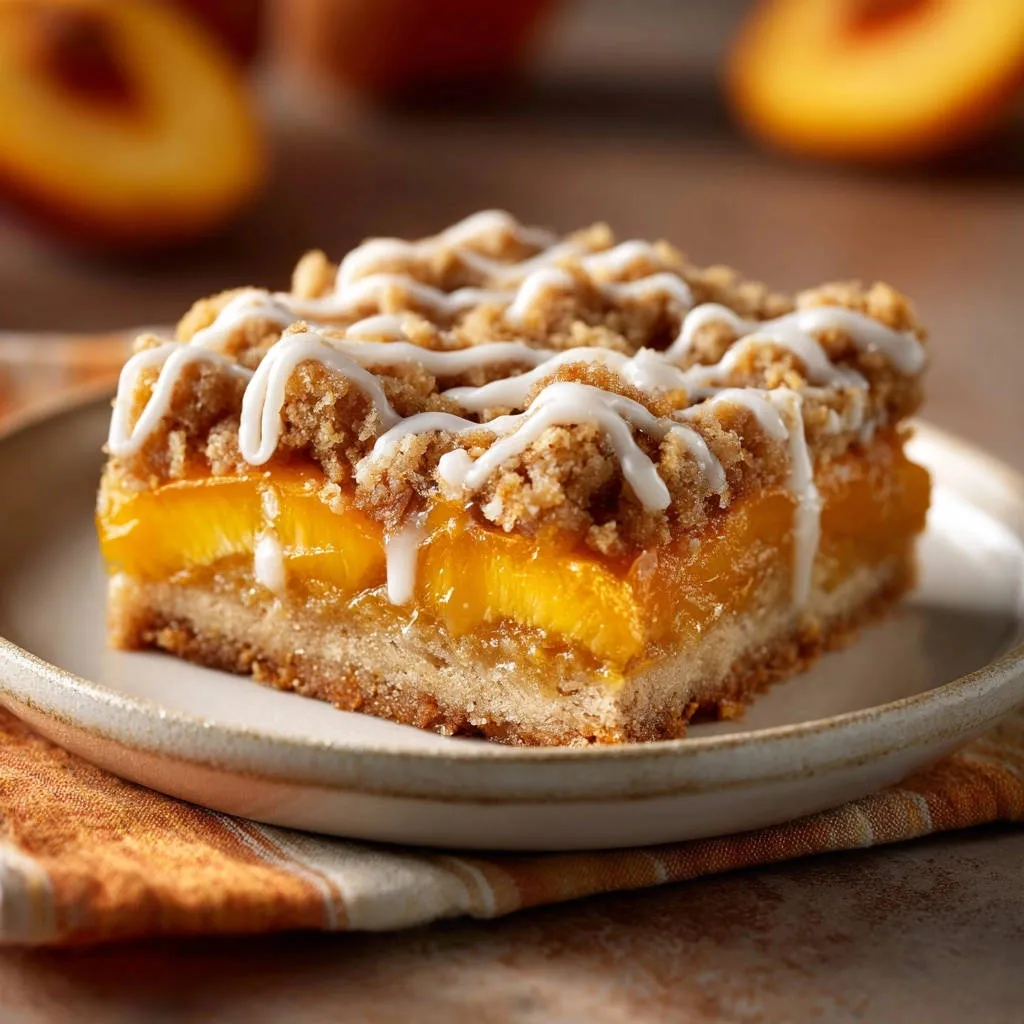
There’s nothing quite like biting into a golden, crumbly bar, only to be met with a disappointing, soggy bottom. I’ve been there, but after countless batches, I’ve perfected the ultimate recipe for Perfect Peach Crumble Bars that banishes sogginess forever.
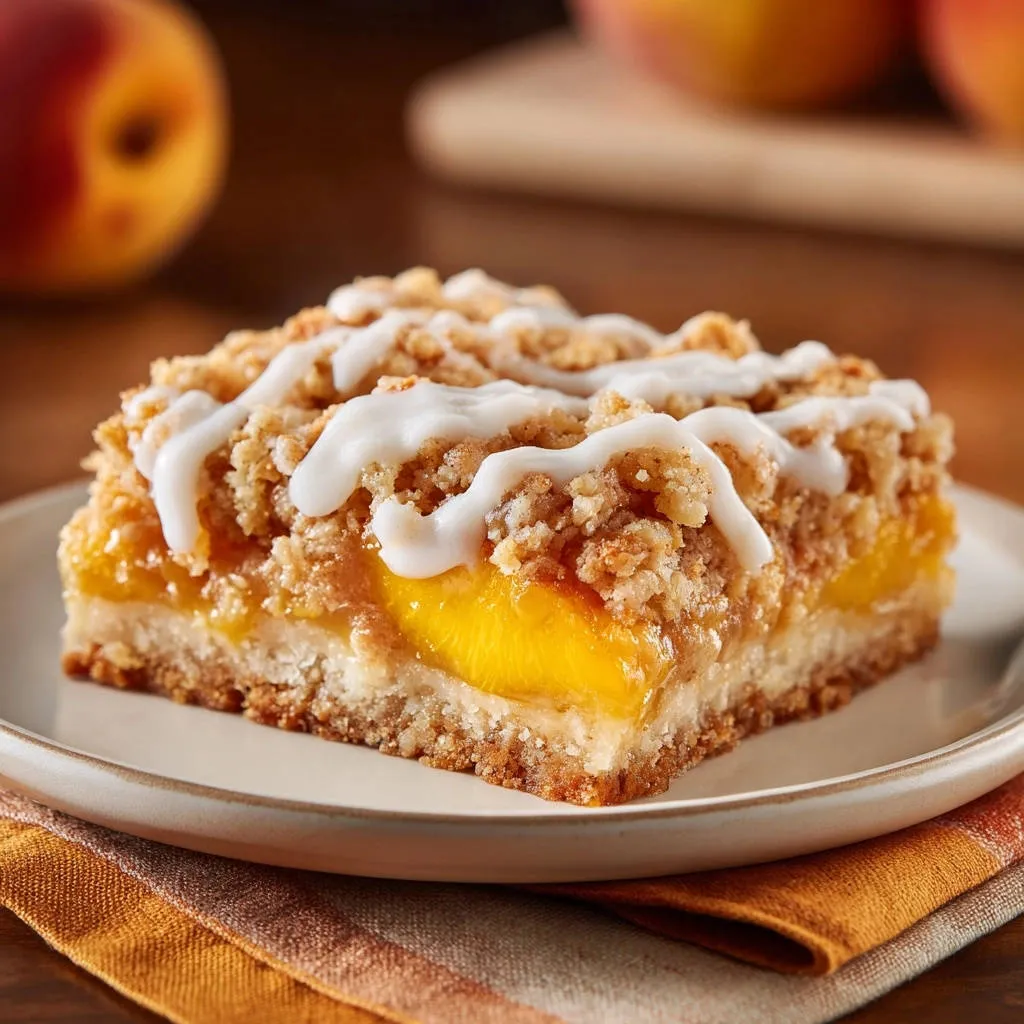
This recipe ensures a remarkably firm, buttery crust that beautifully supports a luscious, sweet peach filling and a crisp, irresistible streusel topping. Get ready to bake a batch that truly impresses!
Why This Perfect Peach Crumble Bars Recipe Is Your New Favorite
This recipe isn’t just another dessert; it’s a testament to simple techniques solving common baking woes.
Our unique “anti-soggy bottom” method ensures every bite is a delightful combination of textures, from the sturdy crust to the juicy peaches.
You’ll enjoy bars that hold their shape beautifully, making them ideal for gatherings or a satisfying treat anytime. The blend of sweet peaches with the spiced crumble creates an unforgettable flavor.
The Essential Ingredients for Irresistible Peach Crumble Bars
High-quality ingredients are the foundation of any great dessert. Here’s what you’ll need and why each element is crucial for your perfect peach crumble bars.
Building the Buttery Base & Crumble
Unsalted Butter: Using cold, cubed butter is paramount. It creates pockets of fat that steam during baking, yielding a tender, flaky crust and a crumbly streusel.
All-Purpose Flour: This provides the necessary structure for both the sturdy base and the delightful crumble topping.
Granulated Sugar: Sweetens the crust and topping, helping them achieve a golden color and a pleasant crispness.
Salt: A pinch of salt balances the sweetness and enhances all the flavors in the crust, making it taste richer.
Ground Cinnamon: This warm spice is added to the crumble topping, providing a comforting aroma and classic flavor pairing with peaches.
Baking Powder: A small amount in the crust helps it rise slightly and ensures a tender, less dense texture.
Luscious Peach Filling Essentials
Sliced Peaches: Fresh, ripe peaches are ideal for the best flavor and texture. If using frozen, ensure they are fully thawed and well-drained to prevent excess moisture.
Granulated Sugar: Sweetens the peaches, drawing out their natural juices and creating a syrupy consistency.
Cornstarch: This is a crucial thickening agent. It prevents the peach filling from becoming too watery, which is key to avoiding a soggy crust.
Fresh Lemon Juice (Optional): A splash brightens the peach flavor, adding a subtle tang that cuts through the sweetness.
The Drizzle of Sweet Perfection
Powdered Sugar: The base for our simple, elegant glaze. Its fine texture creates a smooth finish.
Milk (or Water): Used to adjust the consistency of the glaze. Start with a little and add more slowly until you reach a smooth, drizzleable state.
Vanilla Extract: Adds a hint of warmth and classic sweetness to the glaze, complementing the fruit and crumble.
Tools for Your Baking Success
Having the right tools makes the baking process smooth and enjoyable, ensuring consistent results every time.
9×13 Inch Baking Pan: The standard size for these bars, ensuring proper thickness and baking time. A light-colored pan is best for even browning.
Parchment Paper: Absolutely essential for easy removal and clean up. Ensure you leave an overhang to lift the bars out effortlessly.
Large Mixing Bowls: You’ll need at least two: one for the crust/crumble and another for the peach filling.
Pastry Blender (or Fork/Fingertips/Food Processor): For cutting the cold butter into the flour mixture, crucial for a tender crumble.
Wire Rack: Necessary for cooling the bars completely, which is vital for setting their structure and ensuring the glaze adheres properly.
Crafting Your Perfect Peach Crumble Bars: Step-by-Step Guide
Follow these steps closely, paying special attention to the details that ensure a non-soggy, perfectly set bar.
- Prepare Your Pan & Preheat Oven:
Preheat your oven to 375°F (190°C). Line a 9×13 inch baking pan with parchment paper, leaving a generous overhang on the sides. This overhang is your secret weapon for lifting the entire slab of bars out easily after cooling.
- Mix the Crust & Crumble Base:
In a large bowl, combine 1½ cups of the all-purpose flour, ½ cup of the granulated sugar, the salt, and the baking powder. Add the cold, cubed butter.
Use a pastry blender, your fingertips, or a food processor to cut the butter into the dry ingredients until the mixture resembles coarse crumbs. Avoid overworking the dough, as this can make the crust tough.
- Pressing the Firm Crust:
Take about two-thirds of this mixture and press it evenly into the bottom of your prepared baking pan. This step is crucial: use your hands or the bottom of a flat glass to press the mixture down very firmly and compactly.
A dense, well-compacted base is the first line of defense against a soggy bottom, creating a solid foundation for the juicy peaches.
- The Anti-Soggy Secret: Par-Bake the Crust:
Bake the pressed crust for 15 minutes, or until it’s lightly golden around the edges. This par-baking step is a game-changer!
It helps dry out the crust and forms a protective barrier, preventing the peach juices from seeping in and making it mushy. Proceed with the filling while the crust bakes.
- Prepare the Crumble Topping:
To the remaining one-third of the crust mixture, add the remaining ¾ cup all-purpose flour, ½ cup granulated sugar, and the cinnamon. Mix gently with a fork until well combined and crumbly.
Ensure the mixture remains loose and crumbly for that signature streusel texture. Set this aside until needed.
- Assemble the Peach Filling:
In a medium bowl, gently combine the sliced peaches, ¼ cup granulated sugar, cornstarch, and lemon juice (if using).
The cornstarch will work its magic during baking, thickening the peach juices and further preventing any bottom crust sogginess.
- Layering for Perfection:
Once the crust is par-baked and removed from the oven, carefully spread the peach filling evenly over the still-warm crust.
Then, evenly sprinkle the prepared crumble topping over the peaches. Try to distribute it uniformly for consistent texture and flavor in every bite.
- Baking to Golden Bliss:
Return the pan to the oven and bake for an additional 35-45 minutes. Look for the crumble topping to be golden brown and the peach filling visibly bubbly around the edges.
Bubbly fruit indicates the cornstarch has activated and the filling is properly cooked through.
- Cooling for Optimal Set:
Remove the pan from the oven and, this is critical, let the bars cool completely in the pan on a wire rack before attempting to glaze or cut them.
Full cooling allows the crust to firm up, the filling to set, and the flavors to meld, ensuring your bars hold their shape perfectly and are easy to slice.
- Whisk Up the Glaze:
In a small bowl, whisk together the powdered sugar, milk, and vanilla extract until smooth and drizzleable. Adjust milk quantity slightly to achieve your desired consistency.
- Drizzle & Serve:
Once the bars are completely cool to the touch, drizzle the glaze evenly over the top. Use the parchment paper overhangs to lift the whole slab out of the pan onto a cutting board.
Cut into squares and serve your beautiful, non-soggy, Perfect Peach Crumble Bars!
Pro Tips for Crumble Bar Mastery
Elevate your baking with these expert nuances, ensuring every batch of peach crumble bars is a resounding success.
Achieving That Perfect Firm Crust
Always use cold butter when making the crust and crumble. This prevents the butter from melting too quickly, resulting in a tender, flaky texture after baking.
Press the crust down very, very firmly. The denser the crust, the less likely it is to absorb moisture from the fruit, guaranteeing a crisp base. Don’t be shy with your pressing power!
The par-baking step is non-negotiable. It pre-bakes and sets the crust, creating an invaluable barrier against the juicy peach filling. This is the ultimate defense against sogginess.
Mastering the Peach Filling
If using fresh peaches, ensure they are ripe but still firm. Overripe peaches can release too much liquid, while underripe ones lack flavor.
For frozen peaches, thaw them thoroughly and then drain them exceptionally well. Excess water is the enemy of a firm crust.
Don’t skip or skimp on the cornstarch. It’s the thickening agent that turns watery peach juices into a luscious, jam-like filling that adheres beautifully and prevents a runny mess.
Cooling for Optimal Texture and Structure
Patience is key! Allowing the bars to cool completely in the pan for several hours (or even overnight) allows the cornstarch to fully set the peach filling and the butter in the crust to re-solidify.
Cutting warm bars will result in a messy, crumbly outcome. A fully cooled bar slices cleanly and holds its form perfectly.
Serving Suggestions: The Perfect Accompaniments
These peach crumble bars are heavenly on their own, but a simple accompaniment can elevate the experience even further.
Serve them warm with a scoop of vanilla bean ice cream that slowly melts into the cracks of the crumble.
A dollop of freshly whipped cream adds a light, airy contrast to the rich fruit and buttery crust.
For a rustic touch, simply dust them with a little extra powdered sugar just before serving.
Storage & Make-Ahead Magic
Planning ahead makes entertaining a breeze, and these bars store beautifully.
Keeping Your Bars Fresh
Store fully cooled and glazed bars in an airtight container at room temperature for up to 3-4 days. For longer storage, refrigerate them for up to a week.
For extended freshness, freeze unglazed bars tightly wrapped in plastic wrap and then foil for up to 2-3 months. Thaw at room temperature and then glaze before serving.
Can You Make Them Ahead?
Absolutely! You can prepare the crust and crumble mixture a day in advance and store it in the refrigerator. Just remember to add the extra flour, sugar, and cinnamon to the crumble portion right before baking.
The peach filling can also be assembled a few hours prior to baking; just keep it covered in the refrigerator.
Troubleshooting Common Crumble Bar Questions
Even with the best intentions, sometimes things go awry. Here’s how to fix common issues.
Why is My Crust Still Soggy?
A soggy crust typically results from insufficient par-baking or not pressing the crust firmly enough. Ensure your par-bake is truly golden, and compact that base as much as possible before baking.
It could also mean the peaches weren’t drained well enough or the cornstarch didn’t fully activate, allowing too much moisture to seep into the crust.
My Crumble Topping Isn’t Crispy!
If your crumble is soft, it might not have baked long enough, or the ratio of butter to dry ingredients might be slightly off. Ensure the oven temperature is accurate and bake until truly golden brown.
Sometimes, overcrowding the topping can prevent air circulation, leading to a softer crumble. Spread it out evenly.
Peaches Too Runny or Dry?
If your peaches are too runny, it’s likely due to not enough cornstarch or using overly juicy fruit that wasn’t adequately drained. For future batches, ensure you’re using the specified amount of cornstarch and draining frozen peaches thoroughly.
If they’re too dry, your peaches might have been underripe or you might have used less fruit than specified. Adjust fruit quantity and ripeness for next time.
My Bars Are Crumbly When Cut!
The most common reason for crumbly bars is cutting them before they are completely cool. The filling needs ample time to set and the buttery crust to firm up.
Always allow several hours of cooling, preferably on a wire rack, before attempting to slice into perfect squares.
Your Burning Questions Answered: FAQ
Let’s address some frequently asked questions about making these delicious peach crumble bars.
Can I Use Frozen Peaches?
Yes, absolutely! Just make sure to thaw them completely and drain them exceptionally well. Excess moisture from frozen fruit is a common culprit for a soggy bottom crust. You could also explore other fruit options, perhaps even trying our perfect apple crumble cream pie for another fruity delight.
Gluten-Free & Dairy-Free Substitutions?
For gluten-free, you can substitute a 1:1 gluten-free all-purpose flour blend. For dairy-free, use a good quality plant-based butter substitute and plant-based milk for the glaze. Results may vary slightly in texture, but they can still be delicious.
How Long Do These Bars Last?
These bars are best enjoyed within 3-4 days at room temperature, or up to a week if refrigerated in an airtight container. Freezing unglazed bars extends their life for up to 2-3 months.
Can I Use Other Fruits?
Yes! This recipe is incredibly versatile. Berries (strawberries, raspberries, blueberries), apples (sliced thin, like for our homestyle apple crumble bars), or a mix of fruits work beautifully. Just adjust sugar and cornstarch based on the fruit’s sweetness and water content.
What if I Don’t Have a Pastry Blender?
No pastry blender? No problem! You can use two forks to cut in the butter, or even your fingertips, rubbing the butter into the flour until coarse crumbs form. A food processor with a pulse setting also works wonderfully for this task.
Ready to Bake? Share Your Perfect Peach Crumble Bars Masterpiece!
Now that you have all the secrets to crafting the ultimate non-soggy, flavorful Perfect Peach Crumble Bars, it’s time to get baking!
I can’t wait for you to experience the joy of a perfectly balanced, utterly irresistible dessert. Don’t forget to share your creations and tell me how much you loved them!
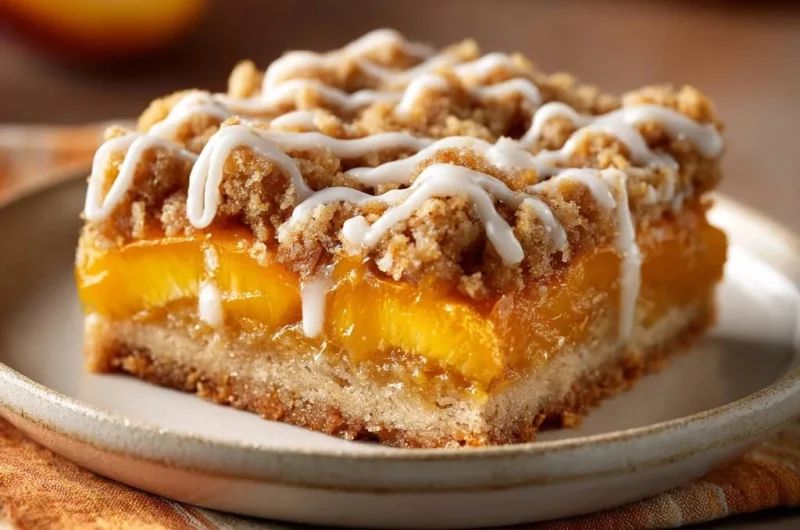
Perfect Peach Crumble Bars
Course: DessertCuisine: American CuisineDifficulty: easy4
12-16 bars25
minutes50
minutes120
minutesAmerican Cuisine
Ingredients
For the Crust and Crumble:
1 cup (2 sticks) unsalted butter, cold and cut into cubes
2 1/4 cups all-purpose flour, divided
1 cup granulated sugar, divided
1/2 teaspoon salt
1 teaspoon ground cinnamon
1/2 teaspoon baking powder
For the Peach Filling:
4 cups sliced peaches (fresh or frozen, thawed and drained)
1/4 cup granulated sugar
1 tablespoon cornstarch
1 teaspoon fresh lemon juice (optional, for brightness)
For the Glaze:
1 cup powdered sugar
2 tablespoons milk (or water)
1/2 teaspoon vanilla extract
Directions
- Preheat your oven to 375 degrees Fahrenheit (190 degrees Celsius). Line a 9×13 inch baking pan with parchment paper, leaving an overhang on the sides for easy removal later.
- For the Crust and Crumble (The Anti-Soggy Bottom begins here!): In a large bowl, combine 1 1/2 cups of the all-purpose flour, 1/2 cup of the granulated sugar, the salt, and the baking powder. Add the cold, cubed butter. Using a pastry blender, your fingertips, or a food processor, cut the butter into the flour mixture until it resembles coarse crumbs.
- Press about two-thirds of this mixture evenly into the bottom of your prepared baking pan. Press it down very firmly with your hands or the bottom of a glass to create a compact base. This firm pressing is crucial for a non-soggy crust.
- Par-bake the Crust: Bake the pressed crust for 15 minutes, or until it’s lightly golden. This step helps dry out the crust and creates a barrier against the fruit juices, preventing sogginess. While the crust bakes, proceed with the filling.
- Prepare the Crumble Topping: To the remaining one-third of the crust mixture, add the remaining 3/4 cup all-purpose flour, 1/2 cup granulated sugar, and the cinnamon. Mix gently with a fork until well combined and crumbly. Set aside.
- Prepare the Peach Filling: In a medium bowl, gently combine the sliced peaches, 1/4 cup granulated sugar, cornstarch, and lemon juice (if using). The cornstarch will help thicken the peach juices, another key step in preventing a soggy bottom.
- Assemble the Bars: Once the crust is par-baked, carefully spread the peach filling evenly over the hot crust. Then, sprinkle the crumble topping evenly over the peaches.
- Bake for an additional 35-45 minutes, or until the crumble topping is golden brown and the peach filling is bubbly.
- Remove the pan from the oven and let the bars cool completely in the pan on a wire rack before glazing. Cooling completely is important for the bars to set and for the glaze to adhere properly.
- Prepare the Glaze: In a small bowl, whisk together the powdered sugar, milk, and vanilla extract until smooth and drizzleable.
- Once the bars are completely cool, drizzle the glaze over the top. Cut into squares and serve.
Notes
- Cooling completely is crucial for the bars to set and for the glaze to adhere properly, ensuring the perfect texture.