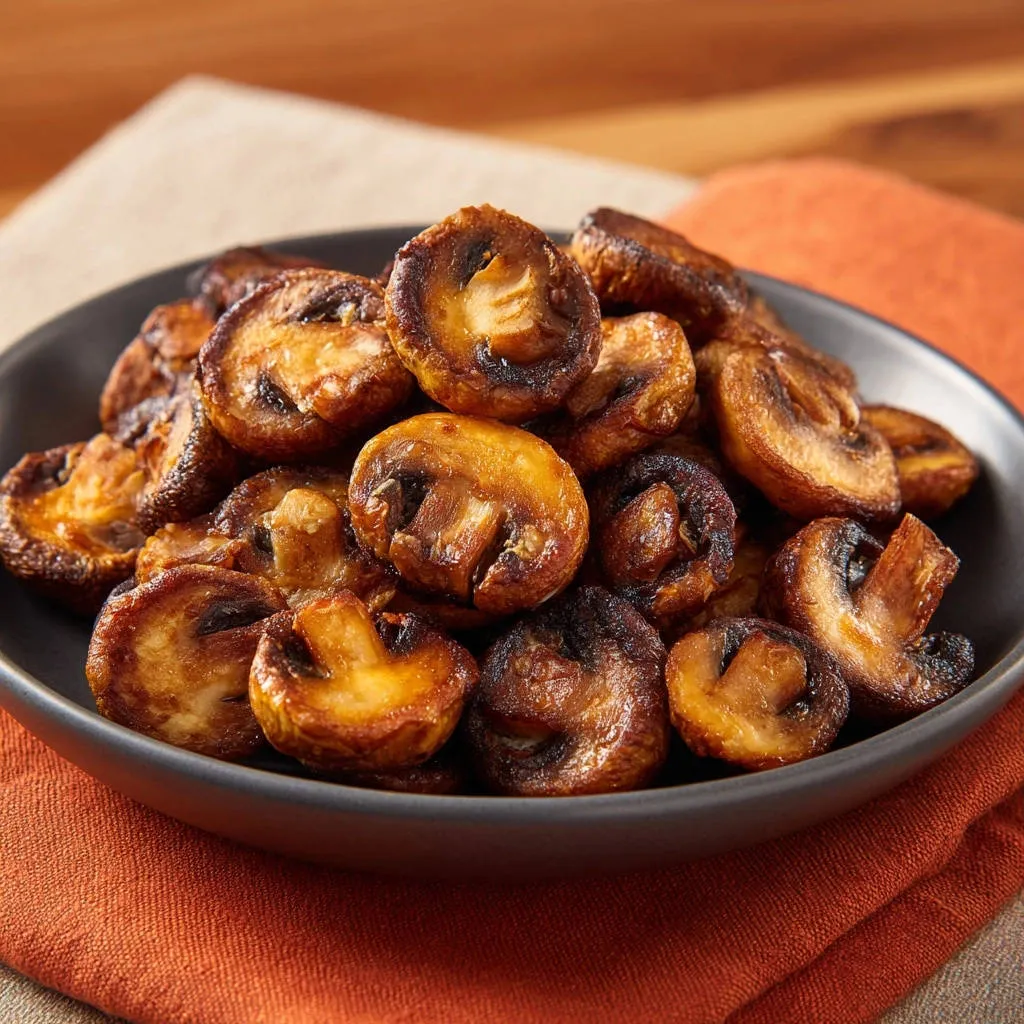
For years, I struggled to achieve those coveted, deeply browned mushrooms, often ending up with a sad, watery mess instead of a golden, flavorful side. It was a persistent kitchen challenge! However, after much experimentation, I finally cracked the code, and now I consistently make Perfectly Browned Garlic Mushrooms that are rich, savory, and never soggy.
This recipe isn’t just about cooking mushrooms; it’s about mastering a technique that transforms them into a culinary delight. You’ll discover the simple yet critical steps that ensure every bite is packed with incredible umami flavor and a satisfying texture.
The Secret to Irresistibly Golden Mushrooms: Why This Recipe Works
Achieving truly exceptional sautéed mushrooms goes beyond just tossing them in a hot pan. This recipe focuses on scientific principles and precise techniques to maximize flavor and texture.
Say Goodbye to Watery Mushrooms: The “Dry Cook” Philosophy
The number one enemy of perfectly browned mushrooms is excess moisture. Water creates steam, preventing the mushroom’s surface from ever reaching the high temperatures needed for browning.
Our “dry cook” philosophy starts with carefully wiping the mushrooms, ensuring their surfaces are ready to sear. This initial moisture management is crucial for success.
The Magic of “No Stir” Sautéing: Building that Golden Crust
The initial undisturbed cooking period is where the magic truly happens. It allows residual moisture to evaporate first, paving the way for the Maillard reaction.
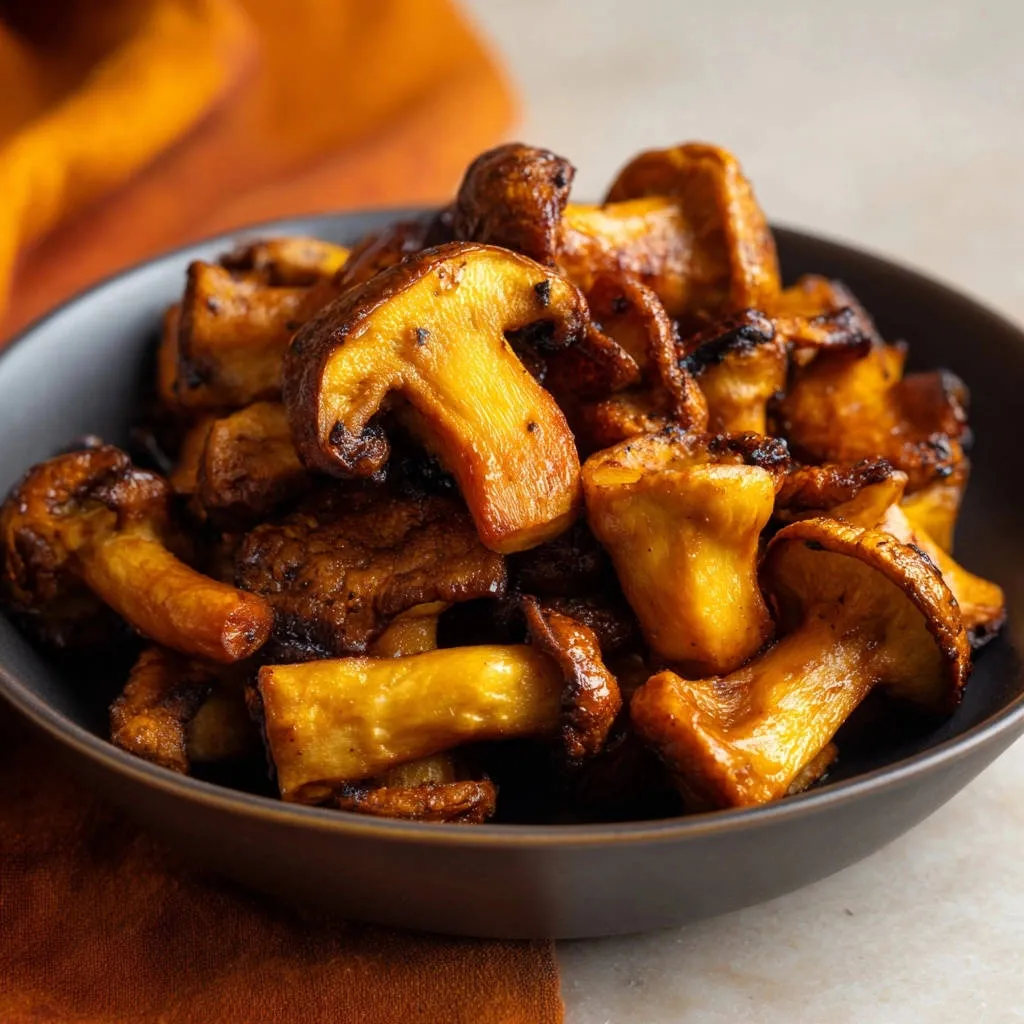
This chemical reaction, responsible for browning and enhanced flavors, gives your mushrooms that beautiful golden-brown crust and complex taste.
Unlocking Deep Umami Flavor, Not Just Color
Proper browning doesn’t just look good; it fundamentally changes the mushroom’s flavor profile. The Maillard reaction concentrates the natural glutamates in the mushrooms, amplifying their savory, umami notes.
This process results in a far richer, more satisfying taste experience than simply steaming them. You’re not just cooking; you’re developing flavor.
Gathering Your Essentials: Ingredients for Sautéed Perfection
Quality ingredients are the foundation of any great dish, and these Perfectly Browned Garlic Mushrooms are no exception.
The Star: Choosing the Right Mushrooms
Cremini or Button Mushrooms: Both varieties work wonderfully for this recipe.
Cremini mushrooms (baby bellas) offer a slightly deeper, earthier flavor, while button mushrooms are milder.
Selection: Look for mushrooms that are firm, free of blemishes, and have a fresh, earthy scent. Avoid any that appear slimy or shriveled.
Sizing: Aim for uniform pieces, quartering or halving larger mushrooms. This consistency ensures even cooking and browning throughout the batch.
Flavor Foundation: Oil & Aromatics
Olive Oil: A good quality olive oil is essential for both flavor and facilitating the browning process.
It acts as a heat conductor, ensuring even searing across the pan.
Choose an olive oil with a medium-high smoke point to withstand the heat required for proper browning.
Fresh Garlic: Minced fresh garlic adds an irreplaceable aromatic punch.
The pungent notes of fresh garlic perfectly complement the earthy mushrooms.
Ensure it’s finely minced so it distributes evenly and infuses maximum flavor in a short cooking time.
Seasoning for Maximum Impact
Salt and Black Pepper: These simple seasonings are crucial for enhancing the natural flavors of the mushrooms.
Salt helps to draw out and highlight the mushroom’s inherent umami, while pepper adds a subtle warmth.
Timing of addition is key: we add them at the end to prevent moisture release during browning.
Essential Kitchen Tools for Mushroom Mastery
Having the right tools makes all the difference in achieving those desirable golden-brown mushrooms.
The Mighty Skillet: Cast Iron vs. Stainless Steel
Heavy-Bottomed Skillet: The most crucial piece of equipment is a large, heavy-bottomed skillet.
A heavy pan maintains consistent, high heat, which is vital for proper searing and preventing temperature drops when food is added.
Cast iron skillets are exceptional for this recipe. Their superior heat retention and even heat distribution create an ideal surface for achieving a deep, caramelized crust.
A good quality stainless steel pan with a heavy base also works well, offering reliability and easy cleanup.
Prep Tools for Efficiency
Cutting Board and Sharp Knife: These are essential for safely and efficiently preparing your mushrooms.
Paper Towels: An often-overlooked but critical tool for thoroughly wiping your mushrooms dry.
The Browning Blueprint: Step-by-Step to Flawless Garlic Mushrooms
Follow these detailed steps closely to master the art of making Perfectly Browned Garlic Mushrooms every time.
Prep: The Dry Mushroom Mandate
Wipe, Don’t Wash: Begin by thoroughly wiping each mushroom clean with a damp paper towel to remove any dirt. This is the single most critical step to avoid watery mushrooms, as washing can introduce too much moisture.
Uniform Sizing: Next, slice or quarter your larger mushrooms so they are roughly uniform in size. This ensures that every piece cooks evenly and achieves consistent golden-brown perfection.
Heating the Pan to Perfection
Hot Pan, Hot Oil: Place a large, heavy-bottomed skillet (a cast iron pan is highly recommended for superior results) over medium-high heat. Add the specified amount of olive oil and allow it to get very hot, almost shimmering, before you introduce the mushrooms. The correct initial pan temperature is paramount for immediate searing and preventing sticking.
The “Don’t Overcrowd” Rule
Single Layer is Key: Carefully add the prepared mushrooms to the screaming hot pan in a single layer. This is non-negotiable! If your pan isn’t large enough to accommodate them in one layer, cook the mushrooms in two or even three separate batches. Overcrowding the pan drastically lowers its temperature, leading to steaming instead of proper browning and caramelization.
For another delightful way to enjoy sautéed mushrooms, try this creamy mushroom pasta.
The Golden Rest Period (Resist the Urge to Stir!)
Hands Off! This is the golden rule for Perfectly Browned Garlic Mushrooms. Let the mushrooms cook undisturbed for a crucial 4-5 minutes. During this vital phase, their internal water will release and quickly evaporate, and the bottom sides will develop that irresistible golden-brown crust. You’ll visibly notice them browning significantly, so trust the process!
Stirring Towards Caramelization
Turn and Continue: After the initial 4-5 minutes, give the mushrooms a good stir, turning them over to expose other sides to the hot pan. Continue cooking for another 3-5 minutes, stirring only occasionally. This allows all surfaces to achieve that desirable deep brown color and rich caramelized texture, deepening their umami flavor.
Infusing with Garlic
Fragrant Addition: Once the mushrooms are beautifully browned, add the minced garlic to the pan. Cook for just 1 minute more, stirring constantly, until the garlic becomes wonderfully fragrant. Be extra vigilant here, as garlic burns very quickly and can turn bitter if overcooked.
Final Seasoning & Serve
Season Off Heat: Immediately remove the pan from the heat. Stir in the salt and freshly ground black pepper. Seasoning off the heat helps the mushrooms retain their optimal texture and prevents the salt from prematurely drawing out more moisture, which could hinder crispness.
Immediate Enjoyment: Serve your Perfectly Browned Garlic Mushrooms immediately. They make a fantastic side dish for nearly any meal, or a flavorful addition to various recipes. They’re also an excellent accompaniment to a comforting classic meatloaf.
Chef’s Secrets: Elevating Your Garlic Mushroom Game
Take your Perfectly Browned Garlic Mushrooms from great to extraordinary with these expert tips.
Maximizing Mushroom Flavor: Beyond the Basics
A Splash of Acidity: Just before serving, a tiny splash of balsamic vinegar or lemon juice can brighten and enhance the mushroom’s savory notes, adding complexity.
Finishing with Butter: Stir in a knob of unsalted butter at the very end, just as you remove the pan from the heat. It adds a luxurious richness and a beautiful glossy finish.
Spice & Herb Variations
Fresh Herbs: Incorporate fresh herbs like chopped thyme, rosemary, or parsley during the last minute of cooking, alongside the garlic, for an aromatic boost. Fresh herbs add a vibrant lift to the rich mushrooms.
A Hint of Heat: For those who enjoy a little kick, a pinch of red pepper flakes added with the garlic provides a subtle warmth without overpowering the mushroom flavor.
Adding a Touch of Umami
Soy Sauce or Tamari: A small dash (1/2 to 1 teaspoon) of soy sauce or tamari (for gluten-free) added during the final minute of cooking will deepen the mushroom’s umami profile significantly. This really makes the savory notes pop!
Troubleshooting Common Mushroom Mishaps
Even seasoned cooks can encounter issues. Here’s how to tackle common problems when making Perfectly Browned Garlic Mushrooms.
Why Are My Mushrooms Watery and Gray?
This is the most common issue, usually stemming from too much moisture. The culprits are typically not wiping the mushrooms dry enough, overcrowding the pan, or not using a hot enough pan.
Solution: Ensure mushrooms are meticulously wiped dry. Always cook in batches if necessary, allowing enough space for steam to escape. Make sure your skillet is properly preheated to medium-high before adding the mushrooms.
My Garlic Burned! What Went Wrong?
Garlic has natural sugars and burns very quickly, turning bitter. This often happens if it’s added too early or cooked over excessively high heat without constant stirring.
Solution: Always add minced garlic in the final minute of cooking, after the mushrooms are browned. Keep the heat moderate during this brief step and stir constantly to prevent it from scorching.
No Browning Despite High Heat?
If your mushrooms aren’t browning, it could be due to a pan that doesn’t retain heat well (too thin), too much oil (which lowers the pan’s effective temperature), or insufficient undisturbed cooking time.
Solution: Use a heavy-bottomed pan, ideally cast iron, which maintains consistent heat. Ensure you’re not using excessive oil; just enough to coat the pan. And critically, allow the mushrooms that initial 4-5 minutes of undisturbed cooking for the Maillard reaction to properly occur.
Pairing & Presentation: Serving Your Perfectly Browned Garlic Mushrooms
These flavorful, Perfectly Browned Garlic Mushrooms are incredibly versatile, making them a fantastic addition to almost any meal.
Versatile Serving Suggestions
Side Dish: They are an elegant and delicious side to roasted chicken, pan-seared steak, or a simple grilled fish.
Pasta & Grains: Stir them into creamy pasta dishes, risottos, or grain bowls for added depth and texture.
Breakfast & Brunch: Elevate your scrambled eggs, omelets, or avocado toast with a generous serving of these savory mushrooms.
Sandwiches & Tacos: Use them as a flavorful filling for gourmet grilled cheese, a hearty sandwich, or even vegetarian tacos.
Storage & Reheating Best Practices
Storage: Store any leftover Perfectly Browned Garlic Mushrooms in an airtight container in the refrigerator for up to 3-4 days.
Reheating: For the best results, reheat them in a dry skillet over medium heat, stirring occasionally, until warmed through and slightly re-crisped. Avoid the microwave if possible, as it can make them soft and watery.
Make-Ahead Tips for Easy Meal Prep
While best enjoyed fresh, you can save time by performing some prep steps in advance. Wipe and slice your mushrooms the day before, storing them in a paper towel-lined container in the refrigerator.
This ensures they stay dry and ready for a quick sauté when you’re ready to cook.
Your Burning Questions Answered: FAQ on Sautéed Mushrooms
Can I use different types of mushrooms for this recipe?
Absolutely! While cremini and button mushrooms are ideal, you can experiment with others like shiitake, oyster, or sliced portobello. Just be mindful that cooking times might vary slightly due to differences in moisture content and thickness.
Is it really necessary to cook in batches if my pan isn’t large enough?
Yes, it is absolutely essential! Overcrowding the pan is the quickest way to end up with steamed, watery mushrooms instead of beautifully browned ones. Cooking in a single layer, even if it means multiple batches, ensures consistent high heat and optimal browning.
Can I skip the olive oil or use butter instead?
Olive oil is recommended for its higher smoke point, which is crucial for the high-heat browning needed. While butter can be used, it burns more easily. If you prefer a buttery flavor, use clarified butter or a mix of olive oil and butter, adding the butter towards the end of cooking.
How do I make this recipe vegan or dairy-free?
Good news – this recipe is already naturally vegan and dairy-free! It relies solely on olive oil and plant-based ingredients, making it suitable for a wide range of dietary needs without any modifications.
How long do Perfectly Browned Garlic Mushrooms last in the refrigerator?
When stored in an airtight container, these delicious sautéed mushrooms will remain fresh in the refrigerator for up to 3 to 4 days. They’re great for meal prepping!
Ready to Savor? Share Your Perfectly Browned Garlic Mushrooms!
You’ve mastered the art of making Perfectly Browned Garlic Mushrooms – a truly transformative skill for any home cook. Now that you’re armed with the secrets to achieving that coveted golden crust and rich, earthy flavor without the dreaded watery outcome, it’s time to share your culinary triumph! We’d love to see your creations and hear about how this recipe has changed your mushroom game. Don’t hesitate to comment below with your experiences or any delicious variations you’ve tried. Happy cooking!
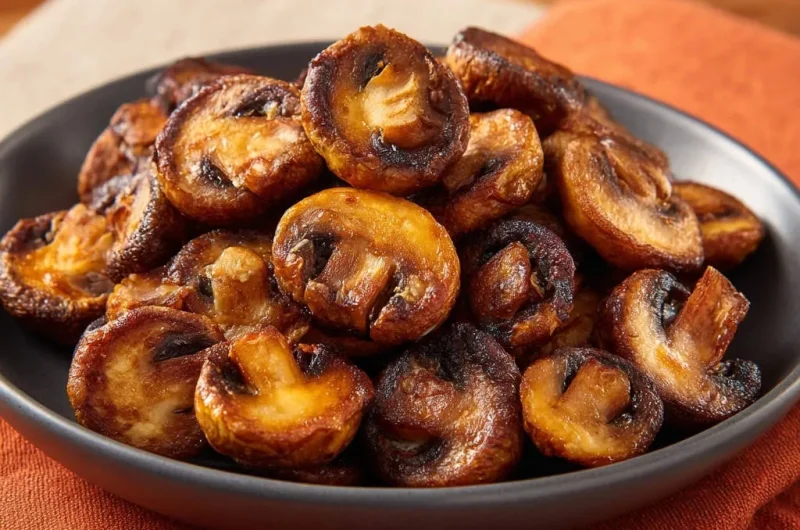
Garlic Mushrooms
Course: Side DishCuisine: AmericanDifficulty: easy4
servings10
minutes15
minutes120
kcal25
minutesSay goodbye to watery mushrooms! This recipe unlocks the simple, game-changing trick to achieve deeply browned, golden, and incredibly flavorful garlic mushrooms every single time. Perfect as a quick and delicious side dish.
Ingredients
1 pound cremini or button mushrooms, wiped clean and quartered or halved if large
2 tablespoons olive oil
2 cloves garlic, minced
1/2 teaspoon salt
1/4 teaspoon black pepper
Directions
- Ensure your mushrooms are dry. Instead of washing them, wipe each mushroom thoroughly with a damp paper towel to remove any dirt. This is critical for browning. Slice or quarter larger mushrooms so they are roughly uniform in size.
- Heat a large, heavy-bottomed skillet or cast iron pan over medium-high heat. Add the olive oil and let it get hot, almost shimmering.
- Add the mushrooms to the hot pan in a single layer. Do not overcrowd the pan. If necessary, cook them in two batches. This is the key to preventing them from steaming and becoming watery.
- Resist the urge to stir! Let the mushrooms cook undisturbed for 4-5 minutes. This allows the water to release and evaporate, and the bottom sides to develop that beautiful golden-brown crust. You’ll see them start to brown significantly.
- After 4-5 minutes, stir the mushrooms and continue cooking for another 3-5 minutes, stirring occasionally, until all sides are nicely browned and caramelized.
- Add the minced garlic to the pan and cook for 1 minute more, stirring constantly, until fragrant. Be careful not to burn the garlic.
- Remove the pan from the heat, then stir in the salt and black pepper.
- Serve immediately as a delicious side dish or addition to your favorite meals.
Notes
- Wiping mushrooms dry and not overcrowding the pan are critical for achieving perfect browning.