I remember the frustration of a once-promising cheese dip turning into a lumpy, separated mess – it’s truly disappointing when you’re aiming for that perfect appetizer. After countless tests and tweaks in my kitchen, I finally perfected the method for a consistently luscious, Silky Smooth Cheese Dip that truly lives up to its name. This recipe isn’t just about cheese; it’s about achieving an incredible, velvety texture and rich flavor every single time, making it the ultimate crowd-pleaser.
Why This Silky Smooth Cheese Dip Recipe is a Game-Changer
The “No More Lumps” Promise: Our Game-Changing Method
The core innovation in this recipe is the strategic use of cornstarch, which creates a protective barrier around each shred of cheese. This simple step prevents the cheese proteins from seizing up and clumping when exposed to heat, ensuring an emulsified and impeccably smooth result without fail.
Unforgettable Flavor and Dreamy Texture, Every Time
Beyond its lump-free consistency, this dip delivers a rich, savory depth that perfectly coats your palate. The careful balance of ingredients and precise cooking technique ensures a dreamy, velvety mouthfeel that is both indulgent and utterly satisfying.
Quick Prep, Impressive Results: Perfect for Any Occasion
Despite its gourmet-level texture and taste, this Silky Smooth Cheese Dip is surprisingly quick to prepare, making it an ideal choice for last-minute gatherings or a cozy night in. It’s an easy party appetizer that consistently impresses guests with minimal effort.
Crafting the Dream: Essential Ingredients for Your Silky Smooth Cheese Dip
The Star: Choosing Your Perfect Cheese (White Cheddar vs. Gruyere)
For this dip, an 8-ounce block of cheese is your foundation. White cheddar offers a sharp, familiar tang, while Gruyere provides a nutty, slightly sweet complexity that elevates the flavor profile. Both melt beautifully and contribute to a fantastic homemade cheese dip.
The Secret Weapon: Cornstarch for No-Fail Smoothness
One tablespoon of cornstarch is your anti-lump insurance. It evenly coats the shredded cheese, preventing separation and guaranteeing a luxuriously smooth, velvety cheese goodness.
Liquid Gold: Milk or Non-Alcoholic White Grape Juice?
One cup of milk creates a classic, creamy base with a mild, rich flavor. Alternatively, non-alcoholic white grape juice introduces a subtle sweetness and fruity note, adding an interesting layer of complexity to your dip.
Flavor Boosters: Salt and Pepper to Taste
A quarter teaspoon of black pepper adds a warm, subtle spice, and a pinch of salt brightens all the flavors. These simple seasonings enhance the overall profile, letting the cheese truly shine.
Serving Suggestion: The Best Bread for Dipping
Four cups of crusty bread, cubed and lightly toasted, are the perfect vehicle for this rich dip. The toasting adds a delightful crunch that contrasts beautifully with the dip’s creamy texture, making it an ideal side for any cheese melt.
Equipping Your Kitchen: Tools for Silky Smooth Cheese Dip Success
The Right Pot: Saucepan or Fondue Pot?
A small saucepan is excellent for stovetop preparation, allowing precise heat control. A small fondue pot is perfect for both preparation and keeping the dip warm throughout your gathering, ensuring continuous velvety cheese goodness.
Whisk vs. Wooden Spoon: Your Stirring Ally
A whisk is invaluable for initially combining ingredients and achieving that ultimate smooth consistency, effectively breaking up any potential lumps. A wooden spoon can also work, particularly for the gentle stirring required once the cheese begins to melt.
Beyond the Basics: Other Helpful Gadgets
If you’re not using pre-shredded cheese, a good box grater or food processor with a grating attachment will be essential for efficient preparation. A heat-proof spatula can also be helpful for scraping down the sides of the pot to ensure all the cheese melts evenly.
Your Path to Silky Smooth Cheese Dip Perfection: A Step-by-Step Guide
- Prep for Success: Cheese, Bread, and Readiness
Start by preparing your ingredients. If your cheese isn’t pre-shredded, grate it yourself for optimal melting. Then, cube your crusty bread into bite-sized pieces and lightly toast them in a dry pan or oven until golden brown; this step adds crucial texture and prevents the bread from becoming soggy.
- The Cornstarch Coating: Preventing Lumps Before They Start
In a medium bowl, combine the shredded cheese with the cornstarch. Toss thoroughly until every piece of cheese is lightly coated. This seemingly small action is the secret to a no-lump dip recipe, preventing the cheese from clumping and separating later.
- Gentle Heat: Simmering Your Liquid Base
Pour your chosen liquid-milk or non-alcoholic white grape juice-into a small saucepan or fondue pot. Heat it over medium-low heat until it just begins to gently simmer, showing tiny bubbles around the edges. Crucially, do not allow it to come to a rolling boil, as excessive heat can scorch the dairy and lead to separation.
- The Art of Gradual Addition: Melting Cheese Like a Pro
With the liquid gently simmering, begin adding the cornstarch-coated cheese, a small handful at a time. Stir constantly with a whisk or wooden spoon, ensuring each addition is fully melted and smoothly incorporated before adding the next. Maintain low heat throughout this process to prevent scorching or the cheese becoming oily.
- Flavor Finale: Seasoning Your Perfect Dip
Once all the cheese has melted and your dip is entirely smooth and creamy, remove it from the heat. Stir in the black pepper and a pinch of salt to taste. A quick taste test at this stage allows you to adjust the seasoning for your perfect cheese melt.
- Serve Hot: Enjoying Your Creation
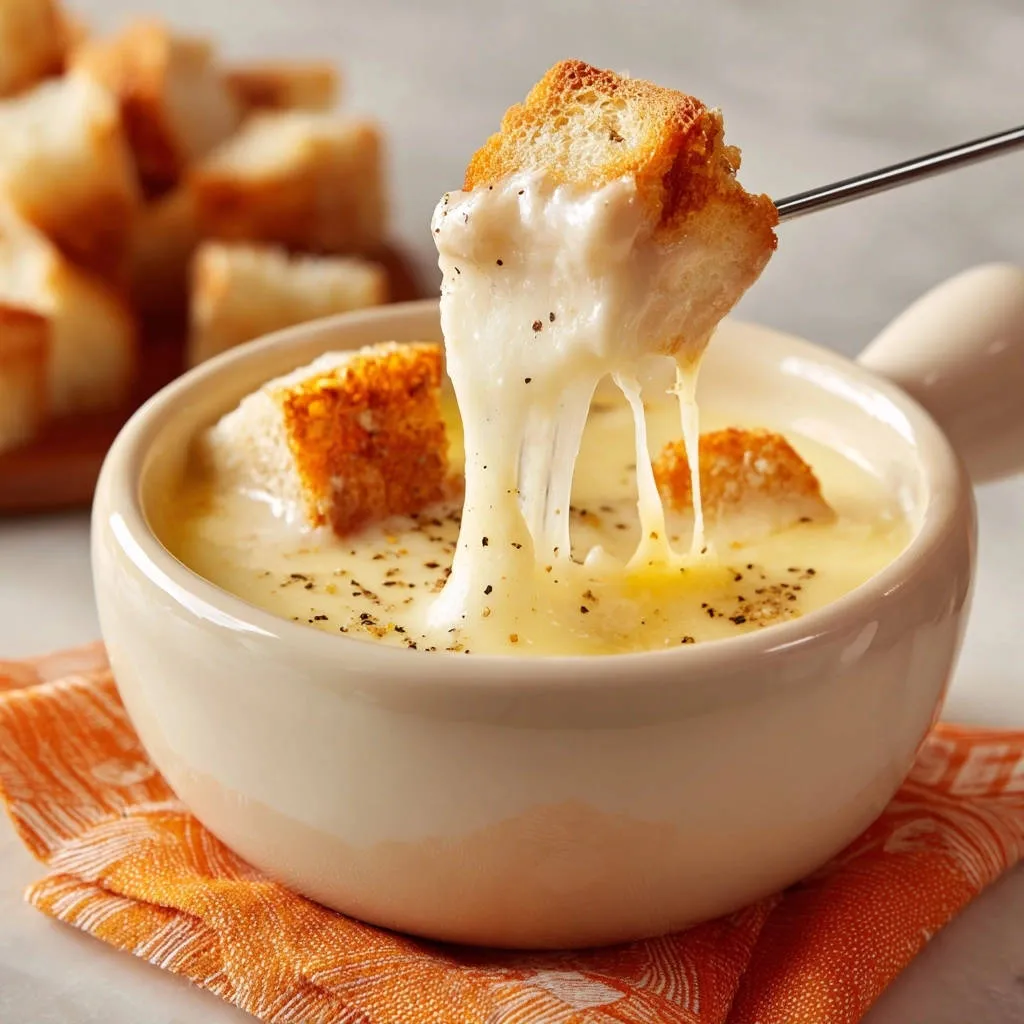
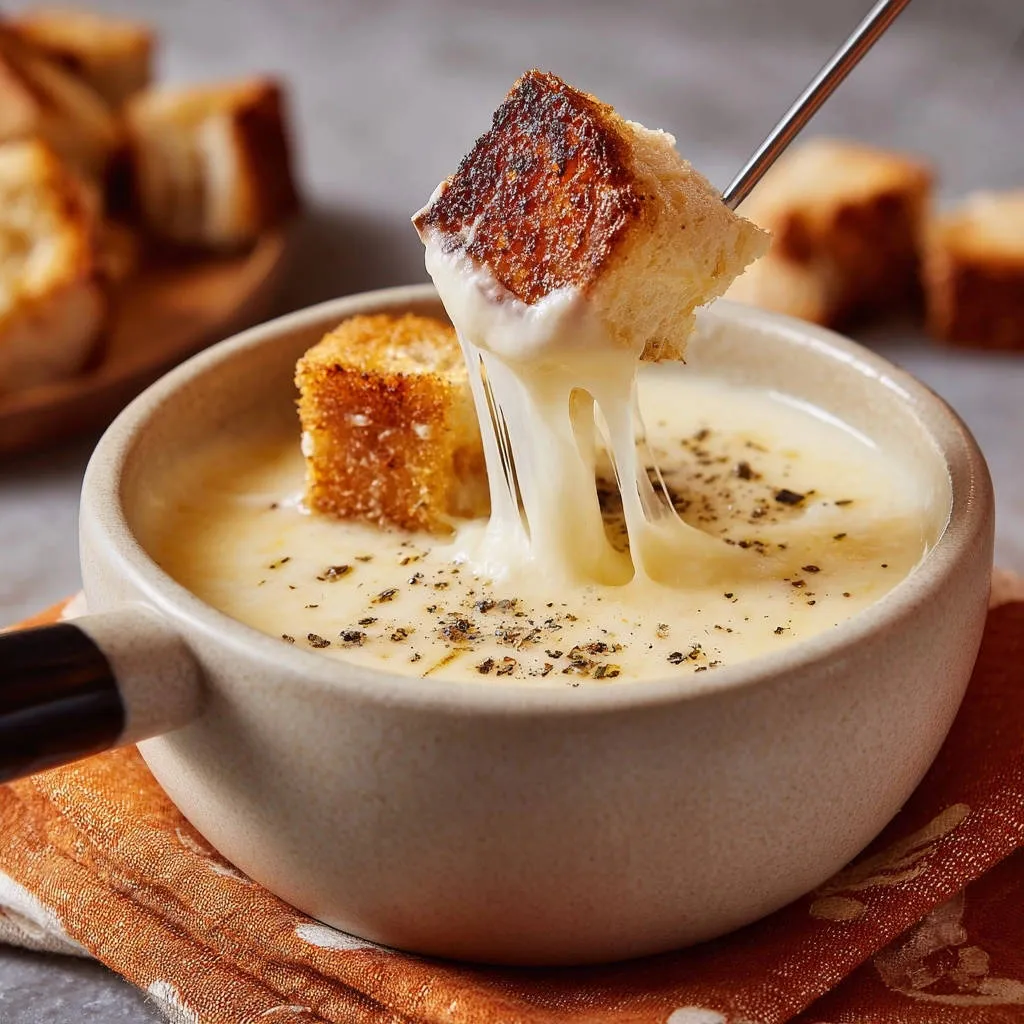
Present your beautifully smooth, never-grainy, Silky Smooth Cheese Dip immediately with the toasted bread cubes. The rich, velvety texture and deep cheesy flavor are best enjoyed warm, offering an irresistible experience for any occasion.
Mastering the Melt: Expert Tips for Your Silky Smooth Cheese Dip
Temperature Control is Key: Avoiding Scorching and Separation
Maintaining a consistent low to medium-low heat is paramount. High heat can quickly cause the cheese to seize, become oily, or separate, ruining that desired smooth consistency.
The Power of Gradual Addition: Patience Pays Off
Adding the cheese slowly and in small batches gives it time to melt into the liquid base evenly. Rushing this step can lead to clumps and an uneven texture.
Freshly Grated Cheese: A Texture Game-Changer
While pre-shredded cheese is convenient, it often contains anti-caking agents that can slightly impede a truly silky melt. Grating your own cheese from a block ensures the purest, smoothest result for your homemade cheese dip.
Taste and Adjust: Perfecting Your Seasoning
Always taste the dip just before serving. Cheese and liquid bases vary, so a final pinch of salt or a little more pepper can perfectly balance the flavors and create a truly unforgettable dip.
Reheating Without Ruin: Keeping it Smooth
If reheating, do so gently over low heat, stirring frequently, or use a double boiler. Avoid microwaving on high heat, which can cause the dip to separate.
Troubleshooting Your Silky Smooth Cheese Dip: Solving Common Mishaps
Problem: My Dip is Lumpy!
If your dip is lumpy, it’s likely due to either insufficient cornstarch coating, adding the cheese too quickly, or too high heat. Ensure thorough coating, add cheese gradually, and always keep the heat low.
Problem: The Cheese is Oily or Separated!
An oily or separated dip is usually a sign of overheating. If this happens, try removing the pot from heat and whisking vigorously, sometimes adding a tiny splash of cold milk or water to help re-emulsify it.
Problem: My Dip is Too Thin/Too Thick!
If your dip is too thin, create a very small slurry of cornstarch and a tablespoon of cold milk, then slowly whisk it into the hot dip until thickened. If it’s too thick, gradually whisk in a tablespoon of warm milk until the desired consistency is reached.
Problem: Lackluster Flavor!
If the flavor seems bland, don’t be afraid to adjust. A little more salt or pepper can make a big difference. For an extra kick, consider adding a pinch of garlic powder, onion powder, or a dash of your favorite hot sauce to your velvety cheese goodness.
Beyond Bread: Creative Ways to Enjoy Your Silky Smooth Cheese Dip
Classic Dippers: From Toasted Bread to Veggies
Beyond the recommended crusty bread, this versatile dip pairs beautifully with an array of dippers. Think crisp vegetable sticks like carrots, celery, bell peppers, or broccoli florets. Pretzels, sturdy crackers, and classic tortilla chips are also excellent choices for an easy party appetizer.
Elevate Your Mains: Drizzling Over Nachos or Potatoes
This Silky Smooth Cheese Dip isn’t just for dipping. Drizzle it generously over a platter of ultimate loaded waffle fry nachos for an instant upgrade, or spoon it over baked potatoes or steamed vegetables. It transforms simple dishes into comforting, cheesy masterpieces.
Drink Pairings: What Complements Cheesy Goodness?
For beverages, a crisp, dry white wine like Sauvignon Blanc or Pinot Grigio cuts through the richness beautifully. A light lager or pilsner also offers a refreshing contrast. For non-alcoholic options, sparkling cider or a zesty lemonade can complement the savory flavors.
Maximizing Enjoyment: Storage and Make-Ahead Tips
Storing Leftovers: Keeping the Creaminess Intact
If you have any leftover Silky Smooth Cheese Dip, transfer it to an airtight container and refrigerate it promptly. It will typically last for 3-4 days while retaining its quality. Proper storage helps maintain that perfect cheese melt for later enjoyment.
Can You Make It Ahead? Best Practices for Prep
While best served fresh, you can prepare the cheese and cornstarch mixture ahead of time and store it in the refrigerator. The liquid base can also be pre-measured. This allows for quick assembly and melting just before serving, making it an excellent make-ahead component for any easy party appetizer.
Reheating for Revival: A Smooth Comeback
To reheat, gently warm the dip in a saucepan over low heat, stirring constantly, adding a splash of milk if needed to restore its original consistency. Alternatively, use a microwave on a low power setting, stirring every 30 seconds until heated through, to preserve its velvety cheese goodness.
Your Silky Smooth Cheese Dip Questions Answered: FAQs
Can I use pre-shredded cheese?
Yes, you can use pre-shredded cheese for convenience, but be aware it often contains anti-caking agents like cellulose. These can sometimes make achieving a perfectly smooth, lump-free dip slightly more challenging than with freshly grated cheese.
What if I don’t have cornstarch?
Cornstarch is highly recommended for this recipe’s unique silky texture. However, a small amount of all-purpose flour could be used as an alternative thickening agent, though it might result in a slightly different consistency. For another amazing dip, consider making a perfect creamy garlic dip.
Is there a dairy-free alternative for this recipe?
Adapting this recipe for dairy-free diets would require significant substitutions for both the cheese and milk, as the dairy components are central to its unique texture. You would need to use a dairy-free shredded cheese that melts well and a plant-based milk alternative, which might yield a different result.
Can I add other seasonings or spices?
Absolutely! This recipe is a fantastic base for customization. Feel free to add a pinch of garlic powder, onion powder, a dash of cayenne for heat, or even a tiny amount of smoked paprika for an extra layer of flavor to your homemade cheese dip.
How long does the dip last in the refrigerator?
When stored properly in an airtight container, your Silky Smooth Cheese Dip will remain fresh and delicious in the refrigerator for up to 3-4 days.
Ready to Impress? Share Your Silky Smooth Cheese Dip Masterpiece!
There’s immense satisfaction in serving a truly perfect dish, and this Silky Smooth Cheese Dip delivers that feeling every single time. It’s more than just a recipe; it’s your secret weapon for unforgettable gatherings and delicious moments.
I encourage you to try this recipe, experience the magic of a consistently no-lump, velvety cheese dip, and share your delightful creations! Explore more incredible recipes and elevate your cooking by visiting our site.

Silky Smooth Cheese Dip
Course: AppetizerCuisine: American CuisineDifficulty: easy4
servings15
minutes15
minutes30
minutesAmerican Cuisine
Ingredients
8 ounces shredded white cheddar cheese (or Gruyere)
1 tablespoon cornstarch
1 cup milk (or non-alcoholic white grape juice)
1/4 teaspoon black pepper
Pinch of salt
4 cups crusty bread, cubed and lightly toasted
Directions
- Prepare your ingredients. Grate the cheese if it is not pre-shredded. Cube the bread into bite-sized pieces and lightly toast them in a pan or oven until golden brown for extra crunch.
- In a medium bowl, toss the shredded cheese with the cornstarch. This crucial step coats each piece of cheese, preventing it from clumping and separating when heated, which is the secret to a perfectly smooth dip.
- Pour the milk into a small saucepan or a small fondue pot and heat it over medium-low heat until it is just simmering gently. Do not let it come to a rolling boil.
- Gradually add the cornstarch-coated cheese to the simmering milk, a handful at a time, stirring constantly with a whisk or wooden spoon. Continue stirring until each addition is fully melted and smooth before adding more cheese. Keep the heat low to prevent the cheese from scorching or separating.
- Once all the cheese is melted and the dip is completely smooth and creamy, stir in the black pepper and a pinch of salt to taste.
- Serve immediately with the toasted bread cubes for dipping. Enjoy the perfectly smooth, never grainy, cheesy goodness!
Notes
- Tossing shredded cheese with cornstarch is the crucial step for a lump-free, perfectly smooth dip.