
There’s nothing more disheartening than a beautiful sheet cake cracking just as you try to roll it into a showstopping dessert. I’ve been there! But I’ve unlocked the simple secret to perfectly pliable, crack-free cake rolls every time, and I’m thrilled to share it in this recipe for Strawberry Dream Cake Rolls.
This recipe ensures your cake stays together beautifully, creating a divine dessert that’s as impressive to look at as it is to eat. Get ready to bake a masterpiece that tastes like pure joy.
The Secret to a Seamless Roll: Why This Recipe Stands Out
Many cake roll recipes promise perfection, but few deliver the consistent, crack-free results you truly desire. Our method for these Strawberry Dream Cake Rolls tackles common pitfalls head-on, ensuring a stunning outcome.
The “Hot Roll” Technique: Your Key to Pliable Perfection
The core of our no-crack guarantee lies in the “hot roll” technique. By rolling the hot cake immediately after baking, with a towel inside, you “train” the cake’s structure.
This critical step allows the cake to cool in the desired rolled shape, making it incredibly flexible and preventing tears when you later unroll it for filling.
Achieving That Dreamy, Never-Dense Cake Texture
A light, airy cake is paramount for a successful roll. This recipe separates eggs, ensuring the whipped whites add significant lift and tenderness.
Gentle folding is emphasized, preserving those delicate air bubbles, which are essential for a cake that’s both fluffy and resilient.
A Burst of Freshness: The Hidden Strawberry Surprise
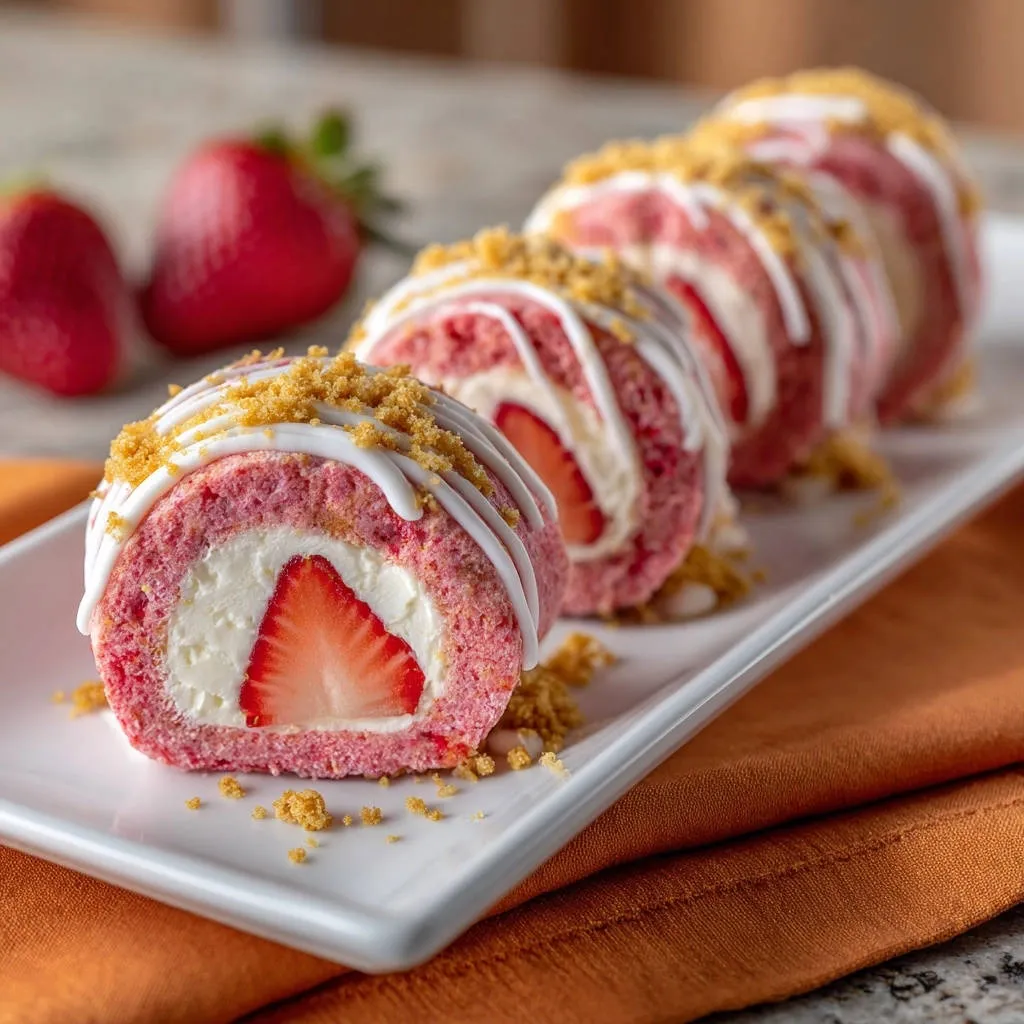
Unlike many rolls that only feature frosting, this recipe tucks whole, fresh strawberries right into the center of your roll. This creates a delightful pop of natural fruit flavor and a beautiful visual surprise with every slice.
It’s a simple addition that truly elevates the freshness and taste of your Strawberry Dream Cake Rolls.
Gathering Your Delights: Essential Ingredients for Strawberry Dream Cake Rolls
For the Light and Flexible Cake Base
All-purpose flour, baking powder, and salt: These dry ingredients form the structure and provide the necessary lift for a tender, springy cake. Proper measurement is crucial.
Large eggs, separated: The separation of yolks and whites is key. Yolks add richness and moisture, while whipped whites provide aeration and lightness, contributing to the cake’s pliability.
Granulated sugar: Sweetens the cake and stabilizes the egg whites, helping them hold their stiff peaks for an airy texture.
Vanilla extract: Adds a classic, warm flavor that complements the strawberries beautifully.
Milk: Contributes moisture and helps create a smooth batter consistency.
Red food coloring: A few drops provide a lovely, subtle pink hue, enhancing the visual appeal of these Strawberry Dream Cake Rolls.
Crafting the Velvety Cream Cheese Filling
Cream cheese, softened: Essential for the signature tangy, rich flavor and creamy texture of the filling. Ensure it’s fully softened to prevent lumps.
Unsalted butter, softened: Adds richness and helps achieve a smooth, stable, and spreadable consistency for the frosting.
Powdered sugar: Sweetens the filling and provides the necessary structure and thickness. Add gradually to avoid a sugary cloud and ensure proper consistency.
Vanilla extract: Enhances the sweet and tangy notes of the cream cheese filling.
Elevating the Presentation: Decorative Touches
Fresh strawberries, hulled: The vibrant pop of color and fresh flavor on top, echoing the strawberries inside the cake.
White chocolate chips or white candy melts: Melted and drizzled, these add a lovely sweet counterpoint and elegant visual appeal.
Shortening or coconut oil: A small amount helps thin the melted chocolate, making it smoother and easier to drizzle.
Graham cracker crumbs or vanilla cookie crumbs: Offer a delightful texture contrast and a subtle, complementary flavor as a final sprinkle.
Essential Tools for Your Cake Roll Journey
Must-Have Baking Equipment
10×15 inch Jelly Roll Pan: The specific size is crucial for the cake’s thickness, which impacts its flexibility and ability to roll without cracking.
Parchment Paper: Absolutely vital for preventing sticking and allowing for easy removal and rolling of the hot cake. Ensure you use enough overhang.
Electric Mixer (Stand or Handheld): Necessary for efficiently beating eggs and creating light, fluffy cake batter and cream filling.
Whisk: Used for combining dry ingredients and light mixing to ensure even distribution.
Large Bowls (2-3): Needed for separating wet and dry ingredients, and beating egg whites separately.
Clean Kitchen Towel: A key component of the “hot roll” technique. It needs to be clean, lint-free, and generously dusted with powdered sugar.
Wire Rack: Provides airflow for even cooling of the rolled cake, preventing condensation and sogginess.
Your Step-by-Step Guide to Flawless Strawberry Dream Cake Rolls
Step 1: Pan & Oven Prep for Success. Preheat your oven to 375°F (190°C) and meticulously line a 10×15 inch jelly roll pan with parchment paper, ensuring generous overhang on the sides for easy cake removal. Don’t forget to lightly grease the parchment paper.
Step 2: Whisk Your Dry Ingredients. In a small bowl, whisk together the all-purpose flour, baking powder, and salt until thoroughly combined. Set this mixture aside; it’s crucial for even distribution in your final batter.
Step 3: Cream Egg Yolks & Sugar. In a large bowl, using an electric mixer, beat the egg yolks with 1/2 cup of the granulated sugar until the mixture becomes light, fluffy, and pale yellow, which takes about 2-3 minutes. Then, gently stir in the vanilla extract, milk, and a few drops of red food coloring until everything is well combined and vibrantly tinted.
Step 4: Gradually Combine Wet & Dry. Slowly add the whisked dry flour mixture to the egg yolk mixture. Mix on low speed until just combined and smooth, taking care not to overmix, as this can develop gluten and lead to a tough cake.
Step 5: Achieve Stiff Egg White Peaks. In a separate, impeccably clean and dry bowl, beat the egg whites until soft peaks begin to form. Gradually add the remaining 1/2 cup of granulated sugar, continuing to beat until you achieve stiff, glossy peaks. These peaks are essential for giving the cake its airy lift and tender texture.
Step 6: Fold with Care and Precision. Gently fold about a third of the whipped egg whites into the cake batter to lighten the mixture, making it easier to incorporate the rest. Then, carefully fold in the remaining egg whites until no streaks of white remain, being gentle to preserve the airiness vital for a pliable cake.
Step 7: Bake to Pliable Perfection. Pour the airy batter evenly into your prepared jelly roll pan, spreading it to the edges for a consistent layer. Bake for 10-12 minutes, or until the cake springs back when lightly touched and the edges are slightly golden. It is crucial not to overbake, as a slightly underbaked cake is key to a flexible roll that won’t crack.
Step 8: The Crucial Hot Roll Technique. While the cake is baking, lay a clean kitchen towel flat on your counter and generously dust it with powdered sugar. Immediately after removing the cake from the oven, carefully invert the hot cake onto the prepared sugared towel. Gently and swiftly peel off the parchment paper from the cake.
Step 9: Cool Completely, Rolled. Starting from one short end, carefully and tightly roll the cake up with the towel inside, forming a log. Place the rolled cake, seam-side down, on a wire rack and let it cool completely for at least 1 hour. This “hot roll” technique trains the cake to hold its rolled shape without cracking when cool, making it a foolproof method for your Strawberry Dream Cake Rolls.
Step 10: Prepare the Dreamy Cream Filling. While the cake cools, prepare the cream filling: In a medium bowl, beat the softened cream cheese and butter until thoroughly smooth and creamy, with no lumps. Gradually add the powdered sugar, one cup at a time, beating until the mixture is light, fluffy, and perfectly spreadable. Stir in the vanilla extract for a hint of warmth.
Step 11: Unroll and Spread Evenly. Once the cake is completely cooled (this is critical!), gently unroll it. Spread the cream filling evenly over the entire surface of the cake, leaving about a 1-inch border on all sides. This border helps prevent filling from oozing out when rolled.
Step 12: Add the Strawberry Center. Line up the whole hulled strawberries end-to-end along one of the short ends of the cake, closest to you. Carefully re-roll the cake, starting from the strawberry end, gently but firmly, tucking the strawberries into the center as you go. This creates a beautiful, fruity surprise inside.
Step 13: Decorate and Chill to Set. Place the re-rolled cake, seam-side down, on a serving plate or tray. For the decoration, melt the white chocolate chips or candy melts with the shortening or coconut oil in a microwave-safe bowl in 30-second intervals, stirring until smooth and fluid. Drizzle the melted white chocolate artistically over the cake roll, then sprinkle with graham cracker crumbs for added texture and visual appeal. Chill the cake roll in the refrigerator for at least 30 minutes before slicing and serving. This allows the filling to set and the cake to firm up, ensuring clean, beautiful slices.
Chef’s Secrets for Flawless Strawberry Dream Cake Rolls Every Time
Achieving a picture-perfect cake roll requires attention to a few key details beyond the steps themselves. These insider tips will help you master your Strawberry Dream Cake Rolls.
Mastering the Bake: Don’t Overcook!
The single most important factor for a pliable cake is to avoid overbaking. An overcooked cake will be dry and brittle, leading to cracks when rolled. Look for the cake to spring back lightly when touched in the center, and for the edges to be just barely golden.
The Gentle Art of Folding Egg Whites
When incorporating whipped egg whites, always use a gentle folding motion, not stirring or beating. This technique preserves the air bubbles, which are essential for the cake’s light texture and flexibility. Imagine you are lightly “lifting” the batter over the whites, rather than squishing them.
Dusting for Success: Why Powdered Sugar is Your Ally
Generously dusting your clean kitchen towel with powdered sugar serves two crucial purposes. First, it prevents the hot cake from sticking to the towel. Second, it adds a subtle sweetness and a beautiful finish to the exterior of your rolled cake, making it effortless to unroll later.
The Power of Patience: Chilling for Perfect Slices
Resist the urge to slice your cake roll immediately after decorating. Chilling is not just for setting the chocolate drizzle; it allows the cream filling to firm up properly and the cake itself to become more stable. This results in clean, neat slices with distinct layers, preventing a messy presentation.
Room Temperature Rhapsody: Softened Ingredients Matter
Ensure your cream cheese and butter are properly softened to room temperature for the filling. Cold ingredients will result in a lumpy, inconsistent filling that is difficult to spread smoothly. Plan ahead and take them out of the refrigerator at least an hour before you begin.
Troubleshooting Common Cake Roll Challenges
Why Did My Cake Crack When Rolling?
Cracking is usually due to overbaking, making the cake dry and inflexible. Ensure you pull the cake from the oven as soon as it springs back. Not rolling the cake immediately while hot, or allowing it to cool unrolled, also stiffens it too much.
Sometimes, rolling too loosely can also lead to issues; aim for a firm, steady roll to help it hold its shape.
My Cream Filling Is Too Soft or Runny
This often happens if the butter or cream cheese were too warm, or if you didn’t use enough powdered sugar. Ensure both dairy ingredients are simply softened, not melted. If it’s too soft, try adding a tablespoon or two more powdered sugar and beat briefly, or chill the filling for 10-15 minutes before re-beating.
The Cake Stuck to the Towel or Parchment
The primary culprits here are insufficient greasing of the parchment paper or not generously dusting the towel with powdered sugar. Make sure both steps are performed diligently. Also, try peeling the parchment paper immediately and carefully after inverting the hot cake onto the towel.
My Cake Roll is Dense and Not Airy
A dense cake typically points to overmixing the batter after adding flour, which develops gluten and toughens the cake. It can also happen if the whipped egg whites were deflated during the folding process. Be gentle and fold just until combined.
Your Top Questions About Strawberry Dream Cake Rolls Answered
Can I Make Strawberry Dream Cake Rolls Ahead of Time?
Absolutely! Cake rolls are excellent make-ahead desserts. You can bake the cake and prepare the filling a day in advance, storing them separately. Once assembled and decorated, the cake roll can be stored in the refrigerator for up to 2-3 days.
How Should I Store Leftover Cake Roll?
Store any leftover cake roll tightly wrapped in plastic wrap or in an airtight container in the refrigerator. This keeps the cake moist and the filling fresh. It will remain delicious for up to 3-4 days.
Can I Use Different Fillings or Fruits?
Yes, this recipe is wonderfully versatile! For different fruit flavors, consider raspberries or blueberries instead of strawberries. For fillings, chocolate ganache, lemon curd, or even a simple vanilla buttercream would work beautifully. For a richer, more decadent option, you might consider our Perfect Cheesecake recipe’s base as an inspiration for a thicker filling.
Can This Recipe Be Made Gluten-Free?
Yes, you can substitute the all-purpose flour with a 1:1 gluten-free baking flour blend that contains xanthan gum. Keep in mind that gluten-free cakes can sometimes be slightly more delicate, so handle with extra care during rolling. The “hot roll” technique remains crucial for success.
What’s the Best Way to Slice a Cake Roll?
For clean, neat slices, ensure your cake roll is well chilled. Use a very sharp knife, and for extra precision, run the blade under hot water and wipe it clean between each slice. This warms the blade just enough to glide through the cake and filling without dragging.
Serving Suggestions and Storage Tips for Your Masterpiece
Presentation Ideas for Your Strawberry Dream Cake Rolls
These beautiful Strawberry Dream Cake Rolls are stunning on their own. For an extra touch, dust lightly with more powdered sugar just before serving. You can also garnish the serving plate with a few extra fresh strawberry halves or a small dollop of whipped cream.
They make an elegant centerpiece for any gathering, from casual brunches to celebratory dinners.
Optimal Storage to Maintain Peak Freshness
To preserve the delicate texture and fresh flavor, always store your cake roll in an airtight container in the refrigerator. This prevents the cake from drying out and the filling from absorbing odors from other foods. Enjoy it chilled for the best experience.
Ready to Impress? Share Your Strawberry Dream Cake Rolls Creation!
Now that you have the secrets to a crack-free, dreamy roll, it’s time to create your own masterpiece. These Strawberry Dream Cake Rolls are truly a delight to bake and an even greater joy to share.
Don’t hesitate to experiment with the flavors and make it your own. We’d love to see your creations and hear about your baking success! Feel free to leave a comment below or explore more of our delightful dessert recipes.

Strawberry Dream Cake Rolls
Course: DessertCuisine: American CuisineDifficulty: easy4
1 cake roll30
minutes12
minutes120
minutesAmerican Cuisine
Ingredients
For the Cake:
1 cup all purpose flour
1 teaspoon baking powder
1/4 teaspoon salt
4 large eggs, separated
1 cup granulated sugar, divided
1/2 teaspoon vanilla extract
1/4 cup milk
A few drops of red food coloring
For the Cream Filling:
8 ounces cream cheese, softened
1/2 cup unsalted butter, softened
3 1/2 cups powdered sugar
1 teaspoon vanilla extract
For Decoration:
4 to 5 fresh strawberries, hulled
1/2 cup white chocolate chips or white candy melts
1 teaspoon shortening or coconut oil (for melting chocolate)
1/4 cup graham cracker crumbs or vanilla cookie crumbs
Directions
- Preheat your oven to 375°F (190°C). Line a 10×15 inch jelly roll pan with parchment paper, leaving an overhang on the sides. Lightly grease the parchment paper.
- In a small bowl, whisk together the flour, baking powder, and salt. Set aside.
- In a large bowl, using an electric mixer, beat the egg yolks with 1/2 cup of the granulated sugar until light and fluffy, about 2-3 minutes. Stir in the vanilla extract, milk, and red food coloring until combined.
- Gradually add the dry flour mixture to the egg yolk mixture, mixing on low speed until just combined and smooth. Do not overmix.
- In a separate clean, dry bowl, beat the egg whites until soft peaks form. Gradually add the remaining 1/2 cup of granulated sugar, beating until stiff, glossy peaks form.
- Gently fold about a third of the whipped egg whites into the cake batter to lighten it, then carefully fold in the remaining egg whites until no streaks remain. Be gentle to keep the batter airy.
- Pour the batter evenly into the prepared jelly roll pan, spreading it to the edges. Bake for 10-12 minutes, or until the cake springs back when lightly touched and the edges are slightly golden. Do not overbake, as this is key to a flexible cake.
- While the cake is baking, lay a clean kitchen towel flat on your counter and generously dust it with powdered sugar.
- Immediately after removing the cake from the oven, carefully invert the hot cake onto the prepared sugared towel. Gently peel off the parchment paper from the cake.
- Starting from one short end, carefully and tightly roll the cake up with the towel inside, forming a log. Place the rolled cake, seam-side down, on a wire rack and let it cool completely for at least 1 hour. This “hot roll” technique trains the cake to hold its rolled shape without cracking when cool.
- While the cake cools, prepare the cream filling: In a medium bowl, beat the softened cream cheese and butter until smooth and creamy. Gradually add the powdered sugar, one cup at a time, beating until light and fluffy. Stir in the vanilla extract.
- Once the cake is completely cooled, gently unroll it. Spread the cream filling evenly over the entire surface of the cake, leaving about a 1-inch border on all sides.
- Line up the whole strawberries end-to-end along one of the short ends of the cake, closest to you. Carefully re-roll the cake, starting from the strawberry end, gently but firmly, tucking the strawberries into the center.
- Place the re-rolled cake, seam-side down, on a serving plate or tray.
- For the decoration, melt the white chocolate chips or candy melts with the shortening or coconut oil in a microwave-safe bowl in 30-second intervals, stirring until smooth. Drizzle the melted white chocolate over the cake roll. Sprinkle with graham cracker crumbs.
- Chill the cake roll in the refrigerator for at least 30 minutes before slicing and serving. This allows the filling to set and the cake to firm up for clean slices.
Notes
- The hot roll technique is key to a flexible, crack-free cake.