Oh, hi there! Come on in. Let’s talk about one of life’s simple, sweet pleasures: cereal treats. Specifically, layered marshmallow cereal treats. You know the kind I mean? Those incredibly addictive, gooey bars that just melt in your mouth? Except… sometimes they don’t?
Have you ever bitten into what you expected to be a soft, yielding square of nostalgic goodness, only to feel like you’re chewing on a tiny, sugary brick? Yeah, me too. For years! It was the ultimate kitchen disappointment.
I tried everything. More butter? Less butter? Different marshmallows? Nothing seemed to consistently nail that perfect, sink-your-teeth-into-it chewiness. It became a mission. A quest for the ultimate, fail-proof chewy bar cookie.
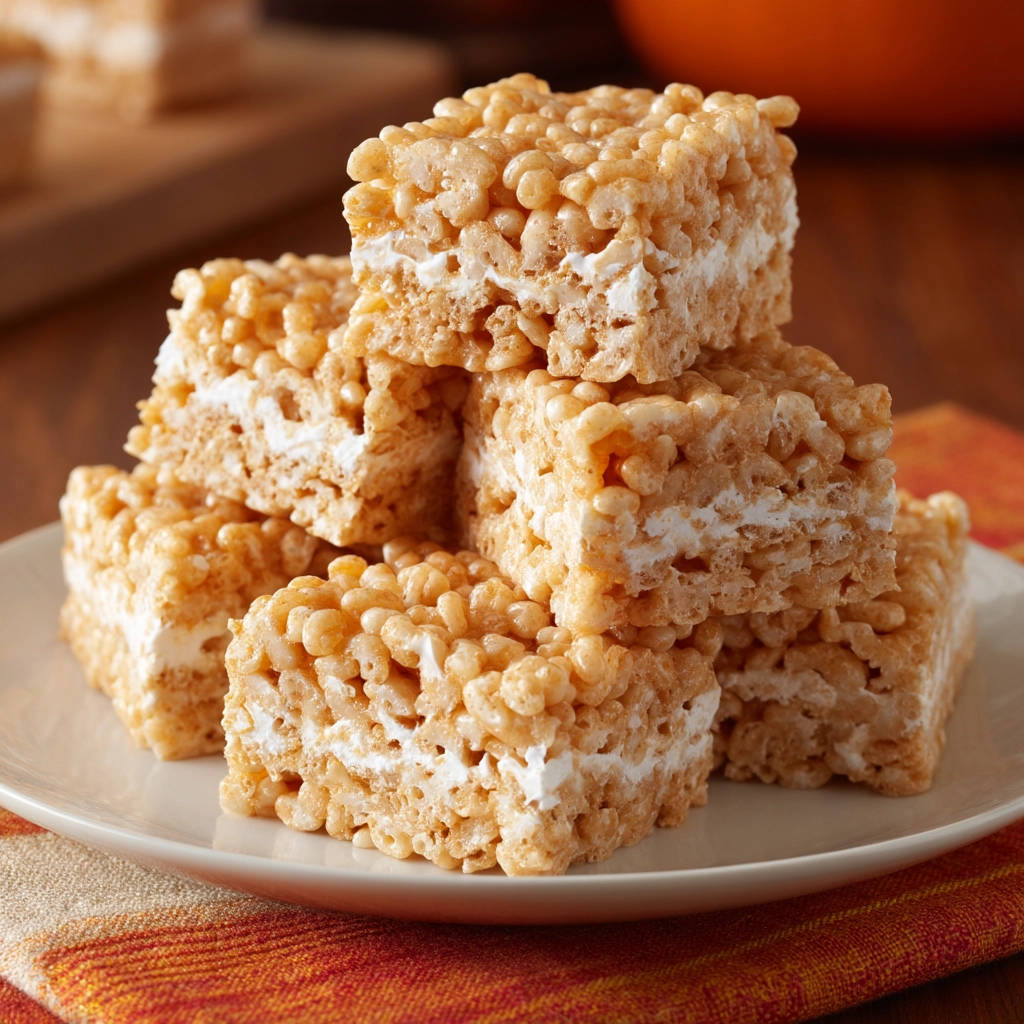
After countless batches (some amazing, many… less so), I finally figured it out. The secret to guaranteed soft, gooey, chewy layered marshmallow cereal treats isn’t just one thing, but a combination of simple techniques that make a world of difference. And adding a luscious layer of marshmallow creme in the middle? Pure genius, if I do say so myself. It doubles down on the gooey factor.
Ready to ditch the hard, crunchy disappointments forever? Let’s make some truly incredible chewy treats together.
Reasons These Layered Marshmallow Cereal Treats Are a Keeper
Why bother with this recipe when there are a million others out there? Because this one works! It’s designed specifically to combat the dreaded “hard treat” syndrome. Here’s why you’ll fall in love:
- Guaranteed Chewiness: We tackle the common culprits behind hard cereal treats head-on with specific techniques.
- Double the Gooey Factor: That extra layer of marshmallow creme? It creates a soft, creamy center that’s utterly irresistible.
- Simple Ingredients: You likely have most of these pantry staples on hand already.
- Quick & Easy: No baking required! This is a perfect recipe for a quick dessert fix or involving little helpers in the kitchen.
- Fun & Impressive: The layered look makes them a little bit fancier than your standard treat, perfect for parties or lunchboxes.
Gathering Your Ingredients for These Chewy Treats
Before we dive into the delicious process, let’s gather our simple lineup of ingredients. The magic of chewy marshmallow treats lies in using fresh, quality ingredients and treating them with care. We aren’t working with anything fancy here, just the right components in the right amounts, handled the right way.
Here’s what you’ll need:
- Rice Krispie Style Cereal (6 cups): The classic choice! Use your favorite brand of crispy rice cereal. Ensure it’s fresh; stale cereal can make your treats harder.
- Unsalted Butter (1/2 cup, which is 1 stick): Butter adds richness and helps bind everything together. Using unsalted butter allows you to control the saltiness yourself.
- Miniature Marshmallows (10 ounce bag, about 5.5 cups): Mini marshmallows melt much faster and more evenly than large ones, which is key to preventing overheating.
- Vanilla Extract (1 teaspoon): A splash of vanilla adds a lovely depth of flavor that balances the sweetness. Don’t skip this!
- Pinch of Salt (Optional): A tiny bit of salt enhances all the other flavors, making the treats even more delicious.
- Marshmallow Creme (7 ounce jar): This is the secret weapon for the gooey center layer! Make sure you have a fresh jar.
Having everything measured and ready before you start is always a good idea, as things move quickly once the marshmallows start melting.
Crafting Your Perfectly Chewy Layered Marshmallow Cereal Treats: Step-by-Step
Alright, let’s make some magic! Making marshmallow cereal treats is one of the easiest kitchen tasks, but achieving that signature chewy texture requires a little finesse. Follow these steps carefully, paying close attention to the heat and mixing instructions, and you’ll be rewarded with the softest, most irresistible treats.
Prepare Your Pan: Start by getting your pan ready. A standard 9×13 inch baking pan works perfectly for this amount. To ensure your chewy layered marshmallow cereal treats don’t stick, lightly grease the inside of the pan. You can use butter or your preferred nonstick cooking spray. Making sure the pan is prepped means easy removal and clean cuts later on.
Melt the Butter Slowly: Grab a very large pot. You’ll need plenty of room for mixing the cereal later. Add the half cup (one stick) of unsalted butter to the pot. Now, here is the absolute first key to chewiness: melt the butter over the lowest possible heat. Seriously, turn that burner down as low as it goes. Melting butter slowly helps maintain its composition and prevents it from reaching a temperature that could negatively affect the marshmallows.
Gently Melt the Marshmallows: Once the butter is completely melted, add the entire bag (10 ounces, roughly 5.5 cups) of miniature marshmallows to the pot. Keep the heat on low and stir constantly. You need to be vigilant here! Continue stirring until the marshmallows are just melted and you have a smooth, gooey mixture. The moment they are smooth, remove the pot from the heat. This is arguably the most critical step for achieving chewy marshmallow cereal treats. Overheated marshmallows become hard and brittle when they cool. Watch them closely – it happens faster than you think!
Stir in the Flavor: With the pot off the heat, quickly stir in the teaspoon of vanilla extract. If you’re using it, add a pinch of salt now too. The residual heat from the marshmallow mixture will be enough to incorporate these flavorings beautifully.
Add the Cereal (Gently!): Now for the star – the cereal! Pour all 6 cups of your crispy rice cereal into the pot with the marshmallow mixture. Using a sturdy spatula, stir gently but efficiently. Your goal is just to coat the cereal evenly with the marshmallow. Avoid aggressive stirring or overmixing. Why? Because overmixing can break the cereal pieces and also compress the mixture, both of which can lead to a tougher texture. Mix until there are no dry spots, but stop as soon as everything looks coated.
Create the First Layer (Lightly!): Transfer exactly half of the cereal mixture into your prepared 9×13 inch pan. Now, here’s the second major secret to chewy treats: do NOT press the mixture down firmly. Using a greased spatula or your lightly greased hands (butter or spray works well), press the mixture into an even layer in the bottom of the pan using only very light pressure. Think of it more like persuading it into place rather than packing it down. Compacting the treats forces air out and results in that undesirable hard texture. Gentle pressure is essential for softness.
Spread the Marshmallow Creme: Carefully open your 7-ounce jar of marshmallow creme. Using a clean spatula or the back of a spoon, gently and evenly spread the marshmallow creme over the first layer of cereal mixture in the pan. This layer adds an extra punch of marshmallow goodness and creates that lovely layered effect. Don’t worry about getting it perfectly smooth right up to the edges, just aim for an even distribution over the surface.
Add the Top Layer (Again, Gently!): Take the remaining half of the cereal mixture. Instead of dumping it all on top, drop spoonfuls of the mixture evenly over the marshmallow creme layer. This makes it easier to create the top layer without disturbing the soft creme too much. Once the spoonfuls are distributed, use your greased spatula or hands again to very, very gently press down. Just apply enough pressure to connect the top pieces and form a relatively even surface. Seriously, minimal pressure here! This ensures the top layer stays just as soft and chewy as the bottom.
Cool Completely: Patience is key! Let the layered marshmallow cereal treats cool completely in the pan before cutting. This usually takes at least 1 hour at room temperature. Cooling allows the marshmallow mixture to set properly. Trying to cut them too soon can result in a gooey mess. Once cooled, grab a knife and grease it slightly – this will make cutting clean squares much easier.
And there you have it! Perfectly chewy, delightfully layered marshmallow cereal treats, ready to be devoured.
Tips for Perfect Treats Every Time & Fun Variations
Beyond the core techniques, here are a few extra tips and ideas to make your layered marshmallow cereal treats truly stand out:
- Freshness Matters: Use fresh marshmallows and cereal. Stale ingredients can definitely contribute to a harder texture.
- Don’t Rush the Melt: I can’t stress the low heat and gentle melting enough! This is the number one factor for chewiness.
- Grease Your Tools: Keep a little butter or nonstick spray handy for your spatula and hands when pressing the mixture. It makes handling so much easier.
- Cutting Cleanly: Re-grease your knife between cuts if needed for the neatest squares.
- Add Some Color: Stir in a few drops of food coloring with the vanilla extract for festive treats!
- Chocolate Swirl: Melt some chocolate chips or drizzle melted chocolate over the top layer once it’s cooled slightly for an extra touch. Just melt the chocolate gently (double boiler or microwave in short bursts) and drizzle with a spoon or piping bag. For more chocolate inspiration, check out our deep dark chocolate layer cake or molten chocolate lava cake recipes!
- Mix-Ins (Optional): If you want to add sprinkles, chocolate chips, or other small candies, stir them in with the cereal in step 5. Do this quickly and gently.
These tips help ensure success, while the variations let you customize your treats for any occasion!
Serving Suggestions
These layered marshmallow cereal treats are fantastic all on their own, perfect for lunchboxes, after-school snacks, or a simple dessert. They’re also wonderful for parties or potlucks.
If you’re looking to round out a sweet spread, consider pairing them with other easy-to-make desserts like our easy carrot cake squares or perhaps some classic powdered sugar cookies. For a fun snack platter, you could include other crispy, sweet bites like classic muddy buddies alongside these chewy layered treats.
Your Layered Marshmallow Cereal Treat Questions Answered (FAQ)
Got questions about getting these treats just right? Here are some common ones:
Q: Why are my marshmallow cereal treats hard?
A: This is the most frequent issue! The two biggest culprits are usually overheating the marshmallows (step 3) and pressing the mixture too firmly into the pan (steps 6 and 8). Melting the marshmallows slowly over low heat and removing them from the heat immediately when just melted is crucial. Also, when pressing the mixture into the pan, use a very light touch. Don’t compact it!
Q: How should I store these layered marshmallow cereal treats?
A: Store them in an airtight container at room temperature. They are best enjoyed within 2-3 days for optimal chewiness. Avoid refrigerating, as this can actually make them harder.
Q: Can I use regular large marshmallows instead of mini marshmallows?
A: While you technically can, miniature marshmallows are highly recommended. They melt faster and more evenly, reducing the risk of overheating and ensuring a smoother marshmallow coating, which contributes significantly to the chewy texture.
Q: Can I double the recipe?
A: Yes, you can double the recipe. Use an even larger pot! Be extra careful when melting the marshmallows to avoid overheating, as a larger volume might retain heat differently. You’ll also need a bigger pan, or you can make two separate batches in 9×13 pans.
Q: What if I don’t have marshmallow creme?
A: The marshmallow creme is what gives these treats their specific layered, extra-gooey center. You could omit it and just make a single layer of the cereal mixture, which would essentially be a classic chewy cereal treat. However, you wouldn’t achieve the unique layered texture and intense gooeyness that this recipe provides.
Enjoy Your Homemade Chewy Layered Marshmallow Cereal Treats!
Making your own chewy layered marshmallow cereal treats is incredibly rewarding, especially when you know they’ll turn out perfectly soft and gooey every single time. This recipe takes the guesswork out of it and delivers on that promise of irresistible chewiness, with the added bonus of that sweet, creamy marshmallow creme layer in the middle.
They’re perfect for sharing, but also dangerous to have around if you’re trying to resist snacking! Whether you’re making them for a special occasion or just because, they’re sure to bring smiles.
Give this recipe a try, and let me know what you think in the comments below! Did your treats turn out perfectly chewy? Share your success and any variations you tried!
Layered Marshmallow Cereal Treats

Ingredients
- 6 cups Rice Krispie style cereal
- 1/2 cup (1 stick) unsalted butter
- 10 ounce bag miniature marshmallows (about 5.5 cups)
- 1 teaspoon vanilla extract
- Pinch of salt (optional)
- 7 ounce jar marshmallow creme
Directions
- Lightly grease a 9×13 inch baking pan with butter or nonstick spray.
- In a very large pot, melt the butter over the lowest possible heat. Melting butter slowly over low heat is essential for maintaining the soft texture of the final treats.
- Add the miniature marshmallows to the melted butter. Stir constantly until they are completely melted and smooth. It is critical not to overheat the marshmallows; remove the pot from the heat the moment they are just melted. Overheated marshmallows result in hard treats.
- Remove the pot from the heat and stir in the vanilla extract and salt (if using).
- Add the cereal to the pot. Stir gently until the cereal is just coated evenly with the marshmallow mixture. Avoid overmixing, as this can break down the cereal and affect the texture.
- Using a spatula or your hands (lightly greased), press exactly half of the cereal mixture very lightly and evenly into the bottom of the prepared pan. Do not press firmly; compacting the mixture is a major cause of hard treats. Gentle pressure is key to keeping them chewy.
- Carefully spread the marshmallow creme evenly over the first layer of cereal mixture in the pan.
- Take the remaining half of the cereal mixture and drop spoonfuls evenly over the marshmallow creme layer. Then, using your greased spatula or hands, very gently press down just enough to form an even top layer. Again, resist the urge to press down firmly.
- Let the treats cool completely in the pan for at least 1 hour before cutting into squares using a greased knife.