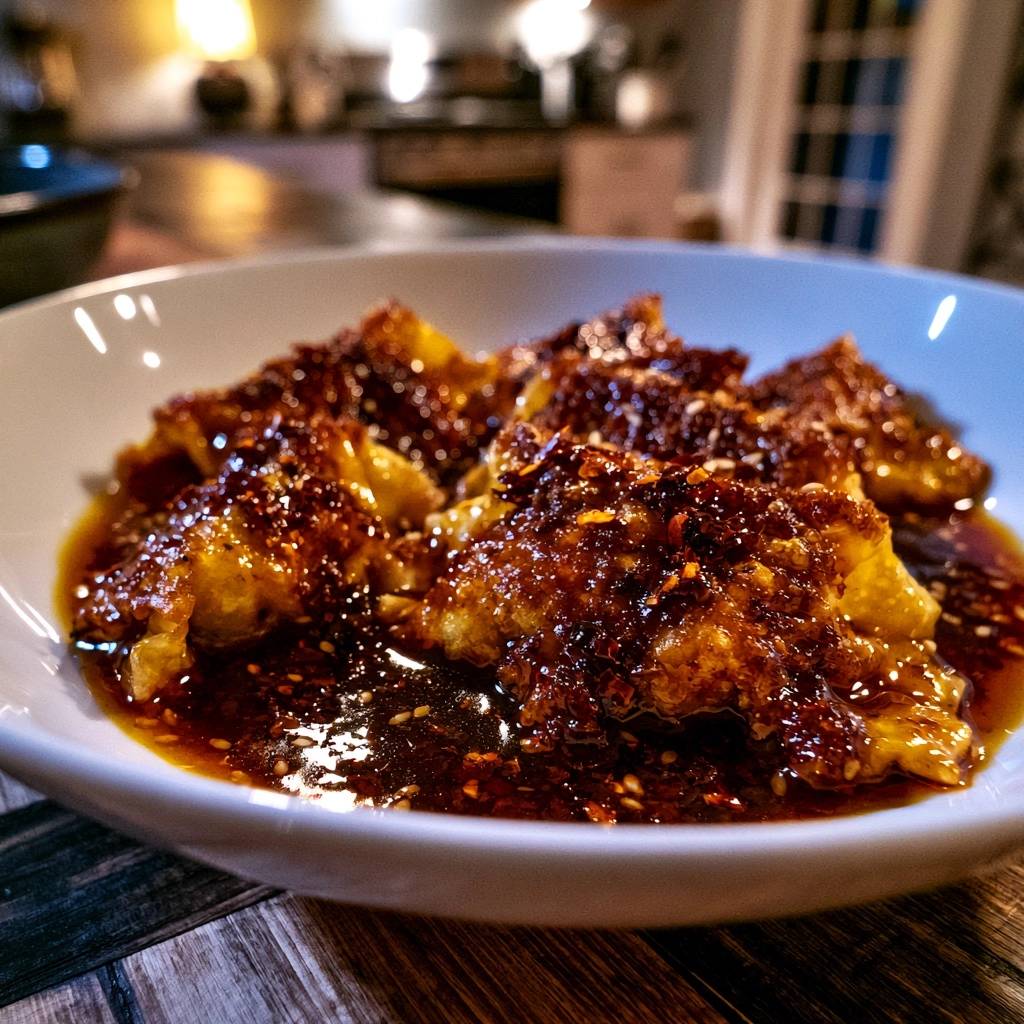
Imagine biting into a dumpling where the bottom doesn’t just yield—it shatters. You get that immediate, sharp crackle of a golden-brown crust, followed by the silky chew of the steamed wrapper and a burst of savory filling. Then, the slow, humming heat of chili oil washes over your palate, balanced by a hit of tart vinegar and pungent garlic.
Most home cooks struggle with the dreaded “soggy bottom” syndrome, where beautiful dumplings turn into a mushy mess the moment they touch the sauce. This happens because the dough acts like a sponge, soaking up liquid until the structural integrity collapses. We’re going to fix that today by using a specific searing technique that creates a moisture-proof shield.
The secret to this professional-grade crunch is a “fry-steam-fry” method combined with a tiny bit of cornstarch. By searing the dumplings in oil before adding a drop of water, you create a hardened starch barrier. This barrier protects the dough during the steaming phase, ensuring your Crispy Chili Oil Dumplings stay loud and crunchy until the very last bite.
The Anatomy of a Perfect Crispy Dumpling
A perfect potsticker is a study in contrasting textures. The top of the dumpling, with its intricate pleats, should be soft, supple, and thoroughly steamed. This part of the wrapper provides the comforting, noodle-like chew that makes dumplings so satisfying to eat.
The bottom, however, must be a rigid, structural foundation. It shouldn’t just be “browned”; it needs to be a distinct, caramelized crust that can support the weight of the filling. When you combine these two textures, you get a dish that feels both light and indulgent at the same time.
Crispy Chili Oil Dumplings take this a step further by introducing a spicy, oily sauce. Because oil and water don’t mix, a properly seared dumpling base will actually repel the liquid in the sauce for several minutes. This gives you plenty of time to enjoy the meal without the texture degrading into a soggy disappointment.
Why Most Home-Cooked Dumplings Turn Mushy
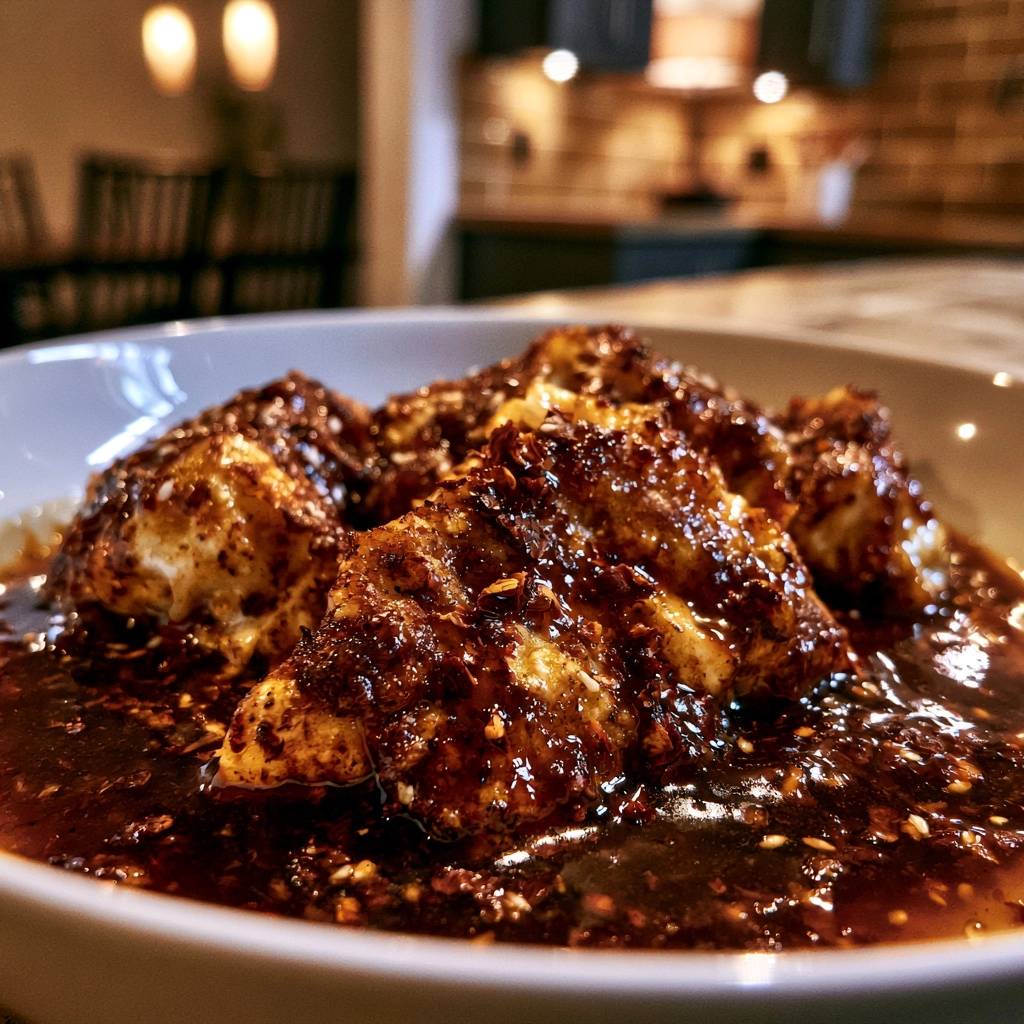
The biggest mistake people make is adding water to the pan too early. If you dump water into a cold pan with dumplings, the dough begins to hydrate and swell before the base has a chance to set. This leads to a gummy, sticky texture that clings to the pan and tears easily.
Over-steaming is another common culprit. If you leave the lid on for too long, the excess steam saturates the starch in the wrapper. Once those starch molecules are fully saturated, they lose their ability to crisp up again, no matter how much oil you use afterward.
To avoid this, we use the “fry-steam-fry” approach. You fry to set the shape, steam to cook the filling and the top of the wrapper, and then fry a second time to drive off any remaining moisture. This triple-threat method is the only way to achieve that elusive, glass-like crunch.
Essential Components for the Chili Oil Base
The sauce is just as important as the dumpling itself. You want a neutral oil for the frying stage, such as grapeseed or canola oil. These oils have high smoke points, meaning they won’t break down or taste bitter when you’re searing the dumplings to a deep golden brown.
For the sauce base, you need a high-quality chili oil that has plenty of “sediment”—those crispy bits of fried chili, garlic, and onions at the bottom of the jar. This sediment provides the texture and the concentrated flavor that makes the sauce more than just spicy liquid.
Fresh garlic is non-negotiable here. While jarred garlic is convenient, it lacks the sharp, aromatic bite needed to cut through the richness of the oil. When you mix finely minced fresh garlic into the sauce, the residual heat from the dumplings mellows it just enough to be delicious without being overwhelming.
Selecting the Right Dumpling Wrapper
If you’re using store-bought frozen dumplings, look for brands labeled “potstickers” or “gyoza.” These typically have a slightly thicker wrapper on the bottom designed specifically for searing. Thinner wonton wrappers are often too delicate for this high-heat method and may tear during the re-crisping phase.
Fresh handmade dumplings are wonderful, but they contain more moisture than frozen ones. If you’re making them from scratch, let them air-dry on a parchment-lined tray for about 15 minutes before cooking. This slight drying of the skin helps the “starch barrier” form more quickly once they hit the hot oil.
When shopping in the frozen aisle, check the ingredients for wheat flour and cornstarch. A little extra starch in the wrapper itself often leads to a better crunch. Avoid dumplings that appear “frost-bitten” or have ice crystals inside the bag, as this extra moisture will cause splattering and sogginess.
The Role of Chinkiang Black Vinegar
Chinkiang black vinegar is the “secret sauce” of Chinese dumpling culture. Unlike white vinegar, which is sharply acidic, or rice vinegar, which is mild and sweet, black vinegar is fermented from rice, wheat, barley, or sorghum. It has a deep, malty, and almost smoky profile that tastes like a cross between balsamic and soy sauce.
This vinegar provides the essential acidity needed to balance the fat in the chili oil. It brightens the entire dish and makes the savory flavors of the meat or vegetable filling pop. Without it, the dish can feel heavy and one-dimensional.
If you can’t find Chinkiang vinegar at your local Asian grocer, you can create a quick substitute. Mix one part balsamic vinegar with one part regular rice vinegar and a splash of soy sauce. It won’t have the exact fermented funk of the original, but it will provide the necessary complexity and tang.
The Science of the Cornstarch Lace Crust
Have you ever seen those dumplings at high-end restaurants that are connected by a delicate, paper-thin lattice? That’s called a “lace crust” or a “tuile.” It looks incredibly fancy, but it’s actually just a simple mixture of water and a tiny bit of cornstarch.
When you pour the cornstarch slurry into the pan, the water evaporates, leaving the starch granules behind. As the water disappears, the starch undergoes gelatinization and then dehydrates, frying in the remaining oil to create a crispy, honeycomb-like structure. It adds an extra layer of “shatter” to every bite.
The ratio is key: 1/4 cup of water to 1/2 teaspoon of cornstarch is the sweet spot. If you use too much starch, the crust will be thick and leathery. If you use too little, it won’t hold together. This thin lattice also acts as a net, catching the chili oil and holding it against the dumpling.
Step-by-Step: Achieving the Starch Barrier Sear
Start by heating your neutral oil in a non-stick skillet over medium heat. Arrange your dumplings in a circular pattern, flat-side down. Do not crowd the pan; they need a little breathing room so the steam can escape later. Now, here is the most important part: wait.
You need to sear the dumplings for 3 to 4 minutes before you add any liquid. You are looking for the bottoms to turn a light, opaque tan color. This initial fry “cooks” the outer layer of the dough, creating that hardened starch barrier that prevents the wrapper from becoming a sponge.
Once you see that the bottoms are starting to firm up, you’ve successfully locked out the moisture. This is the “Anti-Soggy Secret” that separates amateur dumplings from restaurant-quality ones. Only after this barrier is formed should you introduce the cornstarch water.
Managing Heat Levels for Even Browning
Medium heat is your best friend. If the heat is too high, the bottom of the dumpling will burn before the frozen center has a chance to thaw. You’ll end up with a charred exterior and a cold, raw interior—a total kitchen disaster.
Conversely, if the heat is too low, the dumplings will just sit in the oil and absorb it. This leads to a greasy, heavy mouthfeel rather than a clean crunch. You want to hear a gentle, consistent sizzle the entire time they are in the pan.
If you notice one side of the pan is browning faster than the other, don’t be afraid to rotate the skillet. Most home stovetops have “hot spots,” and moving the pan ensures every dumpling gets that perfect, uniform golden-brown finish.
The Precision Steaming and Re-Crisping Phase
After the initial sear, give your cornstarch water a quick whisk (starch settles at the bottom!) and pour it into the pan. Immediately cover it with a tight-fitting lid. The steam trapped inside will cook the tops of the dumplings and the filling in a matter of minutes.
Keep the lid on for about 5 to 7 minutes. During this time, the “sizzle” will turn into a muffled bubbling sound. This is the sound of the water doing its work. Once the time is up, remove the lid. You’ll see that most of the water has vanished, leaving a thin, cloudy film on the bottom of the pan.
Now comes the re-crisping phase. Continue cooking with the lid off for another 2 to 3 minutes. As the last of the moisture evaporates, the “sizzle” will return, louder and sharper than before. This is the sound of the lace crust forming and the starch barrier hardening back up after its steam bath.
Timing Adjustments for Frozen vs. Fresh
Timing is everything when it comes to the perfect texture. For fresh dumplings, 5 minutes of steaming is usually plenty. Because the filling isn’t frozen, it reaches a safe internal temperature very quickly, and you want to avoid overcooking the dough.
For frozen dumplings, you’ll need 7 to 8 minutes of steaming. The extra time ensures the center is piping hot. If you’re unsure, you can gently poke the top of a dumpling with your finger; it should feel firm and bouncy, not soft or squishy.
Don’t rush the final re-crisping step. It’s tempting to pull them off the heat as soon as the water is gone, but waiting those extra 60 seconds allows the oil to “fry” the lace crust into a golden, brittle state that won’t collapse when plated.
Building the Aromatic Chili Oil Emulsion
While the dumplings are finishing their final fry, whisk together your sauce. Combine the chili oil, soy sauce, black vinegar, and minced garlic. The goal here isn’t just to mix them, but to create a loose emulsion where the vinegar and oil are temporarily suspended together.
The “crunchy bits” in the chili oil are vital. They provide little bursts of toasted flavor that mimic the crunch of the dumpling crust. If your chili oil is mostly liquid, spoon out extra flakes from the bottom of the jar to ensure you get that texture.
When you pour the sauce into the serving bowl, do it just before the dumplings are ready. The fresh garlic will stay bright and pungent. When the hot dumplings hit the sauce, they will release a tiny bit of heat that “blooms” the aromatics in the garlic and chili, filling your kitchen with an incredible scent.
Troubleshooting Common Texture Failures
If your dumplings are sticking to the pan, the number one rule is: have patience. Often, the “lace” hasn’t fully dried out yet. As the starch dehydrates and crisps, it will naturally release from the non-stick surface. Give it another 30 seconds before trying to slide the spatula under them.
If your lace crust looks gummy or thick, you likely used too much cornstarch or didn’t let the water evaporate completely. Next time, ensure the pan is completely dry of water and only oil remains before you call it finished. You should see the edges of the lace curling up slightly.
If a dumpling bursts and leaks juice into the pan, don’t panic. Use a paper towel to carefully dab up the excess liquid so it doesn’t boil the other dumplings. A burst dumpling happens when the steam pressure inside gets too high, usually from a wrapper that was too thin or had a small tear.
Preventing the “Oil-Slick” Mouthfeel
Because this dish uses both frying oil and chili oil, it can easily become too greasy. The secret to preventing an “oil-slick” mouthfeel is the balance of acidity. The Chinkiang vinegar is your best tool here; its sharp tang cuts right through the fat.
You can also add a pinch of sugar to the sauce. A tiny bit of sweetness balances the salt of the soy and the heat of the chili, making the overall flavor profile feel lighter and more balanced. It’s all about harmony between the five tastes.
Finally, make sure you drain any excess frying oil from the pan before plating if it looks like too much. You want the dumplings to be coated in the flavorful chili oil, not swimming in the neutral frying oil you used for the sear.
Optimal Serving and Plating Techniques
To preserve that hard-earned crunch, never pour the sauce directly over the top of the dumplings. Instead, pour the chili oil mixture into the bottom of a shallow bowl or plate. Place the dumplings on top of the sauce, crispy-side up.
This “bottom-up” plating method ensures the crispy base stays out of the liquid for as long as possible. You can spoon a little bit of the chili flakes (the sediment) onto the tops for color and flavor, but keep the bulk of the liquid underneath.
Garnish with toasted sesame seeds and maybe some fresh scallions or cilantro. The green herbs provide a necessary visual contrast and a hit of freshness that wakes up the palate between the spicy, crunchy bites.
Pairing Suggestions for a Balanced Meal
Since these dumplings are rich and spicy, you want side dishes that offer a cooling contrast. A smashed cucumber salad (Pai Huang Gua) with plenty of garlic and a touch of sesame oil is the classic choice. The cold, crisp cucumbers reset your taste buds after the heat of the chili.
Steamed or blanched greens, like bok choy or broccoli with a light oyster sauce drizzle, also work beautifully. They provide a fiber-rich, earthy balance to the savory dumplings. Keep the sides simple so the dumplings remain the star of the show.
For a drink, sparkling cranberry juice or a cold herbal tea is fantastic. The carbonation helps scrub the palate of the oil, while the subtle sweetness tames the fire of the red pepper flakes. It makes for a very refreshing dining experience.
Make-Ahead Strategies and Storage Limits
Crispy Chili Oil Dumplings are a “live in the moment” kind of food. They are at their absolute peak the second they leave the pan. As they sit, the steam from the filling will eventually soften the crust, and the “shatter” will turn into a chew.
If you do have leftovers, do not put them in the microwave. The microwave will turn the wrappers into rubber and the bottoms into mush. Instead, store them in an airtight container in the fridge for up to two days.
To reheat, place them back in a dry non-stick skillet over medium-low heat. Cover them for a minute to warm the center, then remove the lid and let the bottoms re-crisp in their own residual oil. It won’t be quite as perfect as the first time, but it’s the best way to salvage that crunch.
How do I store leftover dumplings?
Store any leftover dumplings in an airtight container in the refrigerator for up to 2 days. To maintain as much texture as possible, keep the sauce separate if you haven’t already combined them. When you’re ready to eat, avoid the microwave at all costs. Reheat them in a skillet over medium heat with a tiny drop of oil to bring back the crunch. Do not freeze cooked dumplings, as the texture of the wrapper becomes grainy and the crust will turn soggy upon thawing.
Why did my dumplings stick to the pan?
Dumplings usually stick for two reasons: the pan wasn’t hot enough when you started, or you tried to move them too early. When the starch in the wrapper hits the hot oil, it needs time to polymerize and form a crust. This crust will naturally “release” from the pan once it’s fully cooked and dehydrated. If they are sticking, wait another 60 seconds for the moisture to fully evaporate. Using a high-quality non-stick skillet is also a major factor in success for this recipe.
Can I use a different type of vinegar?
While Chinkiang black vinegar is the gold standard for its malty, complex flavor, you can substitute it in a pinch. Use a mix of half balsamic vinegar and half rice vinegar to mimic the depth and acidity. Avoid using plain white distilled vinegar, as it is too harsh and lacks the fermented undertones that make the chili oil sauce taste authentic. Apple cider vinegar can work as a last resort, but it will add a fruity note that changes the dish’s profile.
What if I don’t have cornstarch for the lace crust?
If you don’t have cornstarch, you can use all-purpose flour or potato starch to create the lace. The ratio remains the same, though flour will produce a slightly more opaque, “bready” lattice compared to the glass-like transparency of cornstarch. If you prefer to skip the lace altogether, you can just use plain water for the steaming phase. The dumplings will still be crispy on the bottom thanks to the initial sear, you just won’t have the extra decorative lattice connecting them.
How do I know when the dumplings are fully cooked?
The best visual cue is the wrapper. When the dumplings are done, the dough will look translucent and slightly wrinkled, hugging the filling tightly. If you’re cooking from frozen, the steaming phase should last at least 7 minutes to ensure the internal temperature is safe. You can also use a meat thermometer to check that the center has reached 165°F. Another sign is the sound; once the water has evaporated and you hear a sharp, consistent sizzling, the dumplings are ready for their final 2-minute crisp.
Crispy Chili Oil Dumplings
Course: Main CourseCuisine: Asian FusionDifficulty: easy2
servings15
minutes12
minutes27
Minutes420
kcalAsian Fusion
Ingredients
12 frozen or fresh vegetable or chicken dumplings (potsticker style)
3 tablespoons neutral frying oil (grapeseed or canola)
1/4 cup water
1/2 teaspoon cornstarch (for the “lace” crust)
4 tablespoons chili oil with plenty of sediment/flakes
1 tablespoon soy sauce
1 teaspoon Chinkiang black vinegar (for depth)
1 teaspoon toasted sesame seeds
1/2 teaspoon red pepper flakes
1 clove garlic, finely minced
Directions
- In a small bowl, whisk the 1/4 cup water with 1/2 teaspoon of cornstarch. Set aside.
- Heat the neutral oil in a non-stick skillet over medium heat. Place the dumplings flat-side down in a circular pattern.
- To solve the soggy bottom problem, sear the dumplings in the oil for 3 to 4 minutes BEFORE adding any liquid. This creates a hardened starch barrier that prevents the dough from absorbing too much moisture later.
- Once the bottoms are deep golden brown, give the cornstarch water a quick stir and pour it into the pan. Immediately cover with a tight-fitting lid. Steam for 5 minutes (or 7 minutes if cooking from frozen).
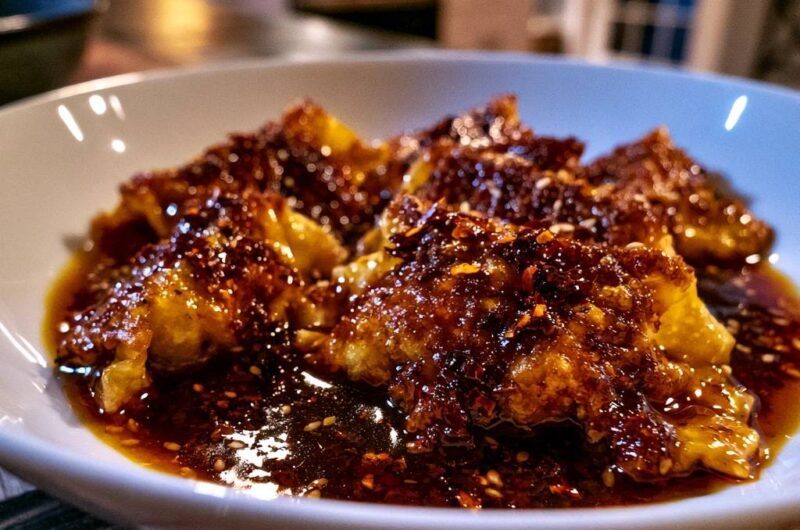
- Remove the lid. Continue to cook for another 2-3 minutes until all water has evaporated. You will see a thin, lacy crust form and the dumplings will begin to sizzle loudly in the remaining oil. This “re-crisping” phase is vital for the texture shown in the image.
- While the dumplings re-crisp, whisk together the chili oil, soy sauce, black vinegar, minced garlic, and red pepper flakes in a bowl.
- Carefully slide a spatula under the dumplings to release the crispy crust. Transfer them to a shallow bowl.
- Pour the chili oil sauce into the base of the bowl and spoon extra chili flakes directly onto the crispy tops. Garnish with sesame seeds and serve immediately while the “crunch” is at its peak.
Notes
- The vital step is searing the dumplings in oil for 3 to 4 minutes before adding liquid to create a hardened starch barrier. Ensure you use a non-stick skillet for the best lacy crust results.