We’ve all been there. You’re craving a snack that actually has some substance, something that satisfies that deep-seated need for a salty crunch without leaving you in a mid-afternoon slump. You try roasting a can of chickpeas, hoping for a crispy, protein-packed treat, but you end up with a tray of chewy, semi-soft beans that are more disappointing than a soggy cracker.
The frustration is real because most recipes skip the fundamental physics of legumes. To get that “shatter-on-impact” texture, you have to treat the chickpea like a tiny potato that needs to be dehydrated before it can be crisped. It isn’t just about the heat; it’s about managing the moisture that lives inside the bean.
I’ve found that the real secret to success is the “naked roast.” By putting the chickpeas in the oven completely dry and without a drop of oil for the first twenty minutes, you allow the internal steam to escape. This creates a porous, dry surface that is perfectly primed to soak up oil and spices later without turning into a mushy mess. It’s a total game-changer for your snacking routine.
The Anatomy of a Crispy Spiced Roasted Chickpea
A chickpea is essentially a little ball of starch and fiber held together by a thin skin. When you buy them canned, they’re sitting in a liquid called aquafaba, which is full of starches and proteins. If you don’t rinse that off thoroughly, it creates a sticky film that traps moisture inside the bean during cooking.
Once they hit the heat, the water inside the chickpea wants to turn into steam. If you coat them in oil right away, you’re essentially sealing that moisture in, which causes the chickpea to steam from the inside out. This results in a texture that’s crispy on the very edge but unpleasantly soft in the middle. We want to transform that starch into a rigid, crunchy structure.
Why Moisture is the Enemy of Texture
Physics tells us that water evaporates at 212°F, but oil can reach much higher temperatures. If your chickpeas are even slightly damp when they go into the oven, the oil will actually lower the surface temperature as the water tries to evaporate. This creates a “boiling” effect rather than a roasting effect.
That’s why the 20-minute air-drying phase is the most important part of this entire process. You want the skins to feel like parchment paper before they ever see the heat. Taking the time to rub them with a kitchen towel ensures that the “micro-moisture” is gone, allowing the oven’s dry air to do its job immediately.
Essential Components for Spiced Roasted Chickpeas
You don’t need a long grocery list for this, but the quality of your staples matters. Extra virgin olive oil is my go-to here because it provides a rich, fruity base that carries the spices beautifully. While some worry about the smoke point, at 400°F, a high-quality olive oil holds up perfectly for the short second-stage roast.
Salt is the other heavy hitter. I always reach for sea salt or kosher salt rather than fine table salt. The larger grains provide a better “pop” of flavor and cover more surface area on the round chickpeas. It also helps draw out any final bits of moisture as they finish roasting.
The Spice Profile: Balancing Heat and Earthiness
The blend we’re using—smoked paprika, cumin, garlic, and onion powder—is designed for maximum umami. Smoked paprika adds a deep, wood-fired scent that makes these feel substantial, while cumin provides an earthy backbone. Garlic and onion powders are essential because they provide savory flavor without the moisture of fresh aromatics.
If you used fresh minced garlic, it would burn into bitter black bits long before the chickpeas were crunchy. The powders create a fine “dust” that adheres to the oil, forming a flavorful crust. If you like a little kick, that pinch of cayenne pepper will wake up your taste buds and give the snack a beautiful glow.
The Two-Stage Roasting Technique Explained
Most people fail at this dish because they toss everything together in a bowl and throw it in the oven. This is a mistake. When you add spices and oil at the start, the spices often burn and the oil prevents the chickpea from drying out. The two-stage method is the professional way to ensure a consistent, long-lasting crunch.
By roasting them “naked” first, you are essentially curing the bean. You’re removing the water that causes sogginess. Think of it like double-frying a french fry; the first pass cooks the inside, and the second pass creates the golden exterior. In our case, the first roast dehydrates, and the second roast flavors and crisps.
Phase One: The Internal Dehydration Roast
During the first 20 minutes at 400°F, you’ll notice the chickpeas start to shrink slightly. They might even make little popping sounds. This is a good sign! It means the steam is escaping. You aren’t looking for much color yet, just a matte, dry appearance. If they still look shiny or feel soft, they aren’t ready for the oil yet.
Phase Two: Infusing Flavor and Setting the Crust
Once the chickpeas are dehydrated, you pull them out and add the oil. Now, instead of the oil trapping moisture in, it’s soaking into the dry, porous surface. When you toss them with the spices, the oil acts as a glue. The second roast is shorter because we just want to “set” the spices and get that final golden-brown finish.
Step-by-Step: Achieving the Ultimate Savory Snack
Start by preheating your oven to 400°F. While that’s heating, drain your chickpeas and rinse them until the water runs clear. Spread them out on a clean kitchen towel and give them a gentle rub. You’ll see some of the thin skins start to peel off; just toss those away so they don’t burn in the pan.
Let them sit there for 20 minutes. Seriously, don’t rush this. Once they’re bone-dry, spread them on a rimmed baking sheet. Roast them for 20 minutes plain. When you take them out, they should feel light and sound a bit like marbles when you shake the pan. Now, drizzle the oil and sprinkle your spice mix over them, tossing until they’re a vibrant orange-red.
Put them back in for another 15 to 20 minutes. You’ll want to give the pan a good shake halfway through. This ensures that the side touching the hot metal doesn’t get too dark while the top stays pale. You’ll know they’re done when they are deeply colored and feel firm to the touch.
The Cooling Hack: Using Residual Oven Heat
This is the secret weapon for a snack that stays crunchy for days. Instead of taking the pan out immediately, turn the oven off and crack the door open just a few inches. Let the chickpeas sit in there for 15 minutes. This slow cooling process allows any remaining microscopic steam to drift away, “locking in” the crunch.
For another simple way to achieve wonderfully crispy skin, check out glazed cranberry roasted chicken thighs.
For another simple way to achieve wonderfully crispy skin, check out glazed cranberry roasted chicke For a similar sticky glaze on chicken, try this Sticky Moroccan-Style Chicken.
Troubleshooting Common Texture Issues
If your chickpeas come out chewy, the most likely culprit is overcrowding. If the chickpeas are touching each other too much, they create a humid micro-climate on the pan. They need space for the air to circulate around each individual bean. If you’re making a big batch, use two separate pans rather than piling them high on one.
Another issue is bitter flavor. This usually happens if the spices burn. If your oven runs hot, try moving the rack to the middle position rather than the top. The top of the oven is often much hotter, which can scorch the delicate paprika and garlic powder before the chickpea is fully crisped.
The Importance of Pan Surface Area
A standard 13×18 inch half-sheet pan is perfect for two cans of chickpeas. You want at least half an inch of “white space” on the pan between the beans. If they look like a solid carpet of legumes, they are going to steam. Using a rimmed sheet is also vital so you can shake the pan vigorously without sending chickpeas flying into the bottom of your oven.
What to Pair with Your Crunchy Chickpeas
To complement your spiced roasted chickpeas, consider these dishes that share similar textures or offer a delightful contrast.
- For a meal featuring roasted vegetables with a creamy base, try the Roasted Carrots and Crispy Chickpeas over Whipped Yogurt.
- If you’re looking for a robust and filling option, the Hearty Beef and Bean Chili provides a deep flavor that stands up well to the spiced chickpeas.
Flavor Variations and Global Spice Swaps
Once you master the technique, you can play with the flavors. For a Mediterranean vibe, try tossing them with two tablespoons of Za’atar and a bit of dried lemon peel after the first roast. The sesame seeds in the Za’atar get toasted and add a wonderful nutty layer to the snack.
If you want something more savory and “cheesy” without the dairy, use nutritional yeast and a heavy pinch of turmeric. The nutritional yeast creates a thick, savory crust that tastes remarkably like white cheddar. For a warm, Indian-inspired snack, use a high-quality curry powder and a touch of ground ginger.
Serving Suggestions and Culinary Applications
These are obviously incredible by the handful, but they’re also a secret weapon for adding texture to meals. Use them as a gluten-free alternative to croutons in a Caesar salad. They provide that necessary crunch but add a boost of fiber and protein that bread just can’t offer.
For a similar crunch, check out these garlic herb smashed potatoes.
I also love throwing a handful over a creamy soup, like roasted butternut squash or tomato basil. The contrast between the velvety soup and the crunchy, spiced chickpeas is addictive. They also make a great “sprinkle” for avocado toast or Mediterranean grain bowls with plenty of tahini dressing.
Storage Protocols to Maintain Maximum Crispness
Whatever you do, do not put these in the refrigerator! The humidity in a fridge is the natural enemy of roasted chickpeas. They will turn soft and rubbery within an hour. Instead, let them cool completely on the baking sheet until they are room temperature.
Store them in a glass jar or an airtight container on your counter. Salt is hygroscopic, meaning it pulls moisture out of the air, so if you live in a very humid climate, you might notice them softening after a day or two. If that happens, just pop them back in a 350°F oven for 5 minutes to “refresh” the crunch.
Expert Tips for Batch Prepping
If you’re doubling this recipe for the week, remember that you’ll need to rotate your pans. Put one on the upper-middle rack and one on the lower-middle rack. Halfway through each roasting stage, swap their positions. This ensures that both pans get equal exposure to the heating elements.
Also, keep an eye on the brand of chickpeas you buy. Some organic brands are packed in very little liquid and are quite firm, while others are very soft. If your chickpeas feel particularly mushy out of the can, they might need an extra 5 minutes in the “naked roast” phase to ensure all that extra water is gone.
Selecting the Right Chickpea Brand
I generally prefer standard store-brand canned chickpeas for roasting. They tend to be uniform in size and hold their shape well. If you use “low sodium” versions, you might need to add a tiny bit more salt to the spice mix to make the flavors pop. The goal is a firm bean that doesn’t collapse when you pat it dry.
Frequently Asked Questions
Can I use an Air Fryer for this recipe?
Yes, you can! Use the same two-stage method. Air fry them “naked” at 390°F for about 10-12 minutes, shaking frequently. Then, toss them with the oil and spices and air fry for another 5-8 minutes. Because the air fryer is so efficient at moving air, they often cook much faster than in a traditional oven.
Why did my spices turn black?
This usually happens if the chickpeas weren’t coated evenly in oil or if the oven rack was too high. The oil protects the spices from the direct dry heat of the oven. Make sure every chickpea is glistening before you add the spice blend. If the spices still burn, try lowering your oven temperature to 375°F for the second stage.
Do I have to peel every chickpea?
Absolutely not. That would take forever! You only need to remove the skins that fall off naturally while you are drying them with the towel. Those loose skins are very thin and will burn quickly, creating a bitter taste in the batch. The skins that stay attached to the chickpeas actually help provide a nice extra bit of crunch.
Can I use dried chickpeas I’ve soaked myself?
You can, but you must boil them until they are fully cooked first. You cannot roast soaked, uncooked chickpeas; they will be rock-hard and potentially break a tooth. Once they are boiled and tender, follow the drying and roasting steps exactly as written. Canned chickpeas are simply more convenient and provide a consistent texture.
Is this snack suitable for specific diets?
This is a fantastic snack for almost any diet. It is naturally vegan, gluten-free, and nut-free. Because chickpeas are high in fiber and protein, they have a lower glycemic index than chips or crackers, making them a much better option for sustained energy throughout the day.
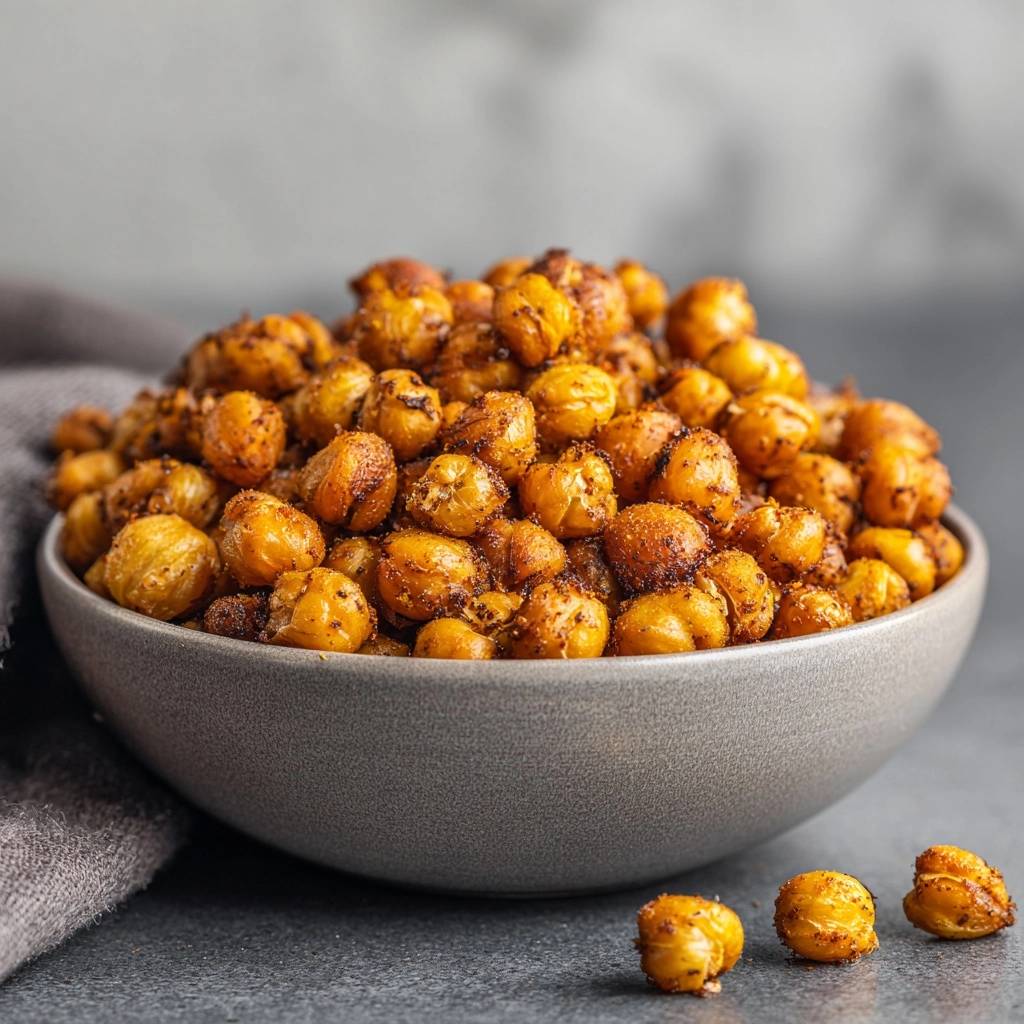
Spiced Roasted Chickpeas
Course: SnackCuisine: Mediterranean and AmericanDifficulty: easy4
servings15
minutes40
minutes165
kcal55
MinutesA healthy and flavorful snack featuring chickpeas roasted with a blend of smoked paprika, garlic, and cumin. This recipe uses a specific drying method and a two-stage roasting process to ensure a long-lasting crunch without the sogginess.
Ingredients
2 cans (15 ounces each) chickpeas, drained and rinsed
2 tablespoons extra virgin olive oil
1 teaspoon smoked paprika
1 teaspoon garlic powder
1/2 teaspoon ground cumin
1/2 teaspoon onion powder
1/2 teaspoon sea salt
1/4 teaspoon black pepper
1/8 teaspoon cayenne pepper (optional, for heat)
Directions
- Preheat your oven to 400°F (200°C).
- To solve the soggy texture issue, spread the rinsed chickpeas onto a clean kitchen towel or several layers of paper towels. Rub them gently to remove all surface water. Let them air dry for at least 20 minutes. If any skins fall off, discard them, as loose skins burn easily and prevent the chickpea from crisping evenly.
- Place the bone-dry chickpeas on a large rimmed baking sheet in a single layer. Do not add oil or spices yet. Roast them plain for 20 minutes. This initial roast evaporates the internal moisture that usually causes mushiness.
- Remove the pan from the oven. Drizzle with the olive oil and toss with a spatula until every chickpea is glistening.
- In a small bowl, whisk together the smoked paprika, garlic powder, cumin, onion powder, salt, black pepper, and cayenne. Sprinkle the spice blend over the oiled chickpeas and toss again until they are evenly coated and appear deep orange-red.
- Return the pan to the oven for another 15-20 minutes. Shake the pan every 10 minutes to ensure even browning and to prevent the spices from scorching.
- For the ultimate crunch, turn off the oven and crack the door open slightly. Let the chickpeas cool inside the oven for 15 minutes. This slow temperature drop allows the remaining steam to escape and locks in the crispy texture.
- Remove from the oven and let cool completely on the tray. Serve immediately or store in an airtight container at room temperature. (Note: Do not refrigerate, as the moisture in the fridge will make them soft).
Notes
- Do not refrigerate the finished chickpeas, as the moisture in the fridge will make them soft. For the best results, ensure chickpeas are bone-dry before the first roast and allow them to cool in a cracked oven.