As a seasoned baker, few things are more frustrating than a sticky recipe that promises perfection but delivers a mess. That’s why I’m thrilled to share my absolute favorite method for creating these truly beautiful and non-messy Charming Chocolate Acorn Treats.
This recipe offers an innovative approach to chocolate ganache that ensures clean shaping and a professional finish every time, transforming a potentially fussy dessert into a joyful baking experience.
Beyond Sticky Fingers: Why Our Charming Acorn Treats Recipe Shines
The “Clean Hands” Ganache Technique That Changes Everything
This recipe’s innovative approach to ganache chilling is the absolute secret to mess-free shaping.
Achieving Professional Acorn Shapes with Ease
No more frustration! Our method ensures perfectly formed chocolate acorns that look like they came from a high-end bakery.
A Treat for All Seasons: Versatility and Charm
While perfect for fall, these delightful chocolate acorns are a charming addition to any festive gathering or cozy moment throughout the year.
Essential Ingredients for Your Delicious Acorn Creations
The Heart of the Treat: Quality Dark Chocolate
Understanding the role of good quality chocolate is crucial for both flavor and texture in your chocolate acorn treats.
Choose a dark chocolate (60-70% cocoa) for optimal melting and setting, ensuring a rich, intense chocolate flavor without being overly sweet.
Creamy Perfection: Heavy Cream’s Role
Heavy cream contributes to the ganache’s luxurious smoothness and rich, decadent mouthfeel, creating a truffle-like texture.
The Finishing Touch: Unsweetened Cocoa Powder
Cocoa powder provides a beautiful, natural, earthy acorn-like finish without excessive sweetness, balancing the rich chocolate.
It also aids in the non-stick shaping process, preventing fingerprints and adding to the realistic appearance of these whimsical chocolate sweets.
Gather Your Tools: Essential Equipment for Acorn Treats
Having the right tools ready makes the process seamless and enjoyable, ensuring your homemade chocolate acorns turn out perfectly.
Heatproof Bowls: Essential for preparing the ganache and melting the decorative chocolate.
Small Saucepan: Used for gently heating the heavy cream to the perfect temperature.
Whisk: For combining the chocolate and cream into a smooth, glossy ganache.
Parchment-Lined Baking Sheets: Crucial for preventing sticking while shaping and setting the treats.
Food-Safe Gloves (Optional, but Recommended): For the cleanest, non-messy shaping experience.
Shallow Dish or Plate: Ideal for rolling your acorn bodies in cocoa powder for an even coat.
Fork: Helps in gently rolling and lifting the cocoa-dusted acorns without smudges.
Piping Bag or Resealable Plastic Bag: For precise control when creating the delicate caps and stems.
Crafting Your Charming Chocolate Acorn Treats: A Step-by-Step Guide
- Step 1: Prepare the Ganache Base
Place 6 ounces of finely chopped dark chocolate into a heatproof bowl. In a small saucepan, gently heat 1/2 cup heavy cream until just simmering around the edges, then pour it over the chocolate.
Allow it to sit undisturbed for 5 minutes, which lets the chocolate soften. Then, whisk gently from the center outwards until the mixture is completely smooth and glossy, indicating a perfectly emulsified ganache base for your chocolate acorn treats.
- Step 2: Crucial Chill for Clean Shaping
This step is paramount for achieving non-messy, perfectly shaped chocolate acorns! Cover the ganache and refrigerate for at least 2 to 3 hours, or until it is firm enough to roll easily without sticking excessively to your hands, but still pliable.
This perfectly firm texture is the absolute key to neat, non-messy shaping; if it’s too soft, it will be sticky, and if too hard, it will crack, so achieving this balance is vital for your whimsical chocolate sweets.
- Step 3: Shape the Acorn Bodies (The Non-Sticky Way)
Once the ganache is properly chilled, scoop out small portions, about 1 tablespoon each. For a super clean process, you can wear food-safe gloves or lightly dust your hands with a tiny bit of cocoa powder, which truly aids in the non-stick shaping.
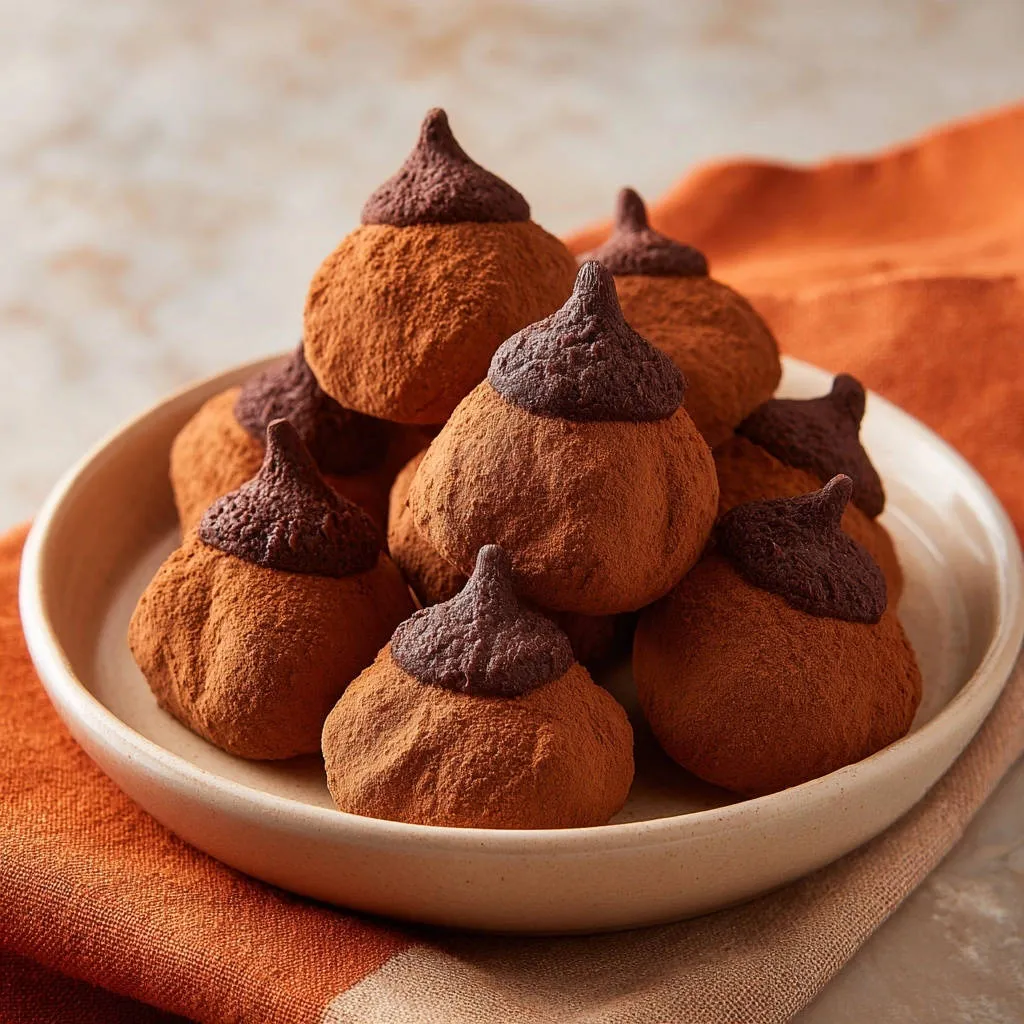
Quickly roll each portion between your palms into an oval or teardrop shape, mimicking the base of an acorn. Work efficiently to prevent the chocolate from melting too much from the warmth of your hands, and place the shaped bodies on a parchment-lined baking sheet.
- Step 4: Cocoa Dusting for a Perfect Finish (No Fingerprints!)
Pour the unsweetened cocoa powder into a shallow dish or plate. Gently drop a few shaped chocolate acorns into the cocoa powder at a time.
Using a fork or by gently shaking the dish, roll the acorns around until they are evenly coated. This method ensures a smooth, even layer of cocoa without getting messy fingerprints on your beautiful shapes, giving them that authentic, whimsical chocolate acorn look.
Lift them out carefully with the fork, tapping off any excess powder, and return them to the parchment-lined baking sheet.
- Step 5: Create the Caps and Stems (For Pro-Level Detail)
Melt the remaining 2 ounces of dark chocolate using a double boiler or a microwave-safe bowl, stirring until completely smooth.
Transfer the melted chocolate to a small piping bag or a resealable plastic bag with a tiny corner snipped off. This provides the precise control needed for those intricate details on your charming chocolate acorn treats.
- Step 6: Decorate Neatly
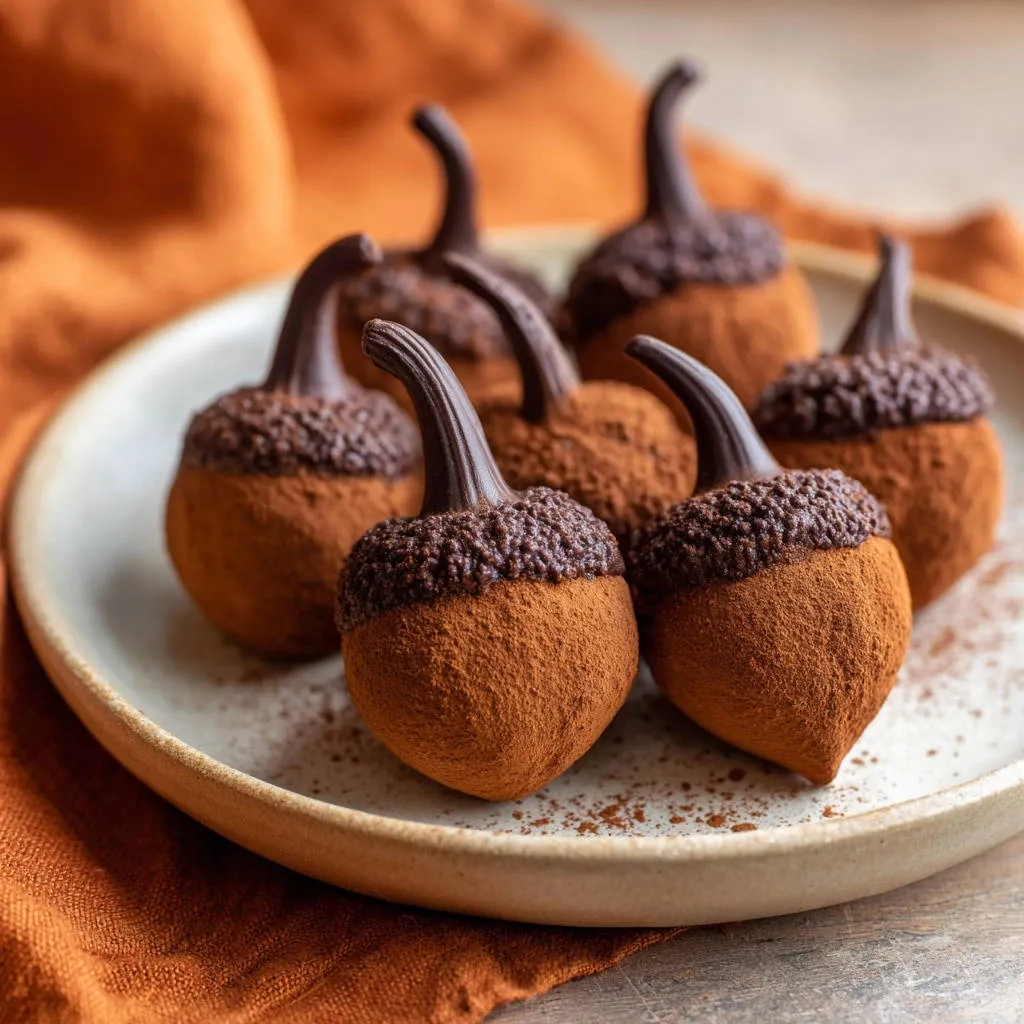
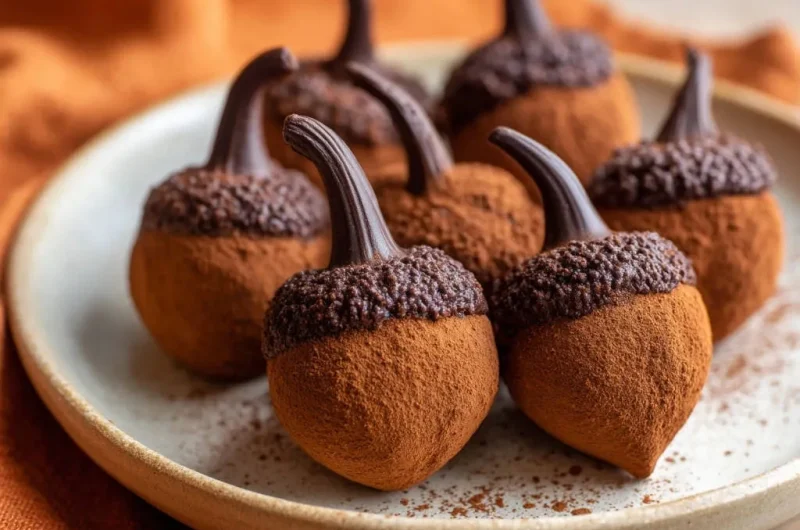
For the acorn caps: Pipe small, textured dots of chocolate around the top wider edge of each cocoa-dusted acorn body, skillfully mimicking the rough texture of an acorn cap.
For the stems: Pipe a small, curved stem shape directly onto the top center of each cap. Using a piping bag gives you precise control, making it easy to create these details without smudges or drips, elevating your chocolate acorn treats to a professional level.
- Step 7: Set and Serve
Place the finished chocolate acorns back in the refrigerator for about 15-20 minutes to allow the piped chocolate caps and stems to set completely.
Once firm, these delightful chocolate acorn treats are ready to serve and enjoy!
Chef’s Secrets: Mastering Your Chocolate Acorn Treats
Unlock the secrets to truly perfect chocolate acorn treats with these expert tips, ensuring every batch is a triumph.
Achieving the Ideal Ganache Consistency
The perfect ganache is firm enough to roll but pliable. If it feels too stiff from the fridge, let it sit at room temperature for a few minutes to soften slightly. If it’s too soft, return it to the fridge briefly.
The Benefit of Food-Safe Gloves (or a Cocoa Dusting Alternative)
Wearing food-safe gloves keeps your hands impeccably clean and, more importantly, prevents the warmth of your hands from melting the chocolate too quickly during shaping. This makes the rolling process much easier and cleaner.
Alternatively, a light dusting of cocoa powder on your hands can also provide a non-stick barrier, helping you maintain those pristine acorn shapes.
Working Efficiently for Best Results
Chocolate is sensitive to heat, so work quickly when rolling the acorn bodies to maintain their shape and prevent stickiness. Prepare your workspace and have everything ready before you start shaping.
Piping Bag Precision for Flawless Caps and Stems
Using a piping bag (even a simple ziplock bag with a tiny corner snipped off) offers unparalleled control for neat, professional-looking details without smudges or drips. This is key for creating those intricate, realistic caps and stems on your chocolate acorn treats.
Solving Common Acorn Treat Challenges
My Ganache is Too Sticky to Roll!
This is usually a sign it’s not chilled enough. Return it to the refrigerator for an additional 30 minutes to an hour, checking every 15 minutes until it reaches the ideal firm-but-pliable consistency.
Proper chilling is the cornerstone of mess-free shaping for these chocolate acorn treats.
My Acorns are Cracking When I Try to Shape Them!
If your ganache is cracking, it’s likely too cold or too hard. Let it sit at room temperature for 10-15 minutes to soften slightly before attempting to roll again.
A pliable ganache is key for smooth, perfectly formed chocolate acorn treats.
Help! My Cocoa Dusting Looks Uneven or Messy!
Ensure you’re using a shallow dish and rolling gently to achieve an even coat. If too much cocoa sticks, tap off the excess carefully with a fork.
Avoid direct hand contact during dusting to prevent smudges and maintain the clean finish of your chocolate acorn treats. This method also works wonders for other delicate chocolate confections, much like the perfect coating you’d want for delicious raspberry chocolate coconut truffles.
My Piped Caps Aren’t Holding Their Shape!
The melted chocolate for the caps might be too warm or too thin. Let it cool slightly, stirring occasionally, until it’s still flowable but has more body.
This thicker consistency will help it set faster and hold its form, ensuring your charming chocolate acorn treats have distinct, well-defined caps.
Enjoying and Storing Your Charming Chocolate Acorn Treats
Elegant Serving Suggestions for Any Occasion
These exquisite chocolate acorn treats are perfect arranged on a dessert platter, as part of a festive fall-themed tablescape, or individually wrapped as charming, edible gifts for friends and family.
How to Store Your Acorn Treats for Freshness
Store your charming chocolate acorn treats in an airtight container at cool room temperature for up to a week for optimal enjoyment. For extended freshness, they can be kept in the refrigerator for up to 2 weeks.
Always allow them to come to room temperature for about 15-20 minutes before serving for the very best texture and flavor, as the chocolate will soften beautifully.
Make-Ahead Tips for Stress-Free Entertaining
The ganache base for these chocolate acorn treats can be prepared and chilled up to 2-3 days in advance, significantly reducing prep time on the day of your event.
For optimal freshness and appearance, it’s best to shape and decorate the whimsical chocolate acorns closer to your serving time.
Your Most Asked Questions About Chocolate Acorn Treats
Can I Use Milk Chocolate Instead of Dark Chocolate?
While dark chocolate provides the best flavor and structural integrity for these chocolate acorn treats, you can use milk chocolate. However, be aware it will result in a sweeter, potentially softer treat, and adjusting the chilling time might be necessary to achieve a rollable consistency.
How Long Do Chocolate Acorn Treats Last?
When stored properly in an airtight container, these charming chocolate acorn treats will stay fresh and delicious for about 7-10 days at cool room temperature. If refrigerated, their freshness can extend up to 2 weeks.
Are These Acorn Treats Gluten-Free or Vegan?
As written, this recipe is not gluten-free or vegan due to the heavy cream and standard chocolate. However, with careful substitutions like dairy-free cream and vegan chocolate, these delightful chocolate acorn treats can certainly be adapted. For comprehensive guidance on plant-based swaps, consult a dedicated guide for vegan baking substitutions.
Can I Freeze Leftover Acorn Treats?
Yes, you can! To freeze, place your finished chocolate acorn treats in an airtight container, separated by layers of parchment paper, for up to 1 month. Thaw them in the refrigerator overnight before bringing them to room temperature to serve, ensuring they regain their perfect texture.
What Other Toppings or Decorations Can I Use?
Get creative with your charming chocolate acorn treats! Edible glitter, a delicate dusting of powdered sugar, or even tiny edible pearls could add extra flair. You can also use melted white chocolate for contrasting caps or stems, or even explore chocolate designs, much like those on decadent chocolate brownies.
Share Your Charming Chocolate Acorn Treats Masterpiece!
We hope this detailed guide empowers you to create truly charming and flawless chocolate acorn treats that delight everyone. There’s immense satisfaction in crafting such beautiful, delicious confections, especially when you know the secrets to making them perfect and mess-free.
Don’t forget to share your creations with us on social media! We love seeing your culinary triumphs. For more delightful dessert ideas and expert baking tips, explore our other irresistible recipes here.
Charming Chocolate Acorn Treats
Course: DessertCuisine: American CuisineDifficulty: easyAmerican Cuisine
N/A
Ingredients
8 ounces (about 1 1/3 cups) good quality dark chocolate, finely chopped, divided
1/2 cup heavy cream
1/4 cup unsweetened cocoa powder, for dusting
Directions
- Prepare the Ganache Base: Place 6 ounces (about 1 cup) of the finely chopped dark chocolate into a heatproof bowl. In a small saucepan, heat the heavy cream over medium heat until it just begins to simmer around the edges. Pour the hot cream over the chocolate. Let sit undisturbed for 5 minutes, then whisk gently from the center outwards until the mixture is completely smooth and glossy.
- Crucial Chill for Clean Shaping: Cover the ganache and refrigerate for at least 2 to 3 hours, or until it is firm enough to roll easily without sticking excessively to your hands, but still pliable. This perfectly firm texture is the absolute key to neat, non-messy shaping! If it’s too soft, it will be sticky; too hard, and it will crack.
- Shape the Acorn Bodies (The Non-Sticky Way): Once the ganache is properly chilled, scoop out small portions (about 1 tablespoon each). For a super clean process, you can wear food-safe gloves or lightly dust your hands with a tiny bit of cocoa powder. Quickly roll each portion between your palms into an oval or teardrop shape, like the base of an acorn. Work efficiently to prevent the chocolate from melting too much from the warmth of your hands. Place the shaped bodies on a parchment-lined baking sheet.
- Cocoa Dusting for a Perfect Finish (No Fingerprints!): Pour the unsweetened cocoa powder into a shallow dish or plate. Gently drop a few shaped chocolate acorns into the cocoa powder at a time. Using a fork or by gently shaking the dish, roll the acorns around until they are evenly coated. This method ensures a smooth, even layer of cocoa without getting messy fingerprints on your beautiful shapes. Lift them out carefully with the fork, tapping off any excess powder, and return them to the parchment-lined baking sheet.
- Create the Caps and Stems (For Pro-Level Detail): Melt the remaining 2 ounces (about 1/3 cup) of dark chocolate using a double boiler or microwave safe bowl, stirring until smooth. Transfer the melted chocolate to a small piping bag or a resealable plastic bag with a tiny corner snipped off.
- Decorate Neatly:
- For the acorn caps: Pipe small, textured dots of chocolate around the top wider edge of each cocoa-dusted acorn body, mimicking the rough texture of an acorn cap. Work neatly and consistently.
- For the stems: Pipe a small, curved stem shape directly onto the top center of each cap.
- Using a piping bag gives you precise control, making it easy to create these details without smudges or drips.
- Set and Serve: Place the finished chocolate acorns back in the refrigerator for about 15-20 minutes to allow the piped chocolate caps and stems to set completely. Once firm, they are ready to serve and enjoy!
Notes
- Crucial chilling and careful shaping techniques are key for perfect, non-sticky results.