Most lemon bars are a disappointment because they suffer from the dreaded soggy bottom. You take a bite expecting a crisp, buttery crunch, but instead, you get a mushy, wet mess that falls apart in your hands. These Creamy Lemon Crumble Bars solve that frustration by using a specific double-bake method and a moisture-barrier technique.
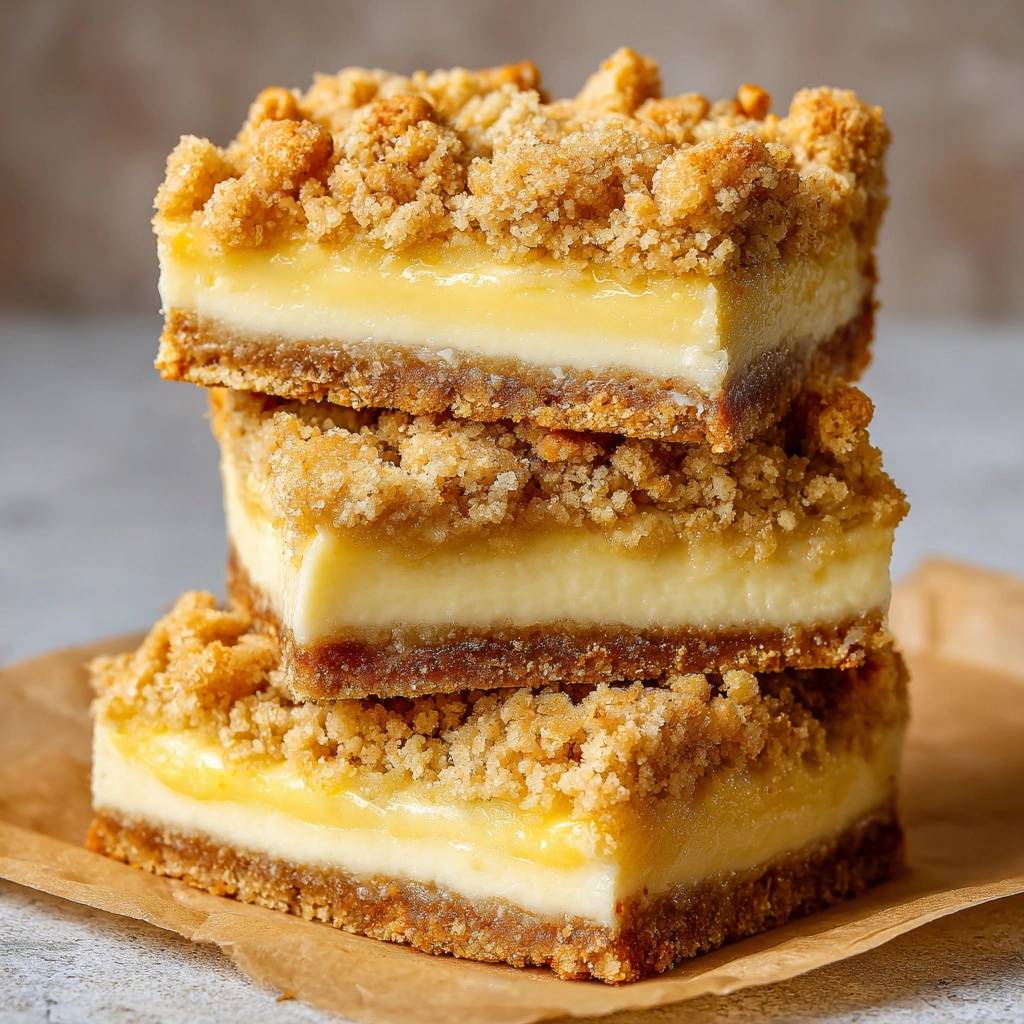
The secret to this recipe lies in the textural contrast between the dense, shortbread-style base and the silky, tart custard. We aren’t just making a standard lemon curd; we’re building a structural masterpiece that balances bright citrus with a rich, creamy mouthfeel. It’s the kind of dessert that looks elegant on a platter but feels like pure comfort food.
I’ve found that the real trick to a professional-grade bar is the compression of the crust. By using the bottom of a flat measuring cup to pack the flour and butter mixture into a tight, dense seal, you create a physical shield. This prevents the lemon filling from soaking into the dough, ensuring every bite has a distinct, snappy foundation.
The Anatomy of a Non-Soggy Lemon Bar
The “Anti-Soggy Bottom” philosophy is all about managing moisture and heat. In a standard single-bake recipe, the wet filling and raw dough go into the oven together, which almost always leads to a gummy interface. By par-baking the crust for 15 minutes, we set the gluten and cook out the initial moisture from the butter.
This par-baking step creates a structural seal. The high butter-to-flour ratio in the base allows the fats to fry the flour particles slightly, creating a golden, toasted barrier. When you finally pour the lemon mixture over the hot crust, the surface is already firm enough to resist absorption, keeping the layers perfectly separated.
Essential Components for the Perfect Citrus Filling
We use sweetened condensed milk as the backbone of this filling because it offers a superior, velvety texture. Unlike traditional lemon bars that rely on flour or cornstarch for thickening, this version creates a creamy custard that doesn’t feel “jelly-like” or translucent. It’s rich, opaque, and incredibly smooth.
The egg yolks are the unsung heroes here, providing the necessary fat and stability to the custard. While the condensed milk provides the sweetness, the yolks ensure the bars set firmly enough to slice while remaining tender. This combination creates a filling that melts on your tongue rather than sticking to your teeth.
Fresh Squeezed vs. Bottled Lemon Juice
You must use fresh lemons for this recipe to work correctly. Fresh lemon juice has a specific pH level that triggers a chemical reaction with the proteins in the condensed milk, causing it to thicken almost instantly upon contact. This natural thickening helps the filling set quickly in the oven.
Bottled lemon juice often contains preservatives and oil extracts that can mute the bright, vibrant citrus notes. Furthermore, the acidity in bottled juice can be inconsistent, which might mess with the creamy consistency of your custard. Stick to the real thing for that sharp, puckery punch that cuts through the sugar.
The Role of Zest and Vanilla Extract
Lemon zest contains essential oils that provide a deep, aromatic citrus flavor that juice alone cannot achieve. When you rub the zest into the filling, those oils release, giving the bars a floral, bright scent. It’s the difference between a bar that tastes like lemon and one that truly sings with citrus.
A splash of vanilla extract might seem counterintuitive in a lemon recipe, but it acts as a flavor rounder. It softens the sharpest edges of the citric acid, creating a more complex and sophisticated palate. It bridges the gap between the tart lemon and the buttery shortbread, tying the whole dessert together.
Building the Structural Shortbread Base and Topping
The dry ingredients are the bones of this dessert. We use all-purpose flour because it provides enough gluten structure to hold the weight of the creamy filling without becoming tough. It’s the perfect middle ground for a crust that needs to be both flaky and sturdy.
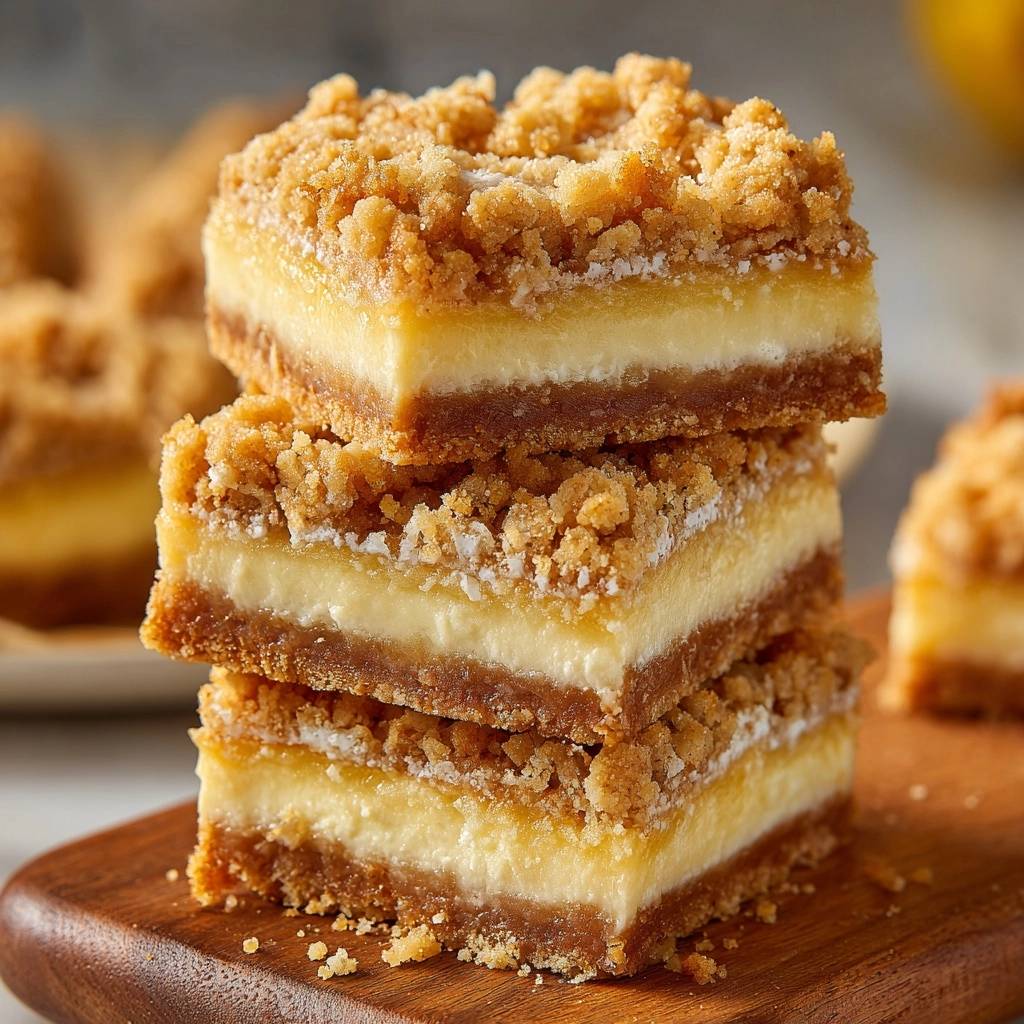
While the base uses granulated sugar for a clean, crisp snap, the topping benefits from a mix of granulated and brown sugar. The molasses in the brown sugar helps the crumble topping caramelize into larger, crunchier nuggets. This creates a beautiful visual and textural contrast against the smooth yellow filling.
Why Cold Cubed Butter is Non-Negotiable
You must use cold, cubed butter to achieve the right texture. When you “cut in” the fat, you’re leaving tiny pebbles of butter throughout the flour. As the crust bakes, the water in those butter pockets evaporates, creating steam that lifts the dough and creates a delicate, shortbread-like crumb.
If you use room-temperature or melted butter, the flour will absorb the fat completely. Instead of a light, snappy crust, you’ll end up with a greasy, heavy slab that feels dense and oily. Keep that butter chilled until the very moment you’re ready to mix it into the flour.
The “Double-Flour” Crumble Technique
This recipe uses a unique “double-flour” technique for the topping. We take a portion of the original crust mixture and toss it with additional flour and brown sugar. This is a vital step because it changes the hydration level of the crumble, making it drier and heartier than the base.
This extra flour ensures the crumble stays “chunky” and sits proudly on top of the lemon custard. Without this adjustment, the topping would likely sink into the wet filling during the second bake. By modifying the mixture, you guarantee a distinct, crunchy lid that provides a satisfying crackle in every bite.
Step-by-Step: Preparing the Foundation
When you start mixing your flour, sugar, and cold butter, you’re looking for a specific visual cue. The mixture should look like coarse crumbs, with some pieces the size of small peas. Don’t overwork it into a solid dough; you want those distinct bits of fat to remain visible for the best texture.
Once you transfer two-thirds of the mixture to your pan, use the bottom of a flat measuring cup to press it down. You need to apply significant pressure here. You aren’t just spreading it; you’re compacting it into a dense moisture barrier. This ensures the crust stays crisp even after sitting under the lemon layer for a few days.
Step-by-Step: Achieving the Silky Lemon Layer
Whisking the filling is a quick but important process. As you combine the condensed milk and lemon juice, you’ll notice the mixture starts to thicken almost immediately. This is the acid working its magic on the milk proteins. Keep whisking until the egg yolks are fully incorporated and the yellow color is completely uniform.
When pouring the filling over your hot, par-baked crust, make sure to spread it all the way to the very edges. This prevents the exposed edges of the crust from over-browning or burning during the second trip to the oven. The filling acts as a heat sink, protecting the perimeter of the base while it finishes cooking.
The Final Bake and the “Jiggle” Test
Knowing when to pull these bars out of the oven is the key to a perfect set. You’re looking for the crumble topping to turn a deep, golden brown. The filling should look matte on the surface and have a very slight jiggle in the center when you gently shake the pan.
Don’t wait for the center to be completely stiff. Carry-over cooking will continue to firm up the custard as the pan cools on the counter. If you overbake them until the center is hard, the filling can become rubbery or lose its signature silkiness. Trust the jiggle!
The Critical Cooling and Setting Phase
I know it’s tempting to slice into these while they’re warm, but that’s a recipe for disaster. If you cut them too early, the filling will ooze out and the crust will shatter. These bars need time for the fats and sugars to undergo a molecular setting process as they cool.
Let the pan rest at room temperature for at least an hour to let the initial heat dissipate. After that, they must go into the refrigerator for at least two hours. This cold rest solidifies the condensed milk and butter, ensuring you get those sharp, clean edges and a perfect, non-messy texture when you finally slice them.
Troubleshooting Common Baking Hurdles
If your crust is crumbling too much when you slice it, you likely didn’t press it hard enough into the pan before the first bake. Next time, really lean into that measuring cup! If the filling feels too tart for your liking, you can slightly reduce the lemon zest, but keep the juice amount the same to ensure the custard sets properly.
If you find your crumble topping is sinking into the lemon layer, it means the topping mixture was too wet. Make sure you’re adding that extra flour and brown sugar to the reserved crumbs as instructed. Finally, if the edges are browning too fast, check your oven calibration; a slightly lower temperature can help if your oven runs hot.
Optimizing Your Kitchen Gear
For the best results, use an 8×8 inch metal baking pan. Metal conducts heat more efficiently and evenly than glass, which helps the crust get that beautiful golden color without overcooking the filling. Glass pans tend to hold heat too long, which can lead to overbaked edges.
Always use a parchment paper “sling.” Line the pan so the paper hangs over two of the sides. This allows you to lift the entire block of bars out of the pan once they’re chilled. Trying to dig the first bar out of a corner with a spatula is the easiest way to ruin the crust and make a mess.
Make-Ahead Strategies and Storage Logistics
These Creamy Lemon Crumble Bars actually taste better on day two. A night in the fridge allows the lemon flavor to mellow and the crust to fully marry with the filling. You can store them in an airtight container in the refrigerator for up to five days, making them a perfect make-ahead dessert for parties.
If you enjoy the sweet fruit filling here, you’ll want to try these fudgy frosted brownies next.
If you want to freeze them, wrap individual squares tightly in plastic wrap and place them in a freezer bag. They’ll stay fresh for up to three months. When you’re ready to eat, just thaw a bar in the fridge for a few hours. To prevent sticking in storage, always place a small piece of parchment paper between layers.
Creative Flavor Variations and Swaps
Once you master the base recipe, you can play with the citrus profile. Substituting lime juice and zest creates a bright, tropical bar, while grapefruit juice offers a sophisticated, slightly bitter edge. You can even add a tablespoon of poppyseeds to the crust mixture for an extra crunch and a classic visual appeal.
If you want a bit more depth, try browning the butter for the crust first, then chilling it back to a solid state before cubing it. This adds a nutty, toasted flavor that pairs beautifully with the sharp lemon. Just remember to keep the ratios the same so the chemistry of the bake remains intact.
Expert Tips for Clean Slicing
To get those professional, bakery-style squares, use a long, sharp chef’s knife. Run the blade under hot water and wipe it with a damp cloth so it’s warm and slightly moist. Make one long, clean cut through the bars, then wipe the blade completely clean before making the next cut.
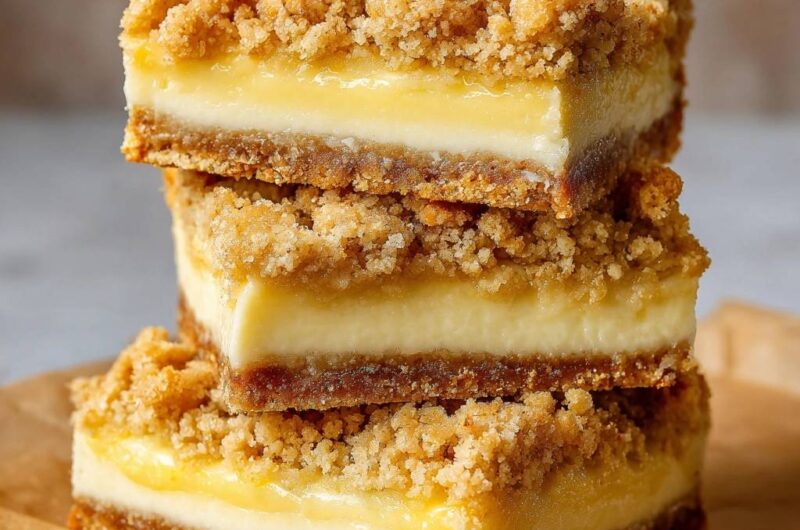
Wiping the knife between every single slice is the secret to maintaining the distinct layers of the Creamy Lemon Crumble Bars. It prevents the yellow filling from smearing onto the golden crust or the crumble topping. It takes an extra minute, but the stunning visual result is well worth the effort.
How should I store these bars and do they freeze well?
Store these bars in an airtight container in the refrigerator for up to 5 days. Because of the dairy in the condensed milk, they should not be left at room temperature for more than two hours. They freeze beautifully; simply wrap individual squares in plastic wrap and store them in a freezer-safe bag for up to 3 months. Thaw them in the refrigerator before serving to maintain the best texture.
Why did my lemon bars turn out runny or soft?
The most common reason for a runny filling is not baking them long enough or using bottled lemon juice. The filling needs to reach a point where it only has a slight jiggle in the center. Additionally, the bars must be fully chilled in the refrigerator for at least 2 hours. If you cut them while they are still warm or even room temperature, the fats won’t have solidified, resulting in a soft, messy center.
Can I use a different type of citrus for this recipe?
Yes, you can substitute the lemon juice and zest with lime or Meyer lemon juice in a 1:1 ratio. If you use a sweeter citrus like orange or grapefruit, you may want to add a teaspoon of cream of tartar or a splash of lemon juice to ensure the acidity is high enough to react with the condensed milk and set the custard properly.
What if I don’t have a pastry cutter for the butter?
If you don’t have a pastry cutter, you can use two forks to “mash” the cold butter into the flour mixture until it reaches a crumbly consistency. Alternatively, you can use a food processor—just pulse it a few times until you see pea-sized lumps. Be careful not to over-process, or the butter will melt and the crust will become tough rather than flaky.
Why is my crumble topping sinking into the lemon filling?
This usually happens if the topping mixture is too heavy or wet. Ensure you are adding the extra 3/4 cup of flour and the brown sugar to the reserved crumb mixture as specified in the recipe. This extra dry matter makes the crumble lighter and more structural, allowing it to float on top of the custard rather than submerging during the bake.
Lemon Crumble Bars
Course: DessertCuisine: AmericanDifficulty: medium12
bars20
minutes45
minutes310
kcal65
MinutesThese lemon bars solve the common issue of mushy crusts by using a moisture-barrier technique and a par-baked base. The result is a perfect balance of a crunchy crumble and a creamy, tart lemon center.
Ingredients
2 1/4 cups all-purpose flour, divided
1/2 cup granulated sugar
1/2 cup light brown sugar, packed
3/4 cup cold unsalted butter, cubed
1/4 teaspoon salt
14 ounces sweetened condensed milk
1/2 cup fresh lemon juice
2 egg yolks
1 tablespoon lemon zest
1/2 teaspoon vanilla extract
Directions
- Preheat your oven to 350°F (175°C) and line an 8×8 inch baking pan with parchment paper, leaving an overhang on the sides for easy removal.
- In a medium bowl, combine 1.5 cups of the flour, the granulated sugar, and salt. Cut in the cold cubed butter using a pastry cutter or fork until the mixture resembles coarse crumbs with some pea-sized pieces.
- Press exactly two-thirds of this mixture firmly into the bottom of the prepared pan. To prevent a soggy bottom, press the crust down very hard with the bottom of a flat measuring cup to create a dense, even seal.
- Bake the crust for 15 minutes until the edges are golden brown. This par-baking step is crucial for creating a crisp foundation that won’t absorb moisture from the filling.
- While the crust bakes, prepare the filling: Whisk together the sweetened condensed milk, lemon juice, egg yolks, lemon zest, and vanilla extract in a bowl until smooth. The acid in the lemon juice will begin to thicken the milk immediately.
- Prepare the topping: Take the remaining one-third of the crumb mixture and toss it with the remaining 3/4 cup of flour and the brown sugar. Squeeze the mixture with your hands to create large, distinct clumps. This extra flour and sugar ensure the crumble stays chunky and sits on top of the filling rather than sinking.
- Pour the lemon filling over the hot, pre-baked crust, spreading it to the edges. Sprinkle the modified chunky crumble mixture evenly over the top.
- Bake for another 25 to 30 minutes. The crumble should be deep golden brown and the filling should be set but have a very slight jiggle in the center.
- Allow the bars to cool completely in the pan at room temperature for 1 hour, then refrigerate for at least 2 hours. This cooling period allows the fats to solidify, ensuring a perfect, non-messy texture when sliced. Lift out by the parchment paper and cut into squares.
Notes
- To ensure a perfect texture, allow the bars to cool at room temperature for one hour before refrigerating for at least two hours. This helps the fats solidify for clean slicing.