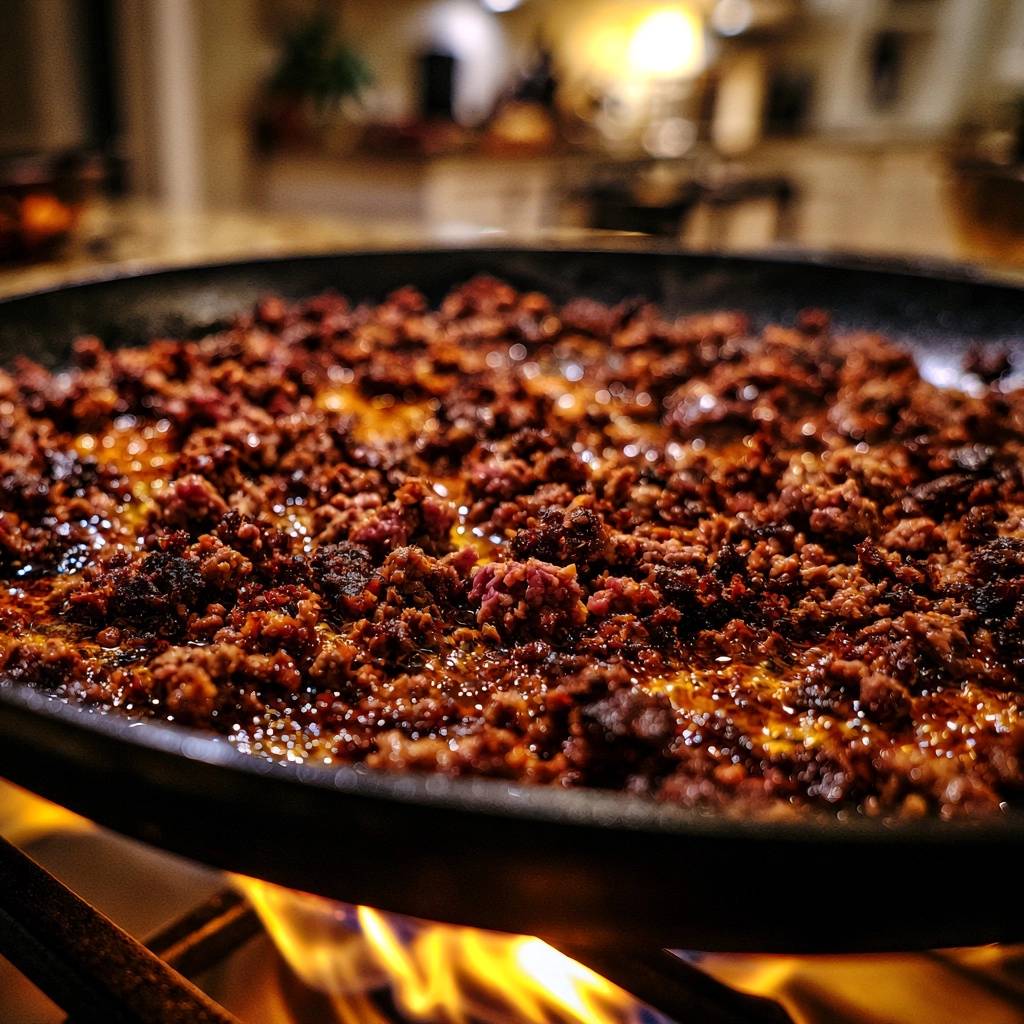
You know that disappointing pile of gray, rubbery ground beef that looks more like it was boiled than cooked? We’ve all been there. It’s the result of moisture trapped in the pan, steaming the meat instead of searing it.
The perfect bite of ground beef should offer a distinct contrast. You want a deeply caramelized, crunchy exterior that shatters slightly between your teeth, giving way to a juicy, savory center. It’s the difference between a sad Tuesday night taco and a gourmet meal.
To achieve this, you have to ignore the urge to stir. The secret lies in the Maillard reaction and the “sear and fry” technique. By letting the meat sit undisturbed in a hot, oiled skillet, you transform a humble staple into a mahogany-colored masterpiece with incredible depth of flavor.
The Science of the Maillard Reaction in Ground Beef
The Maillard reaction is a chemical dance between amino acids and reducing sugars that happens when food hits high heat. This process creates hundreds of different flavor compounds, giving seared meat its characteristic “meaty” and toasted aroma.
However, moisture is the ultimate enemy of this reaction. If your meat is wet or the pan is too crowded, the temperature won’t rise above 212°F because the energy is spent evaporating water. This creates steam, which stalls the browning process and leaves you with that unappetizing gray texture.
Why 80/20 Fat Ratios Are Non-Negotiable
Fat isn’t just for flavor; it’s your primary cooking medium in this recipe. Using lean beef like 90/10 or 93/7 often results in a dry, sandy texture because there isn’t enough rendered lipid to “shallow fry” the crumbles.
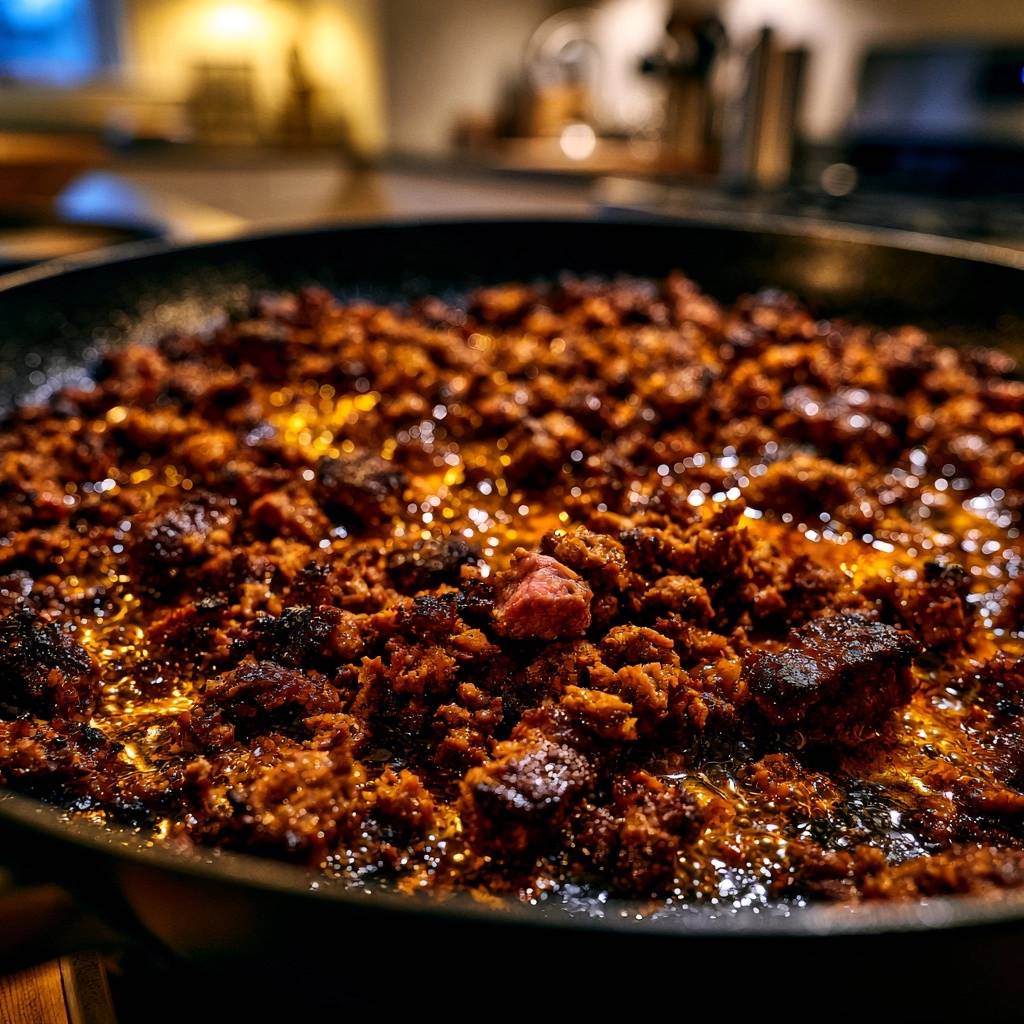
The 80/20 ratio provides the necessary tallow to coat every small bit of beef. As the fat renders out, it bubbles around the meat, essentially frying the edges until they become golden and crisp. If you use leaner meat, you’ll miss out on that glistening, professional-grade finish.
Thermal Conductivity: Cast Iron vs. Stainless Steel
Your choice of pan determines how well you can maintain high heat. When you drop cold meat into a thin, cheap pan, the surface temperature plummets instantly. This temperature drop is exactly what causes the meat to release juices and start steaming.
Heavy-bottomed cookware, like a cast iron skillet or heavy stainless steel, has high thermal mass. It holds onto heat like a battery. Therefore, when the beef hits the surface, the pan stays hot enough to sear the proteins immediately, locking in flavor and starting the browning process on contact.
Essential Components for Crispy Skillet Ground Beef
While the technique is king, the ingredients provide the foundation for that deep mahogany color. Smoked paprika is a secret weapon here. It doesn’t just add a hint of wood-fired flavor; it provides a rich pigment that helps the meat look as dark and appetizing as it tastes.
Kosher salt is also vital because its coarse grains are better at drawing out residual surface moisture than fine table salt. Garlic and onion powders provide a savory baseline that permeates the rendered fat, ensuring every crispy bit is seasoned from the inside out.
Selecting High-Smoke Point Oils
Since we are working with high heat, you must choose your oil wisely. Extra virgin olive oil or butter will smoke and turn bitter long before the beef gets crispy. This creates an acrid taste that ruins the dish.
Instead, reach for avocado oil or grapeseed oil. These oils have high smoke points and neutral flavor profiles. They can handle the intense heat required to get the skillet shimmering without breaking down or making your kitchen smell like a burnt campfire.
The Importance of Surface Dehydration
Even the best meat from the butcher counter has surface moisture. Before the beef ever touches the pan, you must use the “paper towel method.” Gently pat the meat dry on all sides to remove any lingering liquid.
This might seem like an extra step, but it’s the most important thing you can do for a better sear. By removing that surface water, you ensure the heat goes directly into browning the meat rather than boiling off a layer of moisture first.
Step-by-Step: Achieving the Perfect Mahogany Sear
Achieving professional results takes about 12 minutes, but it requires patience. You have to resist the urge to “help” the meat by moving it around. Let the heat do the heavy lifting while you watch for specific visual cues.
Phase 1: The Initial Hard Sear
Start by heating your oil until it is shimmering and you see the very first faint wisps of smoke. Place the meat into the pan in 4 or 5 large, flat chunks rather than breaking it into tiny pieces.
Use a sturdy metal spatula to press these chunks firmly into the hot metal. This maximizes surface contact. Now, walk away. Leave the meat completely undisturbed for 5 full minutes to allow a thick, dark crust to form on the bottom.
Phase 2: Flipping and Fragmenting
After 5 minutes, flip the large chunks over. You should see a deeply browned, almost charred surface. Now is the time to use the edge of your spatula to break the meat into irregular crumbles.
Don’t aim for uniform pieces. The irregular shapes are actually better because the smaller “nubs” will get extra crispy while the larger pieces stay juicy. This variety in texture is what makes the final dish so addictive.
Phase 3: The Shallow Fry Finish
Spread the crumbles out so they are in a single layer. At this point, the fat should be rendered out and bubbling rapidly around the meat. You are now shallow-frying the beef in its own juices and the added oil.
Cook for another 4 to 5 minutes, stirring only once or twice. You want the meat to take on a dark mahogany color. When the fat looks clear and the bubbling sounds like a sharp sizzle rather than a dull hiss, your beef is perfectly crisped.
Troubleshooting Common Textural Failures
If your meat is still turning out gray, you likely overcrowded the pan. If you put too much meat in at once, the moisture has nowhere to go but up, creating a steam chamber. Always ensure there is some visible space between your meat chunks in the beginning.
If you notice the spices are starting to smell burnt or acrid, your heat might be too high for your specific stove. Simply slide the pan off the burner for 30 seconds to let the temperature stabilize, then return it to a slightly lower flame to finish the fry.
How to Handle Excess Moisture Release
Sometimes, despite your best efforts, a lower-quality brand of beef might release an excessive amount of liquid. If you see a pool of gray water forming in the pan, don’t panic. You can still save the dish.
Carefully drain the liquid into a heat-safe bowl, add a fresh tablespoon of oil to the pan, and turn the heat back up. This “reset” allows you to start the searing process over without the meat sitting in a bath of gray liquid.
Managing Heat on Electric vs. Gas Ranges
Gas ranges provide instant heat adjustments, but electric coils can be tricky because they hold onto heat for a long time. If you’re using electric, preheat the pan thoroughly on medium-high for several minutes before adding the oil.
If the pan gets too hot on an electric stove, you can’t just turn the knob down and expect an immediate change. Physically move the pan halfway off the burner to quickly reduce the energy hitting the metal, then move it back once the sizzle calms down.
Optimal Pairings for Crispy Beef Crumbles
This specific texture is wasted in a watery stew or a heavy pasta sauce where it will just get soggy. Instead, use these crispy bits in dishes where the crunch can shine. They are incredible in street-style tacos with a simple squeeze of lime and fresh cilantro.
You can also use them as a savory topping for a bowl of creamy hummus or a grain bowl. The contrast between the smooth base and the crunchy, salty beef is a total game-changer for a quick lunch or dinner.
Low-Carb and High-Protein Serving Suggestions
For a high-protein meal, serve the crispy beef over a bed of roasted cauliflower or sautéed zucchini ribbons. Don’t discard the rendered fat in the pan; it’s packed with the flavor of the garlic, onion, and smoked paprika.
Drizzle that flavorful fat over your vegetables like a warm dressing. It adds a luxurious mouthfeel and ensures that none of the seasoning you worked so hard to develop goes to waste.
Storage and Reheating for Maximum Crunch
If you have leftovers, store them in an airtight container in the refrigerator for up to 3 days. However, be warned that the microwave is the enemy of crispy beef. It will turn those beautiful crunchy bits into soft, rubbery nuggets in seconds.
To revive the texture, reheat the beef in a dry skillet over medium heat for 3 to 4 minutes. Alternatively, toss them in an air fryer at 350°F for about 2 minutes. This will re-crisp the exterior and make the beef taste like it just came out of the pan.
Expert Tips for Professional Results
For the absolute best results, try “tempering” your meat. Take the ground beef out of the fridge about 15 to 20 minutes before you plan to cook. This takes the chill off and prevents the pan temperature from dropping too sharply when the meat hits the oil.
Also, always use freshly cracked black pepper if possible. The oils in fresh pepper are much more vibrant than the pre-ground stuff, and they bloom beautifully in the hot fat during the frying stage.
Scaling the Recipe for Meal Prep
If you want to cook two pounds of beef, do not just double the ingredients in one pan. Unless you have a massive commercial griddle, you won’t have enough surface area to get a good sear. The meat will inevitably steam.
Instead, cook in batches. Sear the first pound, remove it to a plate, wipe the pan if necessary, and then start the second pound. It takes a few extra minutes, but the difference in quality is worth the effort.
Customizing the Spice Profile
Once you master the base technique, you can play with the flavors. For a smoky, Southwestern vibe, add a teaspoon of ground cumin. If you want a Mediterranean profile, stir in some dried oregano and a pinch of red pepper flakes during the final frying phase.
Just remember to keep the base ratio of salt and aromatics the same. The salt is functional for the sear, and the garlic and onion powders provide the savory foundation that makes the beef taste “complete” regardless of what other spices you add.
How do I know if my pan is hot enough?
The best way to check is to look for the oil to “shimmer.” It will look thin and move across the pan like water. You should also see very faint wisps of smoke. If you drop a tiny piece of meat in and it doesn’t sizzle aggressively immediately, the pan isn’t ready yet.
Can I use this method with ground turkey or chicken?
You can, but because poultry is much leaner than 80/20 beef, you will need to add significantly more oil to the pan. Ground turkey also has more moisture, so the “patting dry” step is even more critical to prevent it from becoming a rubbery mess.
Why did my meat stick to the pan?
Meat usually sticks for two reasons: the pan wasn’t hot enough when you started, or you tried to flip it too early. Protein “releases” from the metal naturally once a crust has formed. If you feel resistance when trying to flip, give it another minute or two.
Is it safe to eat the “charred” bits?
We aren’t looking for black, carbonized meat, which can be bitter. We are aiming for a dark mahogany brown. These bits are safe and contain the most concentrated flavor. If the meat actually turns black and smells like smoke, your heat is too high.
Can I freeze crispy ground beef?
Yes, you can freeze it in a freezer-safe bag for up to 3 months. To maintain the texture, let it thaw in the fridge overnight and then re-crisp it in a hot skillet. Avoid the microwave for thawing if you want to keep that signature crunch.
What if I only have 90/10 lean ground beef?
If you must use lean beef, you need to compensate for the lack of animal fat. Add an extra tablespoon of oil to the pan and be very careful not to overcook it. Lean meat goes from “crispy” to “dry and sandy” very quickly, so watch it closely during the final fry.
Crispy Skillet Ground Beef
Course: Main CourseCuisine: AmericanDifficulty: easy4
servings5
minutes12
minutes17
Minutes310
kcalAmerican
Ingredients
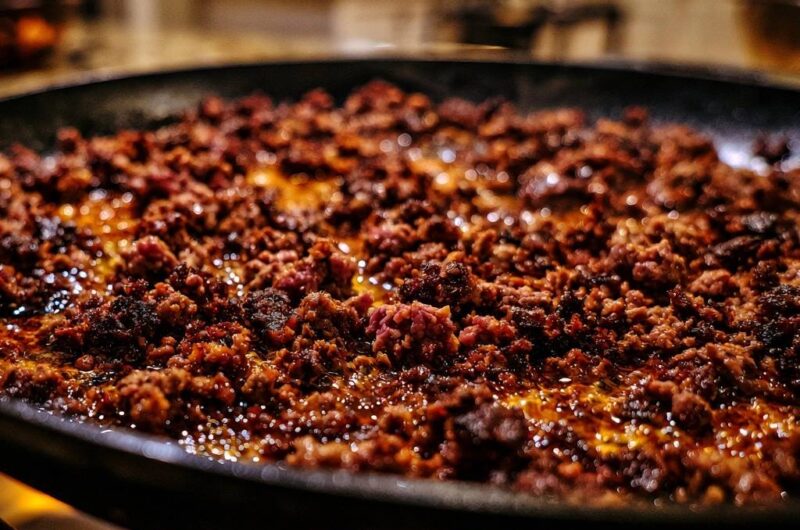
1 pound ground beef (80/20 is essential; the higher fat content is required to achieve the oil-fried texture in the image)
2 tablespoons high-smoke point oil (avocado or grapeseed oil)
1 teaspoon kosher salt
1/2 teaspoon cracked black pepper
1/2 teaspoon garlic powder
1/2 teaspoon onion powder
1/4 teaspoon smoked paprika (for the deep mahogany color shown)
Directions
- Heat a large cast iron or heavy stainless steel skillet over medium-high heat. Add the 2 tablespoons of oil. Wait until the oil is shimmering and just starting to show faint wisps of smoke.
- Pat the ground beef dry with paper towels. Moisture is the enemy of the crust shown in the photo.
- Place the meat into the hot skillet. Instead of one large disc, break it into 4 or 5 large, flat chunks. Use a sturdy metal spatula to press these chunks firmly into the pan to maximize surface contact.
- Season the top of the meat with the salt, pepper, garlic powder, onion powder, and smoked paprika.
- Leave the meat undisturbed for 5 full minutes. Do not move it. You want the bottom to develop a dark, nearly charred crust.
- Flip the large chunks over. They should be deeply browned. Now, use the edge of your spatula to break the meat into the small, irregular crumbles seen in the image.
- Spread the crumbles out across the pan. Because of the 80/20 fat ratio and the initial oil, the meat should now be “frying” in a shallow layer of hot fat. Cook for another 4 to 5 minutes, stirring only once or twice, until the crumbles are crispy and dark mahogany in color. Cook until no pink remains and it reaches 160°F (71°C).
- Look for the visual cue: the fat in the pan should be bubbling rapidly around the small bits of meat. Serve immediately with the rendered fat for maximum flavor, or use a slotted spoon to remove the crispy bits if adding to a recipe.
Notes
- Using 80/20 ground beef is essential for this recipe as the rendered fat is required to fry the meat to a crispy texture. Always pat the meat dry before cooking to prevent steaming.