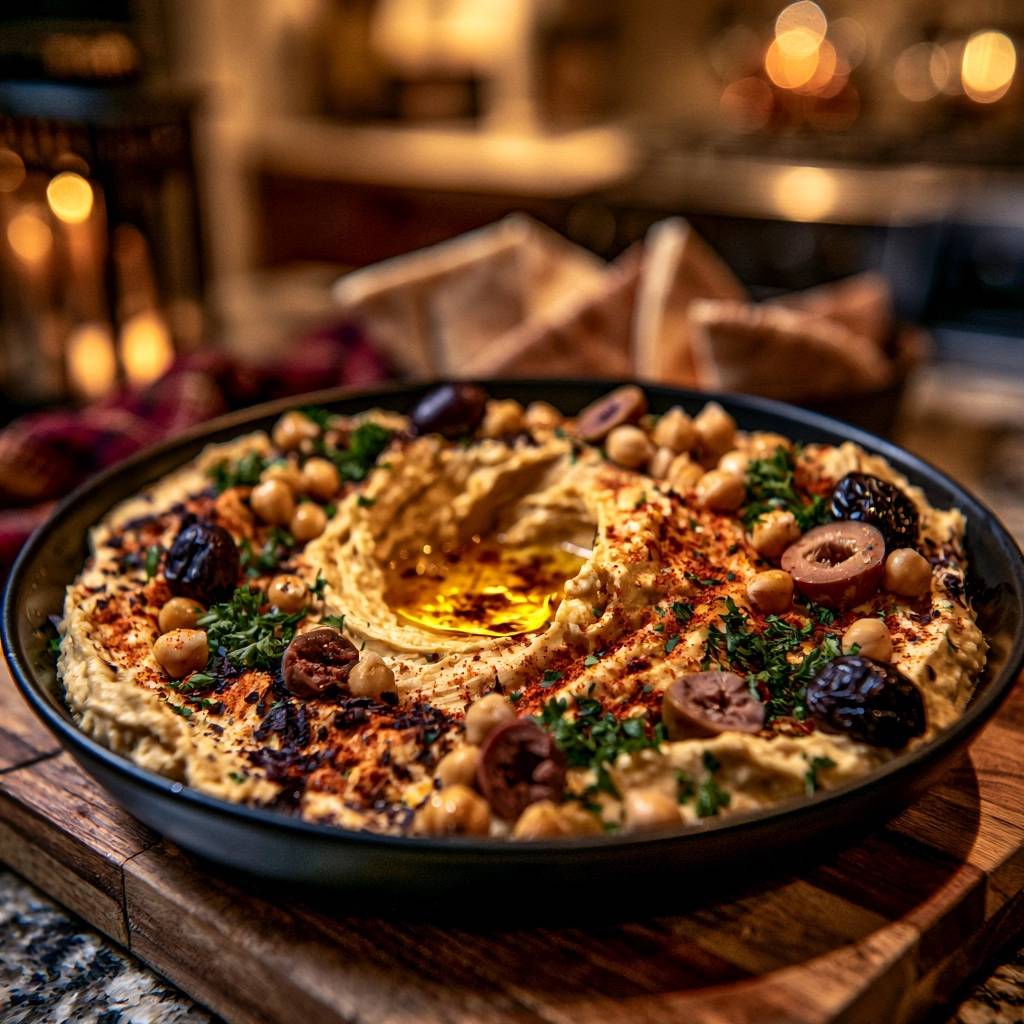
Forget everything you know about those gritty, bland tubs of hummus from the grocery store. You know the ones—they have the texture of wet cardboard and a sharp, metallic aftertaste that lingers far too long. A truly great hummus should be a revelation of velvet-smooth creaminess that practically melts the moment it hits your tongue.
The secret to that restaurant-quality finish isn’t a fancy industrial blender or a hidden ingredient. It actually comes down to a simple scientific trick that breaks down the stubborn fibers of the chickpea. By the time you finish this recipe, you’ll be serving a platter so luxurious and airy it feels more like a savory mousse than a bean dip.
If you want to achieve that professional silkiness, you have to address the skins. Most people toss canned chickpeas straight into the processor, but those skins are the enemy of smooth texture. My favorite trick is a quick simmer with a pinch of baking soda to soften the pectin, ensuring every bite is perfectly uniform and light.
The Science of Achieving Velvet-Smooth Texture
Chickpeas are naturally high in pectin and cellulose, which act like a structural glue holding the bean together. Even a high-powered blender struggles to pulverize these tough outer membranes into a completely smooth liquid. When you skip the prep work, those tiny fragments of skin remain, creating a sandy or “short” texture in the finished dip.
To get that professional result, we have to intervene chemically and thermally. By simmering the chickpeas, we hydrate the starches beyond their usual limit. This makes the beans so soft they lose their structural integrity, allowing them to emulsify into the tahini rather than just sitting alongside it as crushed particles.
Why Baking Soda is Non-Negotiable
Baking soda is the secret weapon in this recipe because it raises the pH level of the cooking water. This alkaline environment works quickly to weaken the hemicellulose in the chickpea skins. As the water boils, you’ll actually see the skins start to tatter and dissolve into a sort of foam on the surface.
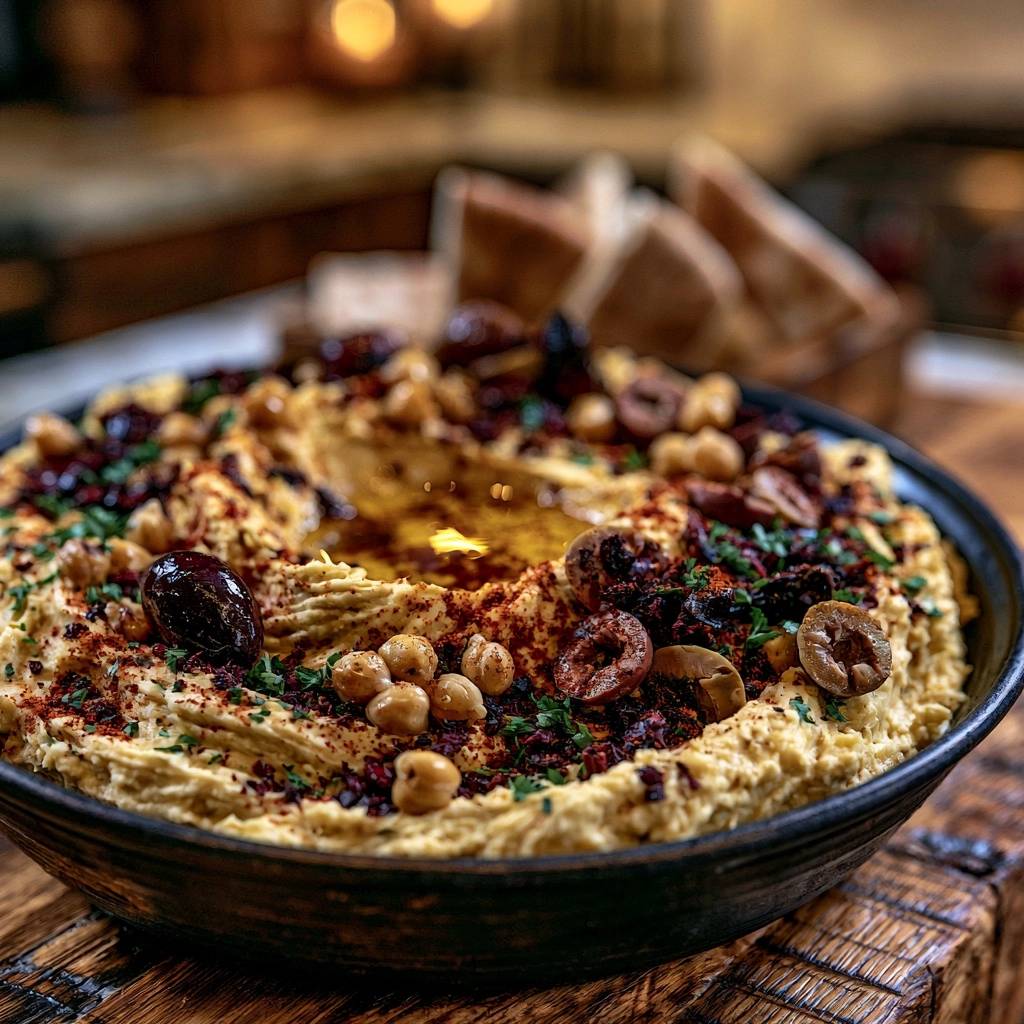
This “heat-friction” method ensures that when the beans hit the food processor blades, they offer zero resistance. Instead of fighting against tough fibers, the blades easily whip the softened beans into a thick, luscious paste. It’s the difference between a chunky mash and a refined puree that coats the back of a spoon.
The Role of Ice Water in Aeration
You might wonder why we use ice-cold water when the chickpeas themselves are warm. This is all about the physics of emulsification. When you drizzle cold water into the spinning blades, it causes the fats in the tahini to seize slightly and then whip, much like making a stable mayonnaise or a fluffy ganache.
This temperature shock incorporates tiny air bubbles into the mixture. As you process, you’ll notice the color of the hummus transform from a dull beige to a bright, pale ivory. The result is a dip that feels incredibly light on the palate despite being rich in healthy fats and protein.
Essential Components for the Loaded Hummus Platter
Quality ingredients are the foundation of a great platter, especially since there are so few of them. While dried chickpeas are wonderful, high-quality canned chickpeas are a fantastic shortcut if you use the baking soda simmering method. They provide a consistent base that saves hours of soaking time without sacrificing the final flavor.
The tahini you choose will define the soul of your hummus. Look for a “premium” version, which usually comes in a glass jar or a plastic tub from Mediterranean markets. It should be pourable and smooth, not a solid, bitter brick at the bottom of the jar. If the oil has separated, just give it a vigorous stir until it’s uniform again.
Selecting the Right Aromatics and Acids
Freshly squeezed lemon juice is a requirement here; the bottled stuff has a muted, artificial tang that can ruin the brightness of the dish. The acid doesn’t just add flavor; it actually helps to “cut” the richness of the sesame paste. It provides a necessary high note that balances the earthy weight of the chickpeas.
I always reach for kosher salt because its larger grains dissolve cleanly without any chemical anti-caking agents. Pair that with ground cumin, which adds a subtle, smoky warmth. Cumin is also a traditional addition because it helps the body digest legumes more easily, making the dish as functional as it is delicious.
The Importance of High-Phenol Olive Oil
Since we aren’t cooking the olive oil, its raw flavor profile is front and center. Use a high-quality Extra Virgin Olive Oil for the finishing drizzle. You want something with a bit of a peppery kick or “phenol” bite, which acts as a beautiful counterpoint to the creamy, nutty tahini.
Avoid using light or refined olive oils for the garnish, as they lack the aromatic complexity needed to elevate the platter. A deep green, robust oil pooled in the center of the hummus adds a visual and flavorful richness that makes the dish feel truly indulgent.
Step-by-Step: Preparing the Chickpea Base
Start by placing your rinsed chickpeas in a medium pot and covering them with plenty of water. Stir in the baking soda and bring the whole thing to a rolling boil. You’ll notice a white, starchy foam rising to the top; this is a sign that the skins are breaking down exactly as they should.
Let them simmer for about 20 minutes. You aren’t looking for “al dente” beans here; you want them to be borderline overcooked. If you pick one up and press it between your fingers, it should turn to mush instantly with almost no pressure. This mushiness is the key to that elusive velvet texture.
Once they are tender, drain them and give them a thorough rinse under cool water. If you have a few extra minutes, gently rub the beans between your palms while rinsing. The loose skins will float to the top, and you can simply discard them. Removing even half of the skins will significantly improve the final result.
The Mellowing Technique for Raw Garlic
Raw garlic can sometimes be too aggressive, leaving a sharp burn that overpowers the delicate tahini. To fix this, mince your garlic and let it sit in the lemon juice for about five minutes before you add anything else. This is a classic chef’s trick that uses the acid in the lemon to “cook” the garlic slightly.
This process neutralizes the harsh enzymes that cause that lingering, pungent aftertaste. Instead of a sharp bite, you get a mellow, aromatic garlic flavor that weaves through the hummus. It’s a small step that makes a massive difference in the sophistication of the flavor profile.
Mechanical Processing and Emulsification Phases
When you start the food processor, patience is your best friend. Most home cooks stop blending as soon as the ingredients look combined, but for professional hummus, you need to keep it running for at least 4 to 5 minutes. The mechanical friction actually generates heat, which further softens the starches.
As the processor hums along, you’ll see the mixture move from a grainy paste to a thick, heavy cream. This is when you start drizzling in your ice water. Watch closely as the hummus begins to “bloom.” It will lighten in color and take on a glossy, whipped appearance that looks almost like frosting.
Stop and scrape down the sides of the bowl at least twice. You want to make sure every stray bit of chickpea is incorporated into the emulsion. By the end of the five minutes, the hummus should be so smooth that you can’t feel any grit when you rub a bit between your thumb and forefinger.
Assembling the Loaded Hummus Platter
Plating is where you turn a simple dip into a centerpiece. Choose a wide, shallow bowl or a large flat platter rather than a deep cereal bowl. A shallow surface area allows you to spread the hummus out, creating more space for toppings and those all-important olive oil “pools.”
Take a large metal spoon and use the back of it to swirl the hummus. Start in the center and push outward in a circular motion to create a deep well. Then, use the tip of the spoon to make little “trenches” or ridges around the edges. These grooves are designed to catch the olive oil and spices so they don’t just slide off the side.
Layering Textures and Colors
Now comes the fun part: the “loading.” Pour a generous amount of olive oil into that center well until it looks like a golden lake. Scatter your halved Kalamata and oil-cured olives around the ridges. The contrast between the purple-black olives and the ivory hummus is stunning.
Add a handful of whole roasted chickpeas for a much-needed crunch, then sprinkle the finely chopped parsley for a pop of fresh green. Finally, dust the entire platter with sumac. Sumac has a wonderful, tart citrus flavor that provides a final hit of acidity to wake up all the earthy flavors on the plate.
Troubleshooting Common Hummus Consistency Issues
If your hummus feels a bit too thin right after blending, don’t panic. The tahini and starches will firm up significantly as the mixture cools. Simply pop it in the fridge for 30 minutes, and it will thicken into a spreadable consistency. If it’s still too thin, you can whisk in an extra tablespoon of tahini.
On the flip side, if the hummus is too thick or “clumpy,” it usually needs more moisture or fat. Add another tablespoon of ice water or a squeeze of lemon juice while the processor is running. Remember that hummus always firms up in the fridge, so if you’re making it ahead of time, keep it slightly looser than your desired final texture.
Flavor Variations and Regional Swaps
Once you master the base, you can get creative with the toppings. For a “Spiced Nut” version, swap the olives for toasted pine nuts or crushed walnuts sautéed in a little cumin and cinnamon. The warm, buttery nuts against the cool hummus create an incredible sensory experience.
You can also fold in a few tablespoons of roasted red pepper puree for a vibrant orange hue and a smoky sweetness. If you want something herbaceous, blend a handful of fresh cilantro and mint into the ice water before adding it to the processor. This creates a “Green Goddess” style hummus that is incredibly refreshing in the summer.
What to Serve with Your Loaded Platter
Warm, pillowy pita bread is the classic choice, but don’t stop there. Toasted triangles of sourdough or even crispy pita chips provide a great structural base for the heavy toppings. If you want to keep things lighter, a spread of fresh crudités is essential. Think crunchy radishes, sliced Persian cucumbers, and sweet bell pepper strips.
This platter also makes a fantastic base for a larger meal. You can top the hummus with warm, spiced ground beef or lamb-style crumbles sautéed with onions and pine nuts. Serve it alongside some hot, crispy falafel, and you have a complete Mediterranean feast that feels both healthy and incredibly hearty.
Storage and Make-Ahead Logistics
Hummus stores beautifully in the refrigerator for up to five days, provided it is kept in an airtight container. However, I strongly recommend storing the hummus “naked.” Do not add the olive oil, olives, or herbs until you are ready to serve. The fresh parsley will wilt, and the olive oil can sometimes develop a slightly bitter note when stored with the lemon juice over time.
When you are ready to eat your leftovers, let the hummus sit on the counter for about 15 minutes to take the chill off. Cold temperatures mute the flavors of the tahini and cumin. Give it a quick stir with a splash of warm water to restore that creamy, whipped texture before adding your fresh garnishes.
Expert Tips for Professional Results
While a food processor is the standard tool, a high-speed blender can actually produce an even smoother result if you are making a large batch. The key is having enough volume for the blades to catch. If you find your blender is just spinning air, switch back to the food processor for better contact with the beans.
Another pro tip: never add the olive oil directly into the blender or processor. Emulsifying olive oil at high speeds can sometimes cause it to turn bitter due to the rapid oxidation of the polyphenols. It is much better to use water for the internal creaminess and save the oil for the beautiful finishing drizzle on top.
The Temperature Factor
Temperature plays a huge role in how we perceive flavor. If you serve hummus straight from the fridge, you’ll mostly taste the lemon and salt. By serving it at room temperature—or even slightly warm—the nutty, toasted notes of the tahini and the earthy depth of the chickpeas really shine through.
If you’ve made the hummus in advance, you can gently warm it in a microwave-safe bowl for 20 seconds just to take the edge off the cold. This softens the fats and makes the dip feel much more luxurious and “freshly made” for your guests.
The Garlic-to-Tahini Ratio
The balance between garlic and tahini is a personal preference, but it’s easy to adjust. If your tahini is particularly bitter, you might want to add an extra half-teaspoon of salt or a bit more lemon juice to balance it out. If you love a sharp garlic kick, you can skip the “mellowing” step and toss the garlic in raw.
Just remember that the flavors will intensify as the hummus sits. What tastes perfectly balanced in the blender might be much more garlic-forward two hours later. Always taste and adjust your seasoning right before you spread it onto the platter for the best results.
Frequently Asked Questions
How do I store leftovers and can I freeze this?
Store the hummus in an airtight container in the fridge for up to 5 days. It is best to store it without the toppings to keep the flavors fresh. While you can freeze hummus for up to 3 months, the texture often becomes slightly grainy once thawed. If you do freeze it, give it a vigorous whip in the food processor with a splash of water after it thaws to help restore the emulsion.
Why is my hummus still grainy even after blending?
This usually happens for two reasons: the chickpeas weren’t soft enough or you didn’t blend long enough. Ensure the chickpeas are “mushy” before blending. If they are already blended and still grainy, try adding one more tablespoon of ice water and processing for another 3 full minutes. The extra time and moisture are often all it needs to smooth out.
Can I use dried chickpeas instead of canned?
Absolutely! Dried chickpeas often have a superior flavor. Soak 1 cup of dried chickpeas overnight with a pinch of baking soda. Drain them, then simmer in fresh water with another teaspoon of baking soda for about 45 to 60 minutes until they are very soft. Use them exactly as you would the canned version in the recipe.
What can I use if I don’t have tahini?
Tahini is a core flavor, but in a pinch, you can use unsweetened creamy almond butter or sunflower seed butter. The flavor profile will change significantly, becoming nuttier and sweeter, so you may need to add a bit more salt and lemon juice to balance the richness. Avoid using peanut butter, as the flavor is too dominant for a traditional hummus.
Is sumac necessary and what does it taste like?
Sumac isn’t strictly necessary, but it adds a beautiful red color and a unique tart, lemony flavor that is traditional in Middle Eastern cooking. If you can’t find it, a sprinkle of smoked paprika provides a nice color and a different, savory depth. You could also use a little extra lemon zest to mimic that bright acidity.
Why do you use ice water instead of olive oil inside the hummus?
Using ice water creates a much lighter, fluffier texture through aeration. If you use only olive oil to thin the hummus, it can become very heavy and greasy. Additionally, high-speed blending can make extra virgin olive oil taste bitter. Using water for the body and oil for the garnish gives you the best of both worlds: a light dip with a rich finish.
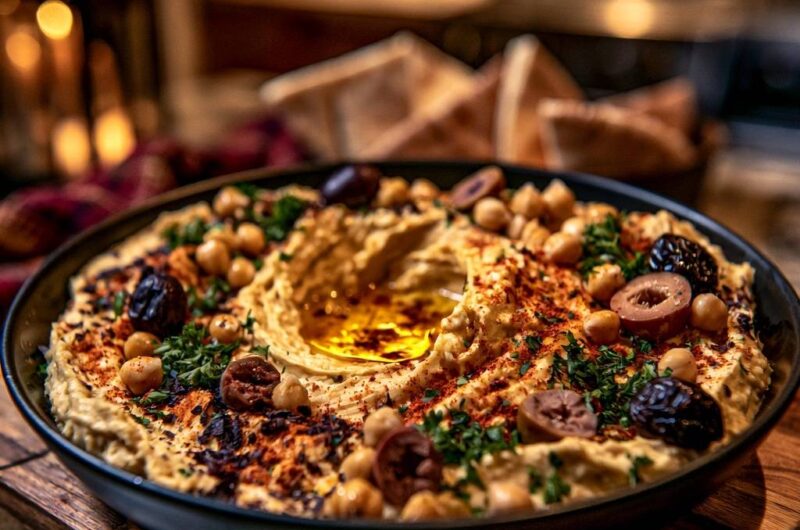
Creamy Loaded Hummus Platter
Course: AppetizerCuisine: MediterraneanDifficulty: easy6
servings15
minutes20
minutes35
Minutes240
kcalMediterranean
Ingredients
2 cans (15 oz each) chickpeas, drained and rinsed
1 teaspoon baking soda
1/2 cup premium tahini
1/4 cup fresh lemon juice
2 cloves garlic, minced
1/2 teaspoon ground cumin
1 teaspoon kosher salt
3-4 tablespoons ice-cold water
1/4 cup extra virgin olive oil (plus more for drizzling)
1/2 cup Kalamata and oil-cured black olives, pitted and halved
2 tablespoons fresh parsley, finely chopped
1 tablespoon sumac or smoked paprika
1/4 cup whole roasted chickpeas (for garnish)
Warm pita bread triangles for serving
Directions
- To solve the grainy texture problem, place your rinsed chickpeas in a pot and cover with water. Add 1 teaspoon of baking soda. Bring to a boil, then reduce to a simmer for 20 minutes. The baking soda raises the pH, breaking down the pectin in the chickpea skins until they are nearly dissolved and the beans are very soft.
- Drain the chickpeas and rinse under cool water. For the smoothest result, gently rub the beans between your hands to let the loose skins float away; discard the skins.
- Place the lemon juice, garlic, and salt in a food processor. Let it sit for 5 minutes. This “mellowing” period allows the acid to neutralize the harsh enzymes in the raw garlic.
- Add the tahini to the processor and blend until the mixture is thick and pale.
- Add the warm, softened chickpeas and cumin. Process for at least 4 to 5 minutes. Do not rush this step; the mechanical friction and heat are essential for creating professional silkiness.
- While the processor is running, drizzle in the ice-cold water one tablespoon at a time. This aerates the fats in the tahini, transforming the hummus into a light, fluffy cream.
- Spread the hummus onto a wide, shallow black bowl or platter. Use the back of a large spoon to create a deep circular well in the center and decorative ridges around the edges.
- Pour a generous amount of olive oil into the center well. Heavily garnish the ridges with the halved olives, roasted chickpeas, fresh parsley, and a dusting of sumac or paprika to match the vibrant, textured look of the platter.
- Serve immediately with a side of warm, toasted pita bread.
Notes
- The secret to the texture is the combination of baking soda to soften the skins and the mechanical friction of long blending times.